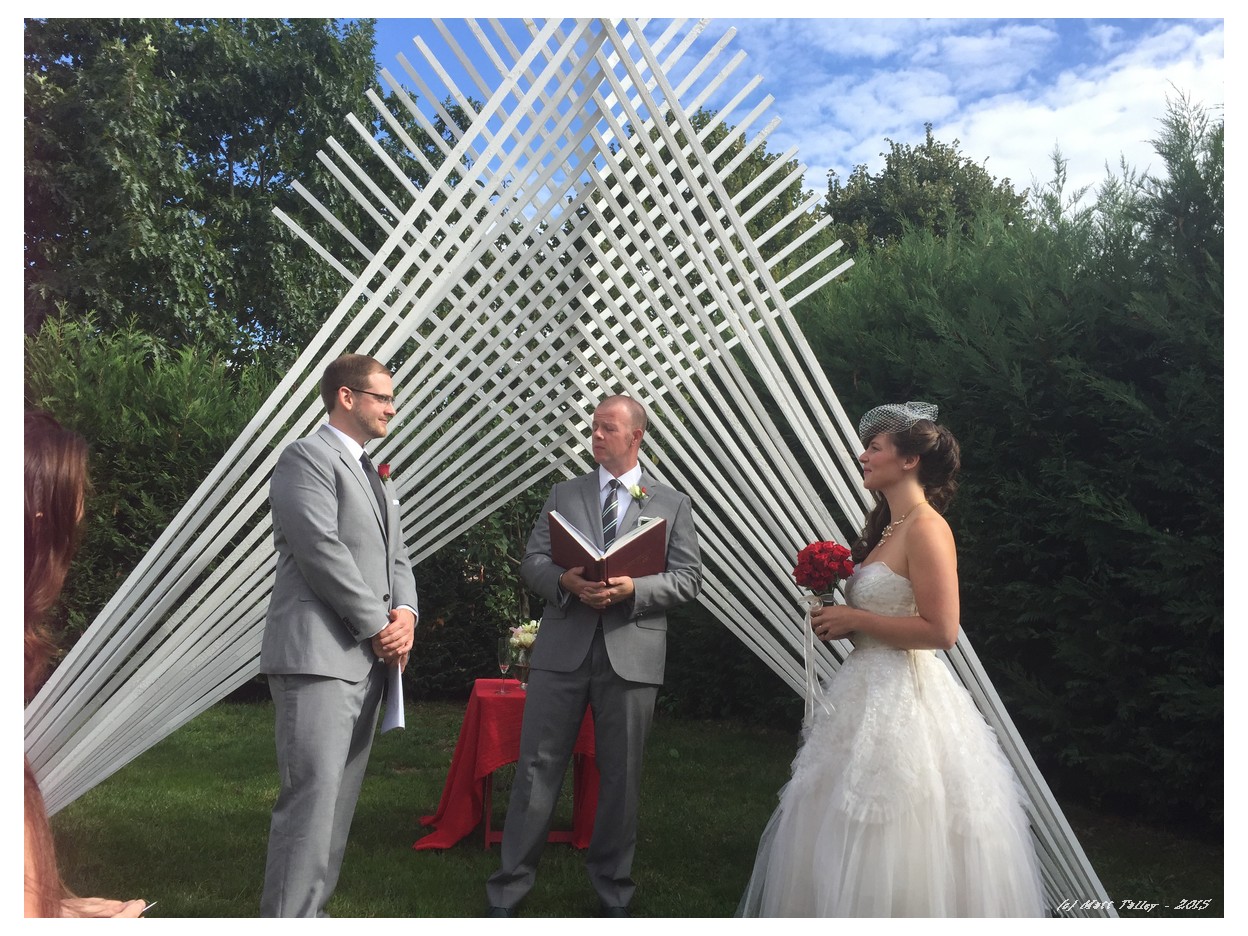
My Brother-in-law and his then fiancé decided early this year that they would visit us in France and while here have a little wedding… Stamps-With-Foot freaked out and turned on the ‘Big-Sister Action Mode’ setting on her internal processor. She quickly organized the shipping logistics, helped with transportation, found lodging for all, located a restaurant for the reception, sourced champagne and wine, etc… I had two jobs. 1. Make sure the yard was a perfect/green as possible. 2. The wedding arch. It was implied that fvcking up either would have dire consequences.
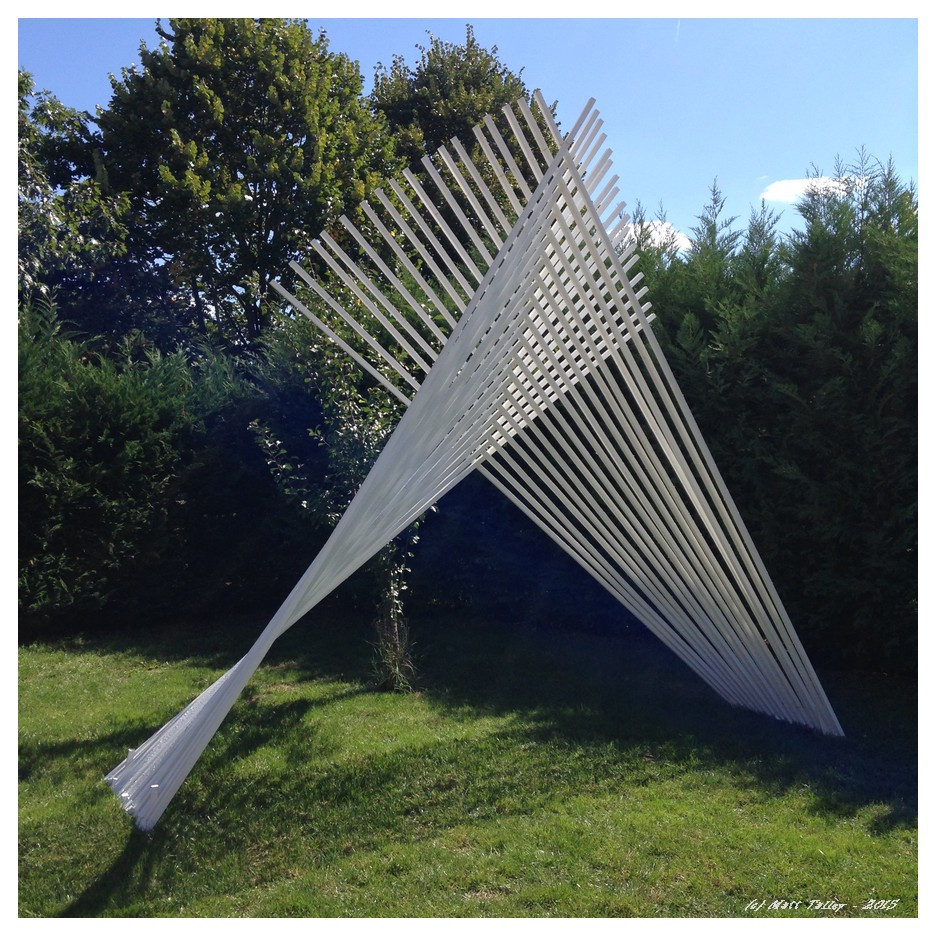
I sketched a bunch of ideas up in my notebook and talked to the bride a little about her ideas and wants over Skype and e-mail. I had planned on doing a big natural arch with the pruned limbs of 70-100 apple and plum trees, but my source burned the branches before I could get to them. I went with Plan B and drew up a modern interpretation of a classic white wedding arch. The bride said ‘go’ and it was on.
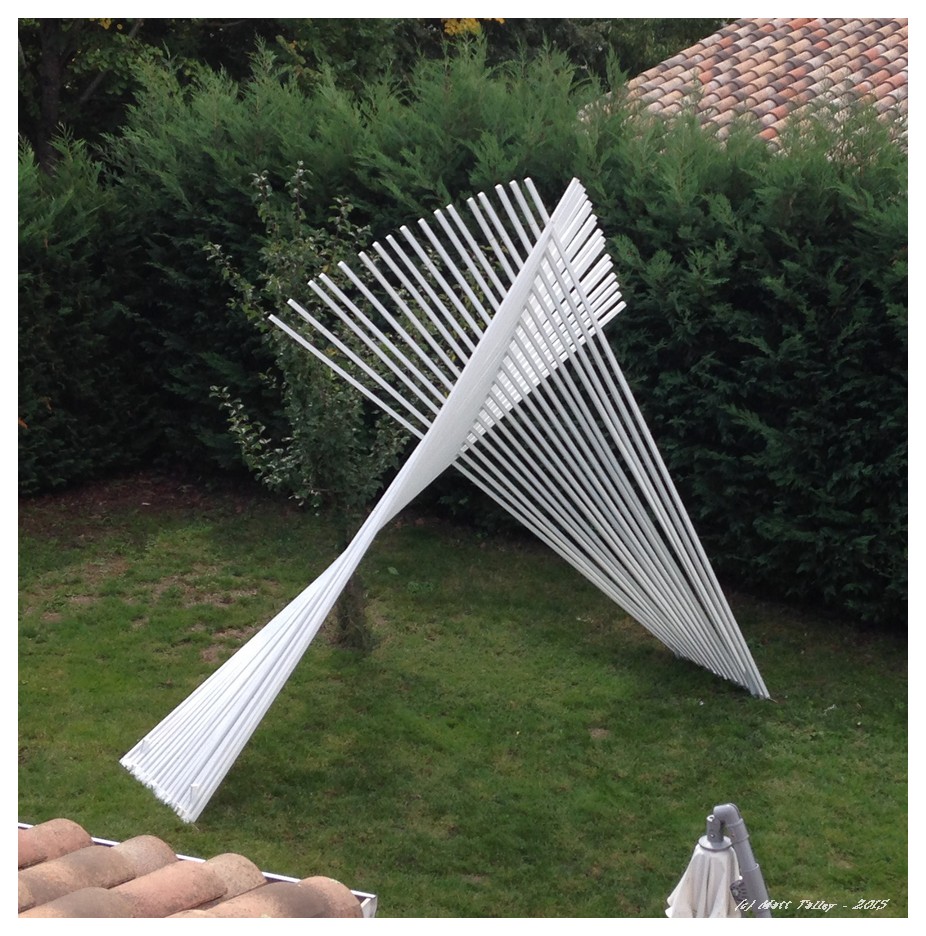
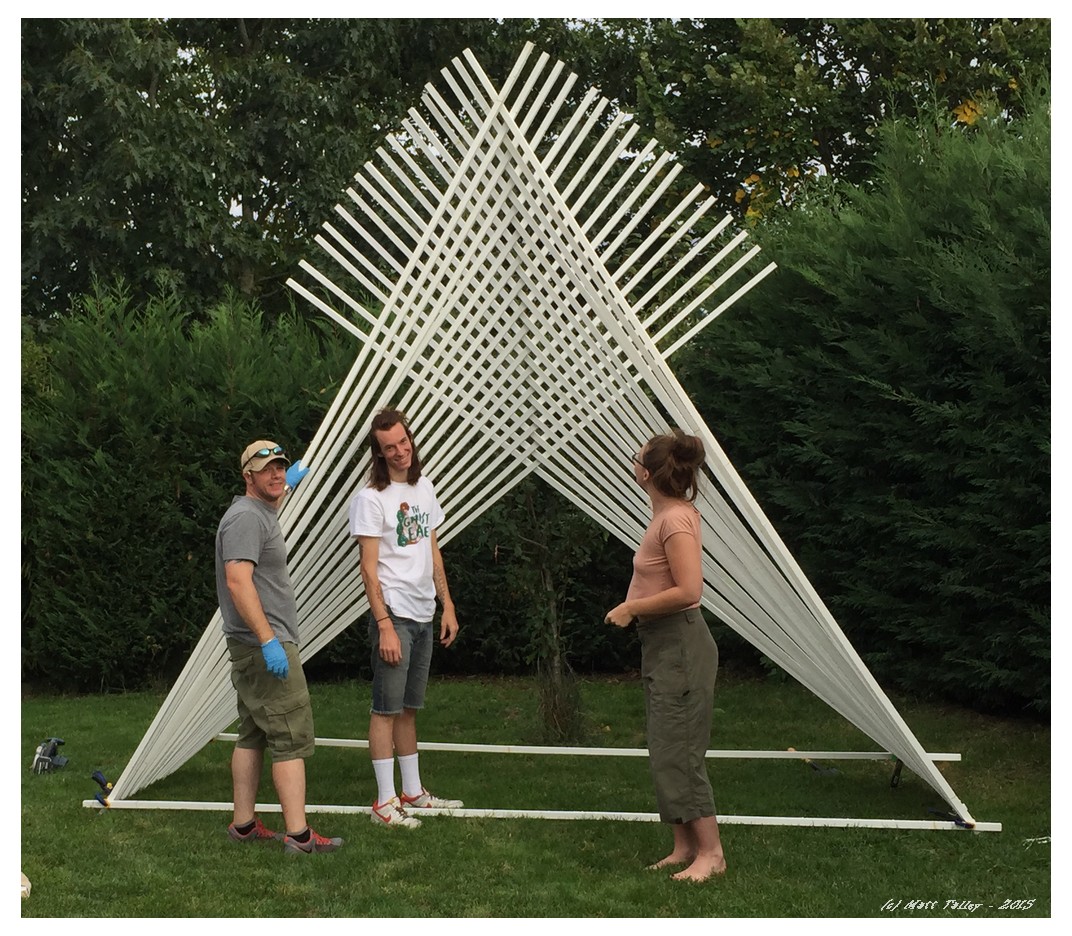
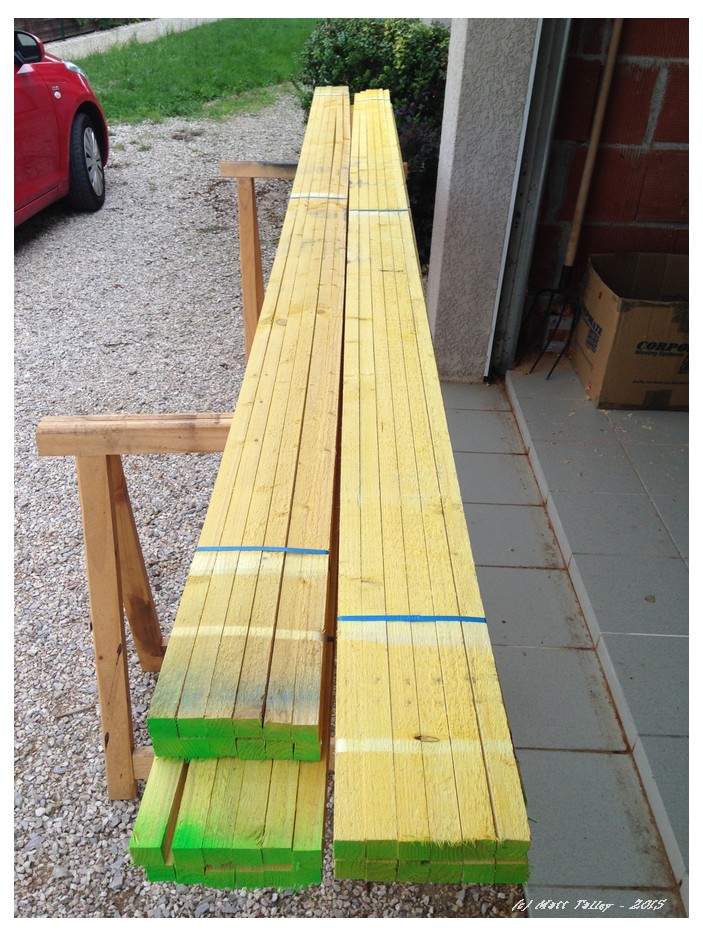
The arch is made from 4 meter (13.14’) X 1.25”X1.25” pine sticks that I sourced at the local lumber yard. They are sold for fencing trim and to cut foundation stakes from. I painted each with two coats of white paint and the bottom is held together with 10mm all-thread. The top is screwed one stick to another – everything is pre-drilled.
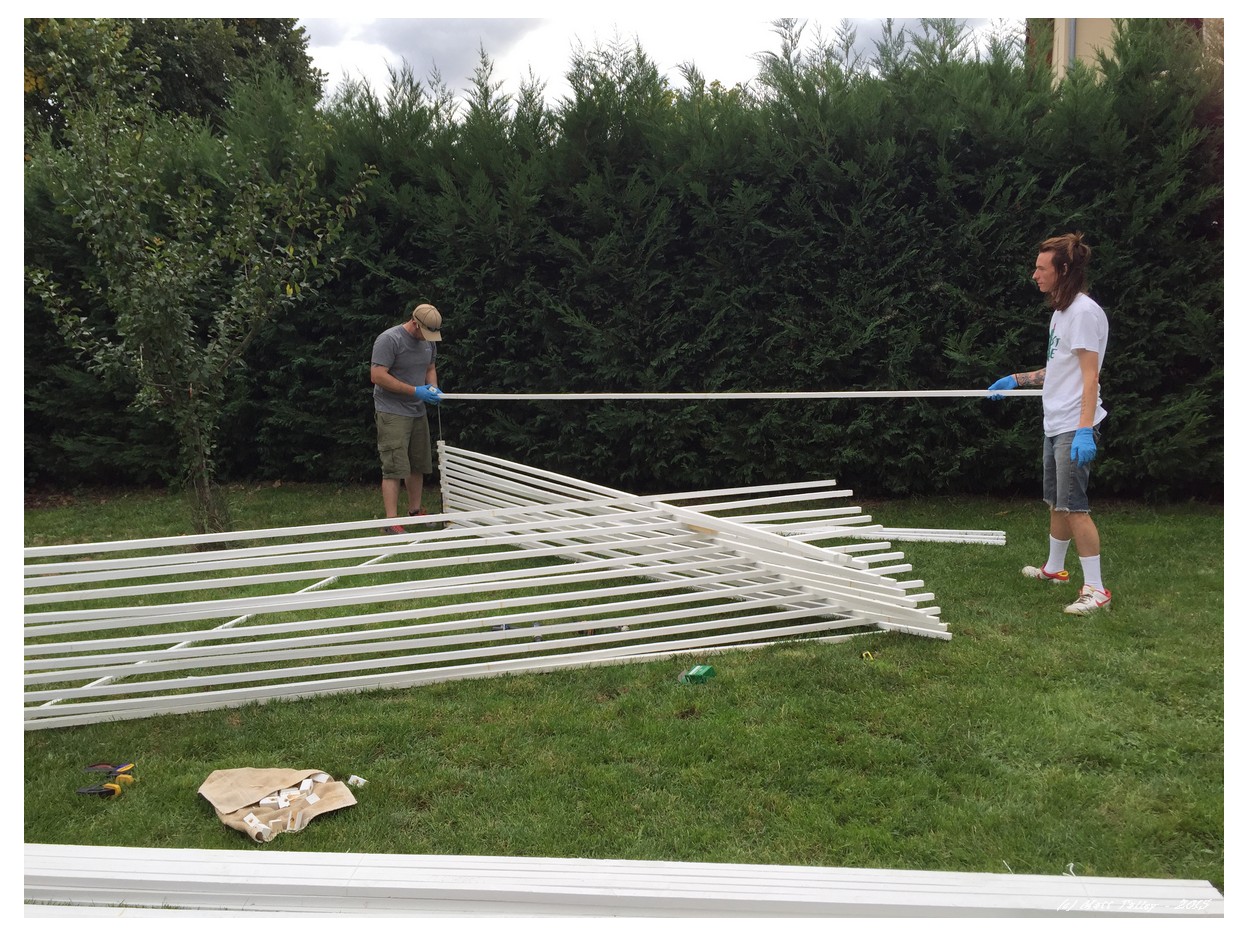
All was finished one day before the ceremony with the bride’s brother, cousin and sister helped out with the final painting (taking turns with the one roller) and installation. I really couldn’t finished in time without their help and support.
The bride and groom seemed very happy with the work and allowed me to even officiate their wedding. Honored does not even begin to describe my feelings about being included in this way. It was my first time getting to use my Ordained Minister credentials and I am SO adding wedding officiate to my resume! I will add some pictures and wedding details later – after the bride has had a chance to flood her social media accounts with pictures to her little heart’s content. Out-doing of being faster than the bride to share “her day” with the world would be bad juju…
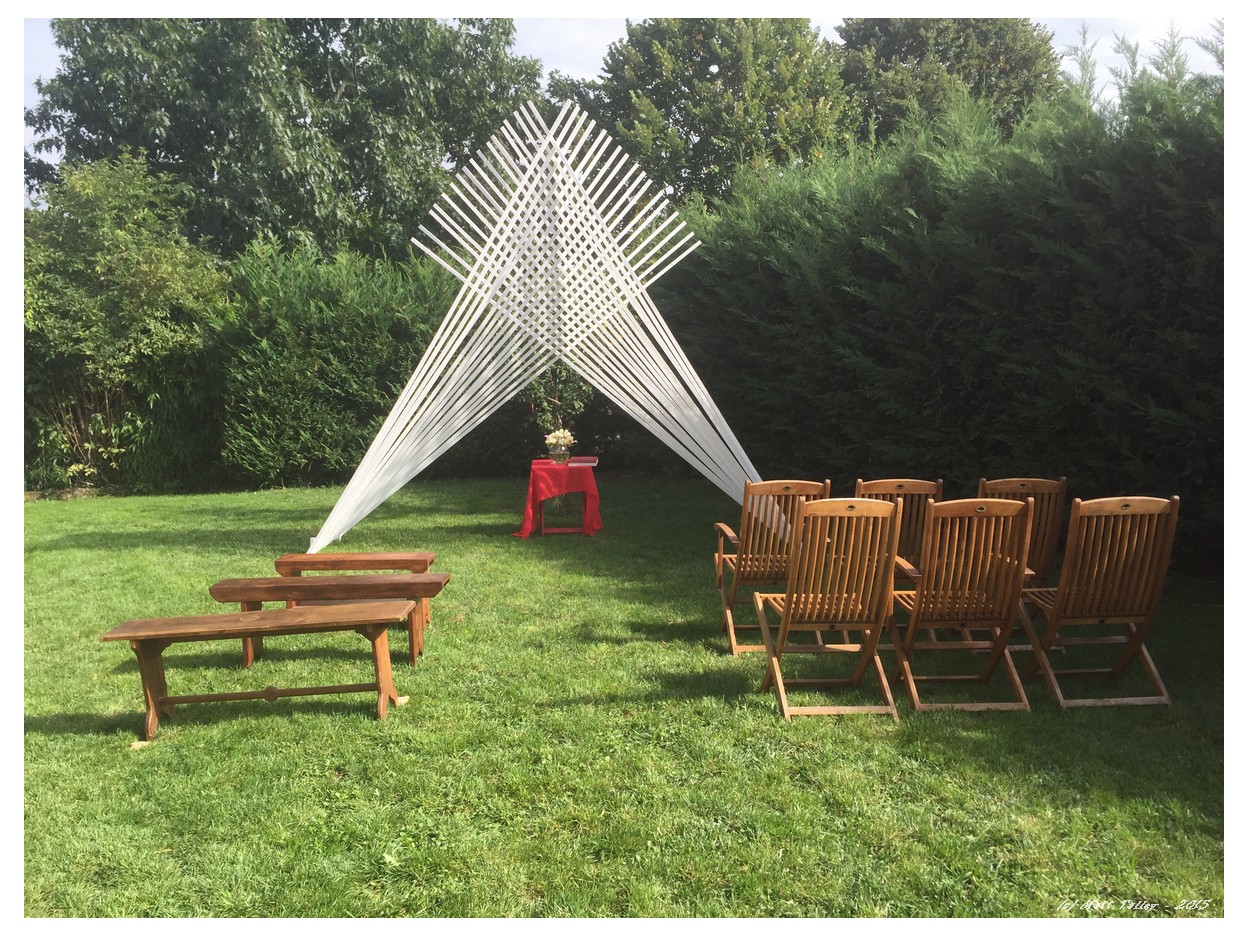
As you can see from the pictures – I succeeded in Job 1 as well: Greenest yard in Toulouse:-)

Updated Materials list and build instructions:
Material:
2 – 3/8”X3’ sections of “all-thread” (Home Depot or Lowes)
4 – 3/8” nuts
4 – 3/8” washers
40-45 – 1”X1”X12’ garden stakes/lathe
These can be substituted by ripping down 2X6 or 2×8 boards on a table saw. The finished stakes will be 1.5”X1”
100ish 1.5” deck screws
White paint with primer
Tools:
Two saw horses or cinder blocks
Paint brush
Hand saw or circle saw
4 – hand clamps
hammer
Two battery drills
Socket set
Combination wrench set
½” drill bit
1/8” Drill bit for pilot holes
Two helpers that have not started drinking or toking
Directions:
1. Check with the bride and get her sign off before any purchase of build is started.
2. After acquiring your stakes or making them, leave them bundled or tie them with packing string. If you removed them from the bundle before assemble, they are likely to warp.
3. Paint all available sides with thick coat of white paint
4. Put on second thick coat
a. You can let you helpers do this and it does not have to be a sober day project. It is better if they are altered. They will paint each other. It will happen.
5. Let paint dry overnight and out of the weather
6. Cut the bundle, retie the stakes with packing string with the unpainted side out.
7. Drill ½” hole in the bottoms of all the stakes about 1/2” from the bottom and on the centerline.
8. Measure up from the top of that hole ½ to 1” and cut what are now your spacer blocks off.
9. Drill ½” hole in the new bottoms of all the stakes about 1/2” from the bottom and on the centerline. Or you can drill both holes in all your stakes at the same time and cut between them.
10. Figure out the spacing of the “floor” of you arch by standing bride, groom and officiate up and seeing what that width is.
11. Add 18”-24” on each side. 10’ is great normally, but you decide.
12. Move all material and tools to the spot where the arch will be erected.
13. Mark out you width on a spate stake and place it in your desired location.
14. Double check with the bride if this is what she wants.
15. Cut your now fully painted bundles
16. Lay you first two sections and have them cross with 6-10” left at the top.
17. Clamp the bottoms to the stake, leaving the ½” hole uncovered.
18. Check the top again and if correct, drill a pilot hole in the top over-lapping stake.
a. This is super important! ALL screw holes must be pre drilled or you will split the wood.
b. This will piss the bride off and you will have a bad day.
19. Insert the all-tread into the bottom hole and put the washer on from the front (under), followed by the nut. Just tighten till the threads are covered on the end.
a. Have one of you sober helpers hold this all-thread until the 5th or 6th course of stakes are laid. If not, then you will split the stakes at the bottom and the bride will find out. You will get into trouble.
20. Slide a spacer block on after each stake is put on.
21. With your sober helpers holding the All-thread, lower another stake into place.
22. You will want to lower both ends at the same time or something will crack.
23. Move to the peak and space the second set.
a. I used a scrap bit of stake so that I would have 1” stakes and 1” spacing between, but if I had to do it again, I would use a 1+1/2” block (skinny part of a 2X4) as the spacer. It makes for a more dramatic fan when done.
24. Drill pilot hold and repeat step 17 – 22 until you have about ½” left on the end of the all thread.
25. Assembly is easier from inside the arch.
26. At some point your sober helpers will start looking for a cooler or a lighter. Do not let them wander off. Trust me.
27. Put on your next par of washers and nuts and hand tighten.
28. Use second set of hand clamps to put another stake across the bottom of the back of the arch. This and the one on front will be removed after you stand it up, but they will help keep everything ridged until it is up.
29. Cut four 18-24” sections of a spare stake and either have a still sober helper sharpen the end (the proper instruction is “like a Vampire stake…”) or you can cut it at an angle with a hand saw
30. Now with all available help stand the arch up, gently.
31. Have the bride sign off on the build and location. Not the bride’s mother. The lady in white herself. Seriously.
32. After you have the OK, then carefully insert a “vampire stake” between two stakes and hammer it into the ground until there is 2” sticking up above the side of the arch.
a. Don’t screw this up and hit the arch with the hammer. You might break something and then you will have to go into witness protection or move to Bulgaria.
33. Predrill a hole in the stake and arch and attach the two.
34. Do this on all four corners.
35. Remove the clamped on temporary bottom sections.
36. You may now release the helpers to become a chemically altered as they so desire.
37. Touch up any or the missing paint from the cords or the assembly.
38. Bask in glory of your accomplishment with a cold malted beverage.
Hi,
I love your design and would like to use it for my wedding! Would you be willing to share more detailed plans on how to recreate this?
Sure. I can send you pictures and sketches/measurements as well