It has been a while since I laid a floor tile – like 18 years. Things haven’t changed though and while time consuming and very detailed – lots of steps – I still remember how it is done. There was no way that I was going to pay someone to do a job that I can/could do, so I took on the task of installing a new kitchen floor in our house. the last of the major projects that I took on during our home remodel.
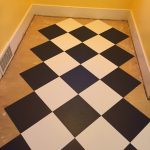
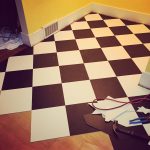
The job is now done and looks great. Most importantly though, my wife is happy. She has a new kitchen floor and it is exactly what she has wanted for years: a black and white checker board kitchen floor that is laid on the diagonal. I am glad she is happy, because I REALLY don’t want to redo it for the next 90 years or so.
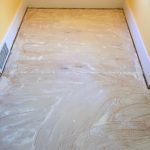
After ripping off 7 layers of old flooring, filling holes, patching a couple sections, removing 40+ screws and 100+ staples, and scrubbing the sub-floor clean, we were ready to start. Starting about 9:00 one Saturday morning, I cut and laid ¼ inch water resistant underlayment – stapling in the field every 4” and along the seams every 2” with narrow gauge crown staples. Starting about 10:00 the next morning, I vacuumed the whole space 3 times to clear any and all debris and locked the puppies out of the kitchen.
Because there is not ONE SINGLE square or plumb wall in my entire 90 year old house, I snapped a grid in the middle of the floor, squared from the doorway leading from the living-room, so that it would look square as viewed from the main room of the house. I applied glue on ½ of the floor and started in the middle of the room and worked toward the south wall/breakfast nook. Stamps-With-Foot cleaned tile as she pulled it from the cardboard boxes (success is in the details) and handed me them as I laid the field and she cut most of the edge pieces as I marked them. Her help was GREATLY appreciated. We laid the other half of the floor, starting about 6:00pm Sunday evening and finished the last piece about 11:30pm. Not too shabby for one weekend’s worth of labor.
I let the glue cure for five days before sealing and then applying 5 coats of satin floor wax. Pre-painted (by me) ¼ round trim was applied around the edges of the walls and cabinets before I very carefully brought the appliances back in and reinstalled. The VC tile I used should outlast my grandchildren and just needs to be scrubbed every other week, then stripped and re-waxed once a year if so.





Your wife is soooooo happy. She appreciates all your hard work and loves you madly.