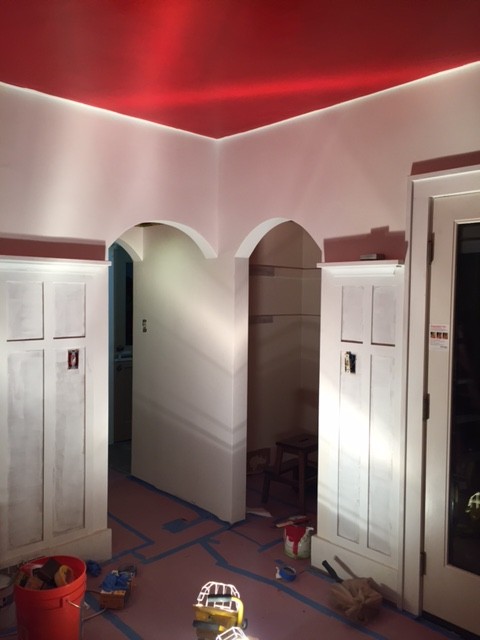
I documented the process to paint the attic conversion that we have spent a couple of months working on. I am using a Graco airless spray rig that I bought a few years ago at a big box store. It has paid for itself MANY times over. This is part 1 of a 2 part video series. In this one, I sprayed the drywall primer and the trim paint. For paint I only use Benjamin Moore. It is my favorite to use and it wears amazing – not cheap though. Wear your mask and keep your lungs healthy!
Tag: Remodel
Catching up and writing more
I have not been writing as much in the last few months as I should. I have lots of excuses:
- House Remodel
- Hectic Work Schedule
- Jeep Rebuild
- A focus on film making and growing my YouTube presence
- Lawn and Garden care – seriously, this takes up a lot of my time.
- Too much TV and interwebs…
- Blah, Blah, Blah…
When you get to the base of it all though, the answer is that I have made time for all the other things that keep me sane/make me crazy except for writing. I am renewing my focus and will be posting more words to go along with all of the pictures and video.
Let’s start with an update of current stuff:
The Attic
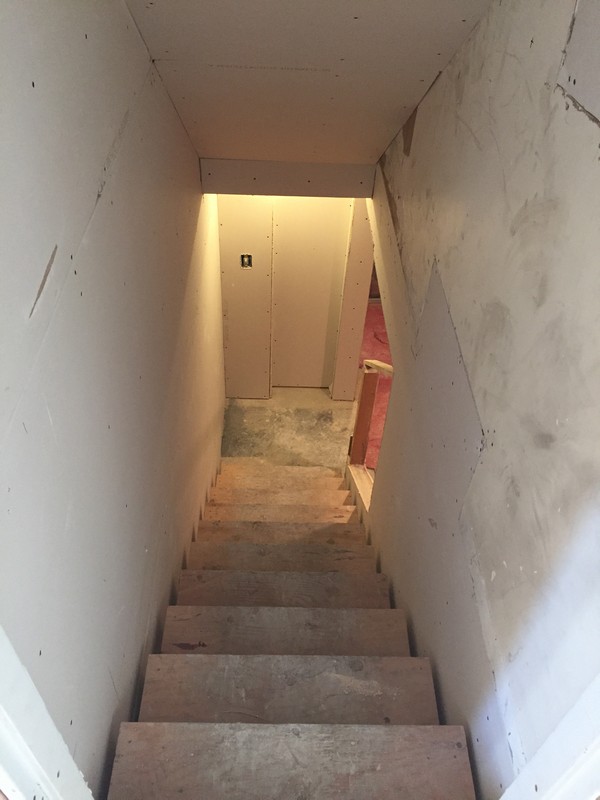
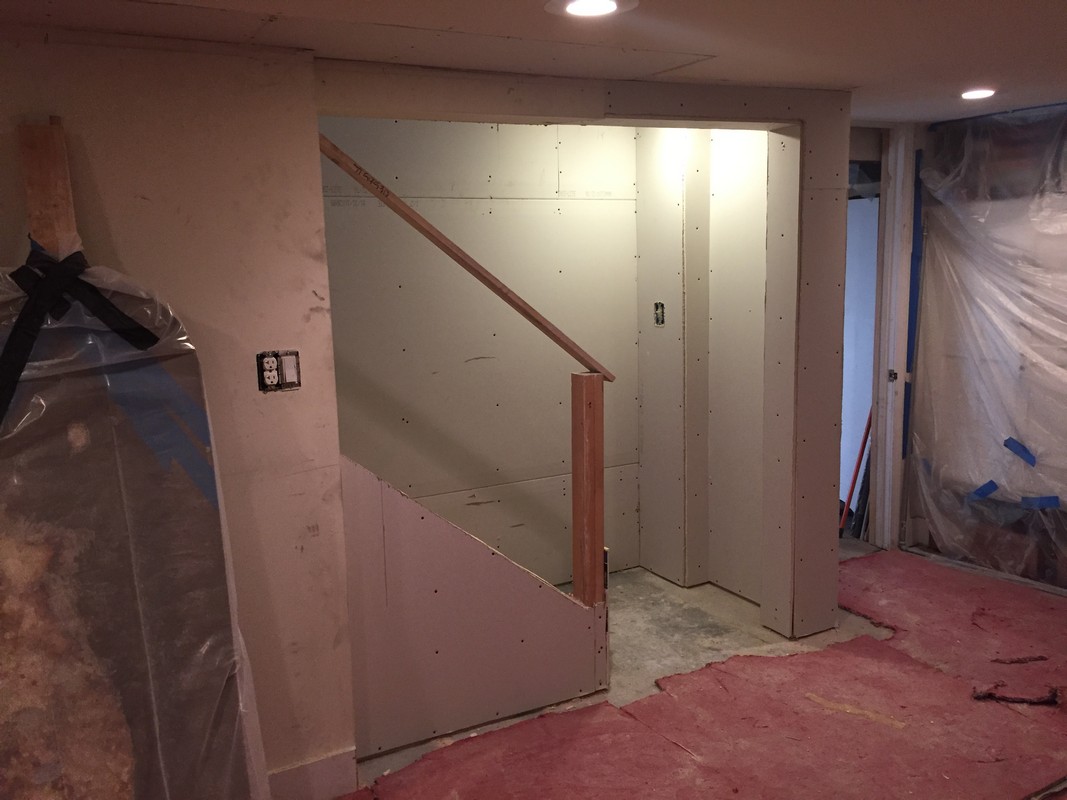
We are so close to being done with the attic conversion. I have to put a couple of coats on the closet door and one on the stair railing and paint the 4 walls with a couple coats of the almond eggshell that my wife picked out. The new hardwood flooring is being delivered today and it will be installed on Friday. I will spend the weekend installing the stair treads and kickers/risers. The receptacles, switches and lights are the last serious items that will go in before I touch-up a little paint here & there and I will be done and can focus on the basement.
Basement
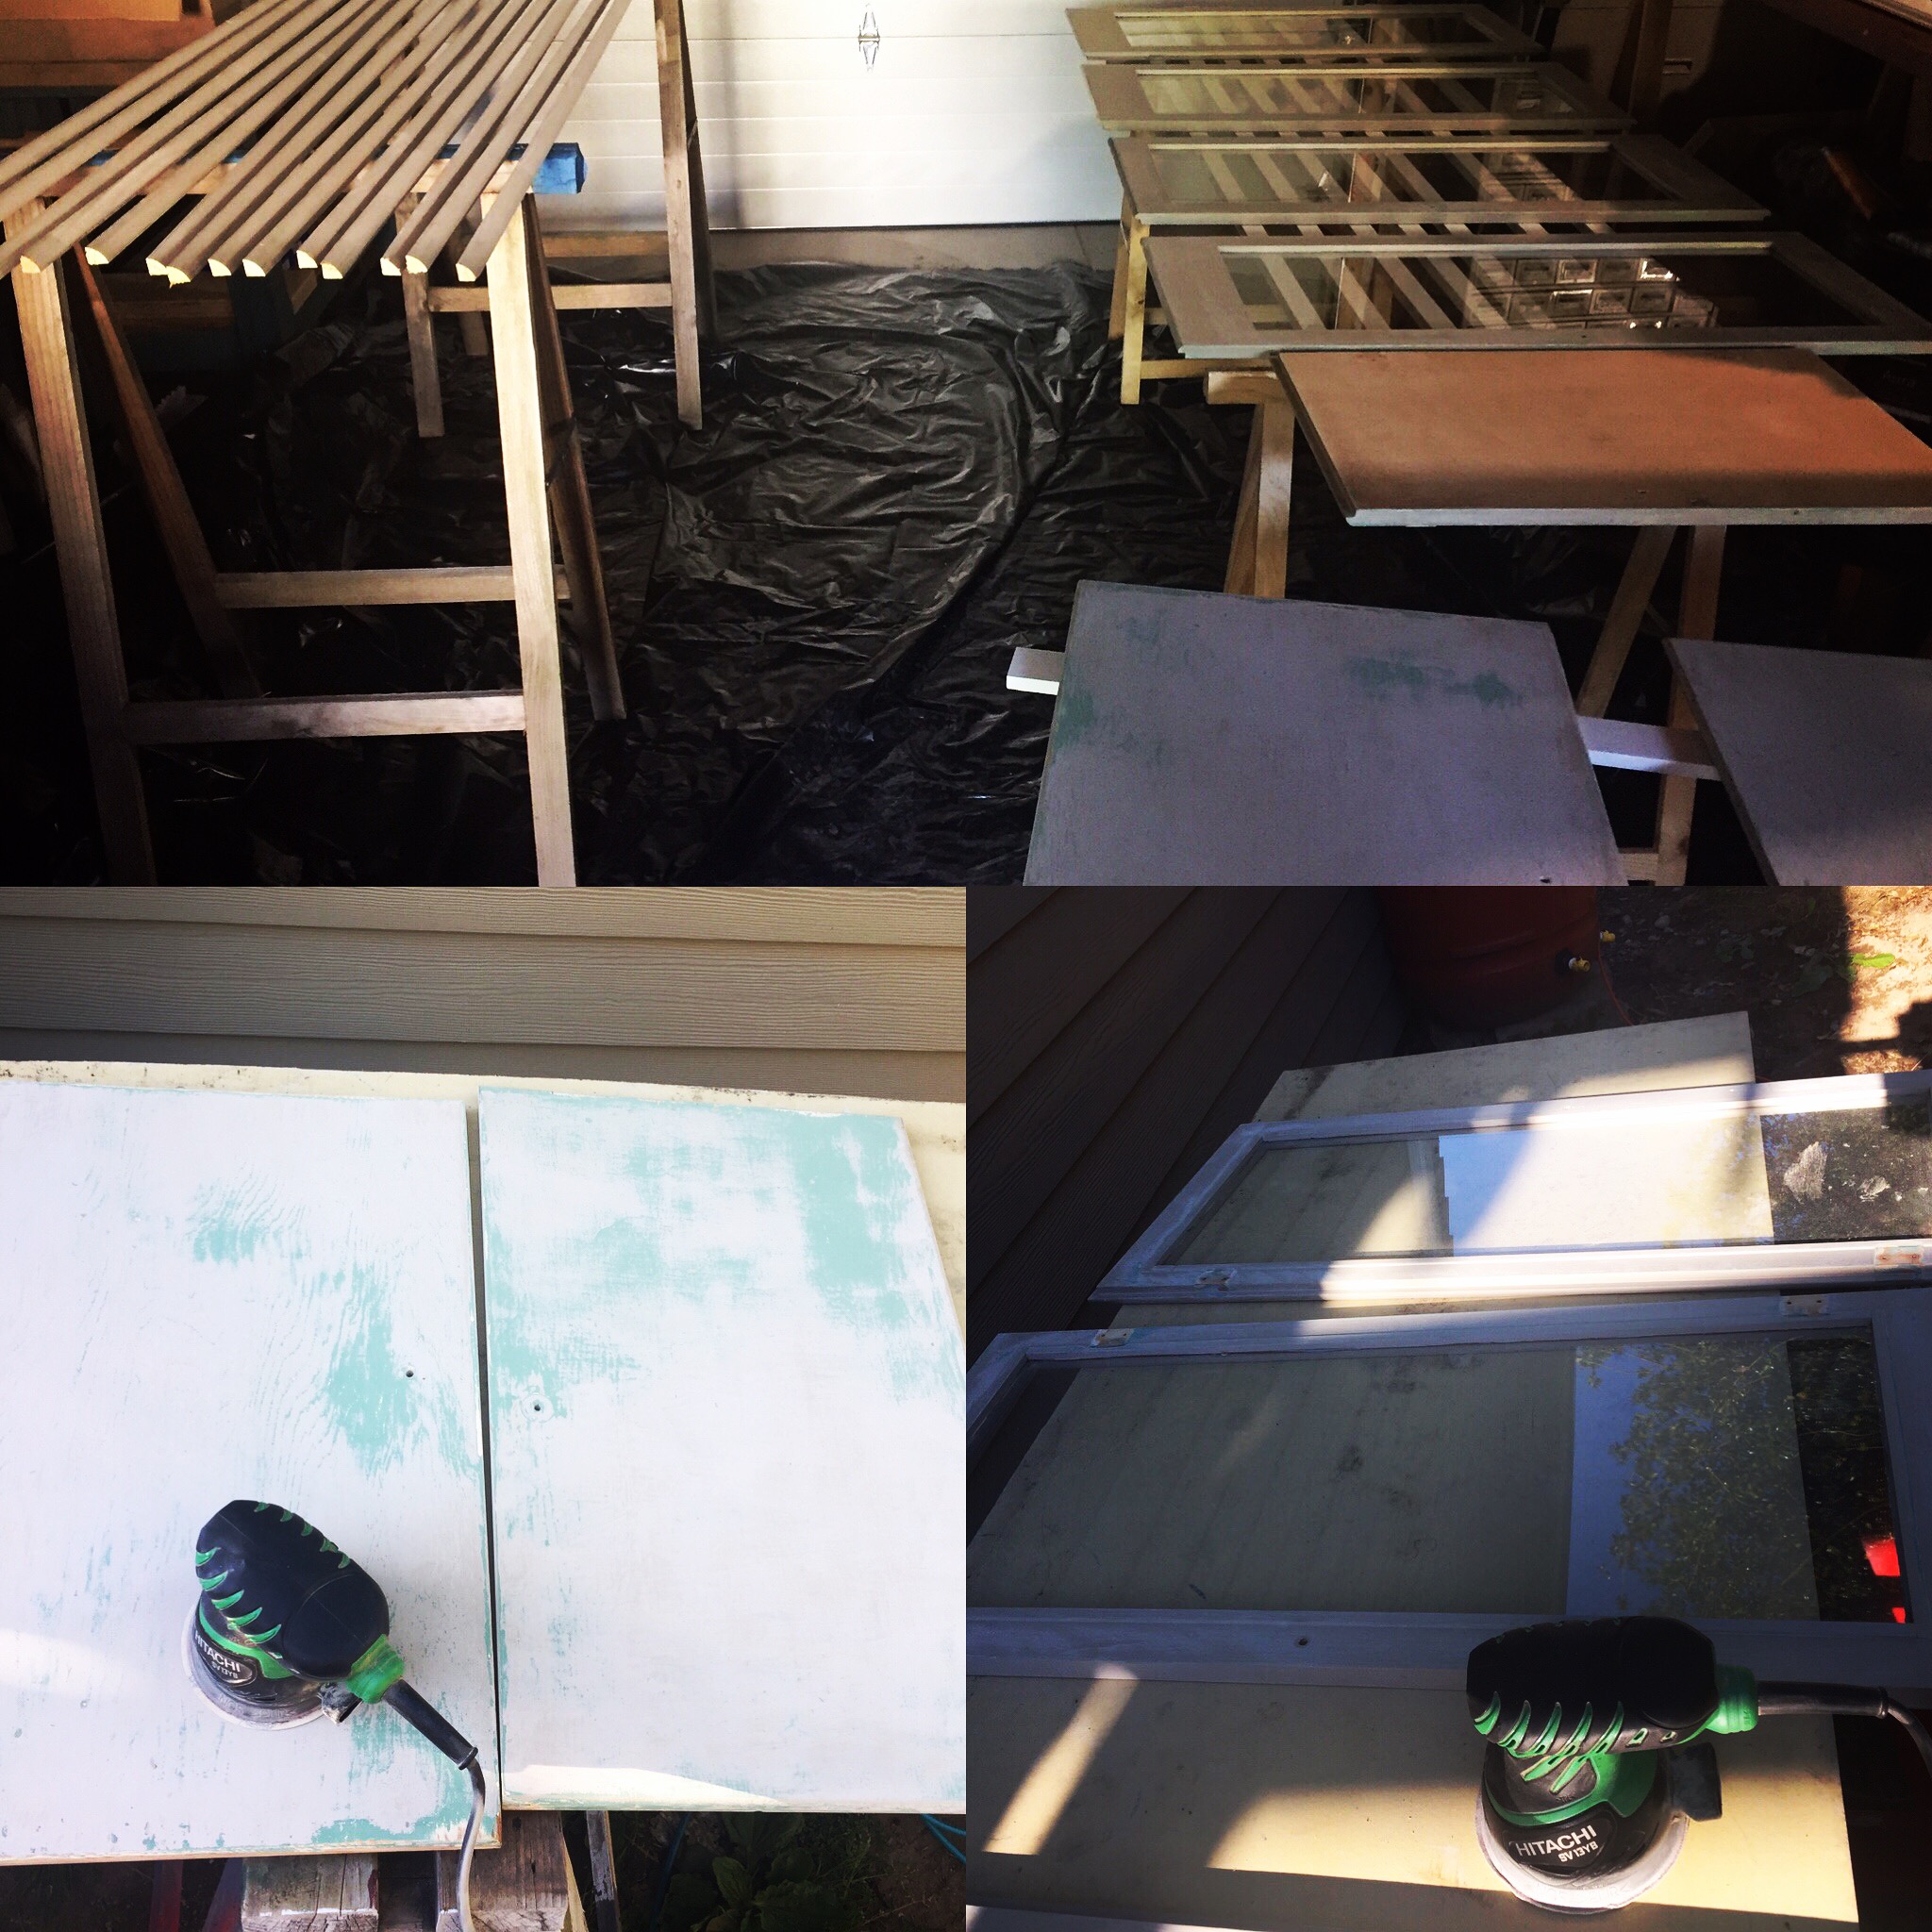
We are 75% there. All tiled laid, grout done and a functioning toilet!! I need to finish the trim install, hang two doors and then paint EVERYTHING! I am having a custom shower rod TIG welded together and will be building the double sink vanity. I have to tack together & paint the medicine cabinet door and mirror frames as well. After all is in, we will have a plumber come out for the sink install and shower hook up. I don’t plumb. I am afraid of flooding my house with water or sewage. I leave that job to the professionals.
Main Level Bath
The tube tile surround is being replaced in two weeks with 6” subway and small hex tile. The new bathroom mirror will be going in this week, and I have to have the exhaust fan switch rewired.
Jeep
I had a solid weekend working on the Jeep. The taillights are installed, the winch is re-wired, mirrors installed, windshield back on with new gasket and PLENTY on extra silicone. The upper KC spotlights are re-installed, and an issue with the front speakers if fixed. I still need to paint and install the spare tire rack, as well as the CB, megaphone speaker, 2nd battery, air compressor, lower KC spot lights, passenger headlight, rub rails, whip antenna, headlight trim rings, and polish the rear tube bumper.
The current plan is to leave the top COMPLETELY off until fall when I re-install the soft top. I need to finish the Hi-Lift Jack rebuild project, have the speedometer serviced, and replace my tube pads as well before the cold winter wind blows.
Garage
The shop of me dreams is packed full of everyone else’s crap right now. It is all leaving by the last weekend in July if I have to put it all out on the road. I need to finish wiring in my 40K lumens of LED lighting, a 50AMP plug, a couple of 220/30amp plugs and have an electrician connect all into my service panel.
House Exterior
- Downspout in back needs attention
- A section of soffit need looking at and possibly repaired
- I need to weld together the Juliet Balcony outside the dining room
- Weld railing for rear steps
- The new front windows need a little trim and paint
- Dining room window needs trim and paint
- The rear steps need to be painted
- The chimney needs to be repointed before fall/winter
- Basement railing needs to be installed
- Both front railings need to be sanded and repainted.
- External security alarm siren need to be installed
- A tiny bit of concrete need to be pouted
- Two security cameras need to be swapped out for the lower profile ones
The yard
Man, the front yard is good, a little weeding and bush trimming maybe. The back yard though… It is still a disaster, or at least ½ a disaster. I want to fill 3-4 gabion baskets with all the rocks left over from a previous owner’s attempt at pond-scaping and make benches around out fire pit. We will be adding a steel arbor from the garage to the patio this fall that I am welding up on-site. The patio table and chairs will get a proper sanding and oiling this weekend and we need/want an umbrella of it this year. I want to add a tool shed and additional firewood racks to the side yard. And finally, the small yard next to the garage is my makeshift apiary and I would like to make that both permanent and presentable with some additional hives, gravel and flower plants in narrow garden boxes.
Health
Stamps-With-Foot, my mom, and the kids are good. I am feeling all of my 40+ years lately though. My hip is still painful a full year after reconstruction. I may have torn the meniscus in my left knee, AND I have Fucking Tennis elbow from chopping firewood!! Not being able to run and bike, coupled with my love of cookies, has left me with a classic “Dad-bod” and even my fat pants are tight right now. Eating better now. Trying to get between 7 and 10K steps in a day, having the knee looked at, and working on the elbow. We are going to Hawaii in February and I need at least a 2-pac as there will be MANY shirtless days in and under the water, for my arm to feel better, and my knee and hip to be like 70%.
Other
Work is work, but I have really traveled at all this year and that is awesome! Still wish I was building cabinets for a living, covered in man-glitter, smiling but that will have to wait. I will be traveling to Arkansas this fall to see my daughter and her family. My son will be here in Seattle for a couple of weeks this summer. I hope to tour a couple of colleges with him. My wife and I have a couple of road trips planned and I want to get out on my bike, kayak, and skate board a little (don’t tell my wife or knee Dr. about the board…) I have started recording for a monthly Podcast. A friend conned me into it after a few years of asking. I am going to just sit and tell stories without naming names or implicating myself in any illegal activities that are not past the statute of limitations. As a reward for losing weight I will go ahead and finish out both of my tattooed arm sleeves and my wife and I are planning matching bee tattoos for our anniversary. I still have not bought a boat or a motorcycle, so she will keep me for a while longer
Film Friday – Double Feature: Attic and Bath Remodel Status
I spent two FULL days, with a little help from my wife, instaling the baseboard, door, skylight, stair, and window trim in the new attic space. This video includes a few tips and tricks along the way. As this will be my wife’s studio space, she put in some sweat equity filling nail holes, doing a little sanding, and she chose the paint scheme. I will be painting next and will document that whole process as well.
This is Part 1 of our basement bathroom build/finish. We decided to add a basement bathroom when we replumbed the house a couple of years ago. 6 months of chaos insued and we took a two year break before diving back into the bathroom build. This time has been SO much better. We went with white subway tile for the walls, black and while hex tiles for the floor, and charcoal grout. The next step is trim, paint and fixture install.
Film Friday – Attic Remodel: Week 7
This is the last of the weekly updates for the Attic Remodel Project. The heavy work and drywall is complete and I will start trimming and painting the space this week (nights and weekends as I have a real J-O-B) so that my wife will have a studio that is full of light and opportunity. The next and final installment of the attic build will show all the paint and trim steps, some tips & tricks, and will be a few weeks away.
Hiring a contractor the right way
I have remodeled 3 homes while living in them and am the son, grandson, brother-in-law, and step-son of contractors. I once had my own general carpentry company and served as a subcontractor for a few small to medium sized home-builders. I have had some great experiences working both professionally and personally with contractors and subs and I have had & seen all the possible home renovation horrors. The advice written below comes from the experience noted above.
Once you have decided on the work to be done and your ability to pay for said work, get written itemized estimates from several firms. Don’t automatically choose the lowest bidder or throw out the highest. Carefully consider how and why they are the lowest or highest bidders. Does the lowest have lower overhead cost or are they missing something important to the job? Does the high bidder know something that the others don’t or does he have a bright shiny new truck to pay for? Never, never, EVER do business with friends, family, or neighbors. Seriously. The “deal” you are getting WILL NOT be worth the hard feelings at the end. Ignore at you own peril….
Some Questions to ask while you are gathering bids:
- How many projects like mine have you completed in the last year?
- Ask for a list so you can see how familiar the contractor is with your type of project.
- Will my project require a permit?
- If so, will you be taking care of the Permitting process?
- If no, why not?
- Does the contractor have any BBB, State Licensing Board, or labor relations board findings?
- Call and check.
- Use the online tools and forums. Even if there is only one negative review. Read it.
- Will you be arranging both permits and inspections?
- A good contractor will get all the necessary permits before starting work on your project.
- Ask for copies of the permits and keep them handy/post on the job site.
- May I have a list of references?
- Any contractor should be able to give you names, addresses, and phone numbers of at least three clients with projects like yours.
- CALL THEM ALL!
- Ask each reference:
- How long ago the project was and whether it was completed on time?
- Were there any unexpected costs?
- Did workers show up on time and clean up after finishing the job?
- Is there anything that you would do different?
- Tell the contractor that you will be visiting the job-site, and will that be an issue?
- The answer should be: “No, you are welcome any time.”
- What types of insurance does the contractor carry?
- Answers should be:
- Personal liability
- Worker’s compensation
- Property damage coverage
- Ask for copies of insurance certificates, and make sure they’re current, or you could be held liable for any injuries and damages that occur during the project.
- Make sure there is an indemnity clause in your contract to relieves you of any liability in the case of injury or damage cause by or to a contractor’s employee or sub-contractor.
- Will you be using subcontractors on this project?
- If so, make sure to state in the contract that the subcontractors have to have current insurance coverage and licenses, if required.
- Will you be paying the subcontractor directly or will they be billing separately?
- Is there a fee added for their service fee by the contractor?
- Answers should be:
Payment Terms:
- Don’t pay cash, don’t pay cash… If a contractor will give you a “better deal” for paying cash, then walk away and go with another contractor.
- If they are willing to not declare income on their taxes, then they are willing to take other shortcuts on your job.
- Limit your down payment to 10-20% of the job cost. Some contractors will want the cost of materials and the 1st week’s labor upfront and that is fine as well.
- Make payments during the project contingent upon completion of defined amounts of work and not on calendar days.
- Example: ½ of project due when roof doors, windows installed and inspection passed. Final Payment due 7 days after final inspection pass and “punch list” items agreed to.
- This way, if the work isn’t going according to schedule, the payments to your contractor also are delayed.
Get a Written Contract:
It should be clear and concise and include the who, what, where, when, and cost of your project with very limited legal language flourish. Before you sign a contract, make sure it includes:
- The contractor’s business name, given address, phone, and state license number
- The payment schedule for the contractor, subcontractors, and suppliers
- The contractor’s obligation to get all necessary permits
- An estimated start and completion date
- Possible monetary penalty for (none weather related) missed dates: $50 off the total amount owed for missed milestone date due to say inspection failure and $50 for each day until Passed Inspection
- The payment schedule for the contractor, subcontractors, and suppliers
- A fully defined Scope of Work (SOW), which detail all work to be performed at a Time & Material rate or as a total bid cost.
- If work to be performed is on a Time & Material basis, then a weekly summation of all costs (labor, material, permits, etc.) and debits (payments or credits) shall be provided to the customer.
- A “Not to Exceed” amount or percentage for the job, say 5-10% of total unless due to noted and signed change orders previously outlining the expense.
- How change orders are handled.
-
- A change order is a written authorization to the contractor to make a change or an addition to the work described in the original contract. It could affect the project’s cost and schedule and that needs to be outlined in the written change order.
- A detailed list of all materials including each product’s color, model, size, and brand. If some materials will be chosen later, the contract should say who’s responsible for choosing each item and how much money is budgeted for it (this is also known as the “allowance”).
- Information about warranties covering materials and workmanship, with names and addresses of who is honoring them — the contractor, distributor, or manufacturer. The length of the warranty period and any limitations also should be spelled out.
- The inclusion of a lien release or lien waiver. See below.
- Notification time if Sewer, Water, Gas, Electrical services will be interrupted, normally 24 hours, and how long they will be off.
- Damage to Property: Negligent damage to property by contractor or subcontractors
-
- “Shall be repaired to previous condition at contractor’s expense.”
- What the contractor will and won’t do. For example, is site clean-up and trash hauling included in the price? Ask for a “broom clause” that makes the contractor responsible for all clean-up work, including spills and stains.
- You will want a broom clause. Trust me.
- Do not sign an Arbitration clause. This is for the sole benefit of limiting the contractor’s cost if things go wrong and if you report the contractor to a state labor board or a BBB in your state, this can be seen as a violation of this clause and the contract as a whole.
- Make sure there is a General Survival Clause:
- In the event any clause or provision of this contract shall be held to be invalid, then the remaining clauses and provisions shall never the less be and remain in full force and effect.
- A written statement of your right to cancel the contract within three business days if you signed it in your home or at a location other than the Contractor’s permanent place of business.
After You Hire a Contractor:
Keep Records!
Keep all paperwork related to your project in one place. If it didn’t happen on paper, then it didn’t happen. This includes:
- Speak directly to your contractor or your assign representative. Not the plumber, framer, or roofer.
- Copies of the signed contract
- Change orders
- Copies of all permits
- Follow up any in person conversations or phone calls with an e-mail detailing any agreed to points.
- Any correspondence with your contractor.
- Print out and keep e-mails for ready reference
- Keep all receipts of any material that you have purchased
-
- A record of all your purchases may be need receipts for tax purposes.
- Keep a log or journal of all phone calls, conversations, and activities. You also might want to take photographs as the job progresses. These records are especially important if you have problems with your project — during or after construction. And serves as a record for future construction or remodeling.
Once the job is “Done”:
Don’t make the final payment or sign an affidavit of final release until you’re satisfied
Besides being satisfied with the work, you also need to know that subcontractors and suppliers have been paid. Laws in your state might allow them to file a mechanic’s lien against your home to satisfy their unpaid bills to the contractor that used them on your job. Protect yourself by asking the contractor to secure a lien release or lien waiver from every subcontractor and supplier before final payment is made.
Know when you can withhold payment
If you have a problem with merchandise or services charged to a credit card, and you’ve made a good faith effort to work out the problem with the seller, you have the right to contact your credit card company and withhold payment from the card issuer for the merchandise or services. You can withhold payment up to the amount of credit outstanding for the purchase, plus any finance or related charges.
Before you sign off and make the final payment, check that:
- All work meets the standards spelled out in the contract
- You have written warranties for materials and workmanship
- You have proof that all subcontractors and suppliers have been paid
- The job site has been cleaned up and cleared of excess materials, tools, and equipment
- You have inspected and approved the completed work
- Use a Sign-Off Checklist/”Punch List”
Attic Remodel: Week 6
This week, we went from bare studs to insulation to wiring to drywall with a dash of new windows thrown in for good measure. The HVAC split unit head vacuum & power lines were installed and we had a serious accident in the attic that occurred during that process.
Film Friday – Attic Rebuild: Week 3
The results from week three of our attic remodel: Floating Floor joists are in, new windows and skylight framed, stairs in, more Roxul insulation in, prepped and ready for electrician to remove everything scary/all the knob&tube next week.
Film Friday – Week 2 of the Attic Rebuild
I know… I have been posting a bunch of videos lately and not a lot of travel, Jeep, Puppy, garden, music, building, or other normal posts. That will change with the coming of Spring and the completion of our attic remodel/rebuild. In that vain, below is the short video documenting week 2 of the process. It looks like it will be a 5-part series.
Mid-week Update
So, this week has been crazy at work and at home. On the home-front, there were birthdays, shopping, it is Income Tax time, we have 3-4 guys showing up every morning at 7:00 with tools in hand to work in and on the attic.
My shop is full. I can’t even get to my table saw and my bench is stacked 5′ high with insulation. I need a little shop time to keep me sane or at least saner… So, I took a little me time and signed up for some classes for spring and early summer where I will get use other folks shops and build/make stuff:
- Canoe Paddle Making
- Claw and Ball Foot Carving
- A 10-Week Letter Press Workshop
- Woodcarving Figures
- Spoon Carving
- Block Printing
- Industrial Sewing: canvas and leather
Film Friday – Framing Double Feature
We are remodeling and rebuilding a 90+ year old attic into a master bedroom. This required completely rewiring to electrical in the attic, moving/fixing plumbing, building a complete floating floor, adding roof supports, etc… Below is thew documentation of the 1st week of the build.
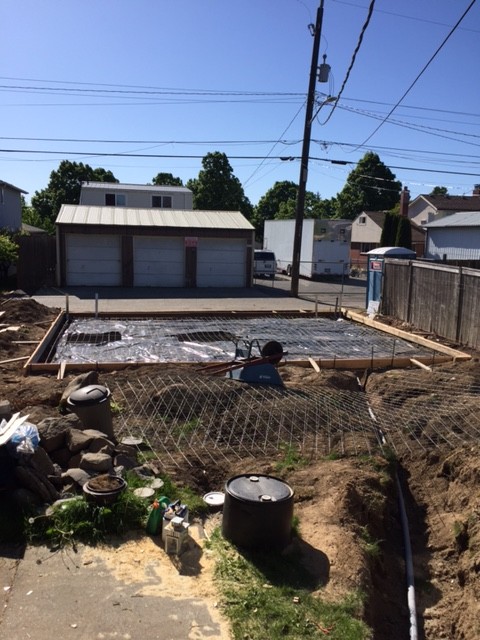
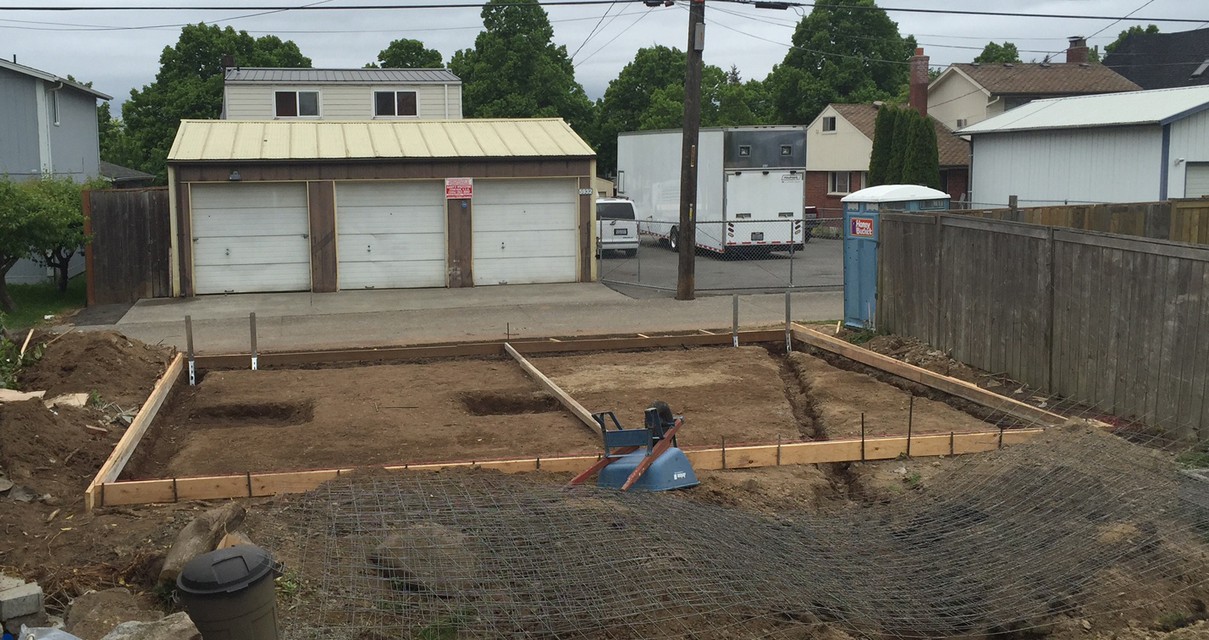
Part I of a 2 part video on the replacement of a falling down 90+ year old shack of a carriage shed with a modern 24X24 garage. This was not a flat mono-slab, green field build. Lots of digging was required and a rebar-filled retaining wall and slab had to be poured in the middle of winter before the first wall could go up.
Spring Has Sprung – 2018
With the official start of Spring – as determined by the fact that my wife was reading a book, enjoying the sunshine, and drinking wine in the yard – we had a busy weekend at La Maison Du Talley:
Moved all the power tools in the shop against the wall for temp storage duty
Ordered material for attic finish
Set up new iPhone (old one a brick!)
Checkout at Pratt to be able to independently use their fabrication shop.
Moved everyone else’s crap out of my basement and temporarily into the garage
Said dirty words about all the other people’s crap being stored in our home
Cleaned the basement completely out
Pruned the apple trees in the backyard
Restacked the firewood wood pile
Cleaned and prepped attic for floor installation
Published two YouTube videos
Set up new condenser microphone in home office/studio
Breakfast with my mom and wife
Went to the Moonshiners 36th Annual Jeep Swap Meet
Did not buy a new-to-me 1946 CJ-2A project Jeep
Stayed Married
Did not buy a motorcycle or boat at the swap meet
Stayed married – there is a theme…
DID buy an ARB on-board air compressor and a duel battery mount – and got a sweet deal!
Signed up for three classes at Pratt for this spring: Block printing, wood carving, and letterpress
Padded and protected the wood floor and built-ins in prep for attic finish
Cleaned the hot tub
Edged and mowed the front and back yard
Spread Weed&Feed on the back yard and parking strip
Re-seeded the front yard
2018 News Year’s Resolutions:
A year ago, to the day, I said that I would do a bunch of stuff in 2017. I did OK, but not great. I could blame it on my old man hip, the surgery, or the recovery time, but mostly not getting stuff on the list done was all me. All my own laziness, stuborness, or my A+ skill level of procrastination. These are the promises I made to myself that I kept:
Take a pottery class
Take a Blacksmithing class at the Pratt
Read 1 book every 2 weeks – minimum
Play my uke, banjo, and guitar with others
Give lots of $$ to Heifer and MFS
Make movies and post: Adventure, craftsmanship, and family.
Make Stuff!!
Ride my skateboard because I am not too old or too fat
Road trip in WA more
Take my wife on vacation
Plant a spring garden
Fix up the front and back yards
The following is what I am committing myself to do in 2018:
- Organize my chaos in the shop and basement.
- Sell, donate, recycle, or throw away shit that I do not use.
- Use my planner and notebooks as tools not as something that I “have” to use.
- Eat my veggies. Seriously. Salads in my future.
- Take my desk at home back and make it a conducive writing space.
- Cut WAY back on sugar and carb intake!
- Lose weight – back to 175! and put on 5-7lbs of muscle
- Go to the gym 3-4 time a week – minimum.
- Box more at the gym and at home
- Write more: Blog posts, REAL letters, Thank you notes, fiction, and non-fiction
- Take more great pictures
Fly my drones more- Take at least a 45 minute lunch at least 4 days a week at work
- Show up to yoga at least once a week
- Take another pottery class
- Finish my CJ-7 Jeep restoration
- Look into getting back into the judo dojo
- Sign up and compete in the Gambler 500 car race
Sign up for a letterpress class at SVC Downtown- Take another blacksmithing class at The Pratt
- Read 1 book every 2 weeks!
- Learn how to play the mandolin and banjo better!
- Play my uke, banjo, and guitar with others
- Build a skin-on-frame canoe for two
- Road and mountain bike
- Take the puppies to Lincoln Park for a walk at least once a week
- Ride the living shit out of my Single -Speed
- Bike to work at least 5 times this year (12 miles each way)
- Volunteer more at the Center for Wooden Boats
- Pay off all credit cards
- Go sailing in Puget Sound
- Turn some amazing and useful stuff on my lathe
- Give lots of $$ to Heifer and MFS
- Make at least 1 movie a week for YouTube and post: Adventure and craftsmanship
- Monetize my YouTube account and increase my presence and standing in that community
- Lessen my Twitter and social media activity…
- See my kids and grandchildren more
- Be involved in politics more: financally and with a time commitment
- Work on my Genealogy database and organize all my info.
- Finish the house remodel – even if I have to pay a contractor to do it (…shudder…)
- Finish the garage/shop/GROP build
- Make.More.Stuff!!
- Ride my snowboard and skateboard because I am not too old or too fat
- Road trip in WA and on West Coast more
- Have two hives of healthy, happy bees
- Kayak lots!
- See my friends more
- Take my wife on vacation
- Plant a spring garden and have a really bountiful fall harvest
- Have an awesome Griswald-like Christmas light display!
I am printing this list out and pasting copies in my notebook, work planner, in the shop, at my desk at work, on the fridge, and in the basement above my warranty voiding workbench.
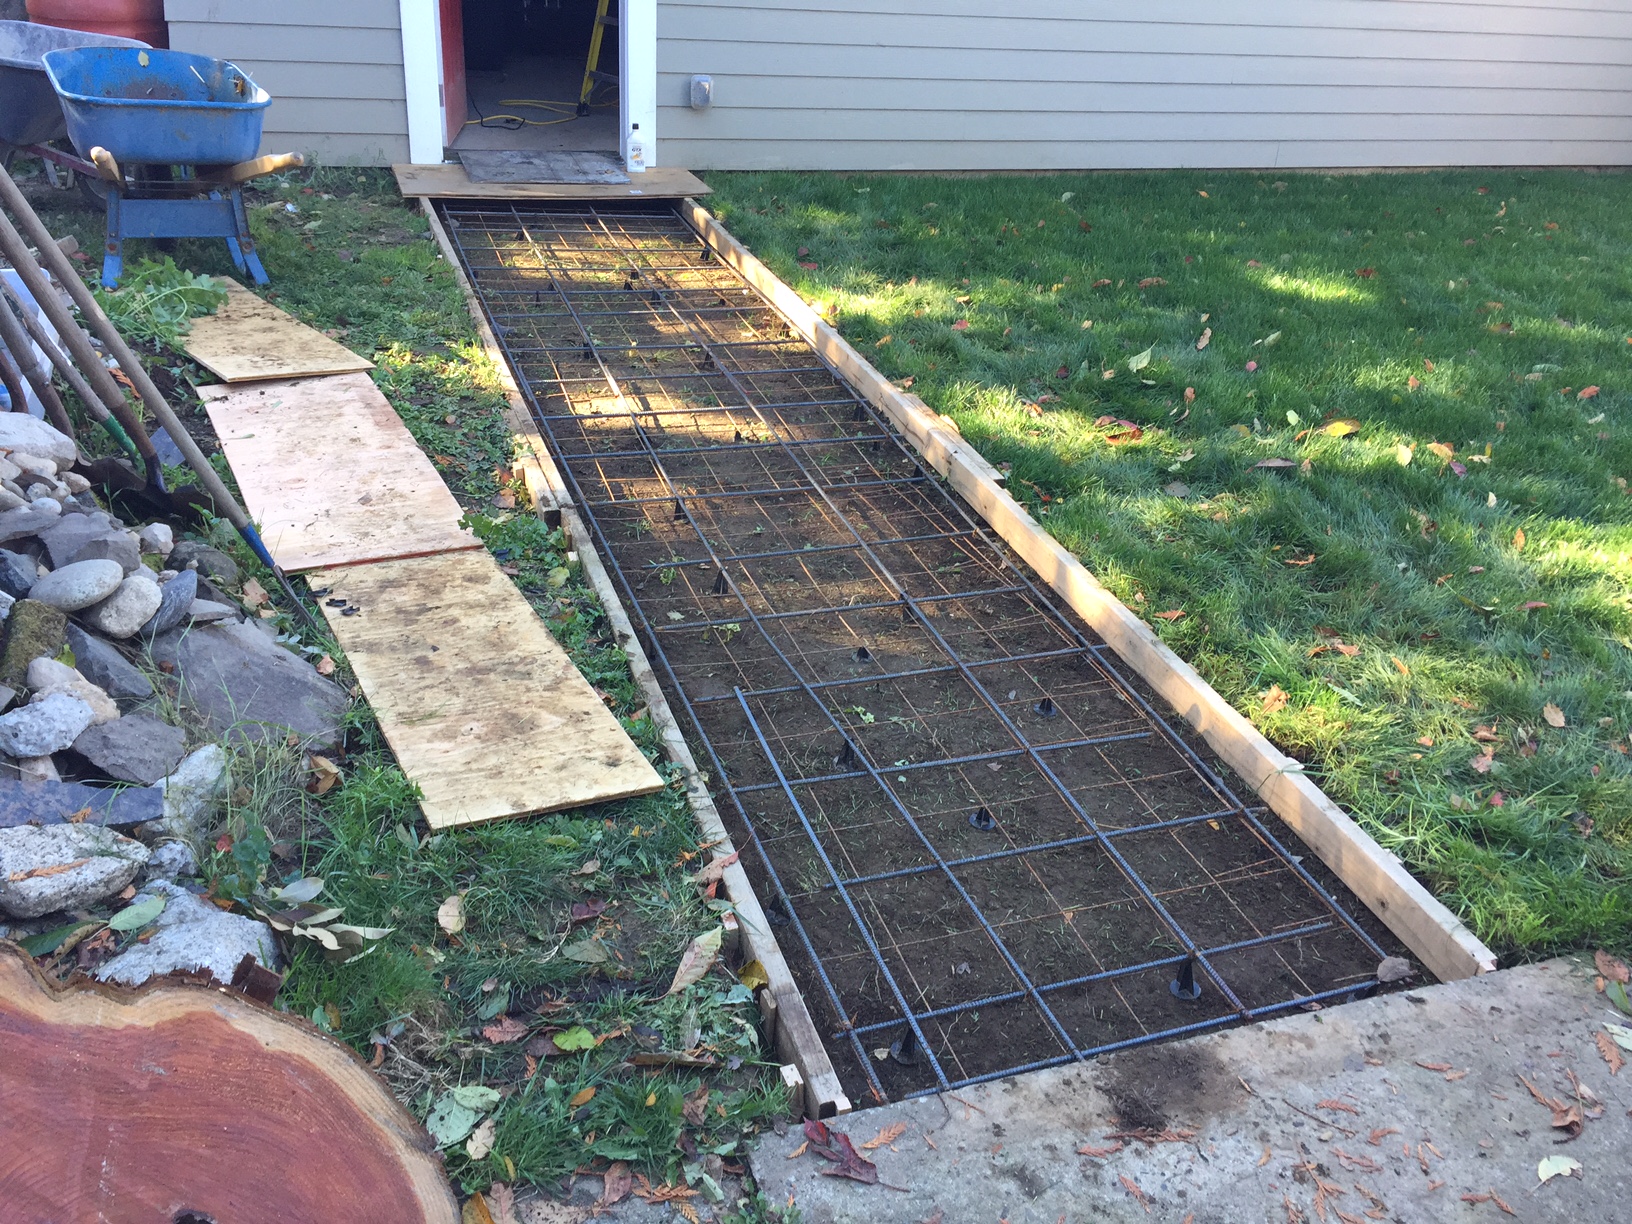
Film Friday – The Garage Sidewalk Pour
Below is a short film documenting all the steps taken in pouring a walkway between our existing patio and my garage/shop, as also discussed in less detail in a previous post. I MAY have overbuilt it… a little… maybe…
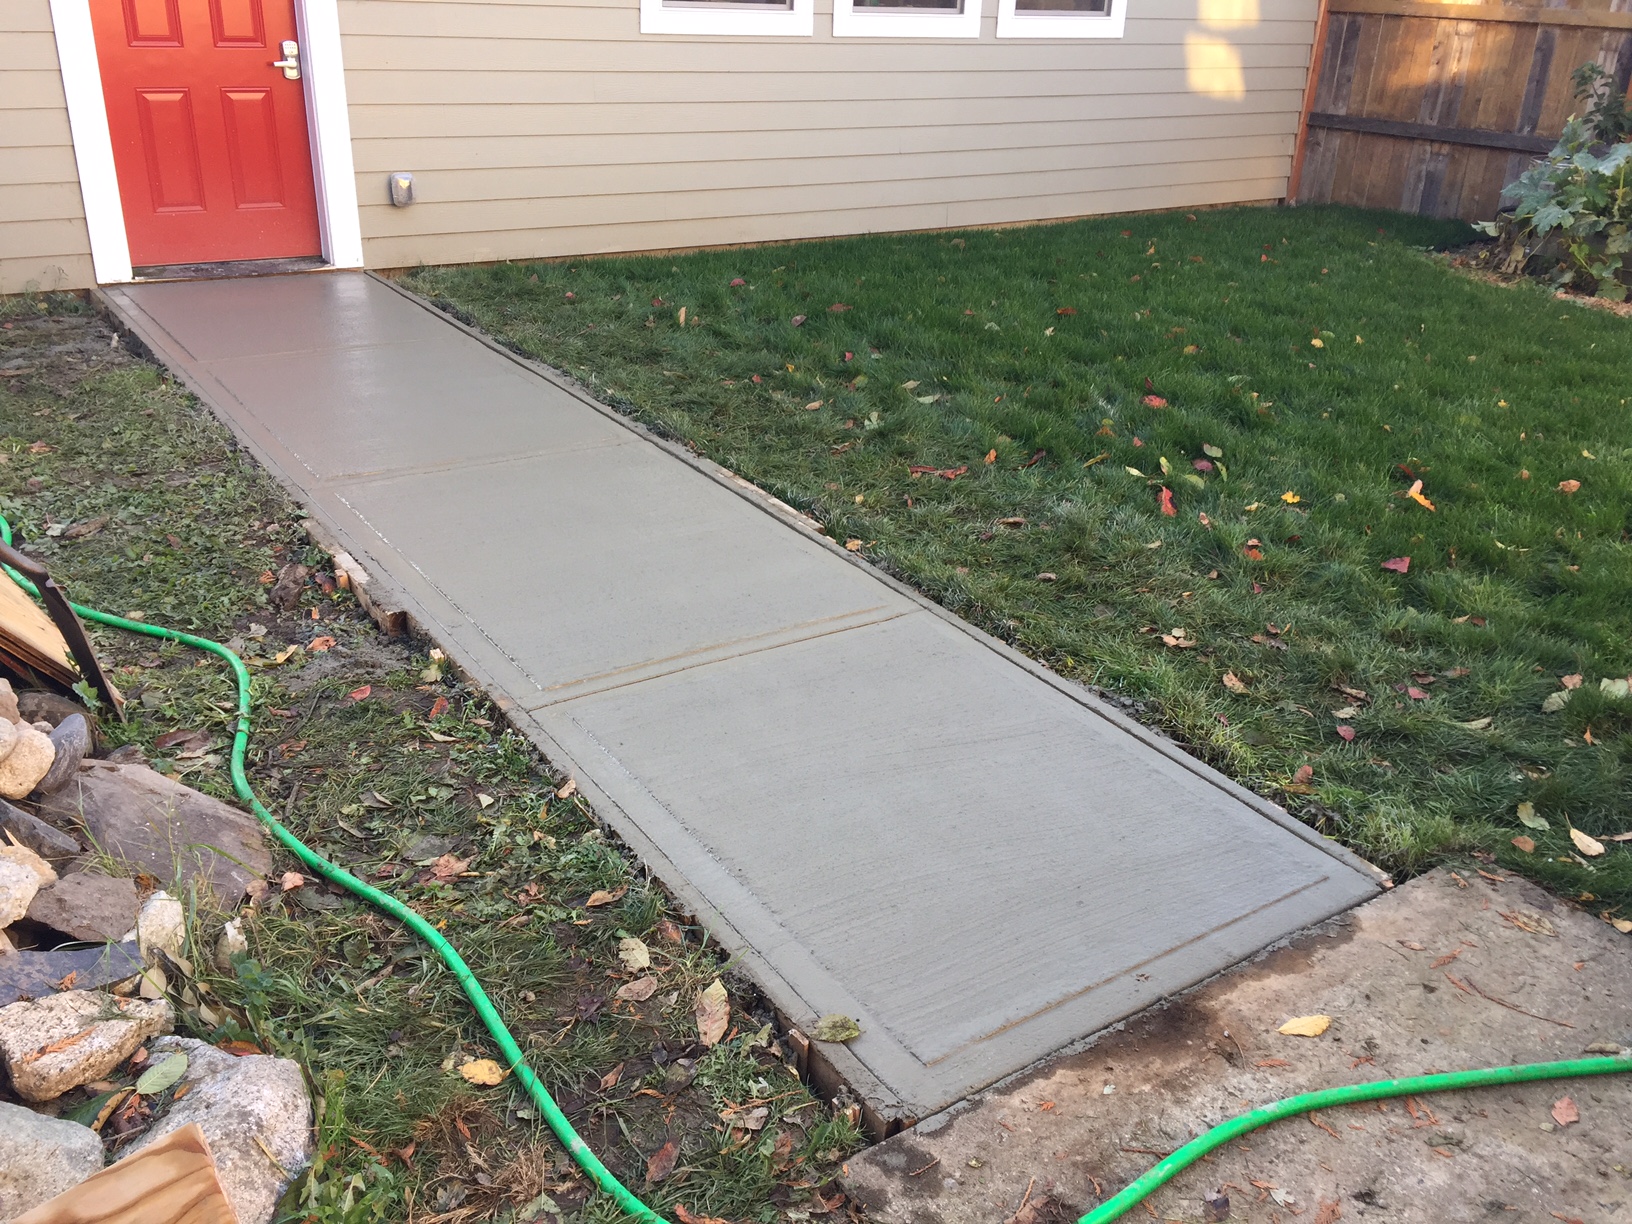
Garage sidewalk now poured with a side of cat-related drama
The sidewalk to the garage is finally poured – 8 weeks after I put the forms in… To recap, it is 20’X4′ and 4″ deep. I used 3500PSI with fiber added and lots of steel, because I hate cracking sidewalks. I paid a guy working on the house next door give me a hand with the wheel barrow concrete moving and to move-hold the other side of the scree board. It took two hours from the minute the truck rolled up until I was cleaning up my tools and I saved >$1500 doing it myself, even with the cost of material, delivery and a couple of new tools.
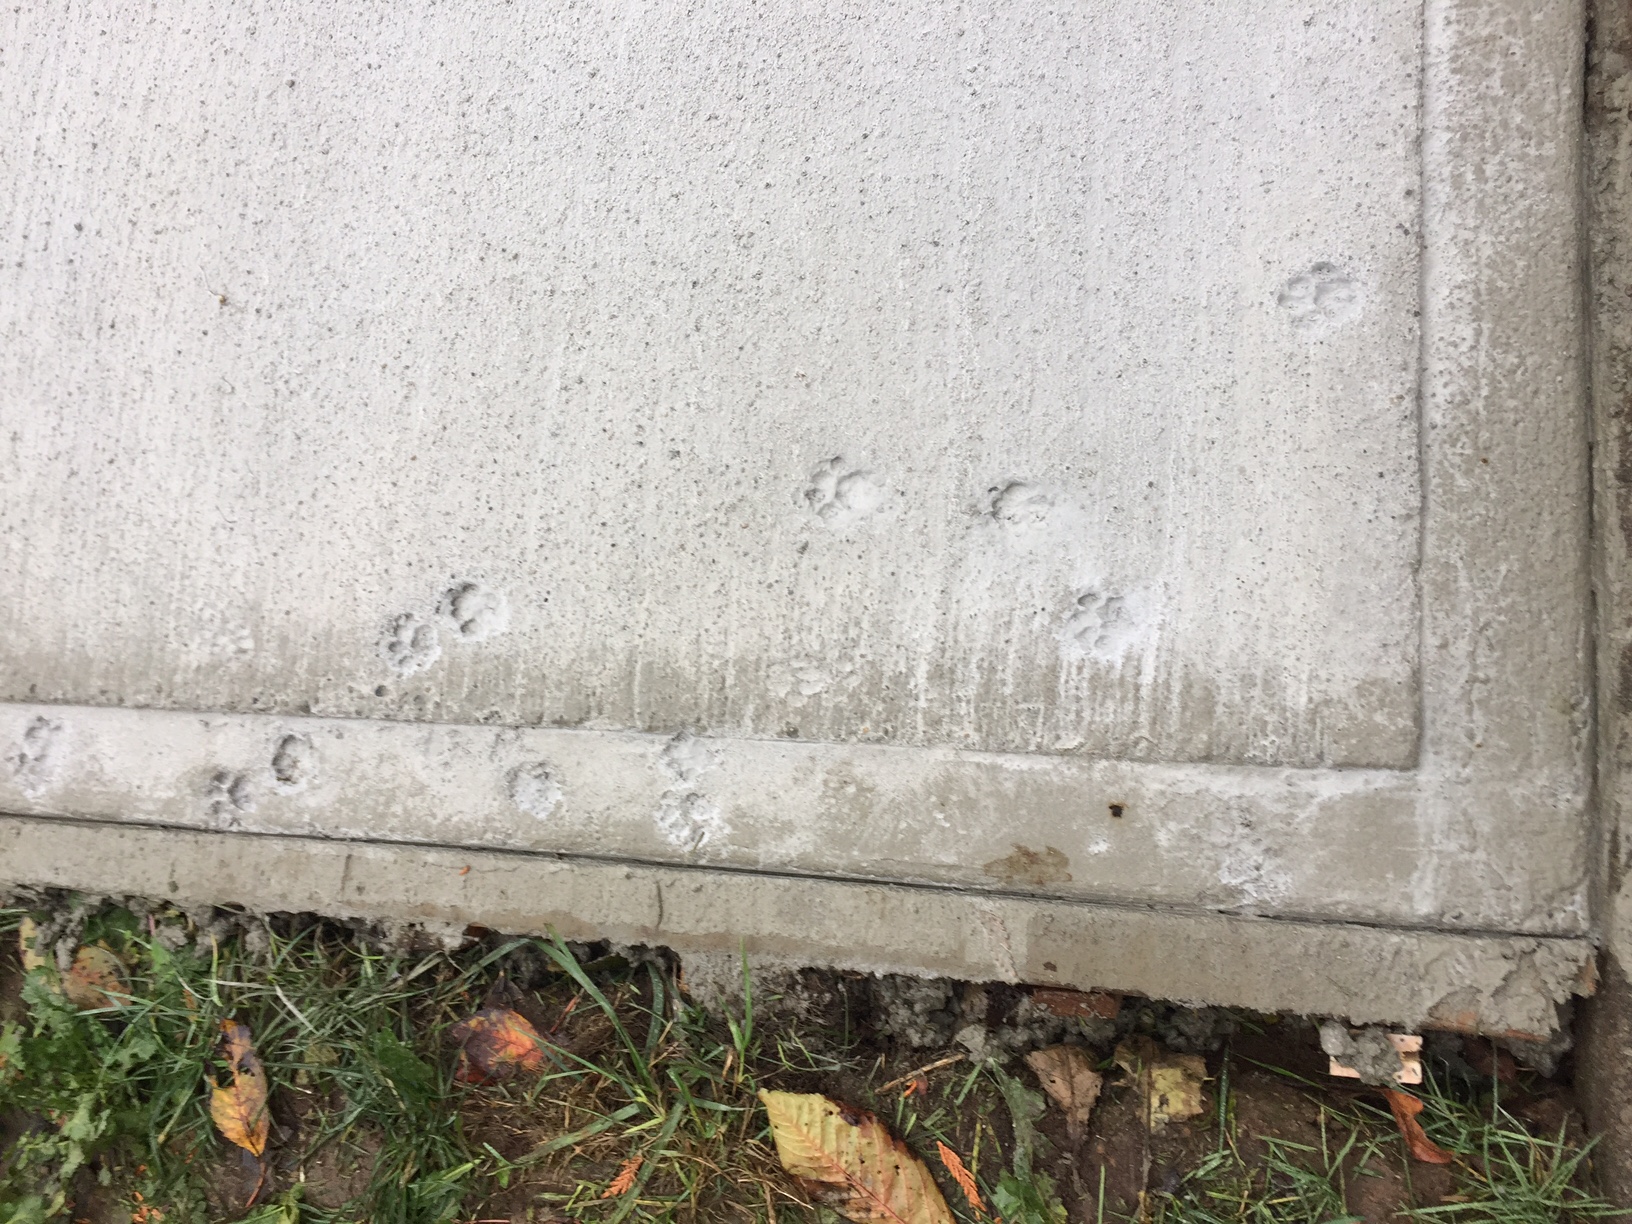
I was super happy with the results when I went inside at 5:30. When I went back out to check on it at 9:30, the cat had walked up one side all the way to the garage, walked across, and back down the other side. I now have cat prints in my “perfect” sidewalk until the end of days…
I am not anthropomorphizing, she did it as a “Fuck You bald monkey!” because I would not let her in the house. It was too dry to re-float. This morning, to add insult, the hate-cat dropped a giant turd in the middle of the thing up by the garage door. I said such dirty words! This is the last straw!
Who would like an overweight white fluffy cat that is passive aggressive and shits on the things I love? I will throw in 2 bags of food, a carrier, shot records, box of band-aids, half eaten mouse, and 3 cat-nip impregnated toys. It is an awesome deal! Won’t last! Act now before someone else snatches her up!

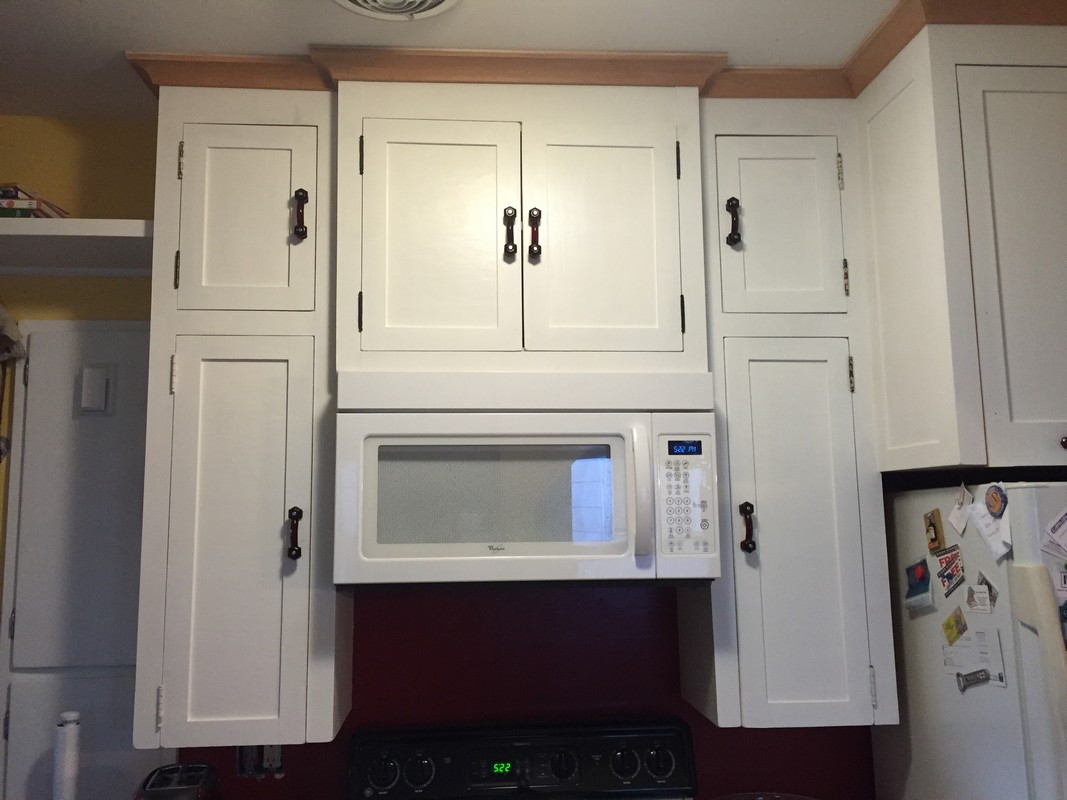
Film Friday – Corner Cabinet Up-Cycle/Rebuild
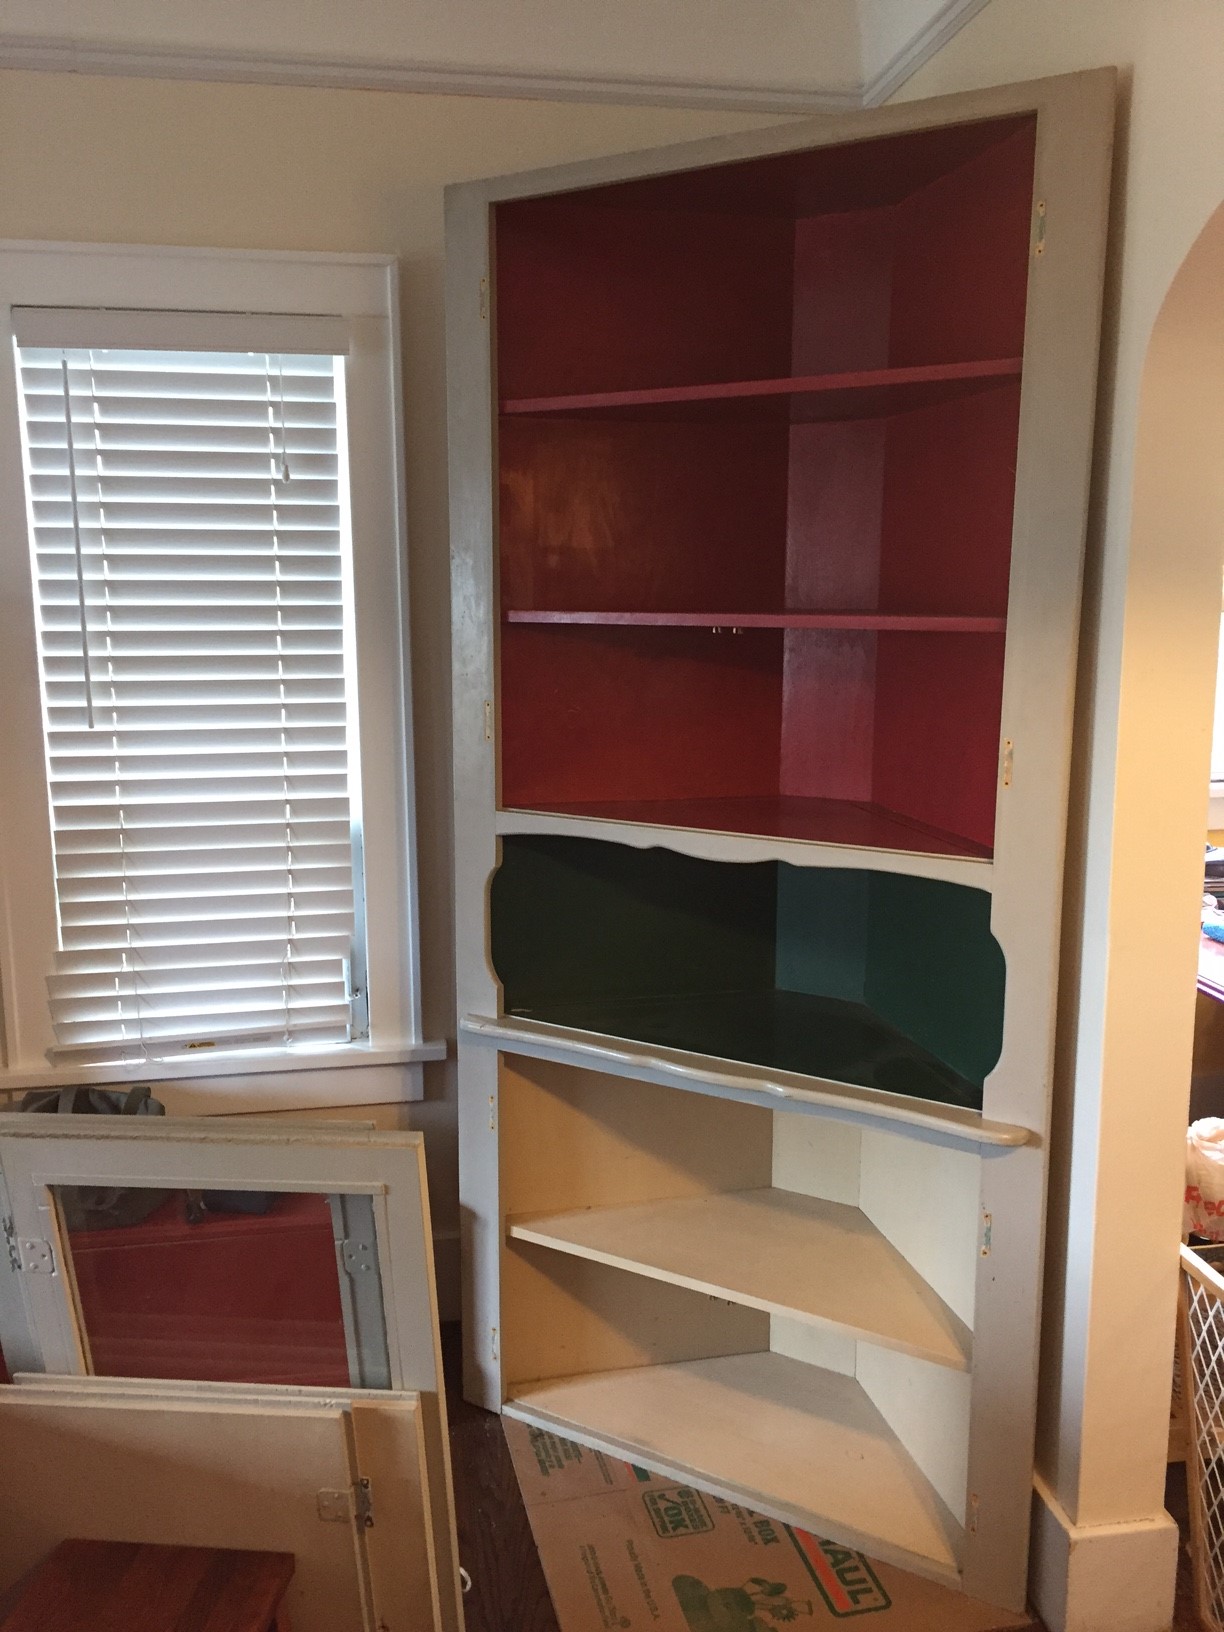
Way back in November of 2015, just after our return from living abroad for two years, I bought a set of hard used, little loved corner cabinets from a local salvage place. I have spent an hour and there installing, building trim, sanding, de-gunking, stripping old paint, priming, painting, and more painting. It has only taken 18 months, but they are now installed and look like they have been in our living room since the very first day.
Here is a slideshow/video tale of the steps taken in the project: What it was to what it became.
A Year Later – The Garage is Finally Legal and Inspected
Holy crap… I got notice from our former garage contractor that the city permit for the build was about to expire. WhAt tHe FUCK!?!? Apparently, he had never called for the final inspection. It just never ends with this guy and the inattention to detail.
After a flurry of calls and e-mails, the city inspector came out yesterday and looked at the framing, roof, gutters, paint, electrical final. He signed off thew garage as legal and conforming but, said that we should have not moved in and started the insulation and drywall until the final was signed and in hand. He was the guy that did the initial inspection and remembered us and the build, so I didn’t have to tear anything out. While I appreciate the contractor letting me know about the expiration, I would have preferred that the inspections were done a year ago when the structure was done.
Update:
The day after the Final Inspection was signed off, I got a notice that a Waste Diversion Report (WDR) needs to be submitted to Seattle Public Utilities (SPU) for all demolition projects as well as any new construction and alteration permits where the project value is $30,000 or greater. Normally this falls to the party that pulled the building permit, but as I did the demo myself it got forwarded to me. Links to the forms are below in case anyone in Seattle needs them.
SPU Waste Diversion Report Manual Form
Seattle WDR Letter 2016
Apparently, if you live in Seattle, our local utility company wants to make triple-extra sure you did not dump any building or demo waste inappropriately. I have the receipts from the equipment company and the hauling company, so there should be no issue.
Getting Stuff Done Over the Weekend
We had a really productive weekend around the house – so much so that I to take an old guy nap on Sunday. In no particular order:
Organized and cleaned up shop from Garage sale two weekends ago
Took 10 boxes of good stuff to Goodwill
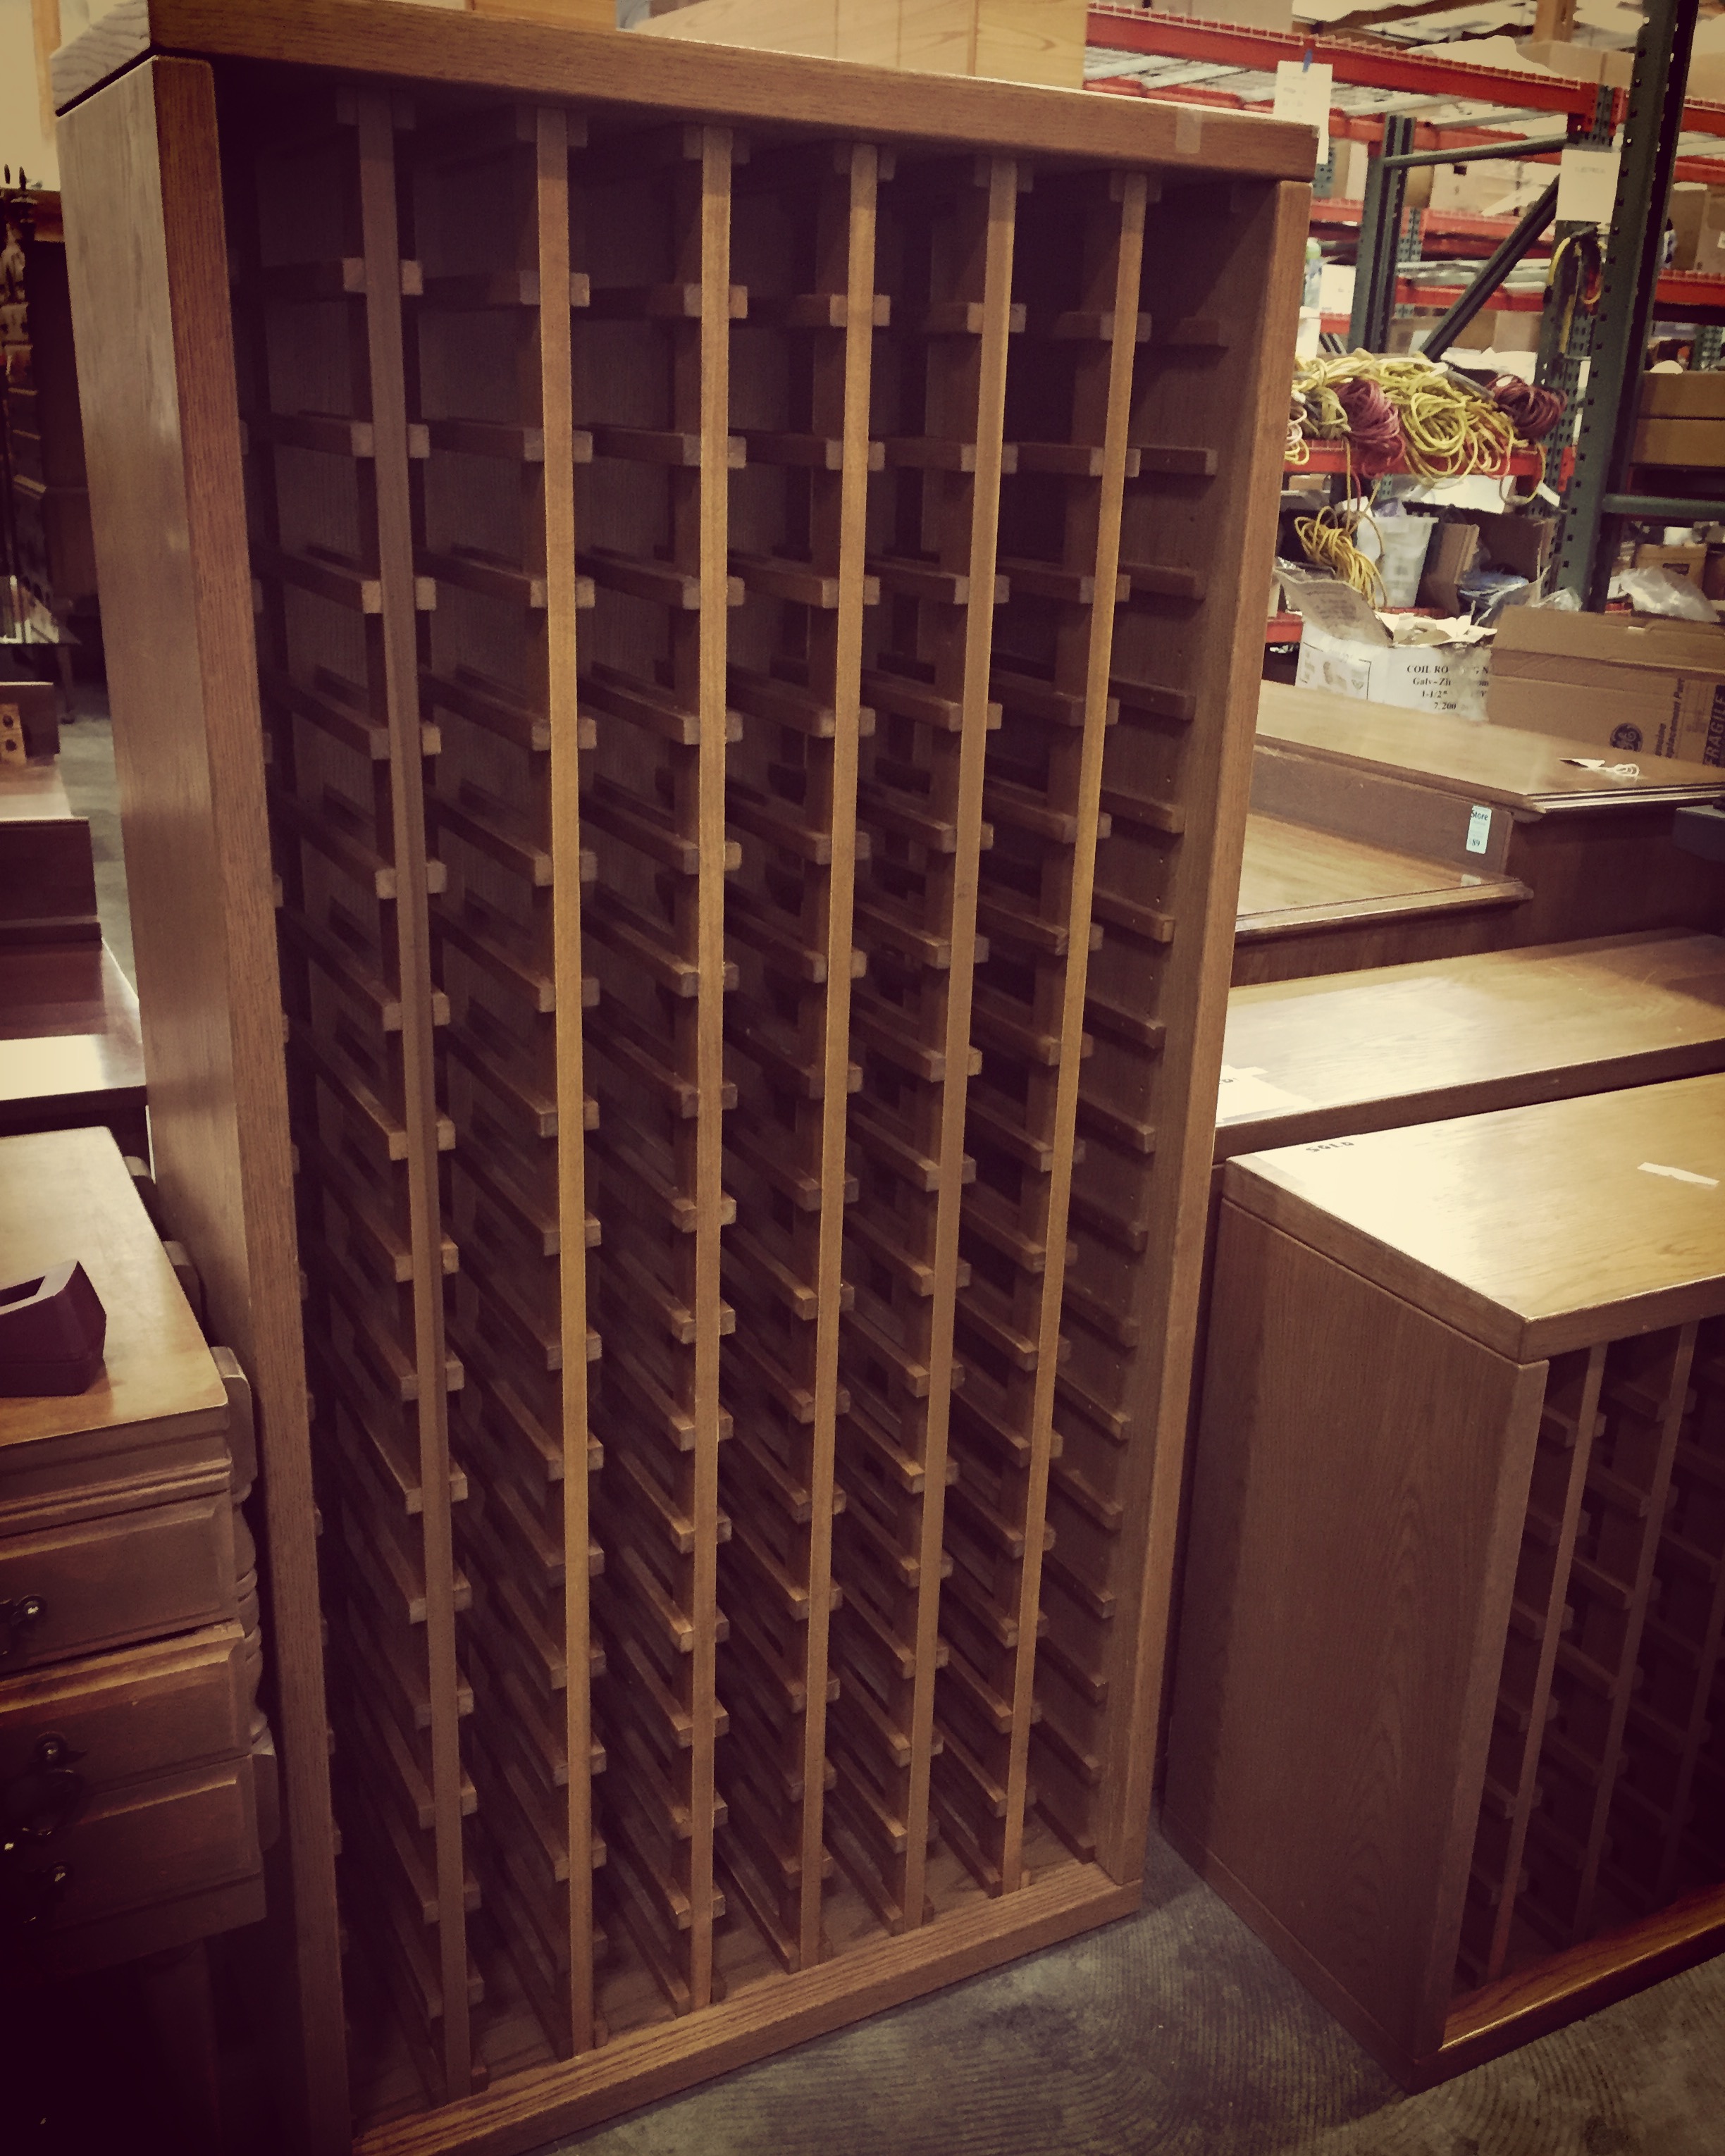
Bought and brought home cabinets and wine racks from Habitat for Humanity in Tukwila
Sourced and purchased some additional boxwood shrubs and mulch for the yard
Mowed the new sod in the yard for the first time
Took the puppies for a walk
Date Night: Burgers and a late 3D showing of Wonder Woman.
Cleaned house
Spent 1.5 hours looking for either one of my orbital sanders
Said dirty words the whole time
Sanded Corner cabinet doors
Shocked the hot-tub with chemicals getting ready for water and filter change
ad a couple of nice glasses of French rosé in the sunshine.
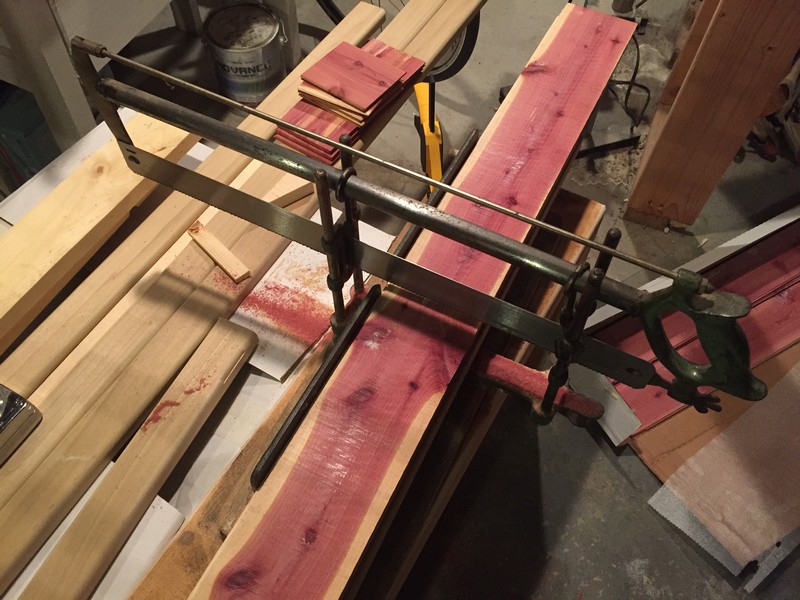
Made lid from up-cycled ceder fence boards and used hardware for the compost bins
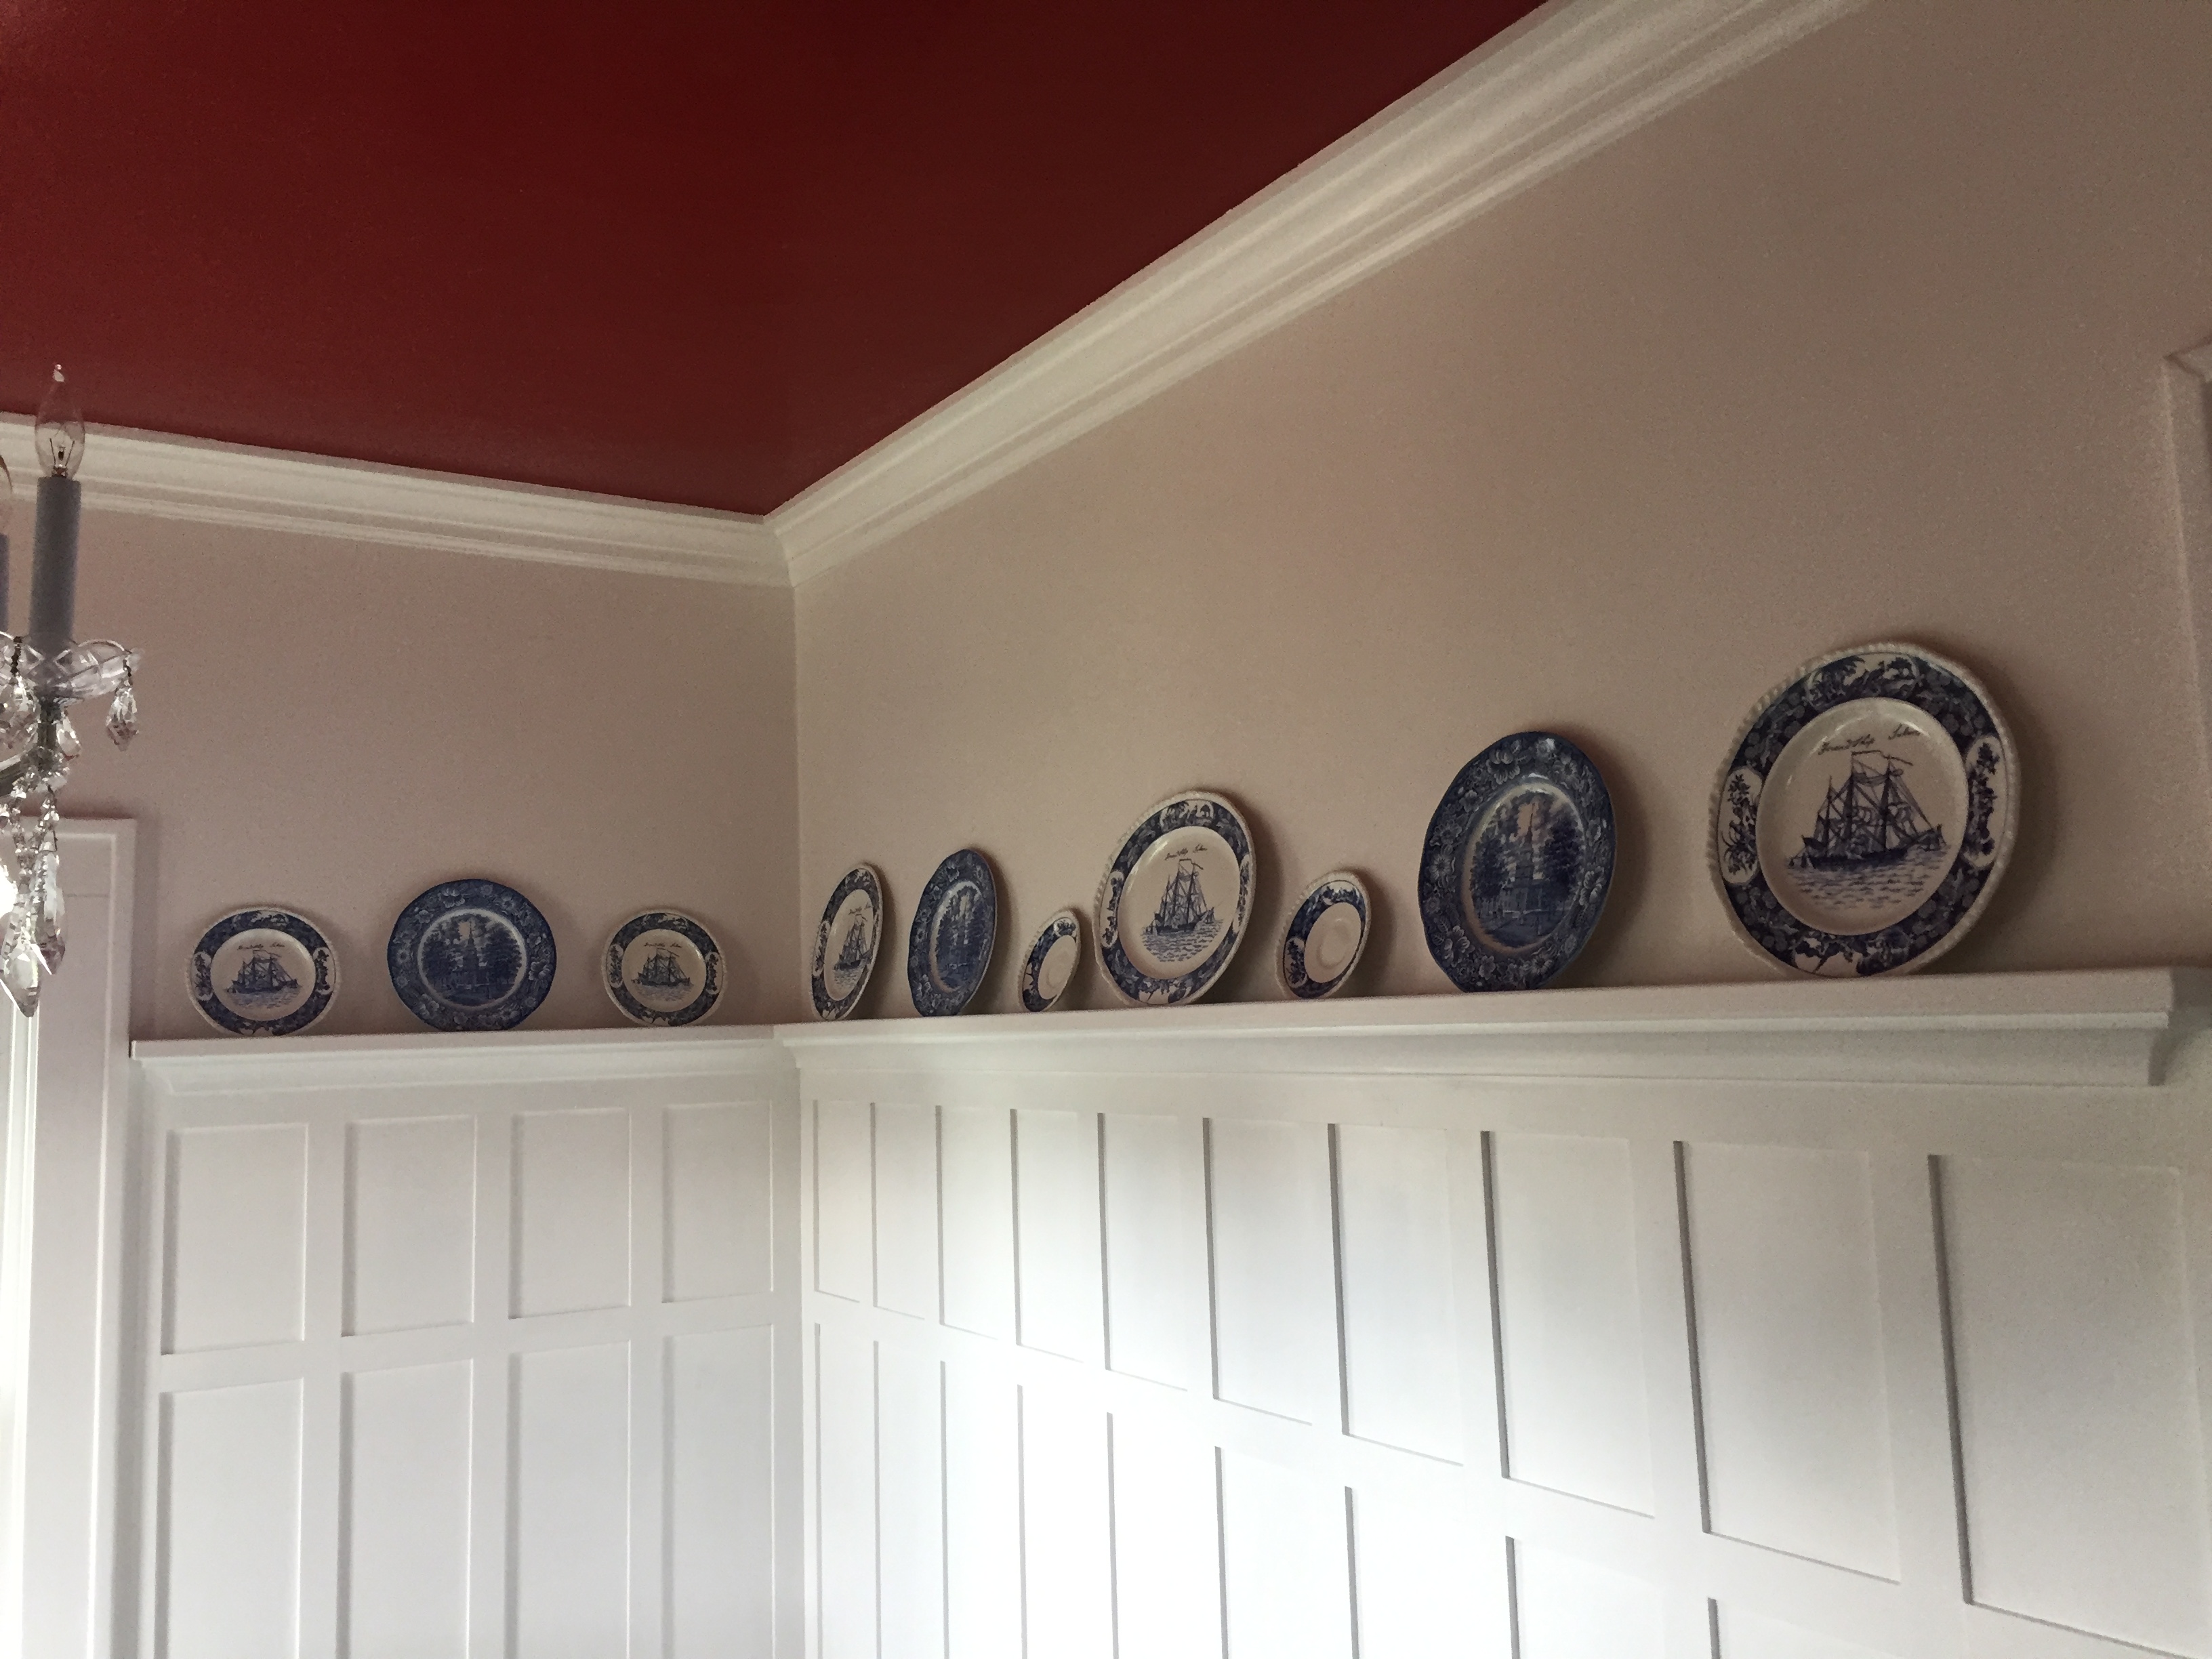
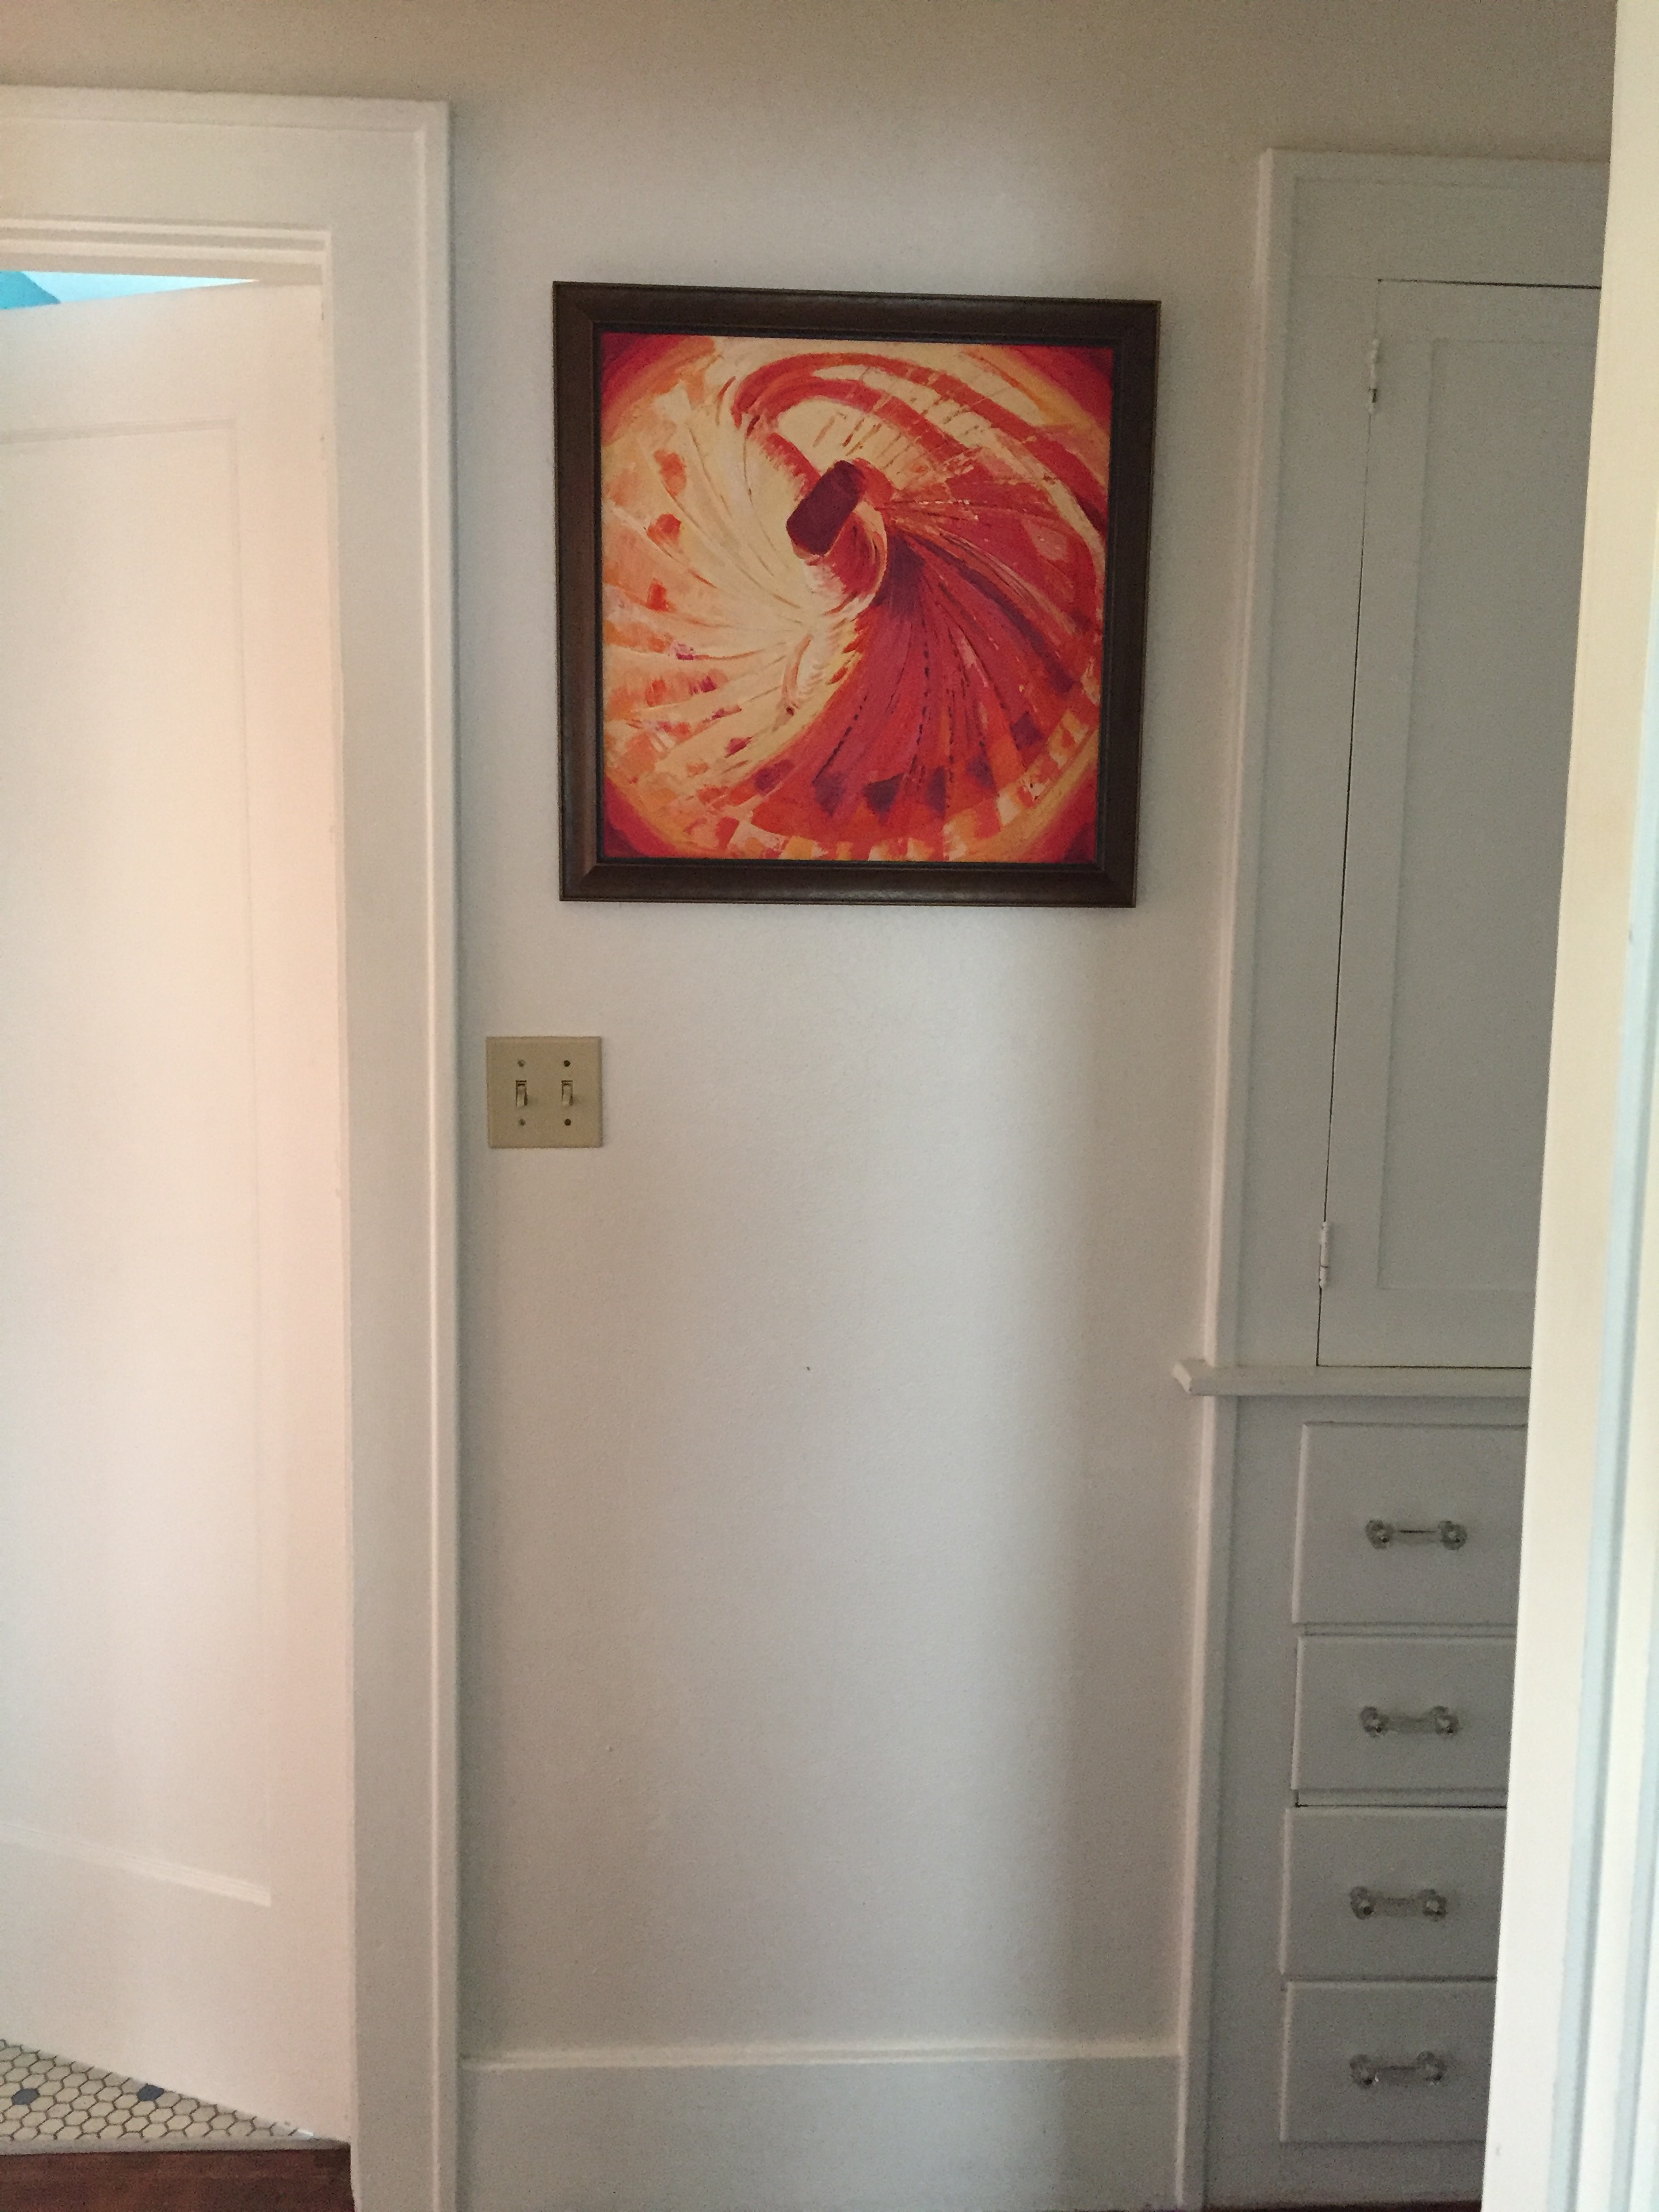
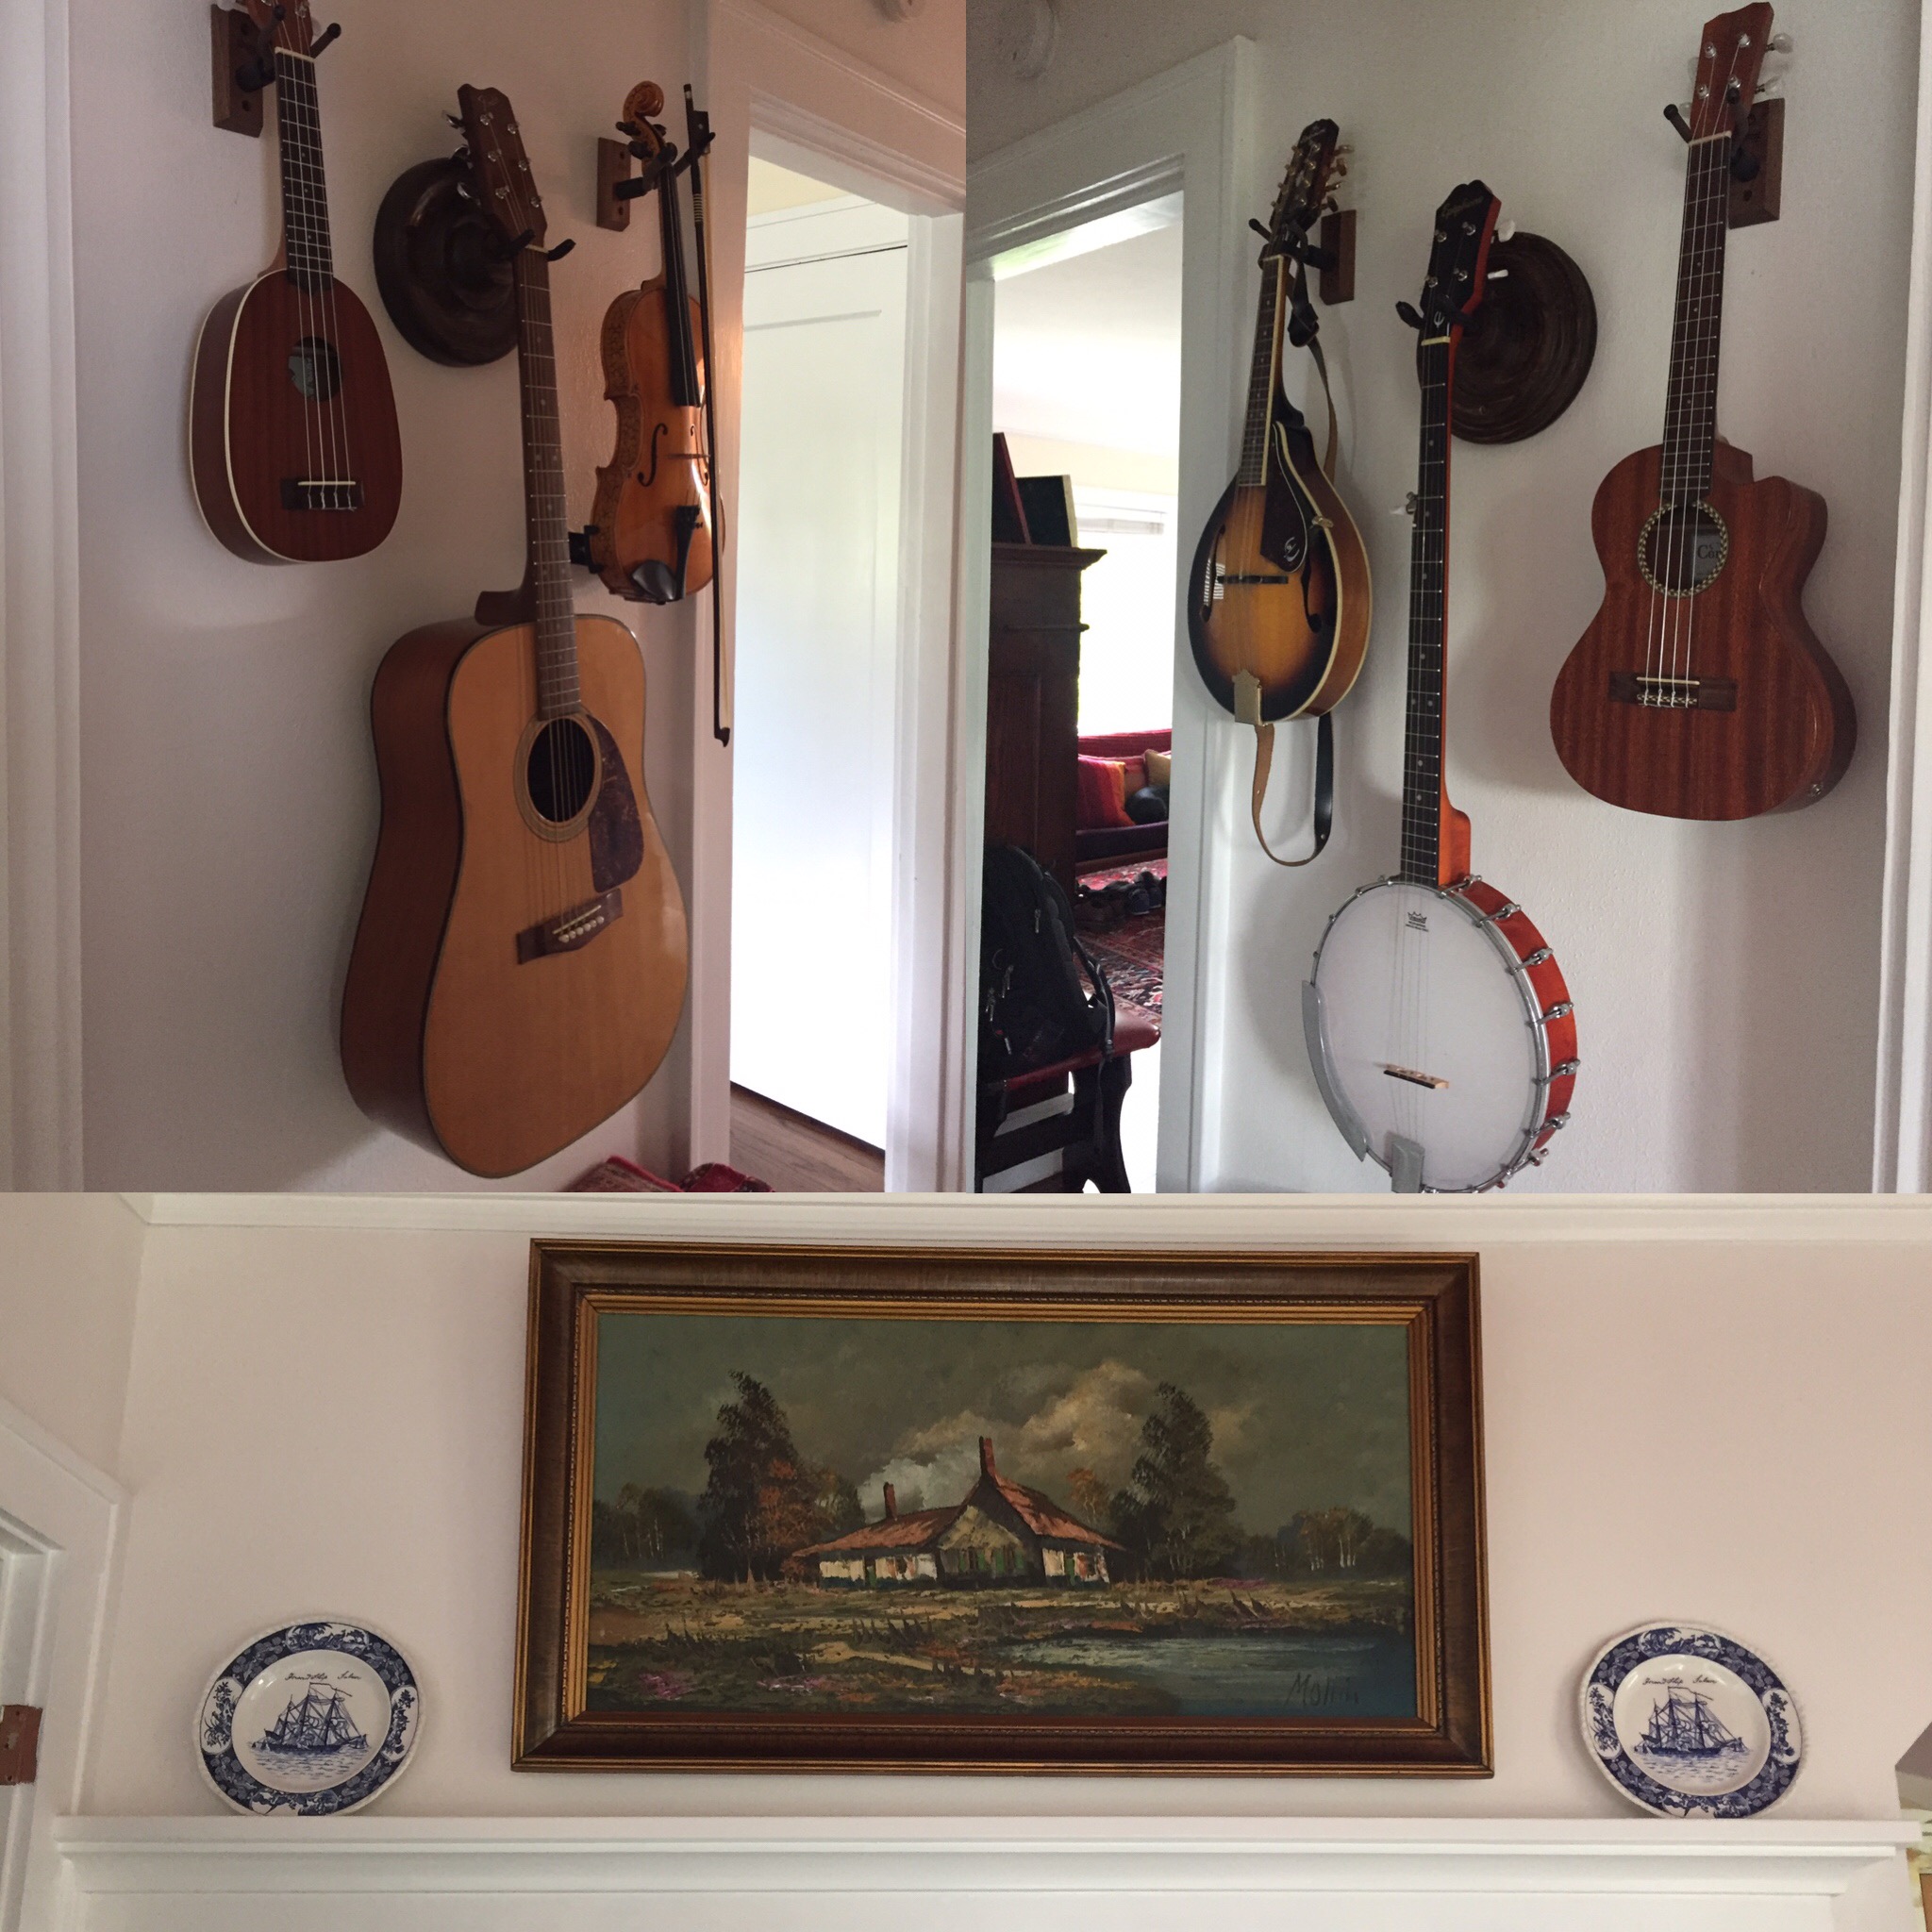
Hung two paintings
Organized dining room
mounted 6 stringed instruments in the hallway
Installed new toilet seat
Ran the chainsaw a bit
Made some woodchips and used as garden bed mulch
Picked up 4 huge rounds of cedar from a neighbor who has a tree cut down to split for kindling
Took out trash and recycling – there was a LOT of the latter
Met new neighbor
Another walk with the puppies
Made a trip to CostCo and dropped more $$ that we wanted to
Paid $12 for a used plywood miter saw station – SCORE!
Drank lots of coffee
Murdered some dandelions in the yard
Paid some bills
Wrote a couple “Thank You” notes
Read a little
Didn’t sleep enough

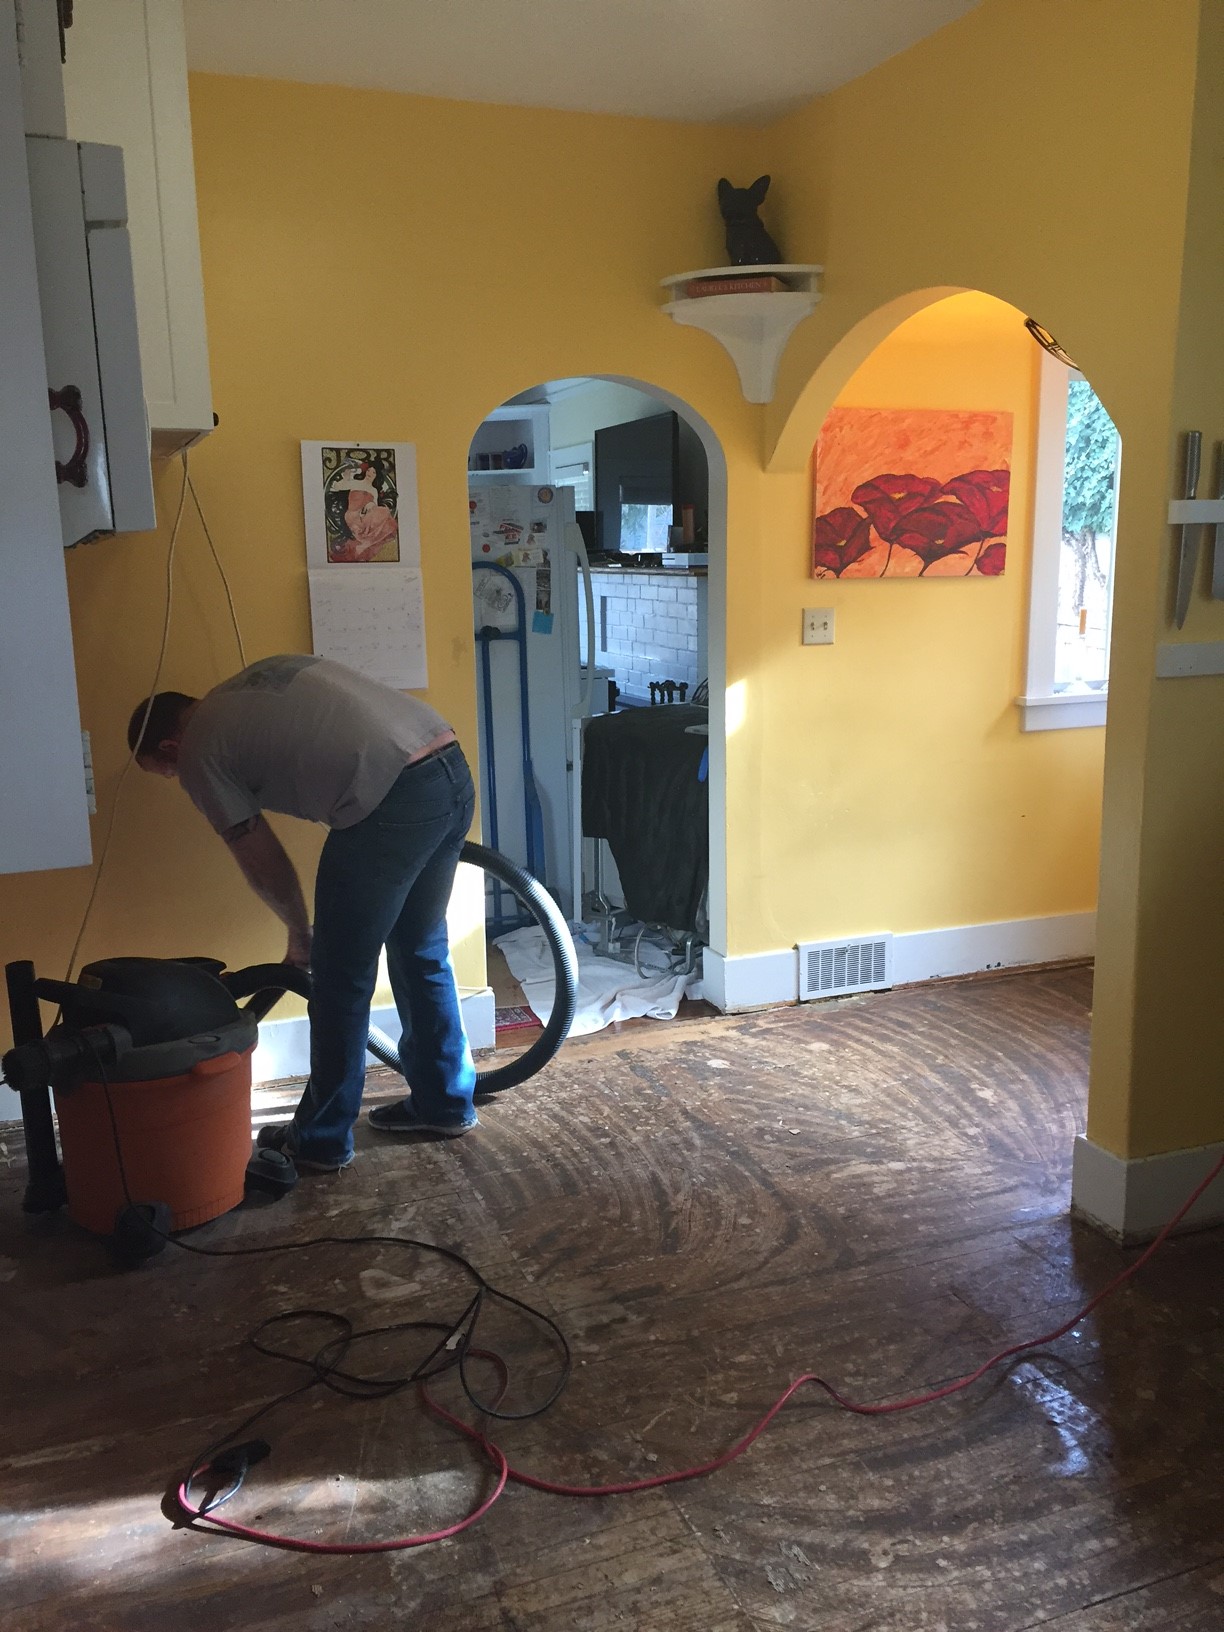
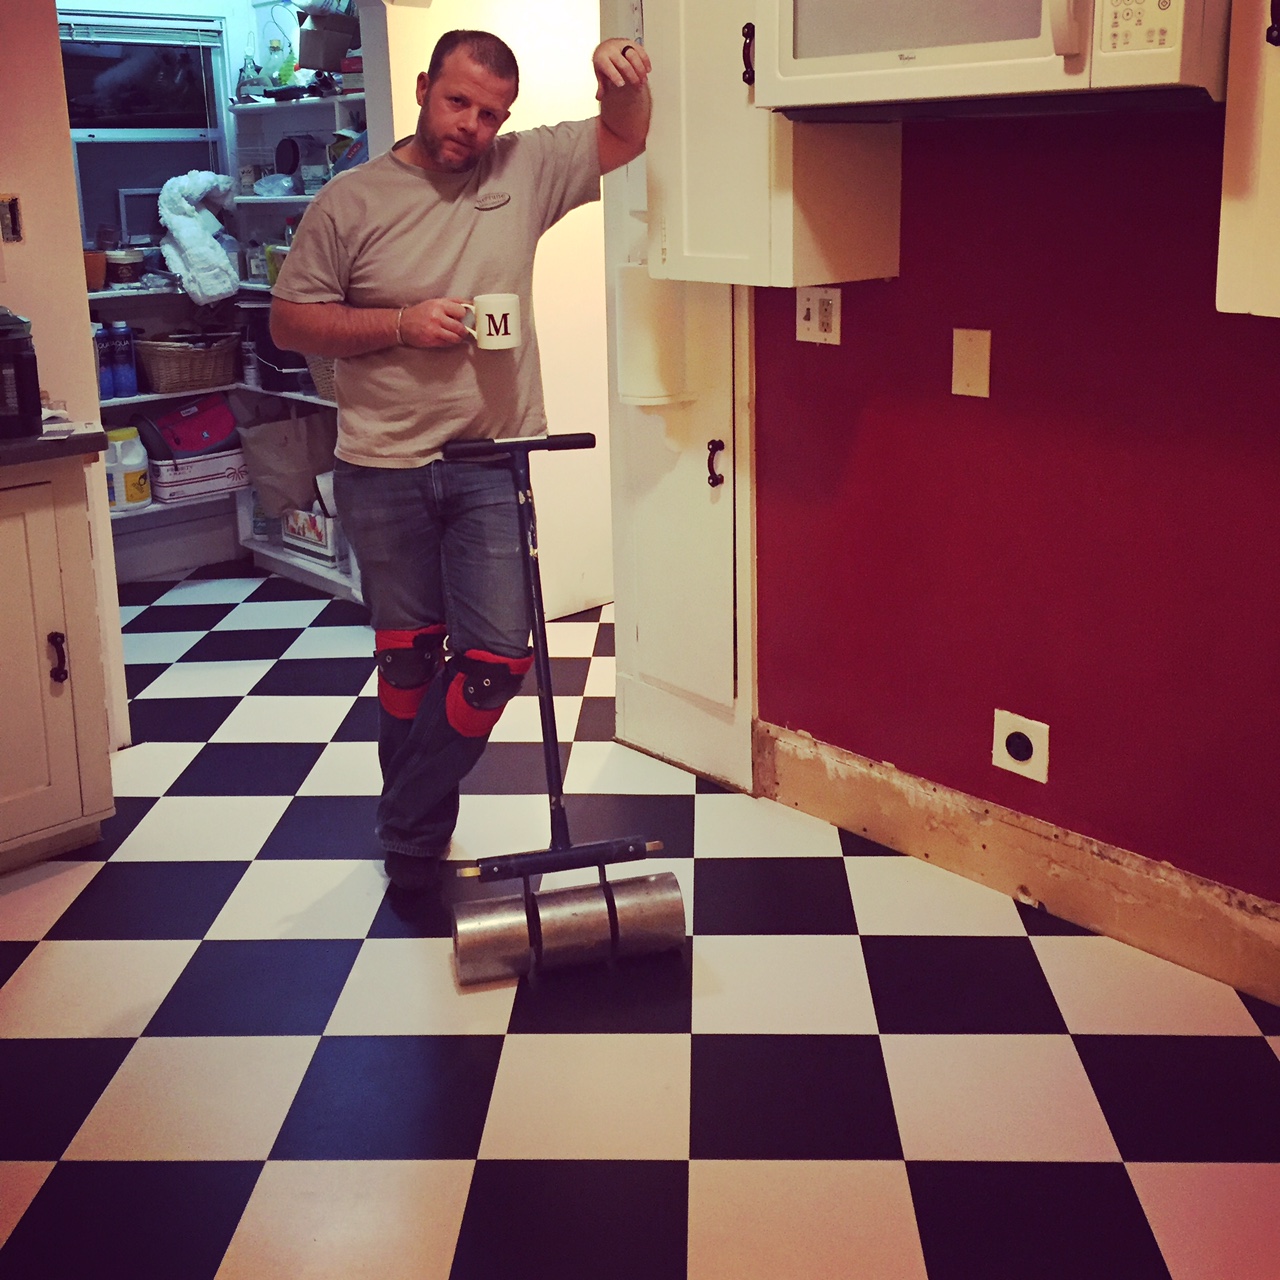
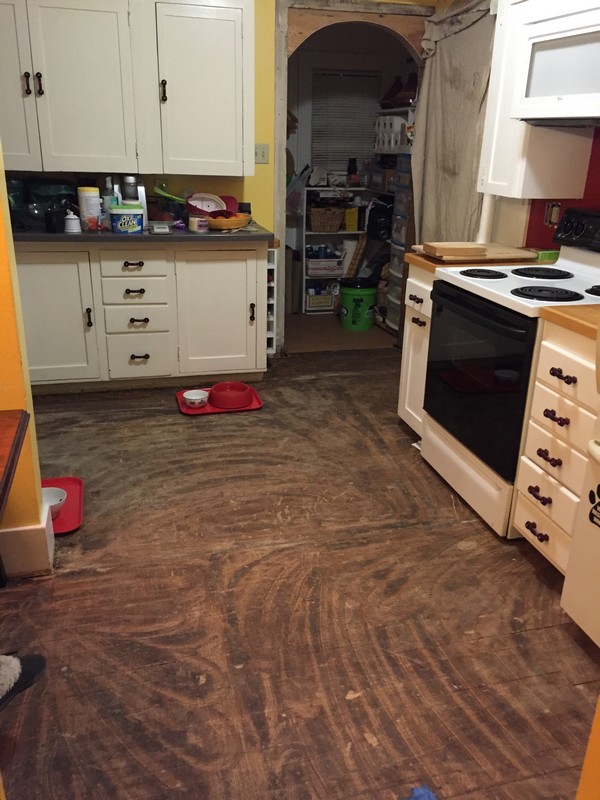
The New Kitchen Floor is Now Installed
It has been a while since I laid a floor tile – like 18 years. Things haven’t changed though and while time consuming and very detailed – lots of steps – I still remember how it is done. There was no way that I was going to pay someone to do a job that I can/could do, so I took on the task of installing a new kitchen floor in our house. the last of the major projects that I took on during our home remodel.
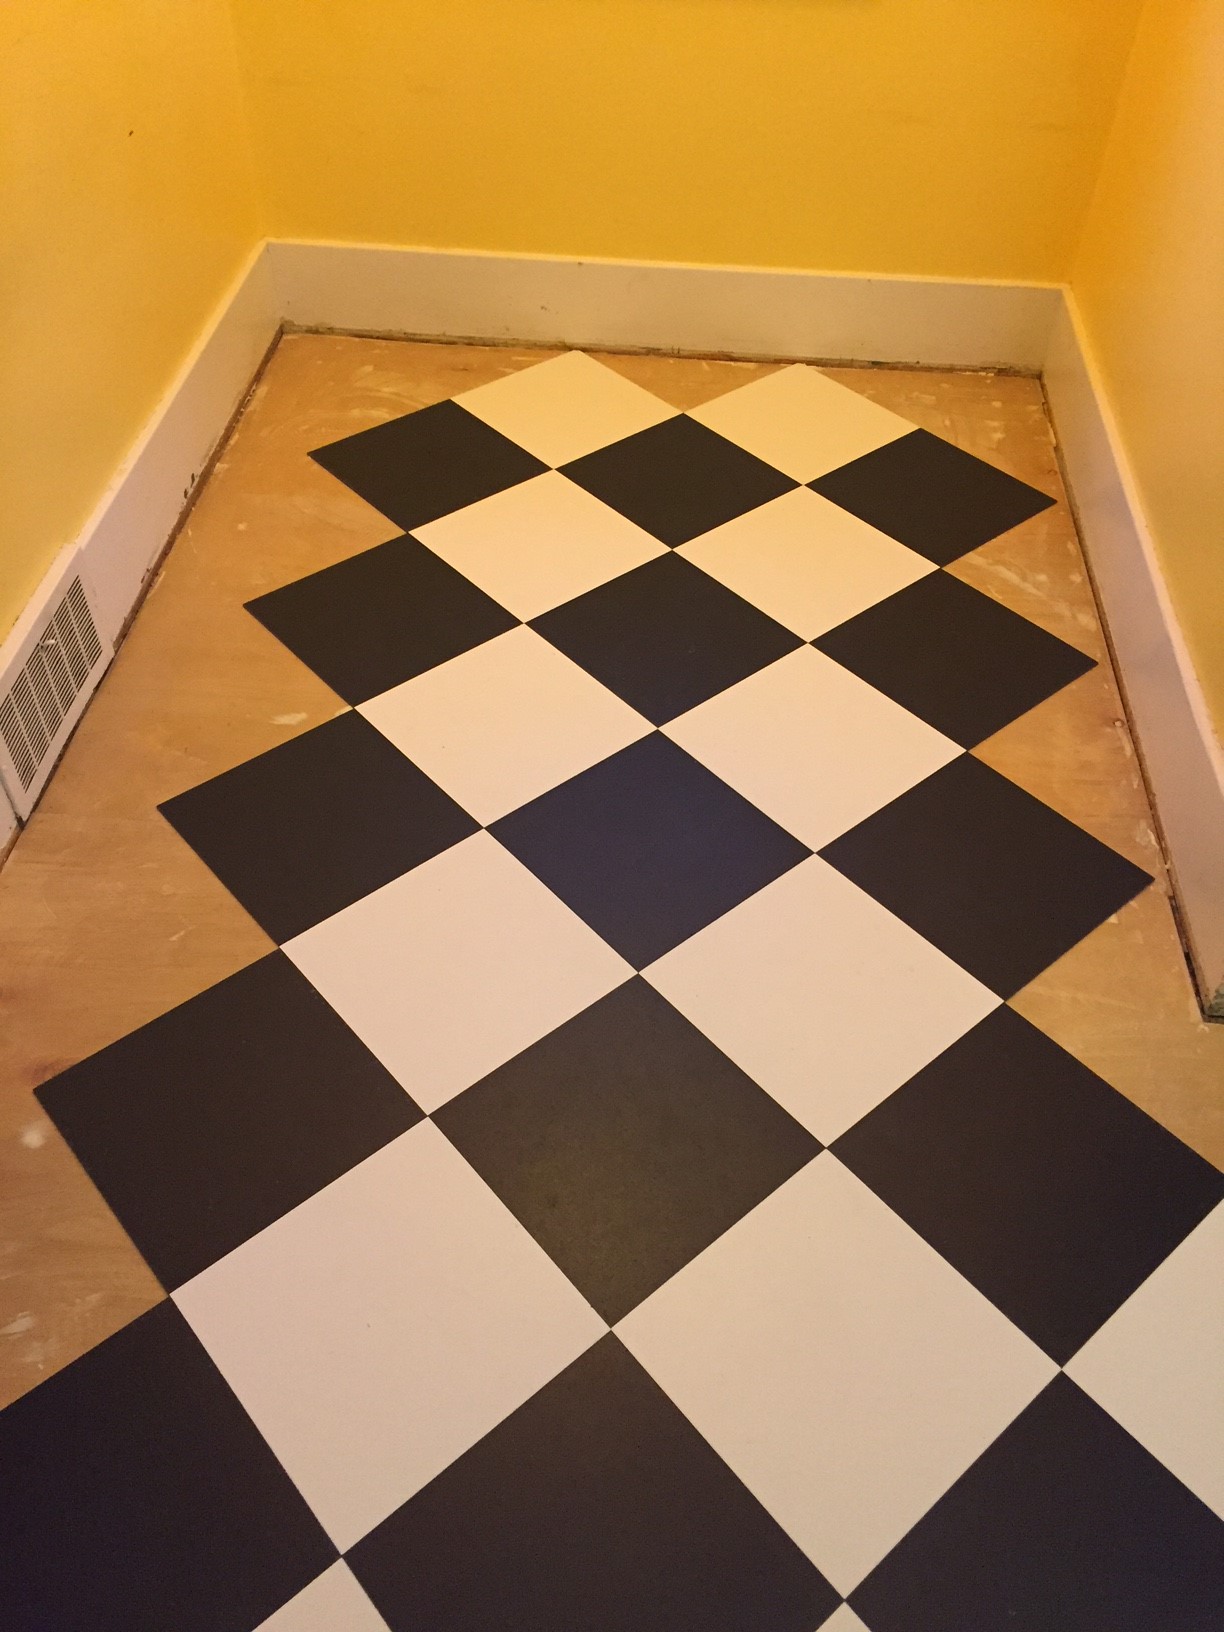
The job is now done and looks great. Most importantly though, my wife is happy. She has a new kitchen floor and it is exactly what she has wanted for years: a black and white checker board kitchen floor that is laid on the diagonal. I am glad she is happy, because I REALLY don’t want to redo it for the next 90 years or so.
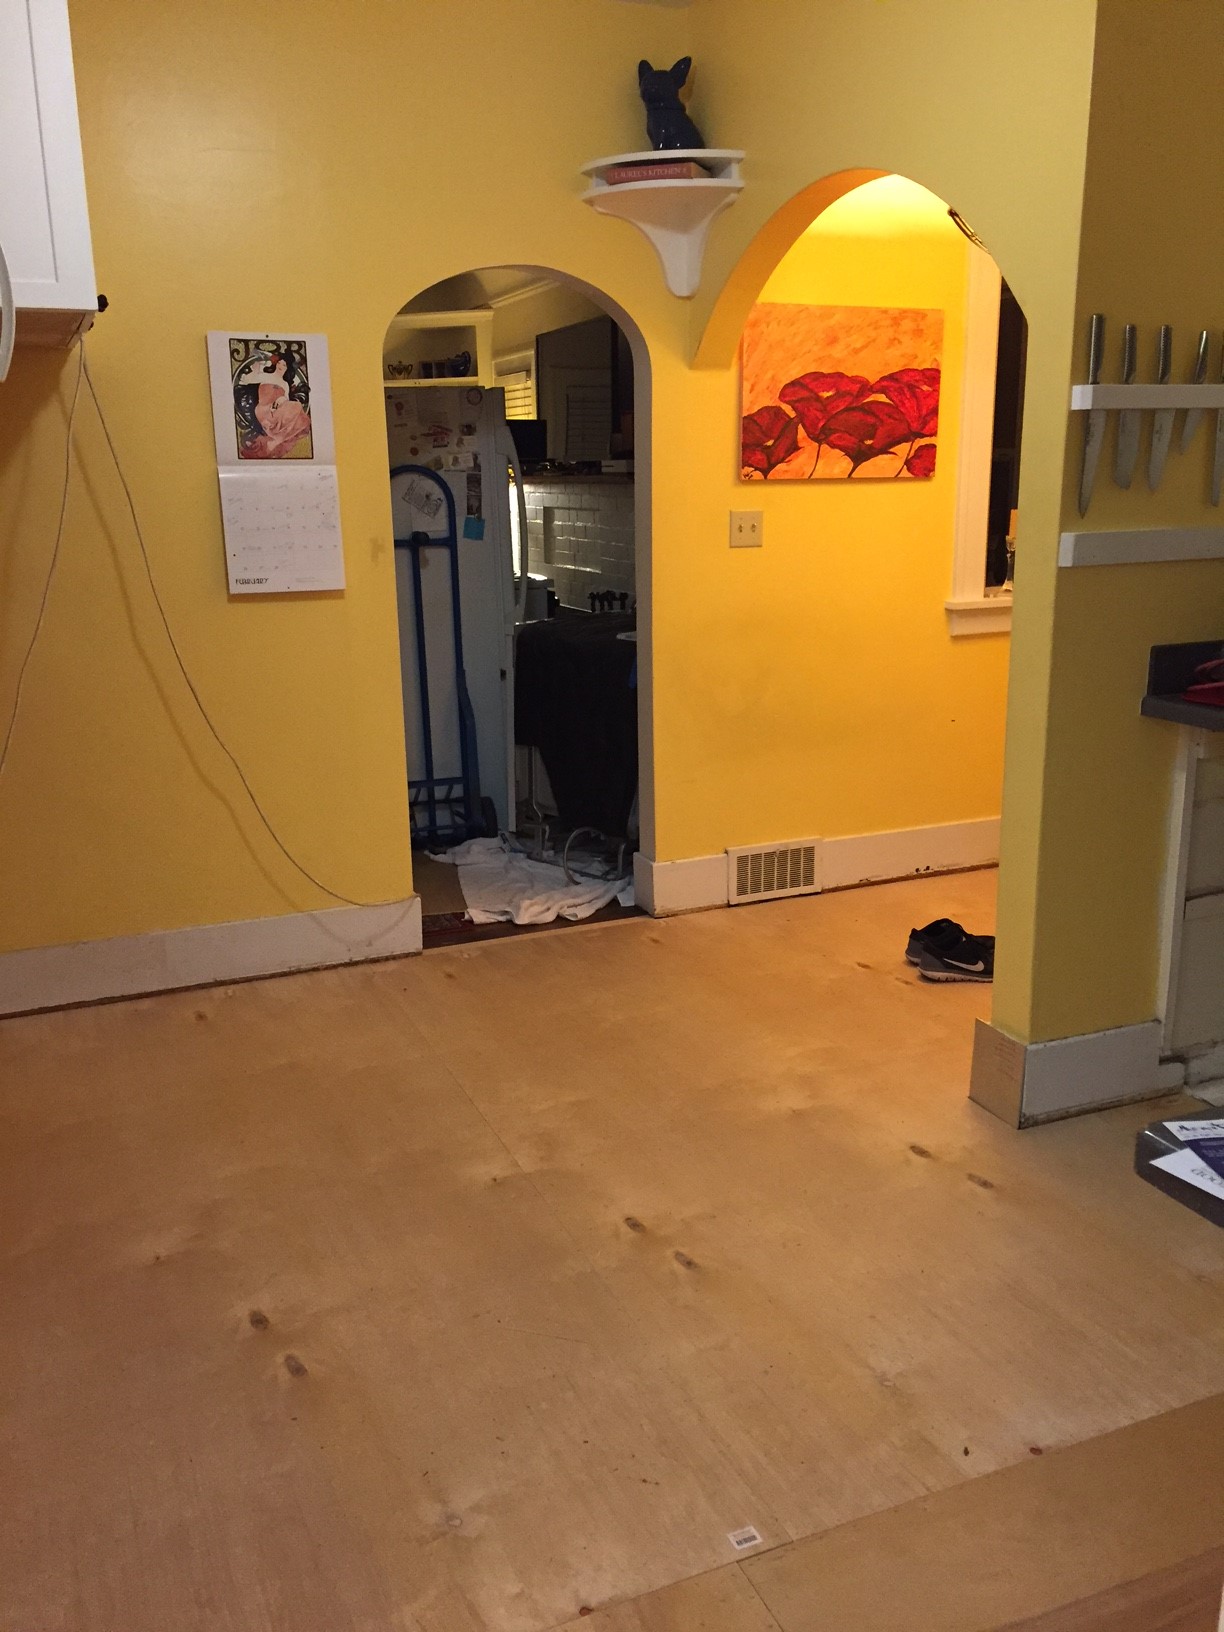
After ripping off 7 layers of old flooring, filling holes, patching a couple sections, removing 40+ screws and 100+ staples, and scrubbing the sub-floor clean, we were ready to start. Starting about 9:00 one Saturday morning, I cut and laid ¼ inch water resistant underlayment – stapling in the field every 4” and along the seams every 2” with narrow gauge crown staples. Starting about 10:00 the next morning, I vacuumed the whole space 3 times to clear any and all debris and locked the puppies out of the kitchen.
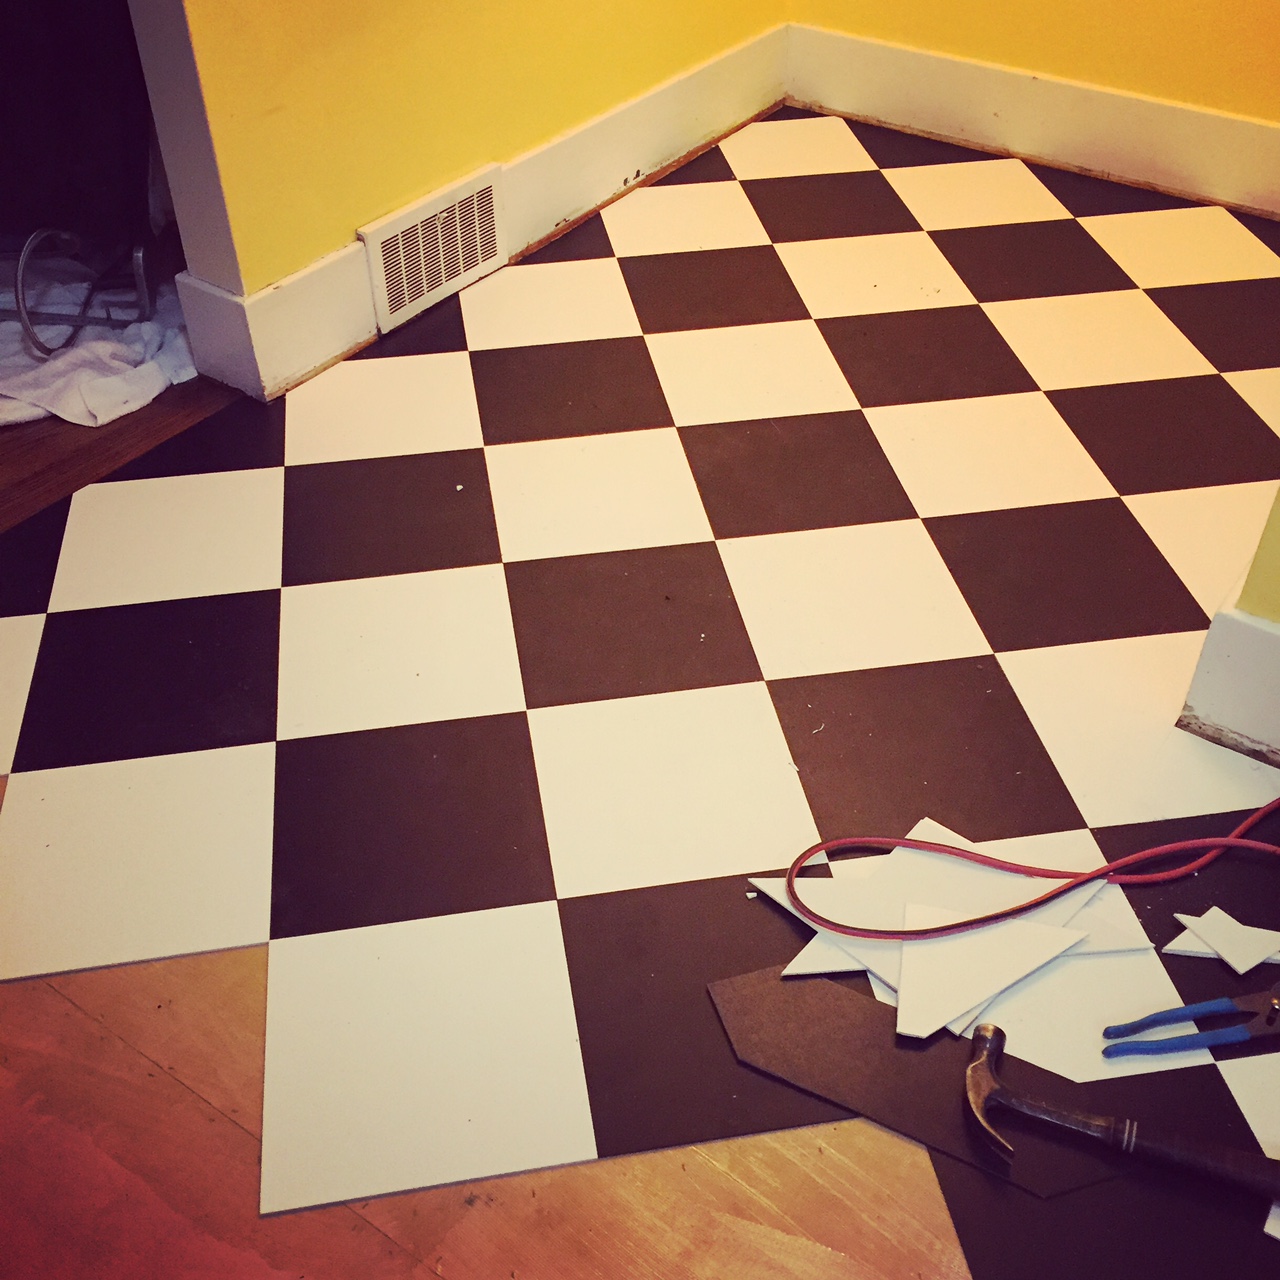
Because there is not ONE SINGLE square or plumb wall in my entire 90 year old house, I snapped a grid in the middle of the floor, squared from the doorway leading from the living-room, so that it would look square as viewed from the main room of the house. I applied glue on ½ of the floor and started in the middle of the room and worked toward the south wall/breakfast nook. Stamps-With-Foot cleaned tile as she pulled it from the cardboard boxes (success is in the details) and handed me them as I laid the field and she cut most of the edge pieces as I marked them. Her help was GREATLY appreciated. We laid the other half of the floor, starting about 6:00pm Sunday evening and finished the last piece about 11:30pm. Not too shabby for one weekend’s worth of labor.
I let the glue cure for five days before sealing and then applying 5 coats of satin floor wax. Pre-painted (by me) ¼ round trim was applied around the edges of the walls and cabinets before I very carefully brought the appliances back in and reinstalled. The VC tile I used should outlast my grandchildren and just needs to be scrubbed every other week, then stripped and re-waxed once a year if so.


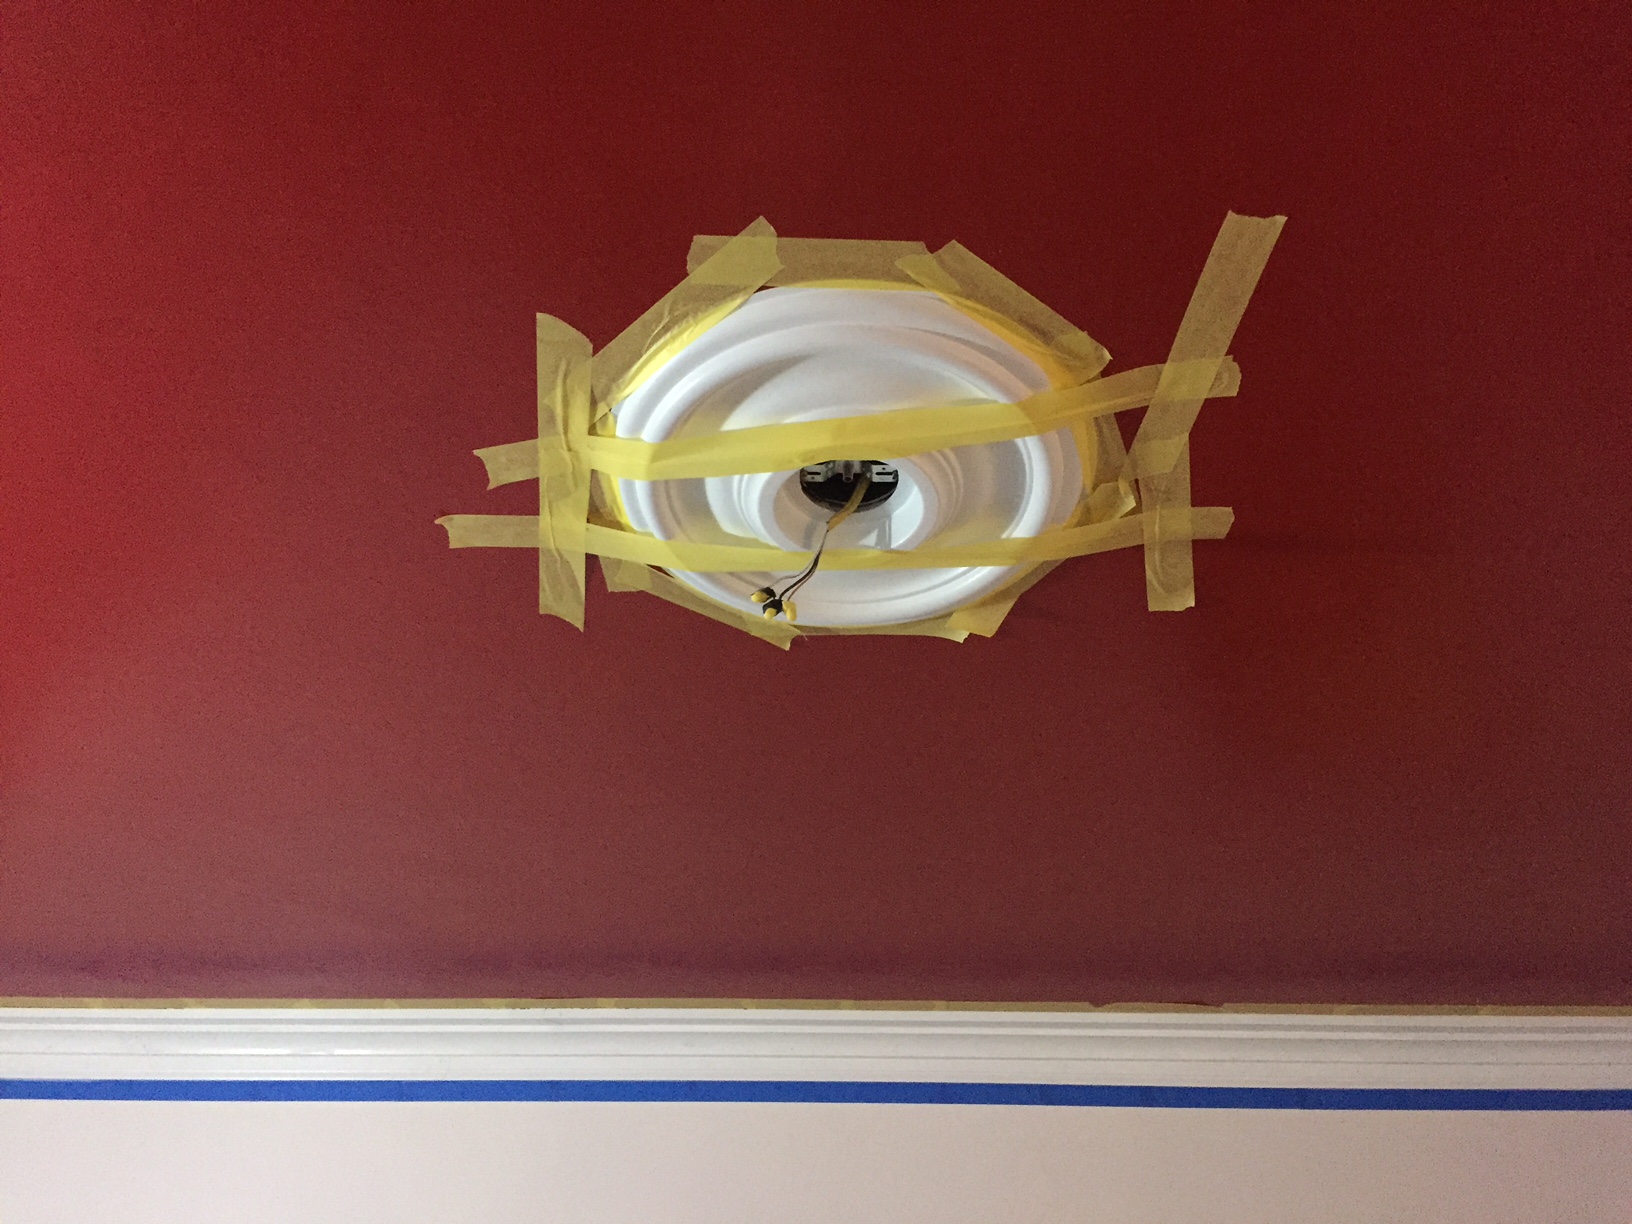
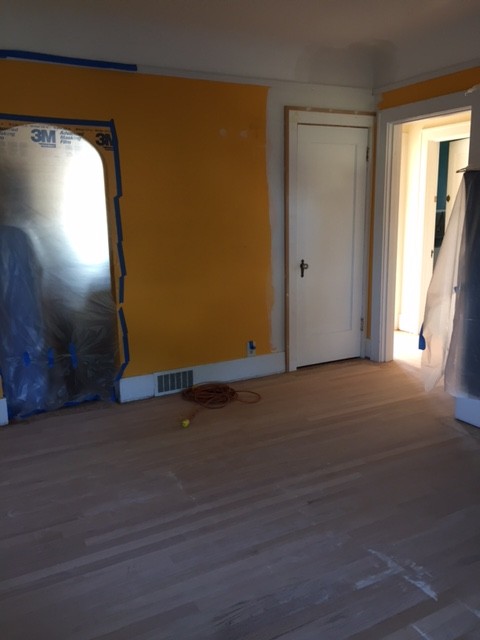
My Wife’s Prized Chandelier Almost Made Me Poop Myself
We are in the house remodel home stretch. Just small trim details left on the main floor. One of them being my wife’s chandelier installation. I had planned to install the kitchen floor this past weekend, but Stamps-With-Foot had other plans. She sat me down over coffee Saturday morning and made it clear that my plan was out and that her sparkly lamp was in. Always a fan of choosing my battles wisely – into the dining room I went.
I needed to caulk the new dining room crown molding and prep it for paint before I could install the ceiling medallion/escutcheon for the light. It took two passes and some light sanding, but all the cracks and gaps are filled and we were ready to hang the crystal and steel behemoth around 4:00pm on Saturday. I had my wife sitting in the attic holding the chandelier by its safety cable while I wired it to the ceiling junction box. Like in a really bad sit-com, there was a “ping” noise, the safety wire popped, and the stupid-expensive hunk of cut glass and metal headed to the floor. It happened like it was all in slow motion. Now this thing is not small. It is not light. It did not come with handles. From the top of a six-foot ladder, I instinctively reached way out and grabbed her prized chandelier as it fell. I teetered for a second on the top of the ladder, having flashes of crashing to earth and how many stitches I would be getting, before the ladder stopped moving and I was able to slowly walked the beast down to the floor. I did have to check my britches as it was a rough couple of seconds, anything could have happened. Thankfully, just one single tiny glass bit cracked in half from the jolt – super glue will be the answer. The ceiling medallion also popped loose and I had to pull it down, remove the adhesive and remount it, afterward clamping it to the electrical box and taping the edges to the ceiling so that the glue would set up overnight.
After getting the medallion in the air, I went to Home Depot, purchased some 1/8” stainless steel cable and with a swaging tool -everyone should have their own… 🙂 , I remade the safety cable. After waiting until the next morning, I spent an hour installing the beast. My wife danced around with giddy joy when I flipped the switch after all twenty of the 45watt bulbs were installed. Happy wife, happy life…
I will be done painting the trim this week, the blue and yellow tape will come down, and then the dining room is 100% done. On to the Kitchen.


Working on my day off
The house remodel seems to never end… I will be so glad to just be and live in our space at some point. We are close, but there are still details left undone – enough that I am trying to concentrate on one room at a time. My plan is to get each done in turn and then move on to the next. I wasn’t as successful at that as I wanted to be this weekend as I bounced back and forth between the living room and our bedroom closet, but I did get a ton done.
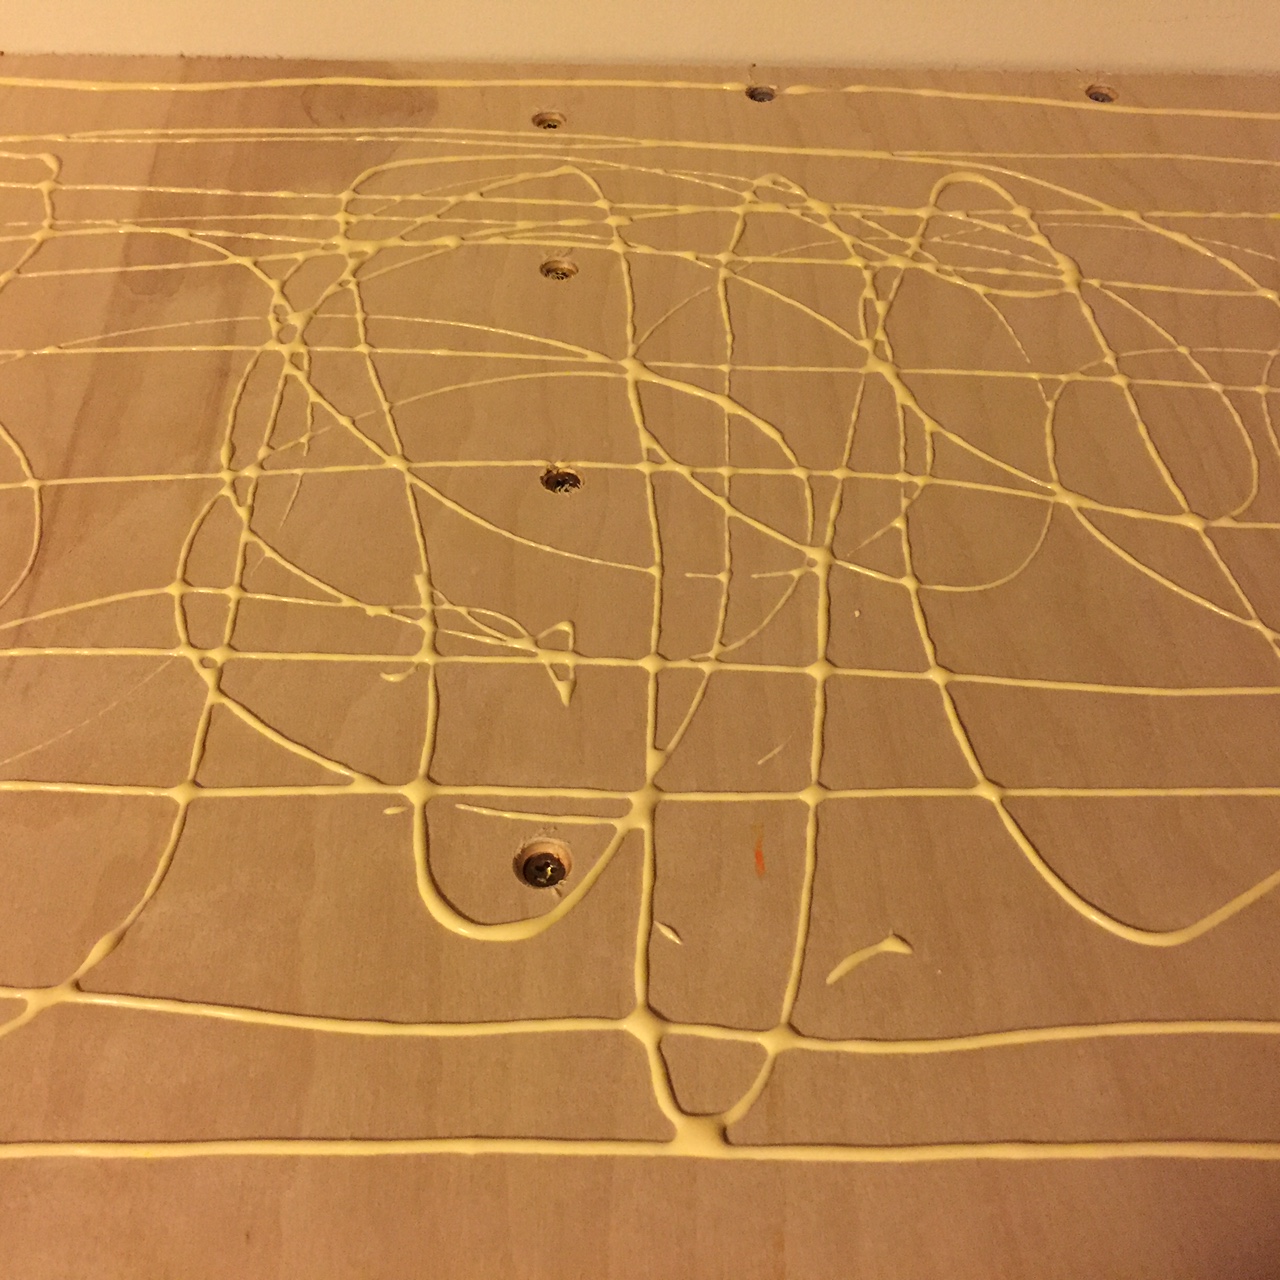
I installed the upper shelves and corner shelf in the walk-in closet, laminating two layers of 3/4″ plywood for really strong support over a 54″ span and in the unsupported corner. In addition to using copious amount of glue and screws, I attached the butted plywood edges together with wood biscuits – it is always a fine day when I get to crank up the biscuit joiner.
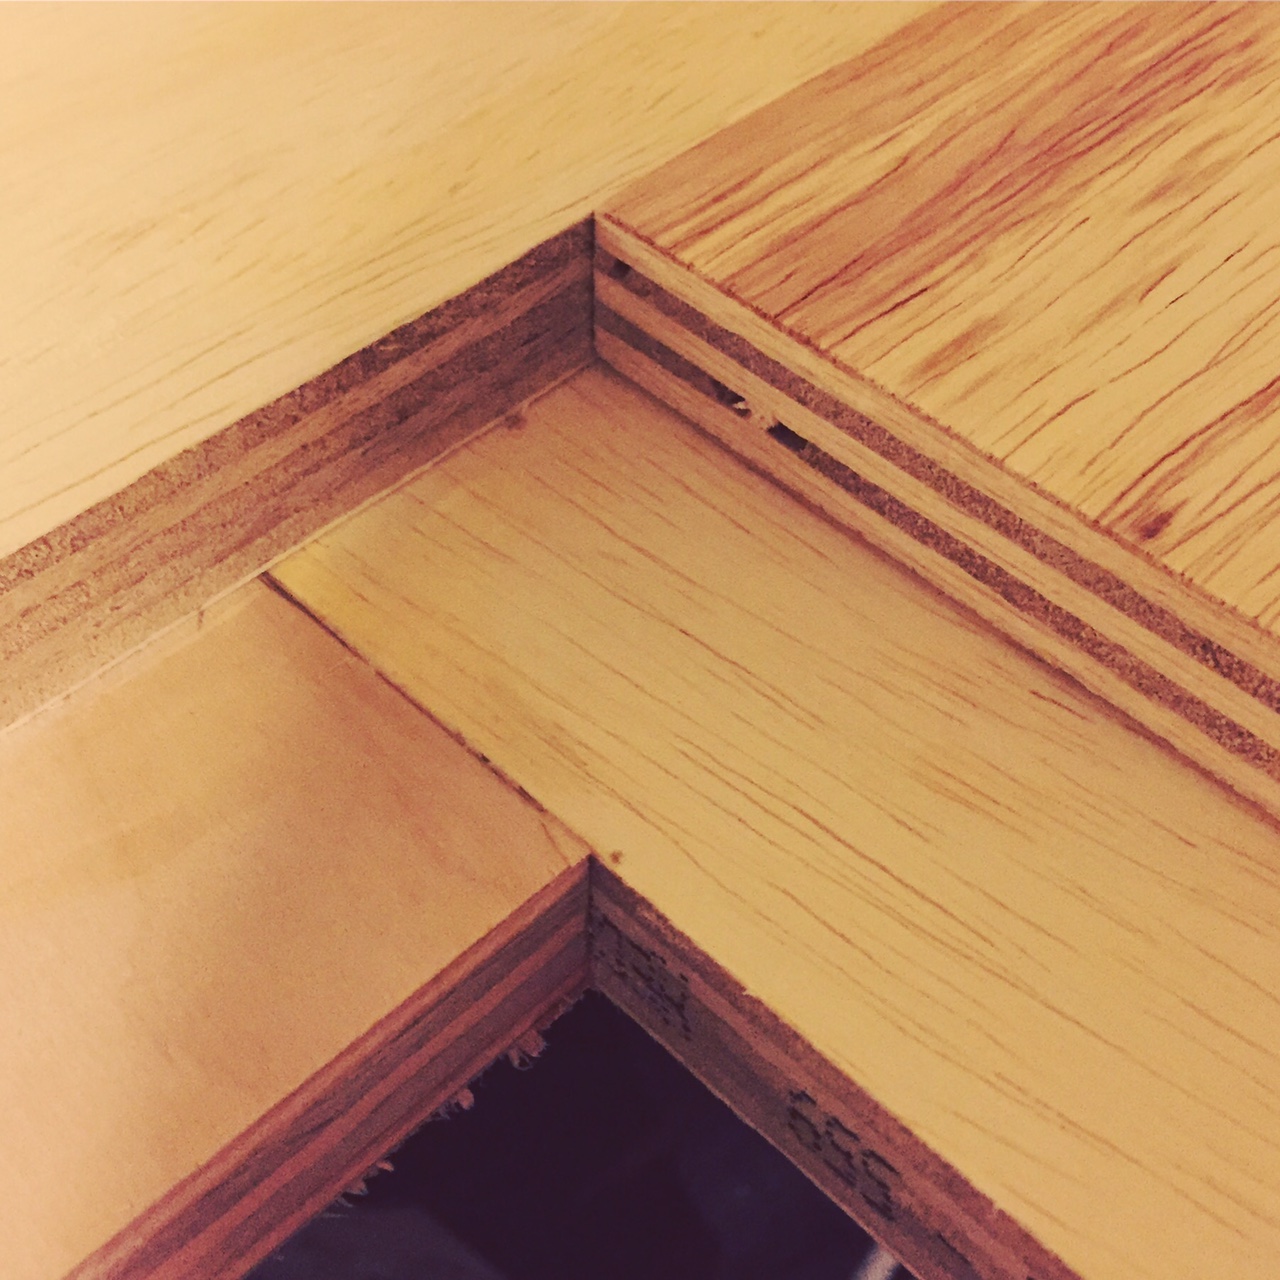
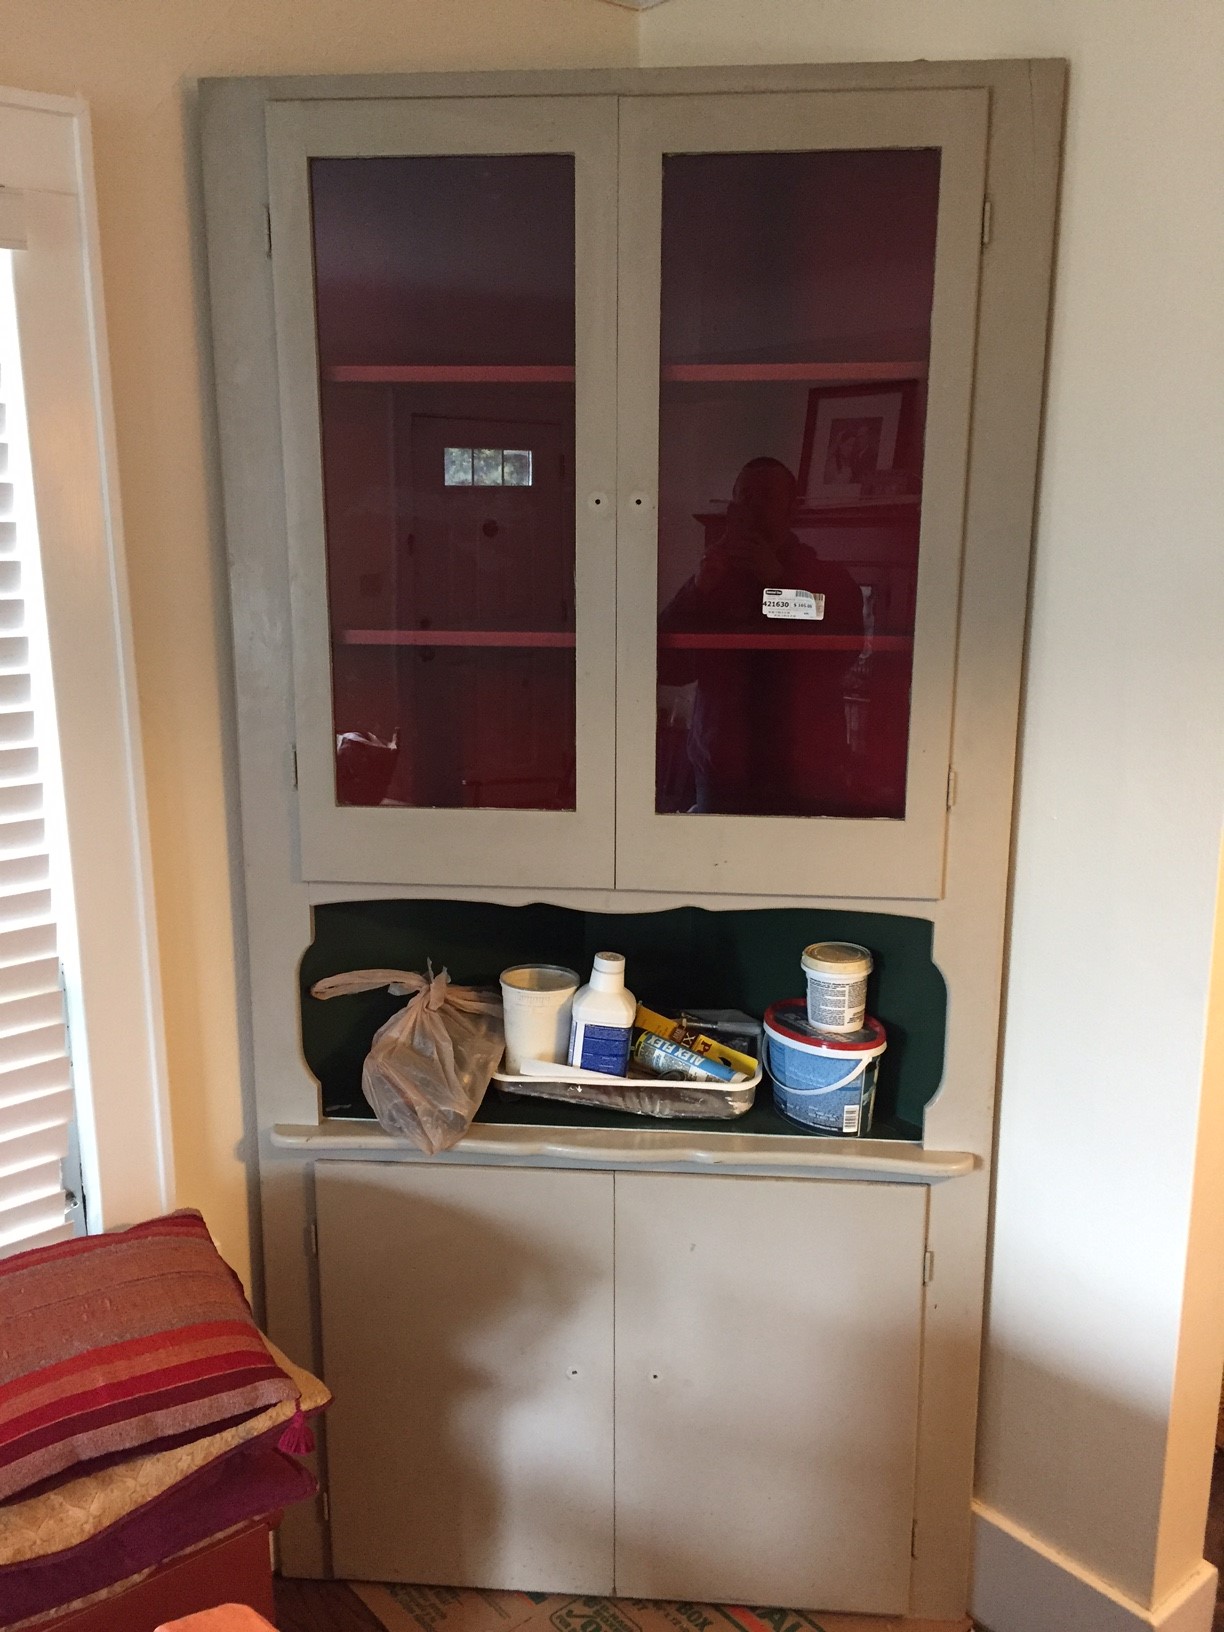
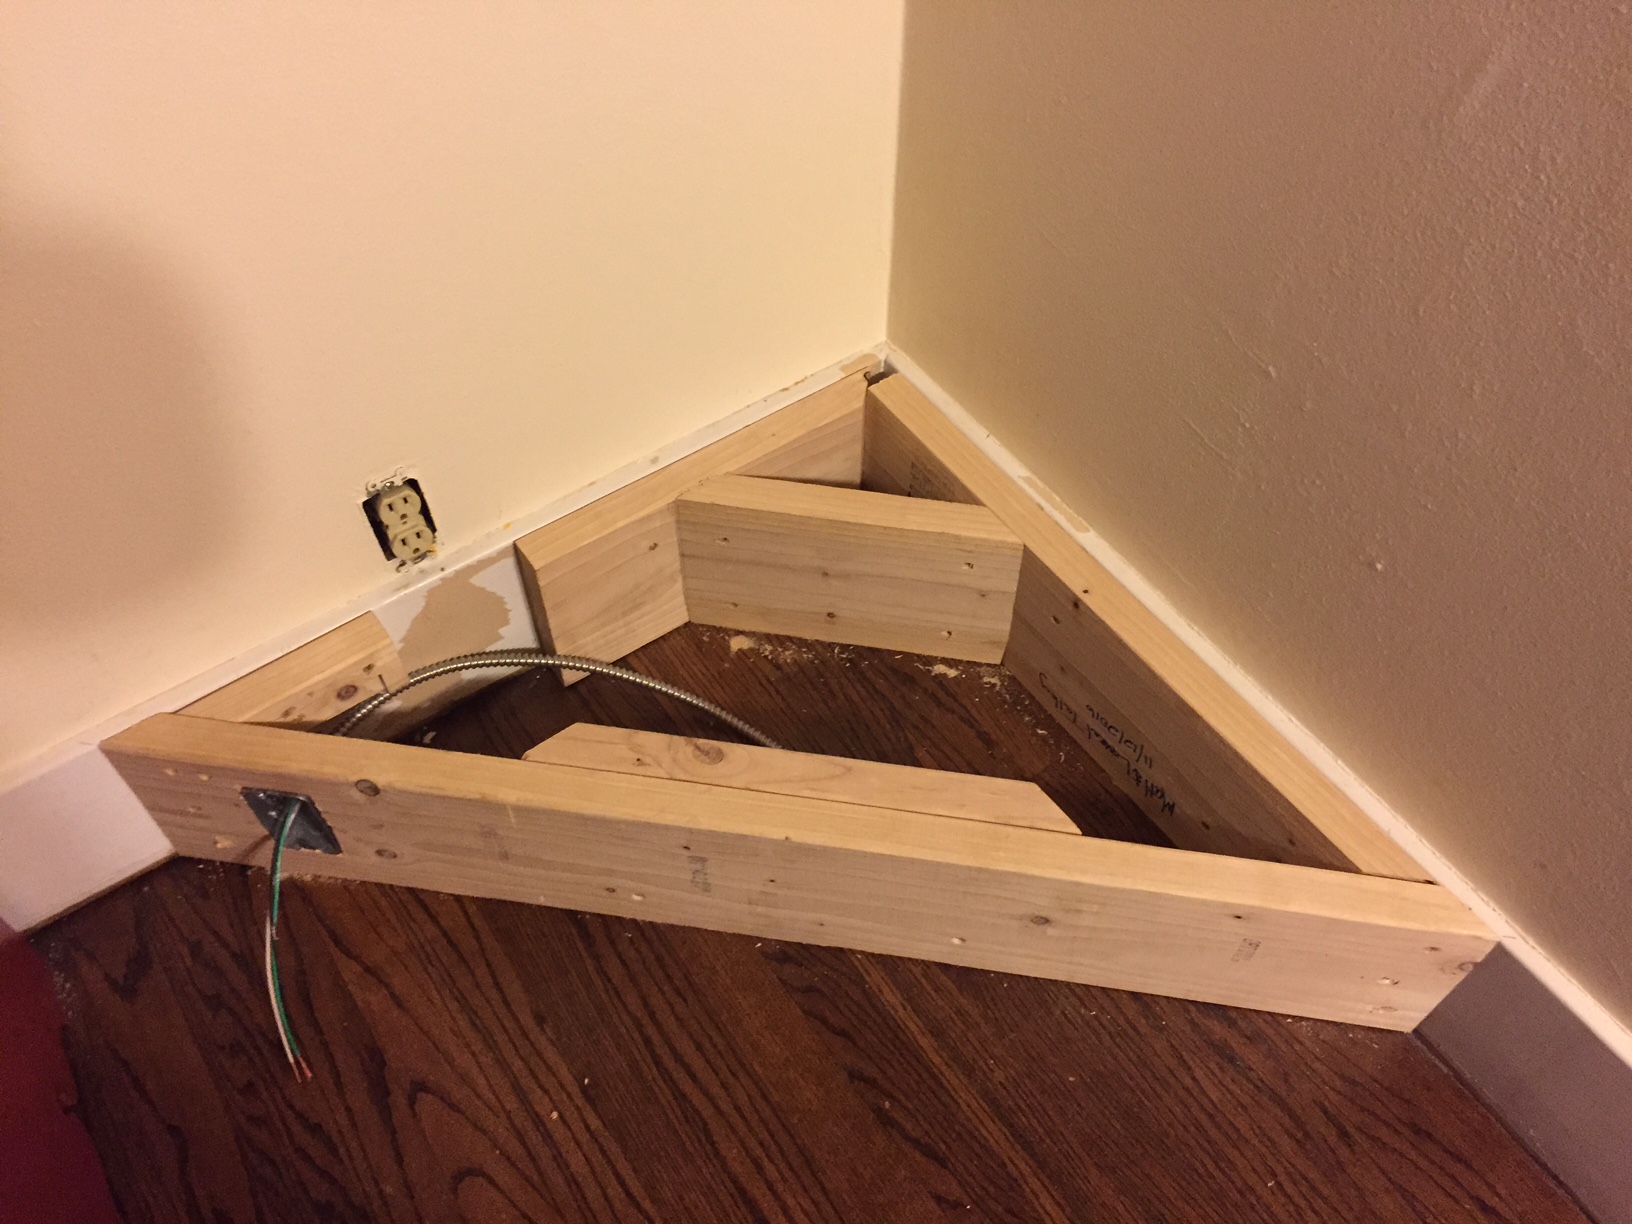
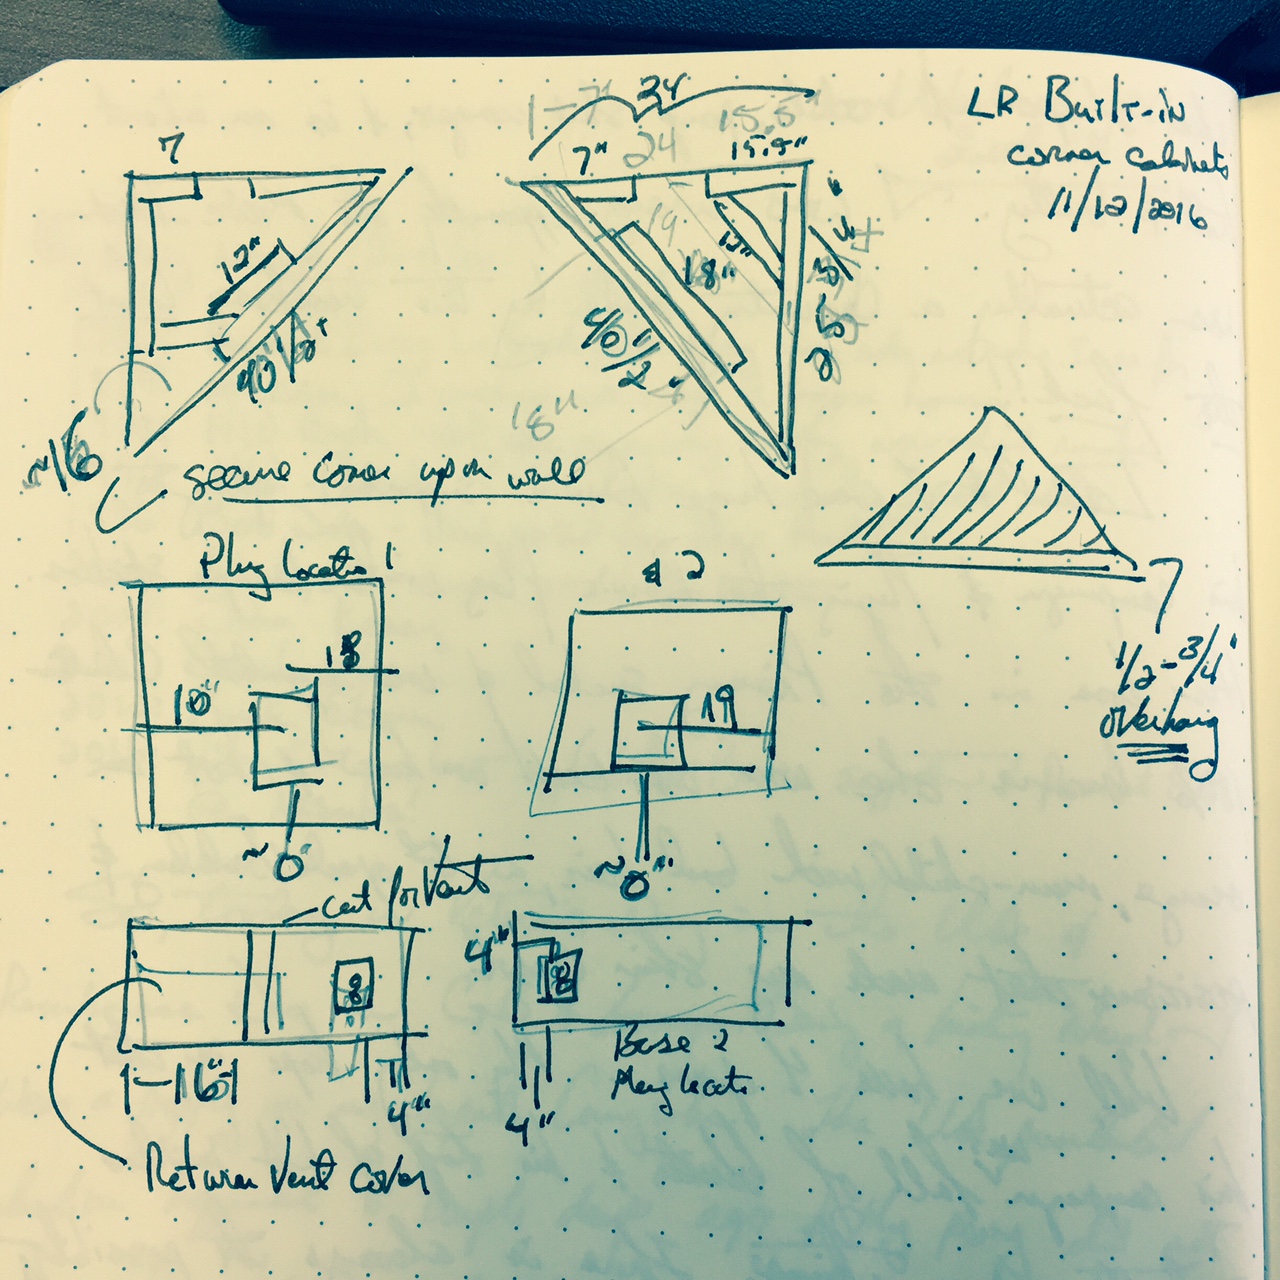
Almost a year ago, I sourced some corner shelves at one of the local architectural salvage places for less than $200 – far cheaper than what it would have taken me to build them. They came out of a 1930-40’s house and were painted Christmas colors, but I knew that they would be perfect for our living room, which was stripped of its built-ins at some point in the last 88 years. They have sat in storage and until this past week when I pulled them out and got some material together to permanently mount them. Stamps-With-Foot helped me set them in place after I built sturdy bases. Each of them cover a wall plug, so I am in the process of re-routing the receptacle using armored cable. I also have to build in an air-return duct under one and that has taken some serious brain power to get right. I will add trim this week and my wife and Mother-in-law will paint them cabinet white this weekend.

While I was at it, I punched out a rubber washer for a pot lid knob. I made the knob a couple years ago out of some scrap cherry firewood after the original plastic one broke. The original washer had corroded, so I made a new one and installed it.

I also took a couple minutes to mount the red glass post topper on the back fence. It was ordered (along with a spare) months ago and have meant to put it on every weekend since. There is always an excuse for why I didn’t, so I marched right out first thing Saturday with a tube of clear silicone and finally just got it done. It is the little victories that keep me going.

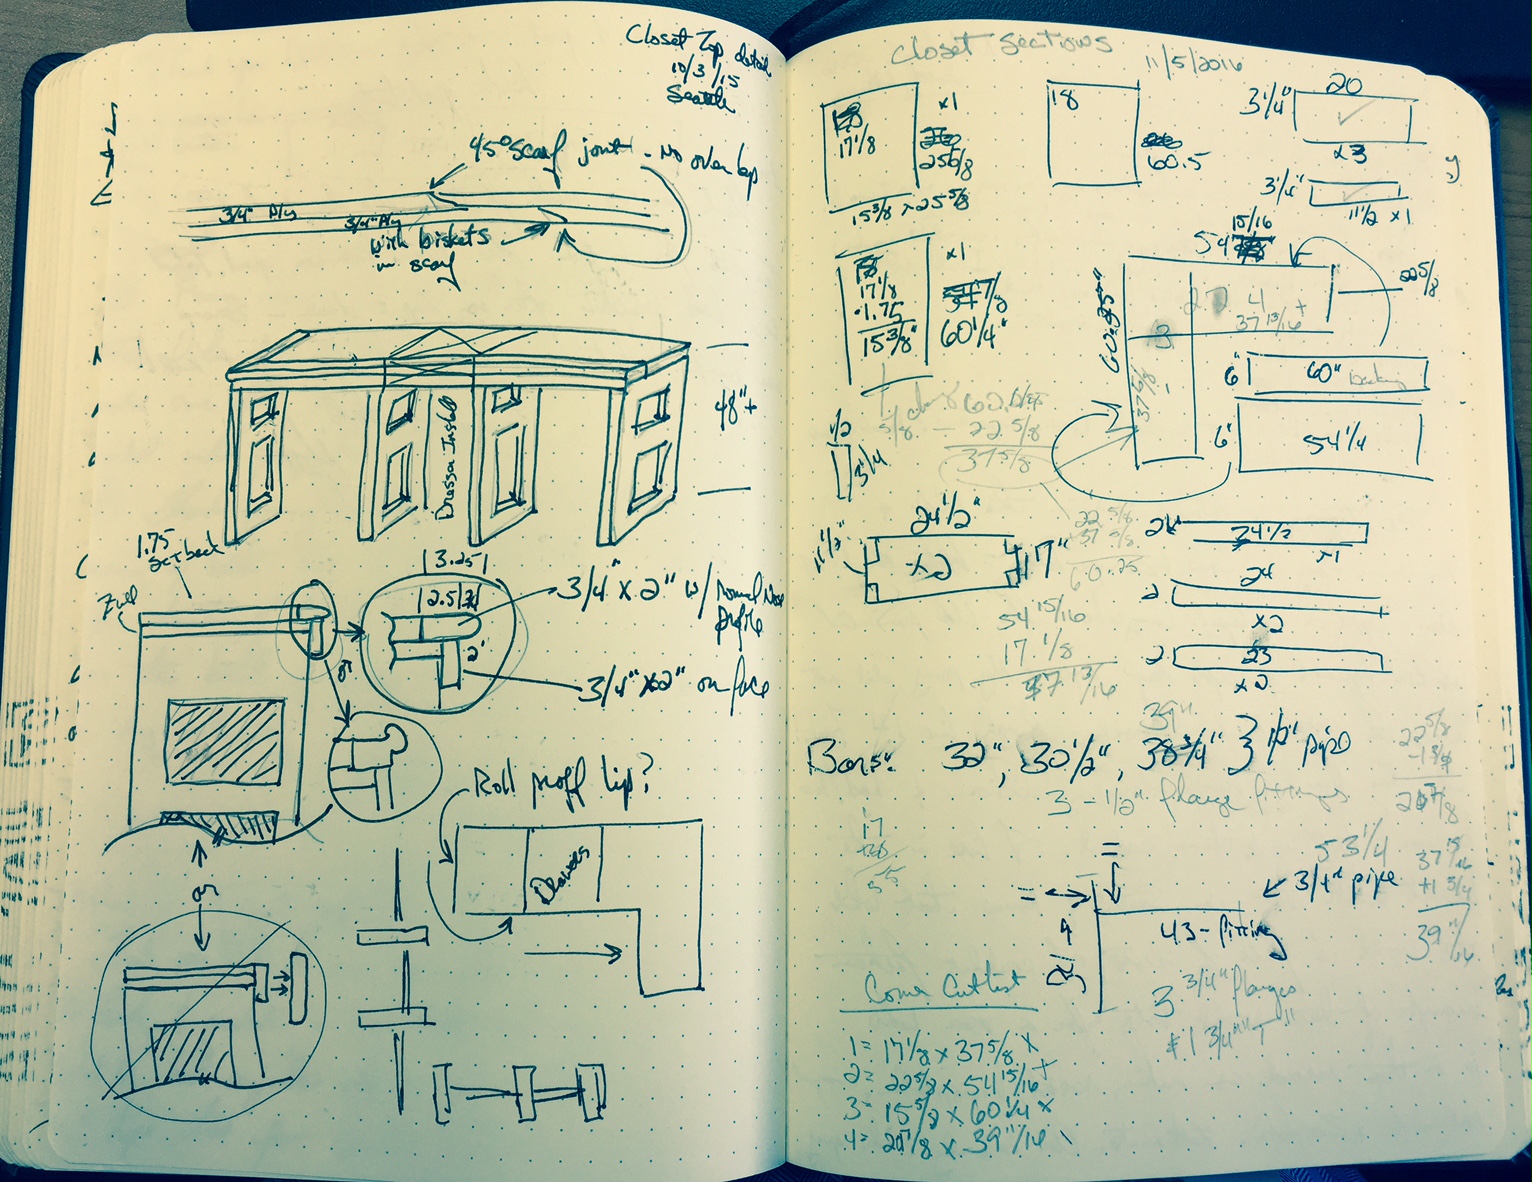
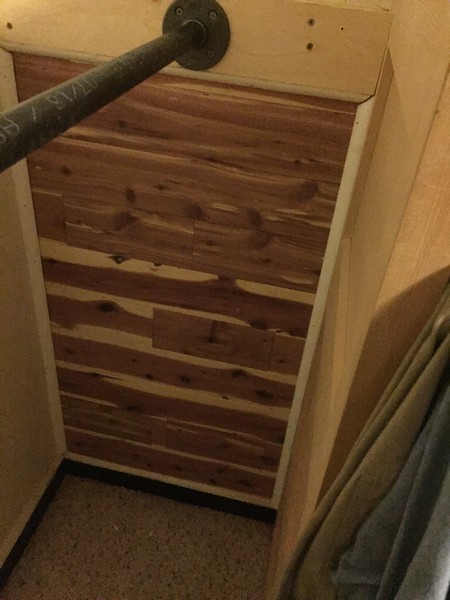
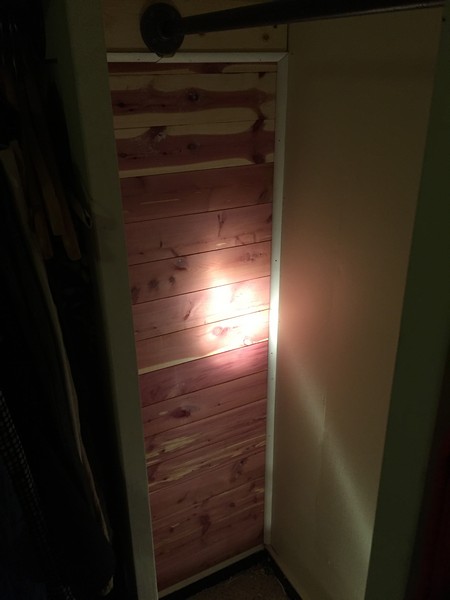
A Walk-in Closet for My Wife
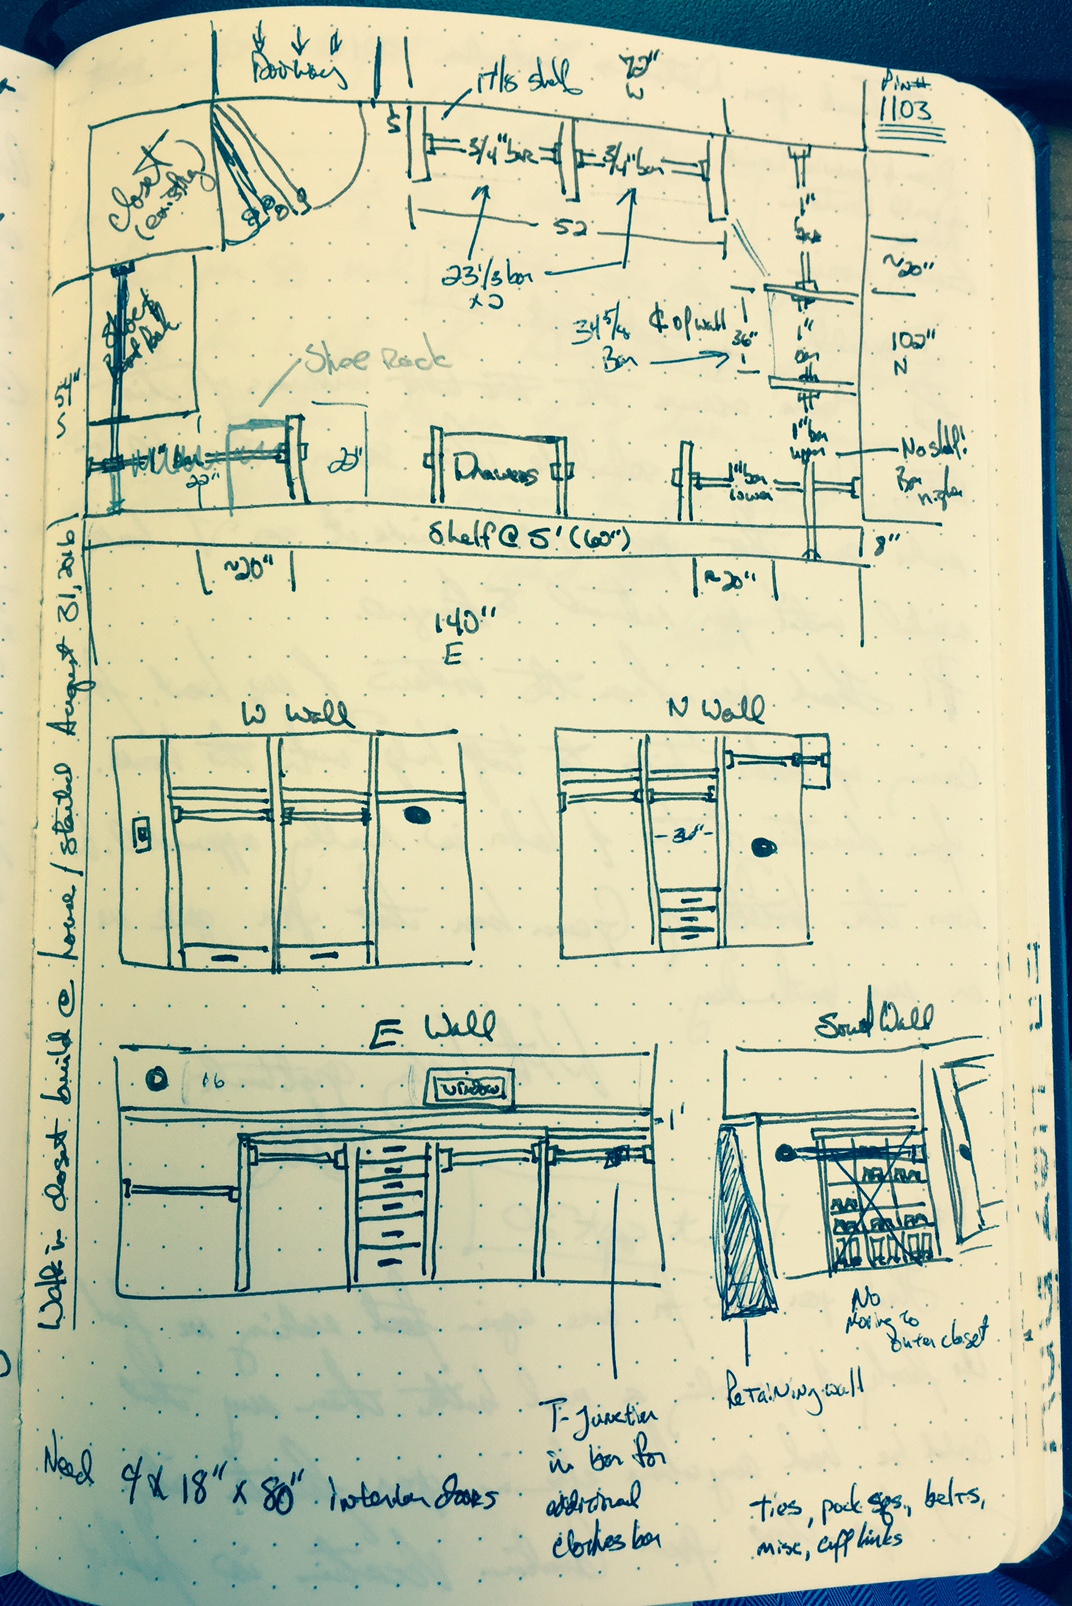
As part of the now 10 month rehab, remodel, rebuild of our house my wife wanted some space to hang her clothes and put her shoes and boots that was not an afterthought. A place that, for once was not crammed or disorganized and was purpose built. It was decided that we turn a small bedroom/office into a walk-in closet.
I sketched out a few ideas in my notebook and went over them with her. She removed a large shoe rack and opted for more clothes bar space. She also wanted a bunch of drawers to store smaller stuff in. I initially drew everything with a built in dresser, but changed it a little and made room for a free-standing French dresser made in Revel in the 1930’s that we acquired while living in Toulouse. There is 27 feet of linear hanging space using iron pipe (no sag), 24+ shoe cubbies, shelves, drawers, storage, and two full length mirrors.
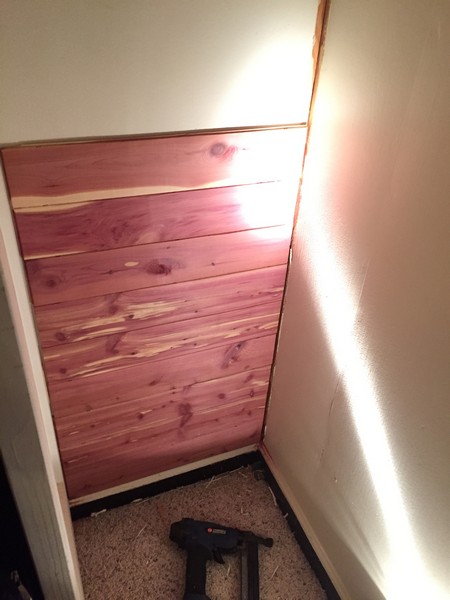
I spent most of this past weekend getting the flat panel section dividers up, installing the clothes bars and adding top shelves. There are three areas that are made for off-season storage: coats in the summers/short sleeves in the winter. For these spaces, I decided to line one wall each with cedar. While some people might line the whole closet with cedar, I would advise against it unless you and your significant other wants to smell like a lumberjack constantly. Too much and the smell, while pleasing for me, pervades everything.
I lined two of the three spaces this weekend and got to use my old-school hand miter saw. While manual, it is faster to use in the closet – no dragging in a stand and cords and creates a LOT less dust than my big power Bosch miter saw.
I still need to add shelving on one side, put up all of the upper and lower panel trim, fill my nail holes, sand, paint, and bring the dresser in, but the space is usable and has allowed us to unpack all the boxes that have sat in our bedroom full of clothes. I will take the clothes back out on the day that I sand and paint.
Here is the progress to this point:

House Remodel Status September 2, 2016 – 7.5 months in
Here is the house/garage re-build/build status for the 1st part of September.
- The F-Bomb Garage has been painted – at least the outside walls. I need to paint the trim and doors next.
- Repaired some major issues with the trim and siding on garage – real unhappy with my garage builder!
- Front yard is still green, but need to clean and re-seed the back yard.
- There oar only 2 rooms in the house that are complete and need no work at this point. Stamps-With-Foot could be happier with me right now…
- The mounting brackets for the granite in the basement are done and I will install them this weekend.
- Our washing machine went out… fuck. The bearings finally gave up the ghost. need to haul it out and put another in.
- No garage power yet. Huge load of confusion between the City of Seattle and my electrician. Maybe worked out now, but we will see.
- The yard is completely fenced in and the rear gate is installed. just a couple of tweaks and then power wash and polyurethane coat.
- The living room corner cabinets are in place, but not painted or installed.
- We have a small roof leak – motherfvcker!!! it is around the kitchen vent and from where the moss removal team got too eager with the power washer. I will go up there this weekend and seal it.
- Got a huge bill from our plumber for work that they didn’t do before abandoning the job. wanted to scan my ass into the 3D printer and send them a copy. Called a lawyer instead. we have a plan forward.
Garage and House Build/Remodel Update – 6/14/16
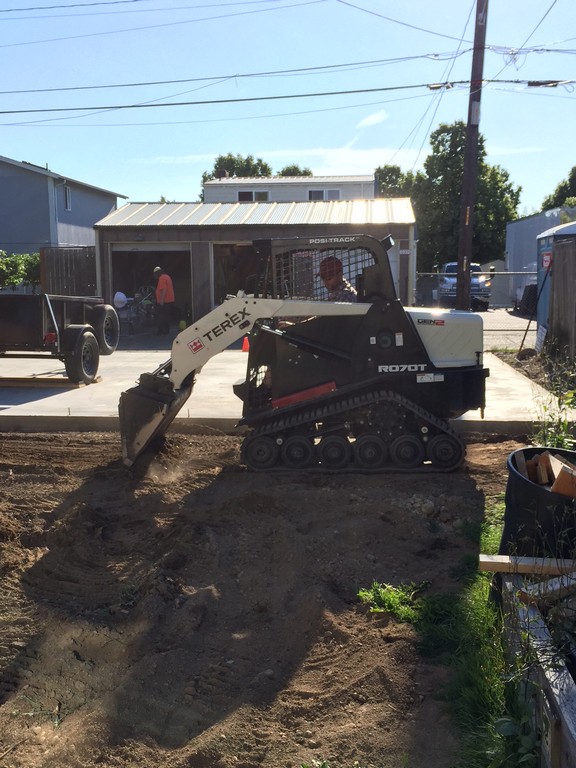
Garage:
- My slab is cured and the densifyer has been applied. really happy with the results – a big thank you to Mr. Mark Flood!!
- The ground around my garage slab is all level. I rented a Skid-Steer this past weekend and played in the dirt. Hauled 2 yards of excess over to the neighbors yard to fill some voids and I used the skid-steer to pull out 7 small stumps for her.
- Got a call from the builder yesterday and the lumber will be onsite today, Framing starts Wednesday, and trusses are delivered on Friday.
- Was asked to move the Honey-bucket so that the lumber would have enough room. Odd, request for my builder to make of the homeowner/customer, but I did it just so there would be no issues with the lumber delivery.
- If schedule holds, windows and siding start next Wednesday, and we will be fully in the dry by next Friday.
- It looks like I will be installing the windows as I am more particular than the builder about such things.
- My son, The Ruminator, will be here for a few weeks and I will get him help me run wire in the garage shell.
- My 2-post car lift will be installed by the end of the month


House:
- We are finishing up the paint on the main level.
- I need to start putting the 1/4 round trim back down.
- Bathroom: there is tile work to finish and a mirror to be hung.
- Basement remodel is stalled. We had the head manager for the plumbing company out on Saturday after we found even more problems with the work that was done and we have told them: “…in light of the previous and continuing issues, incomplete work, existing damage caused by your subcontractors that we will have to have repaired, and that the basement portion of our remodel has been brought a complete stop, my wife and I do not want a____________ employee, or anyone from a subsidiary company back in our home. We do not wish to continue dealing with _______.” We can’t really touch anything until they agree to this. If they do not, then we can’t do anything as the matter will have to be settled via remediation.
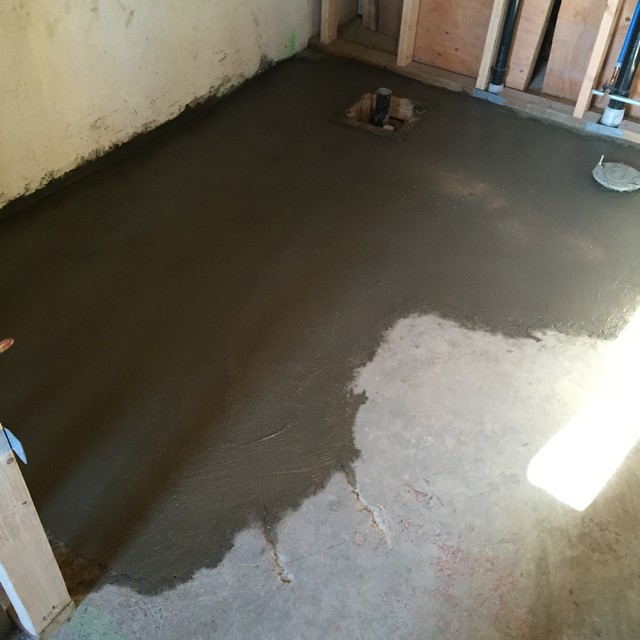
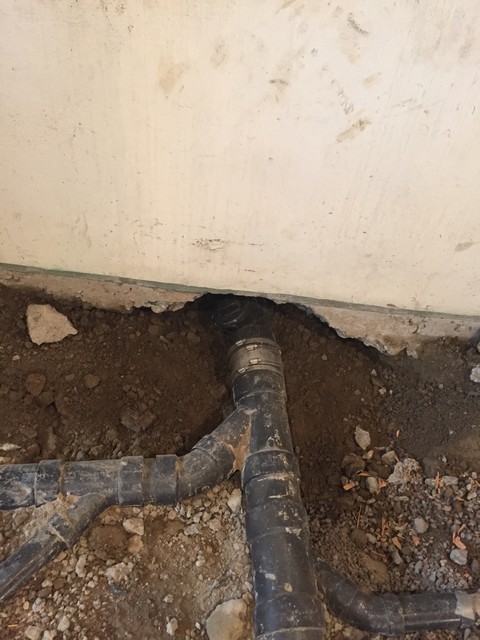
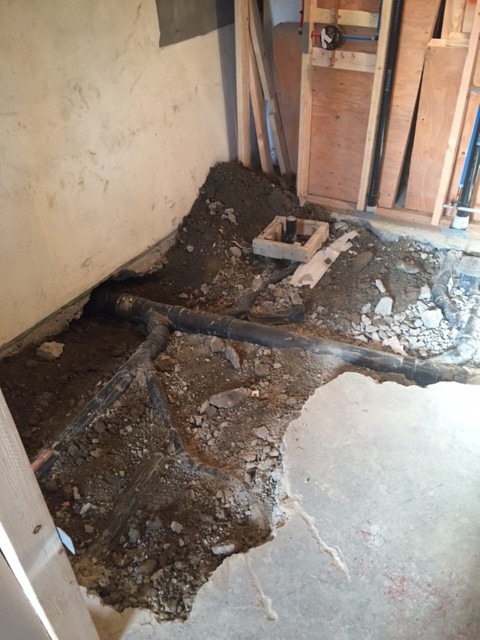
Continued Plumbing Woes…
As mentioned previously, no plumbing permit was pulled for the work in our house and we had to have the BRAND NEW concrete in the basement torn back so that the county inspector can view the pipes and witness a pressure test. When the inspector arrived for the first try, he found 3 additional issues that the plumbing company (big company, one of the oldest in Seattle) had to address. They ended up tearing up more concrete, part of our foundation wall and a 2′ section of my BRAND NEW AND FRESHLY PAINTED drywall!! To add a little insult – I found an empty bottle of wine from a case we imported from France under the trash pile that the first and second crew used in our back yard. Seriously, why would they leave the bottle?! As a ‘Fuck You’..?!
I am unhappy and Stamps-With-Foot is livid. The plumbing company GM came by and was really apologetic and assured us that we would get an update, directly from him, every day. That hasn’t happened and we had no clue that the concrete was being re-poured until my floor re-finisher called and asked if it was OK that he let the concrete guys in.
The new concrete is super wonky and out of level – 1/2″ below the toilet flange and my tile guy wants $800 in addition to his original quote to lay extra floor leveler. To rub salt in the wound, the plumbers sent us a bill for $36,000 dollars. That is not a typo: $36K. The original agreement was for $9200.00 BEFORE they screwed up. I called the GM, sent him all the emails that had gone back and forth and he promised that he would get right back to me. That was a week ago…
Super frustrating. Out of the 7 contractors that have worked on our house remodel and garage build, the plumbing company is the ONLY one that we have had any issue with. Everyone else to this point has been super easy to deal with, lived up to their contract, filed for and received permits, and were clear and concise when small issues came up.
I am not naming names – yet. I am going to see what their next step is. If they try to bill me for another dime, I won’t hesitate in publishing all the details, pictures, e-mails and text messages here on the interwebs – I get 34K hits to my site a week, so… I will be having a long talk with the county concerning a fine request, use Angie’s List remediation, file a BBB complaint, file a WA State L&I claim, and then there is the Consumer Protection Division of the WA Attorney Generals office. That should get things started at least.

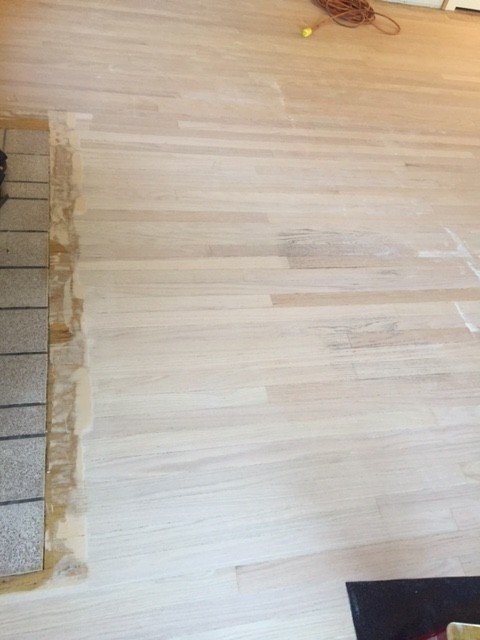
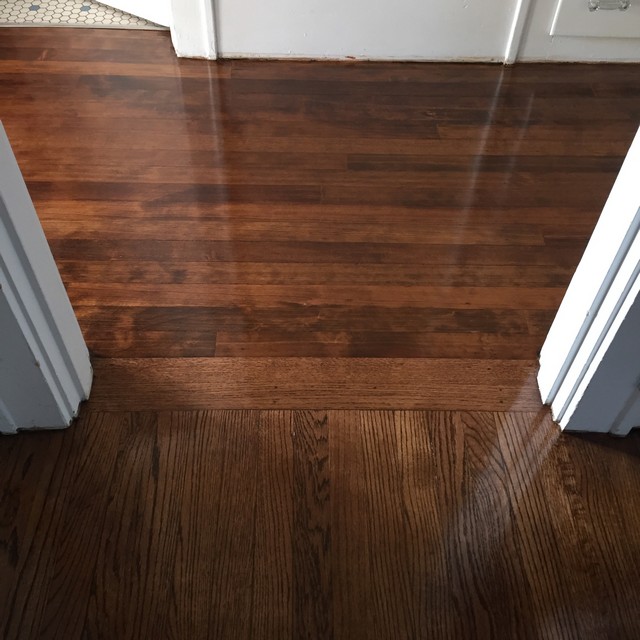
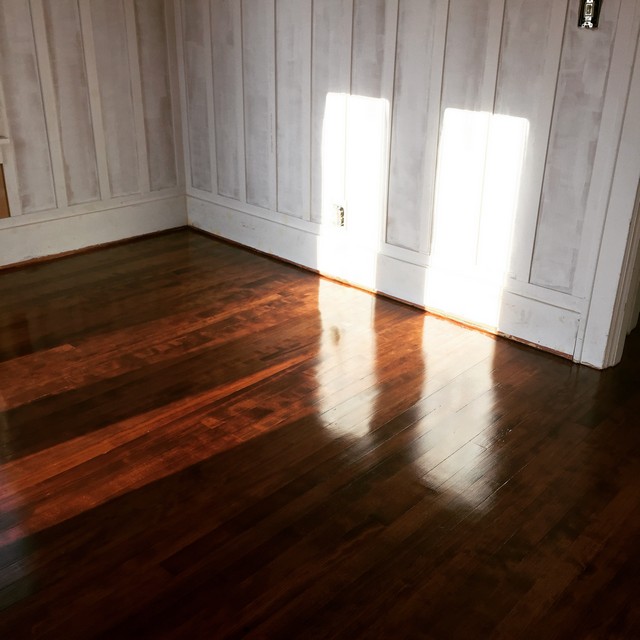
New Floors! Reason #451 for me to have OCD
We are out of the house and living in the basement like quiet mice this week as our floors are being sanded and refinished. I am both super-stoked and full of trepidation. Let me explain: I love my original oak and hemlock floors. LOVE them! They are beautiful and I want the entire world to see them shimmer in the sunlight. However, I do not want them dirty or dented, or scratched, or even breathed on heavily. That was before they were refinished…
With the new stain (DuraSeal Spice Brown) and 3 coats of hard Swedish Finish, our floors will look even more stunning and I will become a minor dictator of the hardwood – I know this will happen. Woe be the young lady who steps inside the house with heeled shoes on and I almost feel sorry for the first electrician or plumber that comes in wearing muddy boots.
The plan was to get done with painting before we had the floors done, but contractor scheduling and a huge plumbing oops (more on that later), mean that with are 1/2 done with the painting and will continue as of next week. The stain goes on today and they will have to cure until Sunday night.
5/16/16 Update:
Here they are with the last coat on and dry. We are going to let them harden for a few more days before moving and furniture in and bringing in the paint ladders for finish up the last couple of rooms.
Garage Build Update 5/10/16
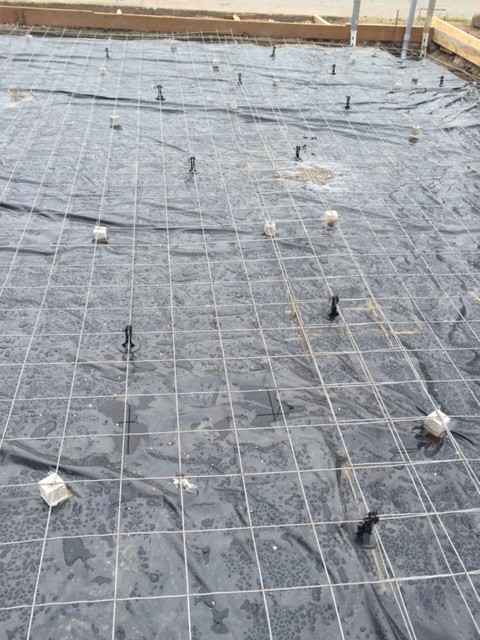
My slab gets poured next Tuesday. All clear from the City for electric trench and slab forms. There were a few issues that I saw last week that needed to be adjusted: There was a rebar oops in the car lift footings that was a serious new-guy error, but instead of calling my contractor to bitch, if just fixed it. Sometimes you are only as good as your worst employee… I picked some rebar and a couple boxes of chairs, looped ties, and put a 12″OC grid down of 1/2′ rebar 3″ from the dirt in the footing hole on Friday evening after work.
I also lifted the existing rebar over the footing holes up with chairs so that it would all be the same level as the welded wire. Hanging it from the wire would force the wire down to the top of the visqueen, negating the use of the material in a large area. I took the extra chairs I had and added them to the welded wire field. I understand that it gets stomped down when they pour and walk the pour, but the trick for me is to limit the amount that stays down. It was $90.00 worth of material and a couple hours of my time and we can work it out as we move forward with the build. The minor details in the grand scheme.


House Status and Plumbing Woes
We are making progress, abet slowly:
- My father-in-law came in this weekend and painted our bathroom and the trim.
- I have a new granite vanity top installed – one with the facets centered on the sink.
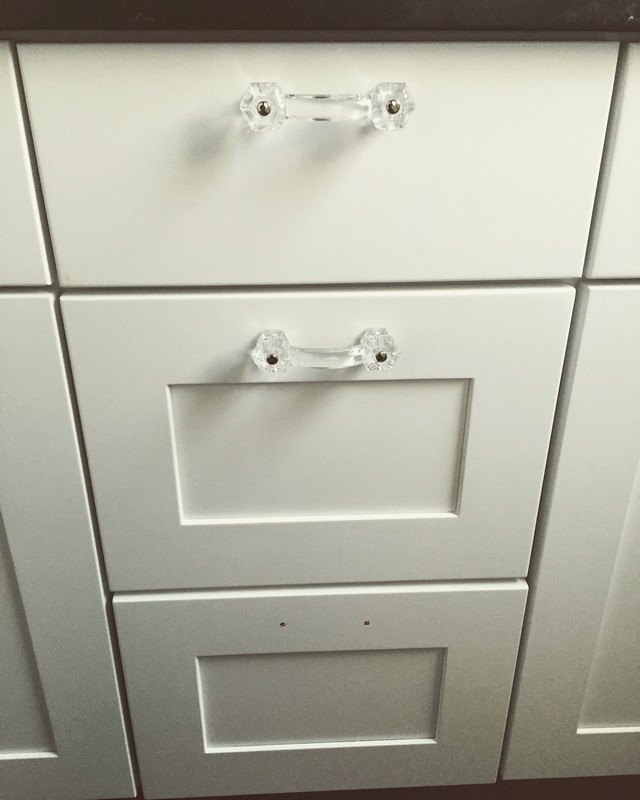
- New reproduction 1920’s glass handles are installed in the vanity. I is not gud counter. I bad at numbers. Didn’t have enough – one short. Store now sold out. Amazon to the rescue.
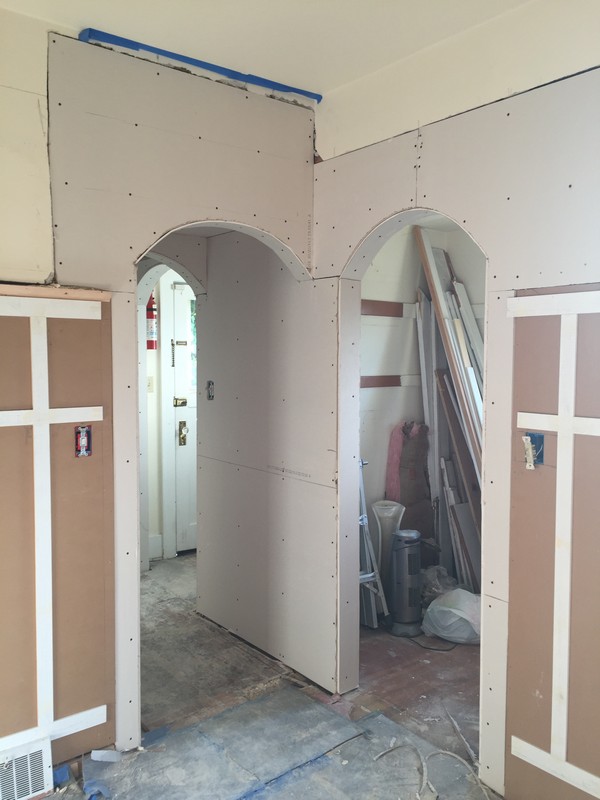
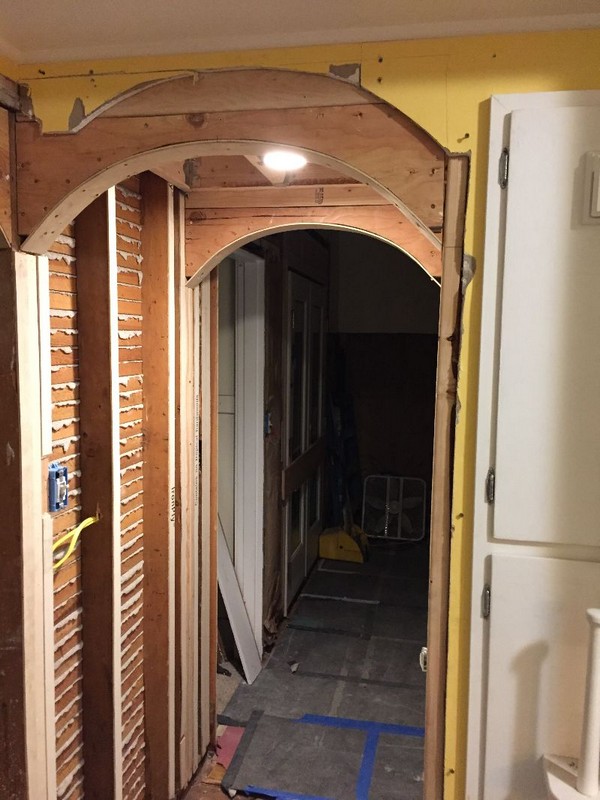
- The drywall should completely done and sanded as of today. The new arches are super sexy!
- I modified the kitchen knife rack to fit the new ceramic sharpener. The original was broken by the asshat moving company and Kyocera doesn’t make that size anymore, so I had to drill out its assigned slot. The replacement knives (also the movers…) are now in as well.
- Primer will go on the fresh walls tonight and tomorrow night.
- I have patched the hole in the tub surround and am waiting for the thin-set mortar to dry so that I can lay the tile.
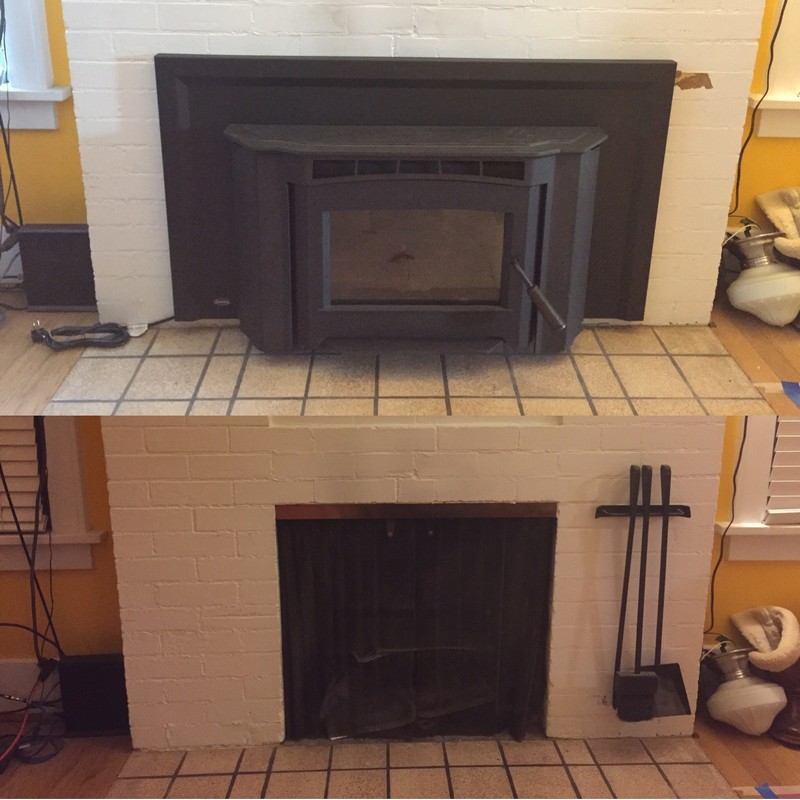
- The new fireplace insert is in and fantastic. I will do the new surround and mantel after the floors are refinished and as I am trimming out the Dining room Ceiling
- I met with the garage foundation crew on Monday to go over all the details and they start the ground work today. I am almost giddy with excitement.
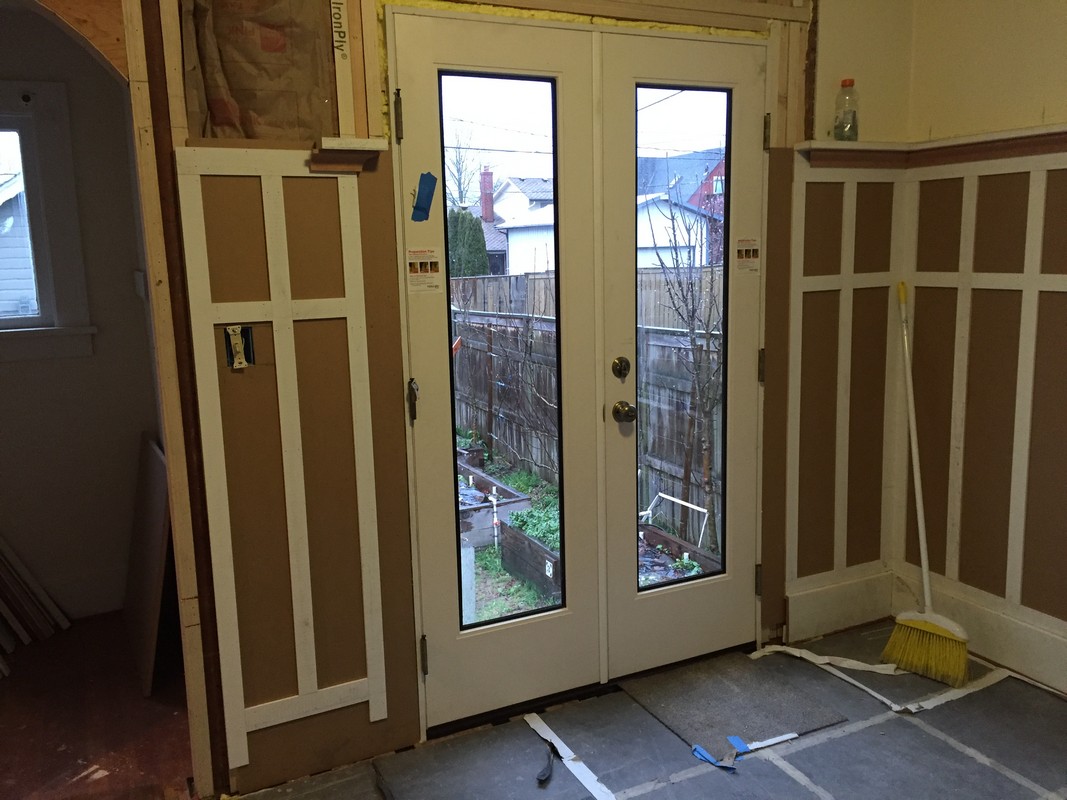
- My new dutch doors are ready and I will pick them up Friday
- The finish carpentry trim-out starts next Monday.
- I learned yesterday afternoon that no plumbing permit was pulled and that we might have to demo the concrete in the basement – the new concrete – and the newly laid supply line so that the county inspector can view the pipes. I am super unhappy and will update as I know more.
- We are now 4 weeks without a shower or bathroom sinks at the house. I have been a decent human being and fairly understanding up to this point with our plumbing company (big company, one of the oldest in Seattle). I am afraid that they have mistaken nice for weak and unwilling to have a confrontation. That was a miscalculation. Please refer to the Capone quote concerning kindness…
- My wife is still medium chipper and hasn’t threatened to leave me yet over the lack of a shower or all the dust, so that is something.
- The lavender out front is in bloom and the bees are back, so not all is lost.


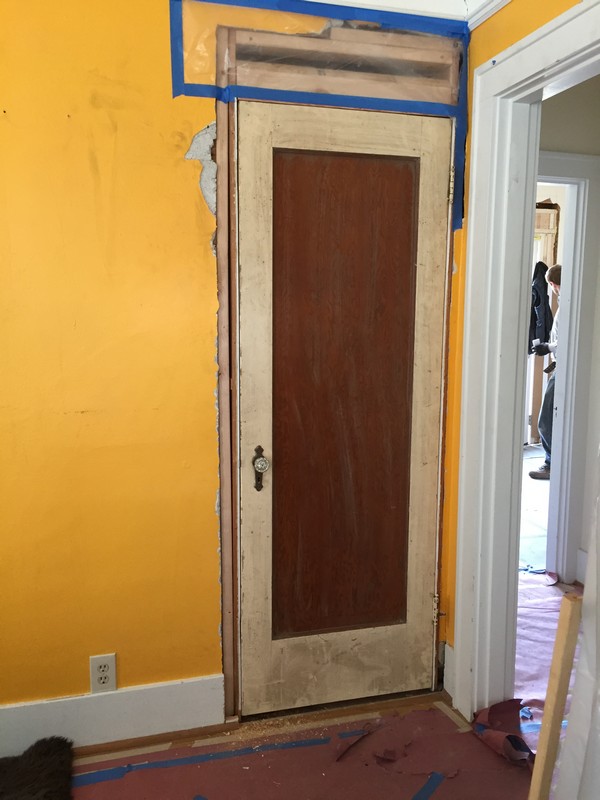
Story Time – A Small Remodeling Success
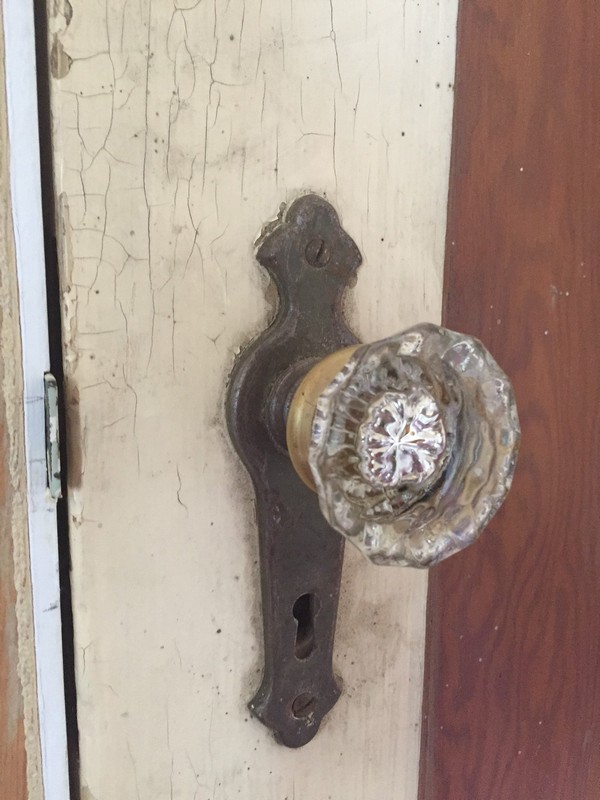
I am super proud of this door. It is original to our 1928 house and at some point in the last 88 years was removed from a closet or from somewhere in the basement and stuck in the rafters of the garage were it was covered in something near a ¼” layer of dust.
We built a stairwell to the attic and needed a door. I was all ready to source one at Second Use or Earth Wise, but at the last minute, I remembered this beauty and it was the perfect size (28″) I needed. For a jamb, I cut down one we had just pulled out of what is now the dining room. The door knob plate is a perfect match to the others in the house, which is awesome as it would have been impossible to find another one. I did source a vintage lock, brass strike plate, brass screws, and 1920’s glass knob at one of the local vintage building supply shops – both match what we already have all over the house perfectly. The job to install the lock, attach the knob, and mortise in the strike plate took all of 30 minutes and in a year, no one will ever know that the door hasn’t always been there or about its long dormant sleep in the top of the garage.
I am really happy to have this original piece of our home hanging there again. The trim went on to match the other doors and now just needs to be painted. I will do so after painting the walls and with the rest of the trim in the room.

A small personal note:
I don’t normally get super personal here, but this is a happy day and I am going to share.
1. We have been dealing with an insurance company who is in charge of covering a loss that happened during our move back to the States. We have had a claim that is almost 8 weeks old, moving slowly through their “process”. It is not for a small amount of money. I got a note today (after badgering them for two weeks with facts, data, and common sense) that they were going to send us an interim payment for 1/5 of the total claim while they continue to work through it all. I was happily shocked as they have up to this point been rife with fuckery.
2. We are are in the process of refinancing our house and taking a little equity cash out so that all of the unexpected repairs that have come up during the remodel don’t all continue to flow directly out of my now shallow pocket. I got a call that we have the green light to start the closing process, which means I will have a finished house and new garage/shop by summer.
3. I do not currently have ass cancer. I have been privately dealing with that real possibility for a couple of weeks and went to see a specialist/surgeon today. Apparently, I am fine and my plumbing is all good. I almost broke down and sobbed like a little bitch when I got the news.
Overall, it has been a very good day.
House Remodel Update – Mid-March 2016
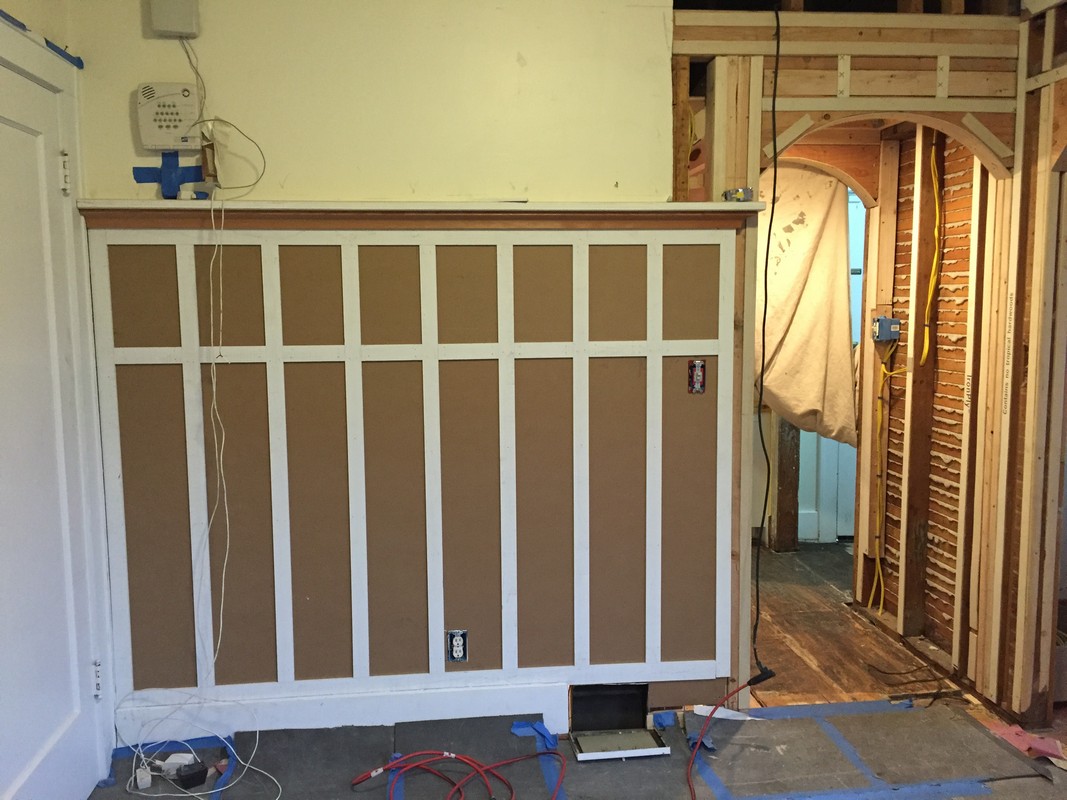
All of the demolition work is now done and the rebuild has started. Electrical is moving along, the City inspector signed off on the new HVAC (there is a permit inspection for the basement still to come), and all of the rough work on the main floor is complete. The once scary attic is now clean and waiting for a reinforced floor and new spray foam insulation. Some of the trim in the dining room and kitchen is done, specifically the cove/crown on the cabinets. All the doors are now hung, and the Wainscoting in the new dining room is 90% up. I need to finish up around the double door and fill and prime/paint.


Next steps:
Plumbing
Basement bathroom
Finish electrical
Camera system
New window install
Coffered Ceiling in Dining Room
Hutch built in the dining room vestibule
New security system (Hate ADT)
New drywall main floor
New main bathroom vanity
New Kitchen floor (both decision and install)
Finish trim out
balcony install
Attic floor install – pending engineering review
Attic and wine cave insulation – yes, we are that bourgeoisie
New basement door and back door – both will be dutch doors
Main floor hardwood floor refinish
Basement drywall finish and paint – pending city inspection
New carpet in Basement
Garage build