The New Kitchen Floor is Now Installed

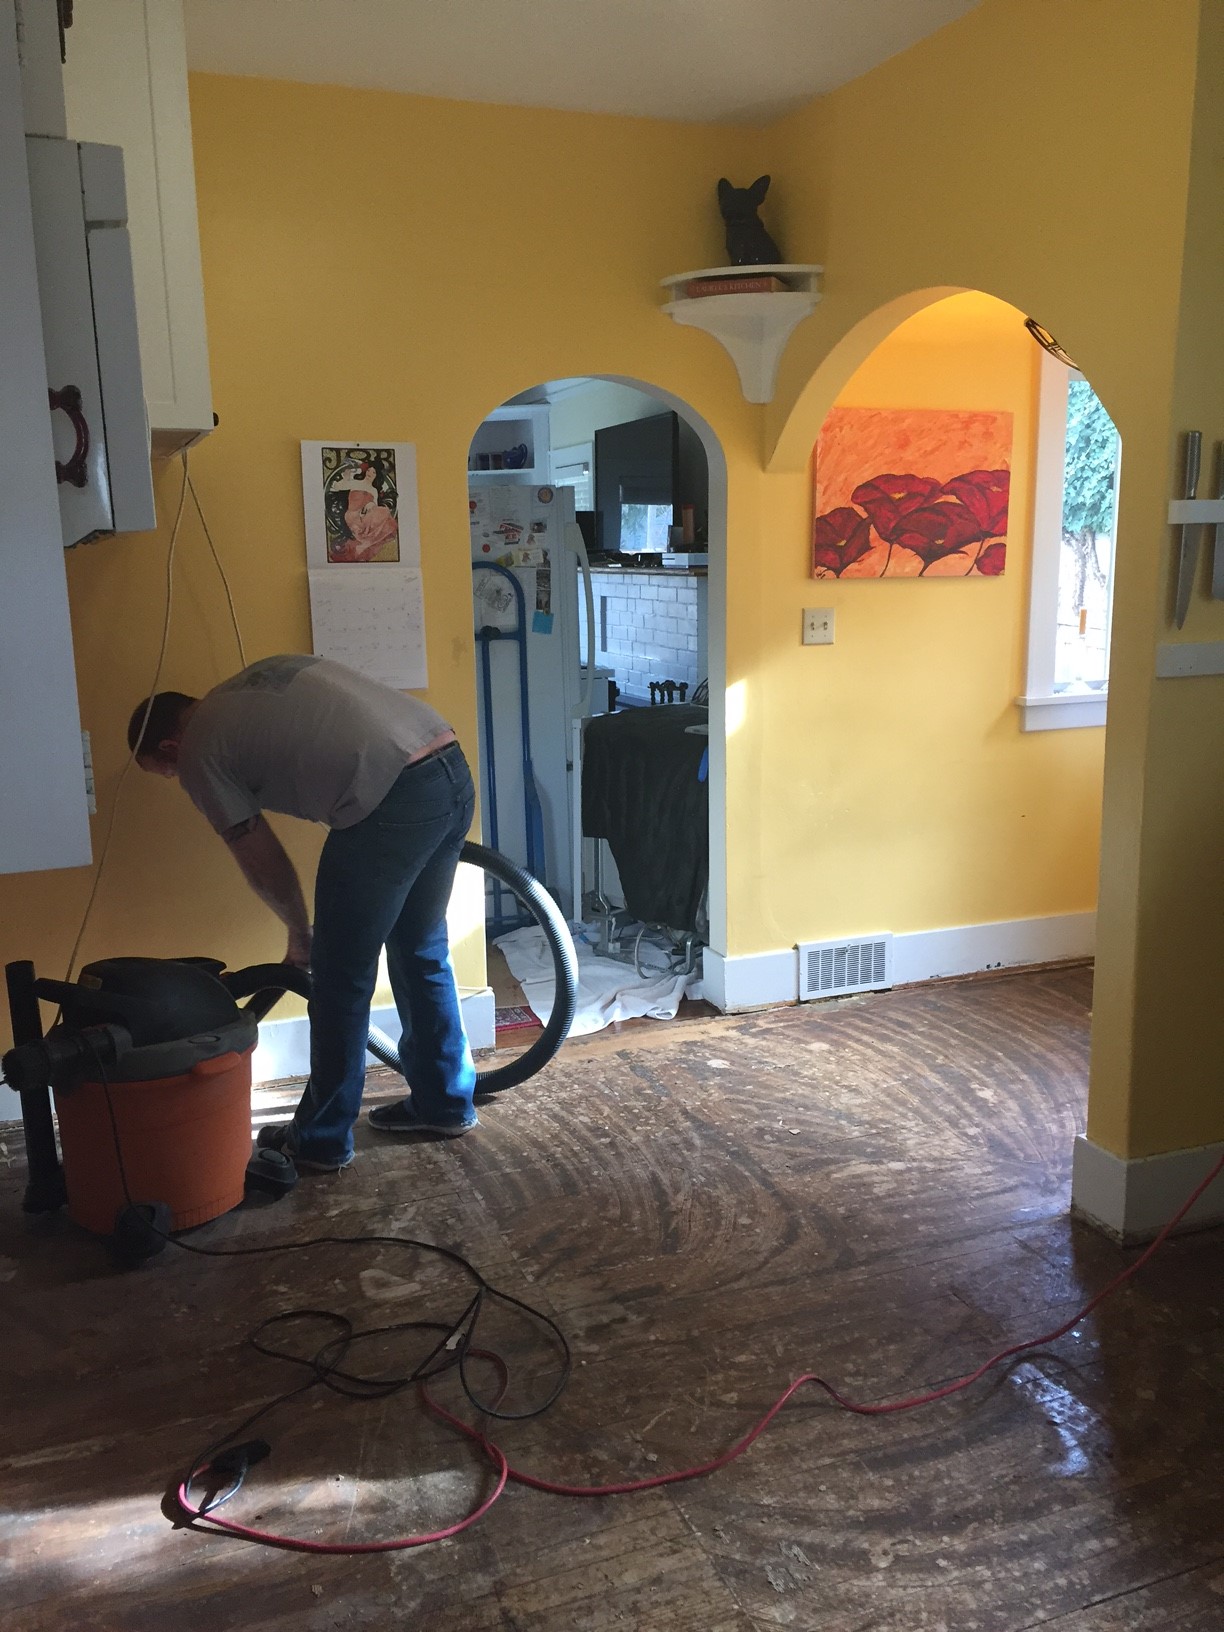
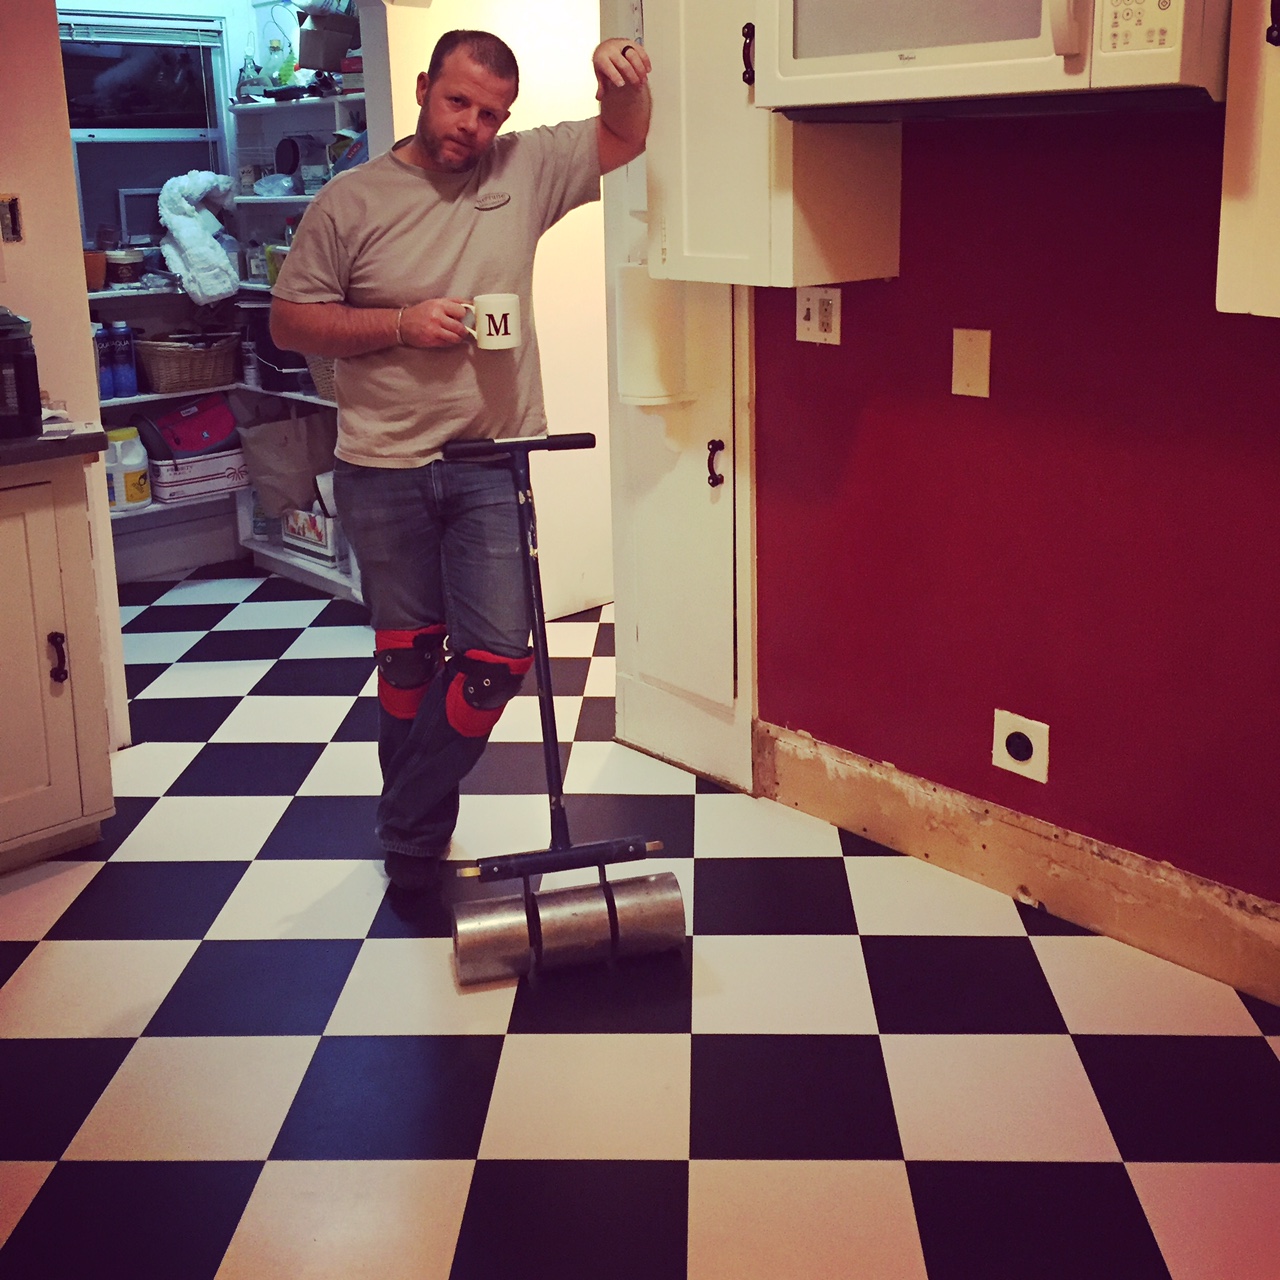
It has been a while since I laid a floor tile – like 18 years.  Things haven’t changed though and while time consuming and very detailed – lots of steps – I still remember how it is done.  There was no way that I was going to pay someone to do a job that I can/could do, so I took on the task of installing a new kitchen floor in our house.  the last of the major projects that I took on during our home remodel.

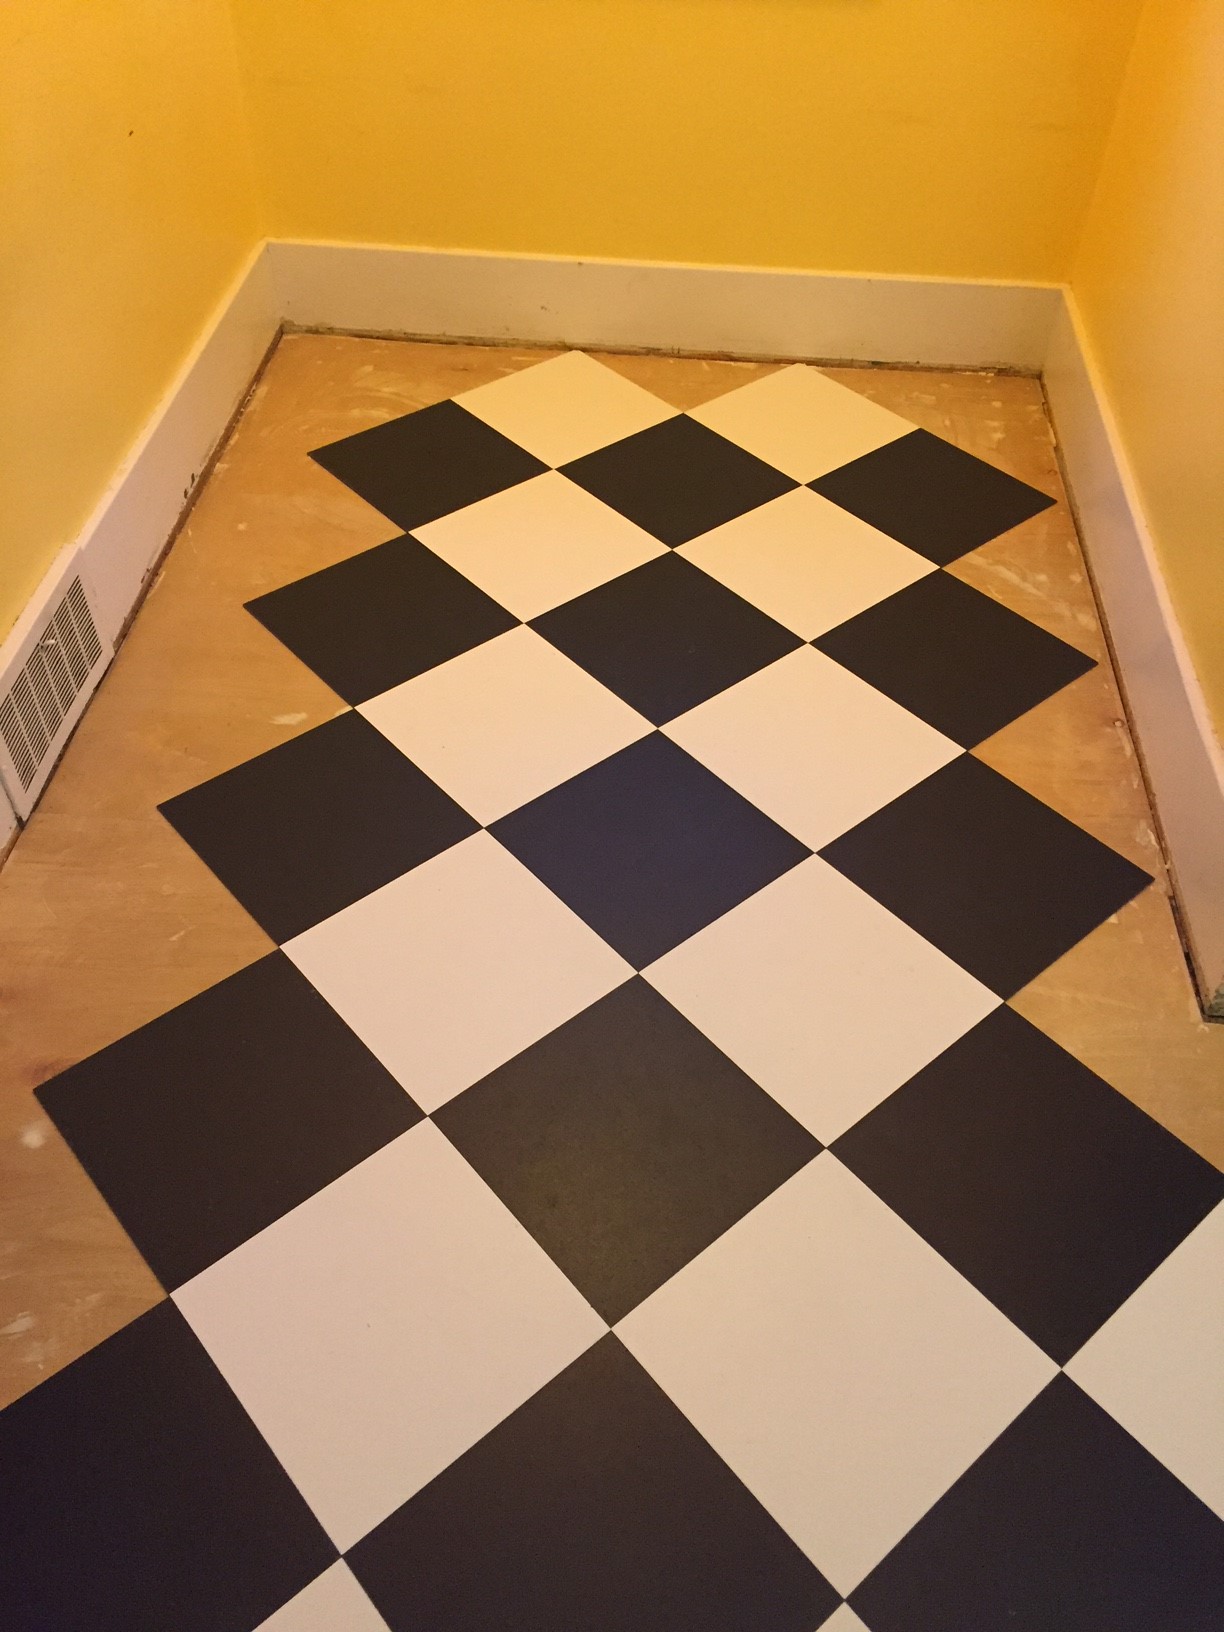
The job is now done and looks great.  Most importantly though, my wife is happy.  She has a new kitchen floor and it is exactly what she has wanted for years: a black and white checker board kitchen floor that is laid on the diagonal.  I am glad she is happy, because I REALLY don’t want to redo it for the next 90 years or so.

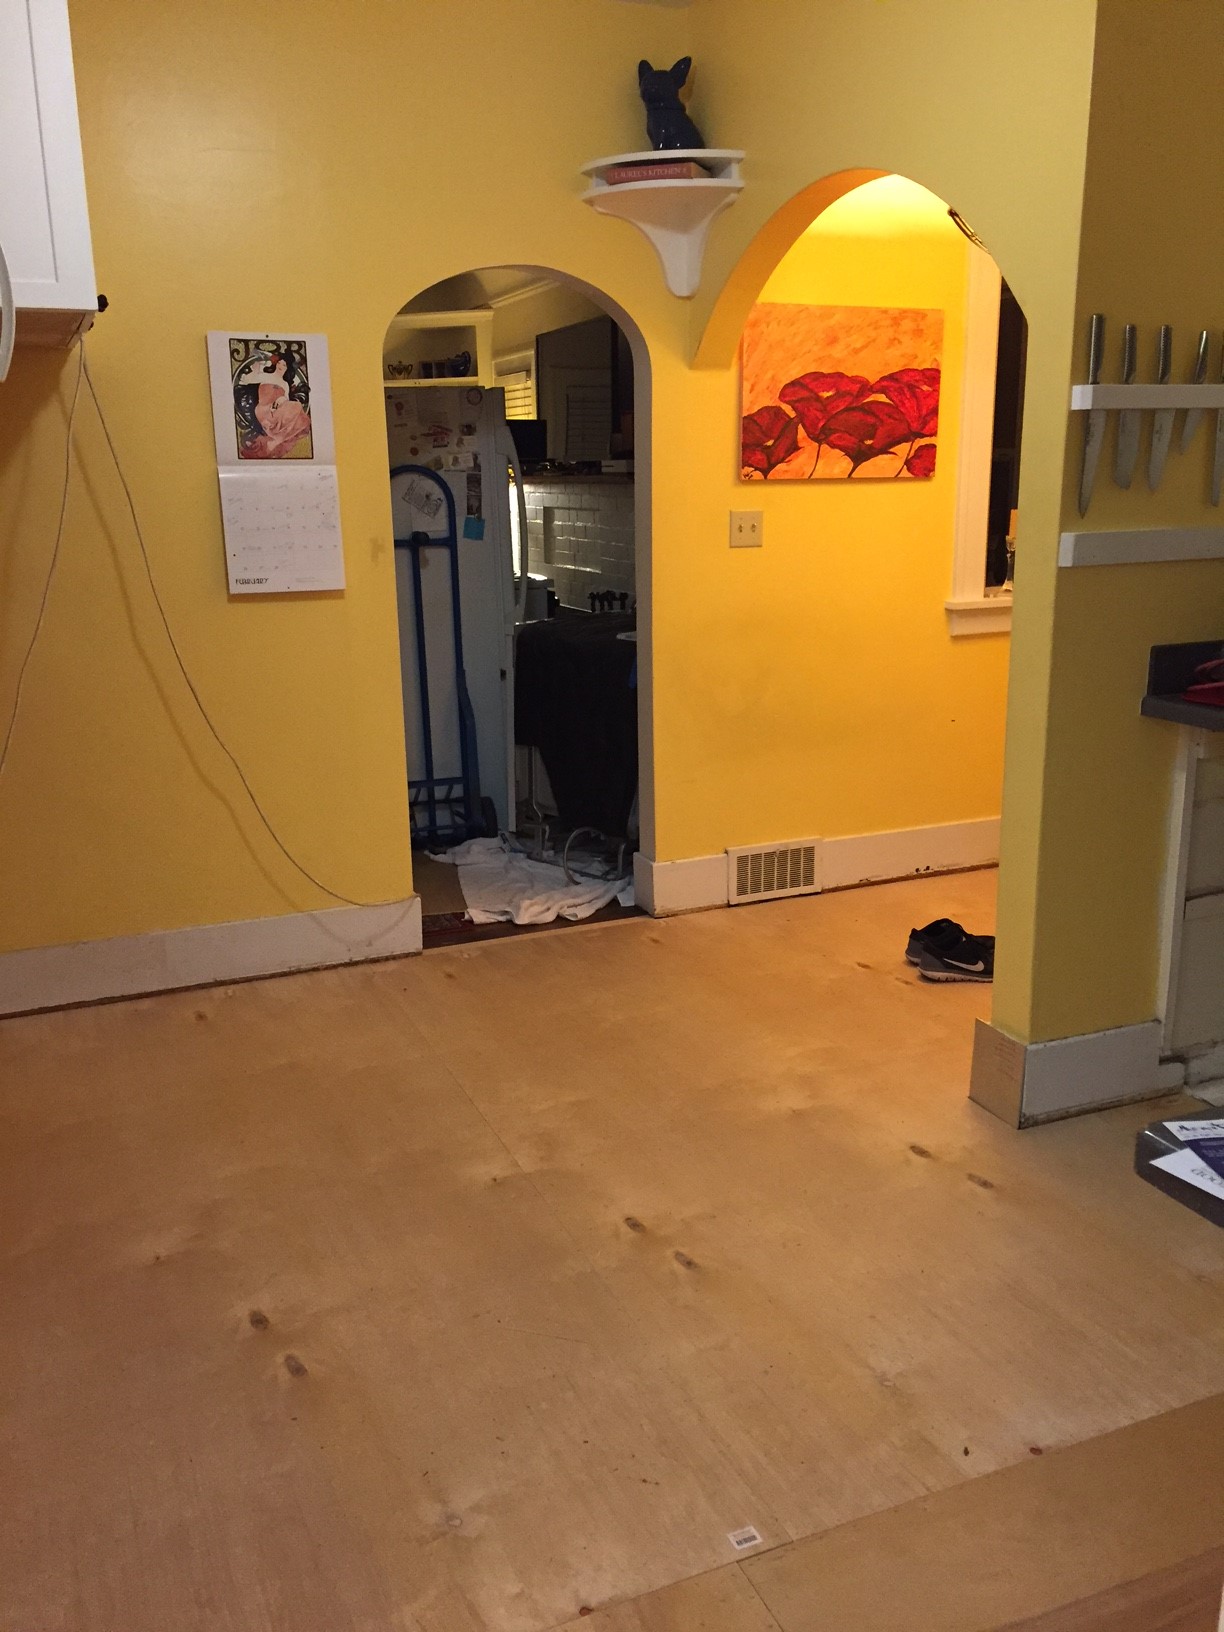
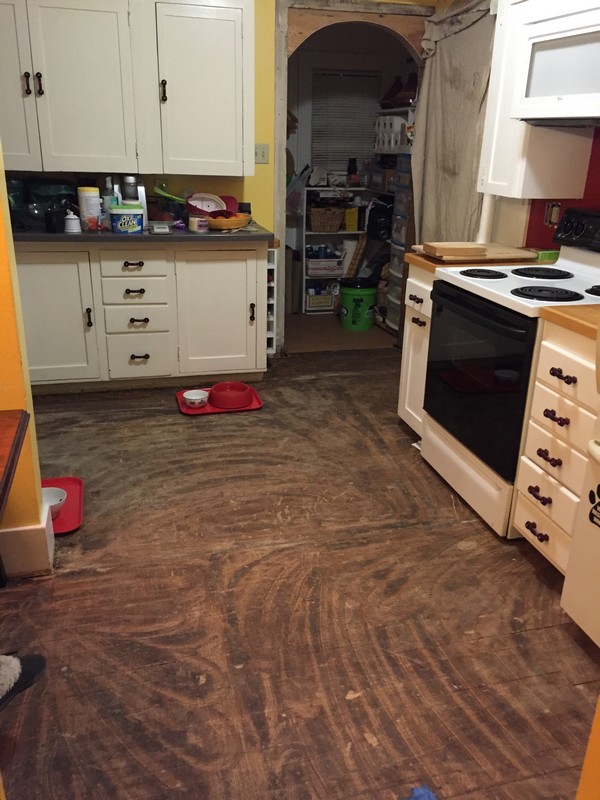
After ripping off 7 layers of old flooring, filling holes, patching a couple sections, removing 40+ screws and 100+ staples, and scrubbing the sub-floor clean, we were ready to start.  Starting about 9:00 one Saturday morning, I cut and laid ¼ inch water resistant underlayment – stapling in the field every 4” and along the seams every 2” with narrow gauge crown staples.  Starting about 10:00 the next morning, I vacuumed the whole space 3 times to clear any and all debris and locked the puppies out of the kitchen.

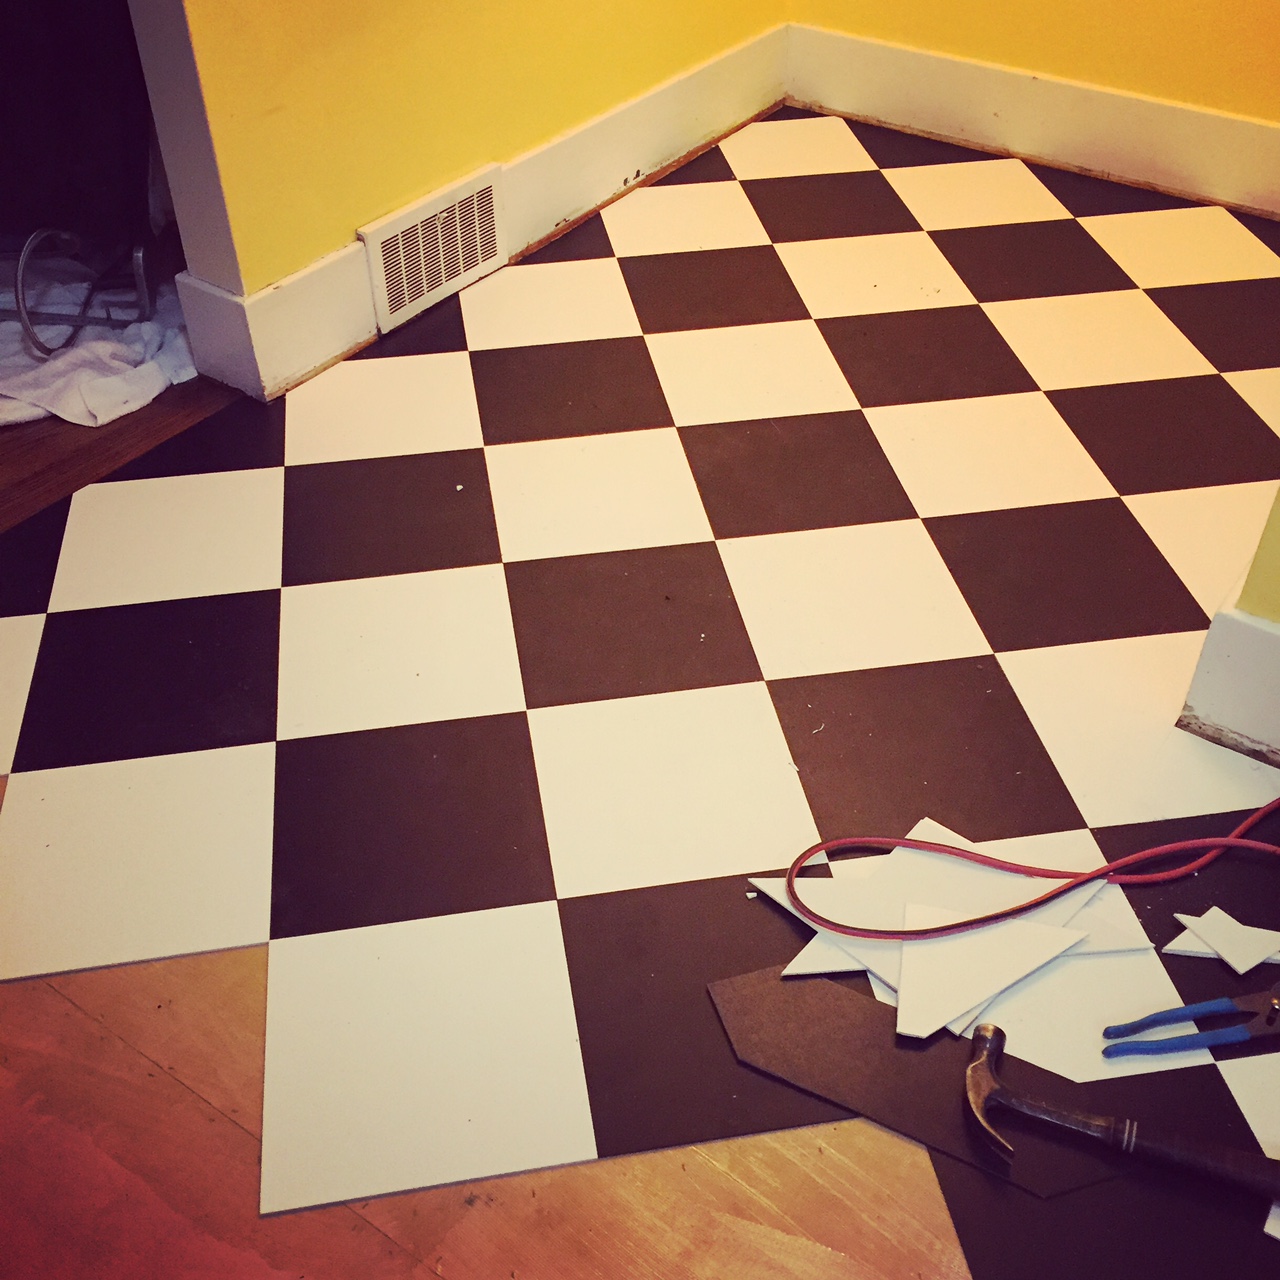
Because there is not ONE SINGLE square or plumb wall in my entire 90 year old house, I snapped a grid in the middle of the floor, squared from the doorway leading from the living-room, so that it would look square as viewed from the main room of the house.  I applied glue on ½ of the floor and started in the middle of the room and worked toward the south wall/breakfast nook.  Stamps-With-Foot cleaned tile as she pulled it from the cardboard boxes (success is in the details) and handed me them as I laid the field and she cut most of the edge pieces as I marked them.  Her help was GREATLY appreciated.  We laid the other half of the floor, starting about 6:00pm Sunday evening and finished the last piece about 11:30pm.  Not too shabby for one weekend’s worth of labor.

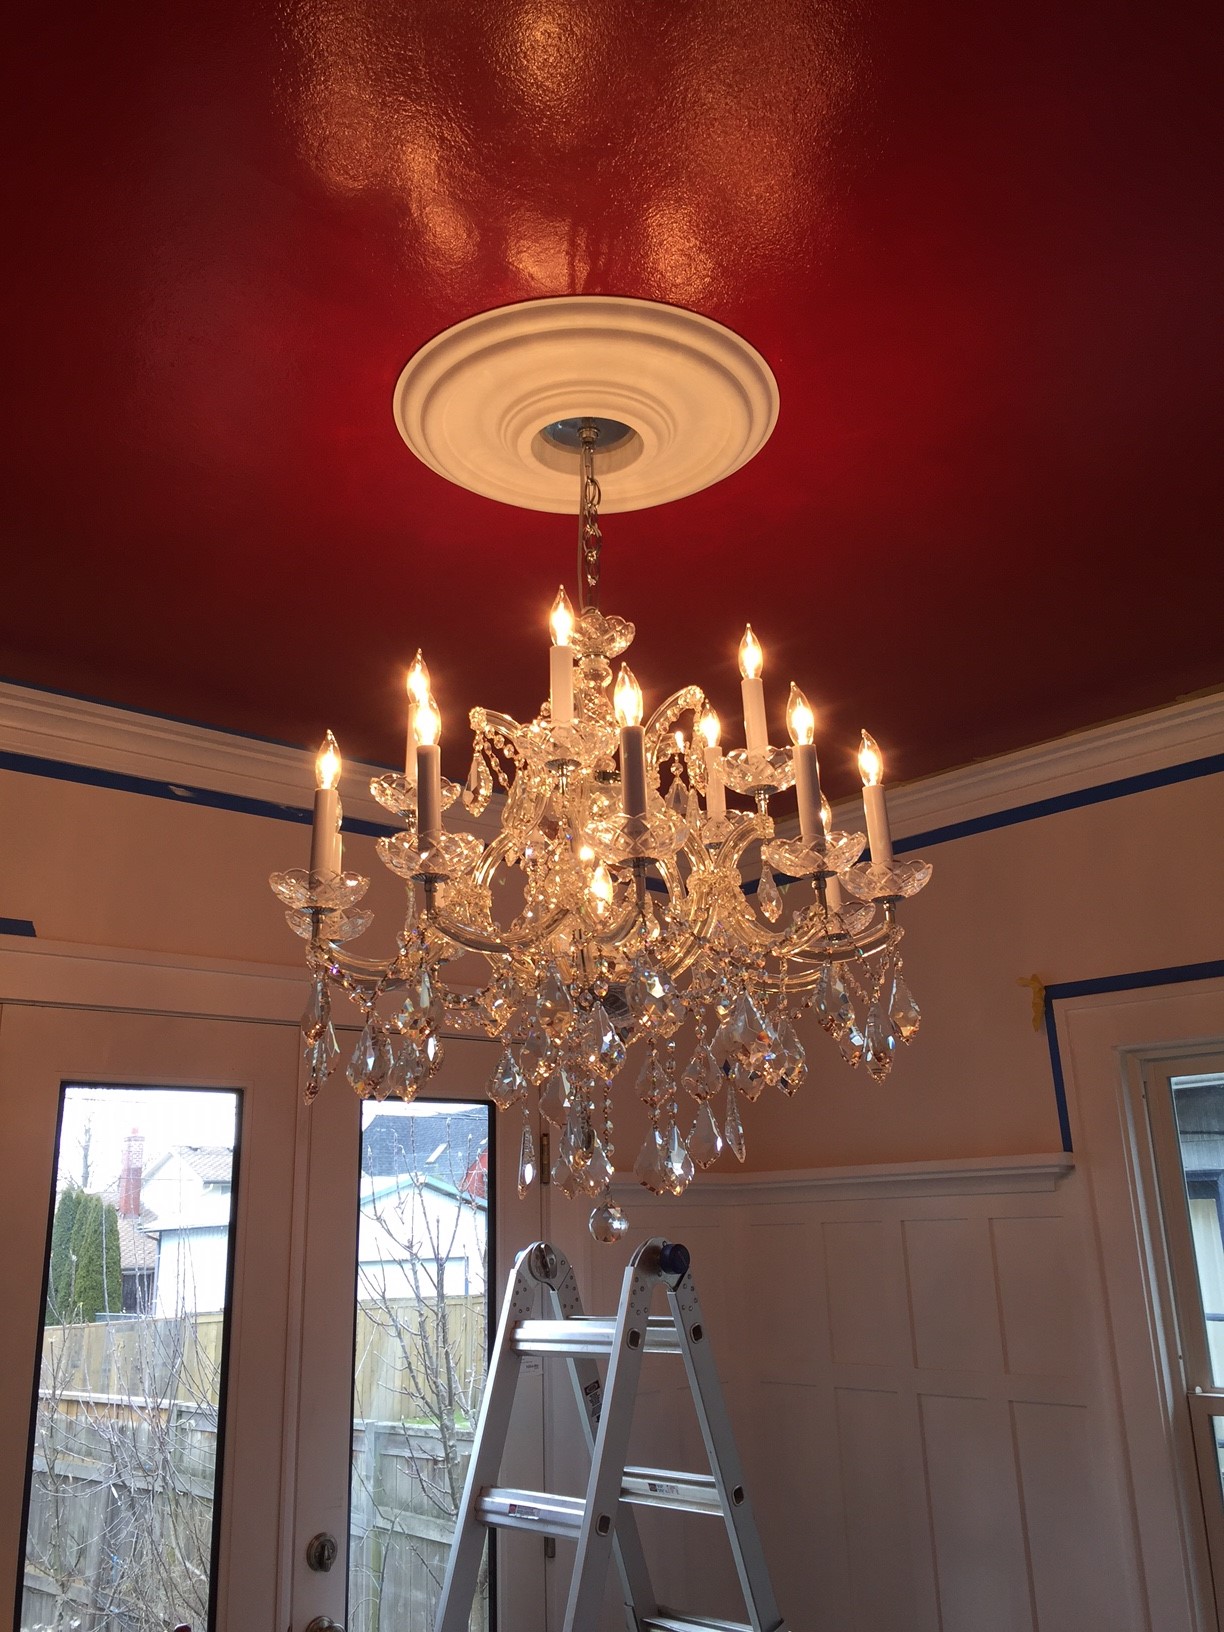
I let the glue cure for five days before sealing and then applying 5 coats of satin floor wax.  Pre-painted (by me) ¼ round trim was applied around the edges of the walls and cabinets before I very carefully brought the appliances back in and reinstalled.  The VC tile I used should outlast my grandchildren and just needs to be scrubbed every other week, then stripped and re-waxed once a year if so.

matt-talley-_-new-kitchen-floor-2017-6matt-talley-_-new-kitchen-floor-2017-7matt-talley-_-new-kitchen-floor-2017-3matt-talley-_-new-kitchen-floor-2017-2matt-talley-_-new-kitchen-floor-2017-4matt-talley-_-new-kitchen-floor-2017-8matt-talley-_-new-kitchen-floor-2017-9matt-talley-_-new-kitchen-floor-2017-1

My Wife’s Prized Chandelier Almost Made Me Poop Myself

We are in the house remodel home stretch. Just small trim details left on the main floor. One of them being my wife’s chandelier installation. I had planned to install the kitchen floor this past weekend, but Stamps-With-Foot had other plans. She sat me down over coffee Saturday morning and made it clear that my plan was out and that her sparkly lamp was in. Always a fan of choosing my battles wisely – into the dining room I went.

I needed to caulk the new dining room crown molding and prep it for paint before I could install the ceiling medallion/escutcheon for the light. It took two passes and some light sanding, but all the cracks and gaps are filled and we were ready to hang the crystal and steel behemoth around 4:00pm on Saturday. I had my wife sitting in the attic holding the chandelier by its safety cable while I wired it to the ceiling junction box. Like in a really bad sit-com, there was a “ping” noise, the safety wire popped, and the stupid-expensive hunk of cut glass and metal headed to the floor. It happened like it was all in slow motion. Now this thing is not small. It is not light. It did not come with handles. From the top of a six-foot ladder, I instinctively reached way out and grabbed her prized chandelier as it fell. I teetered for a second on the top of the ladder, having flashes of crashing to earth and how many stitches I would be getting, before the ladder stopped moving and I was able to slowly walked the beast down to the floor. I did have to check my britches as it was a rough couple of seconds, anything could have happened. Thankfully, just one single tiny glass bit cracked in half from the jolt – super glue will be the answer. The ceiling medallion also popped loose and I had to pull it down, remove the adhesive and remount it, afterward clamping it to the electrical box and taping the edges to the ceiling so that the glue would set up overnight.

After getting the medallion in the air, I went to Home Depot, purchased some 1/8” stainless steel cable and with a swaging tool -everyone should have their own… 🙂 , I remade the safety cable. After waiting until the next morning, I spent an hour installing the beast. My wife danced around with giddy joy when I flipped the switch after all twenty of the 45watt bulbs were installed. Happy wife, happy life…

I will be done painting the trim this week, the blue and yellow tape will come down,  and then the dining room is 100% done. On to the Kitchen.

matt-talley-chandileir-install_2017-1 matt-talley-chandileir-install_2017-2 matt-talley-chandileir-install_2017-3

House Remodel Update – Mid-March 2016

All of the demolition work is now done and the rebuild has started. Electrical is moving along, the City inspector signed off on the new HVAC (there is a permit inspection for the basement still to come), and all of the rough work on the main floor is complete. The once scary attic is now clean and waiting for a reinforced floor and new spray foam insulation.  Some of the trim in the dining room and kitchen is done, specifically the cove/crown on the cabinets.  All the doors are now hung, and the Wainscoting in the new dining room is 90% up. I need to finish up around the double door and fill and prime/paint.

Matt Talley_house Remodel_016

Matt Talley_house Remodel_017

Matt Talley_house Remodel_018

Matt Talley_house Remodel_020

Matt Talley_house Remodel_022

Matt Talley_House Remodel_030

Matt Talley_House Remodel_032

Matt Talley_House Remodel_033

Matt Talley_House Remodel_034

Matt Talley_House Remodel_035

Matt Talley_House Remodel_039

Matt Talley_Attic Remodel 2016_006


Next steps:
Plumbing
Basement bathroom
Finish electrical
Camera system
New window install
Coffered Ceiling in Dining Room
Hutch built in the dining room vestibule
New security system (Hate ADT)
New drywall main floor
New main bathroom vanity
New Kitchen floor (both decision and install)
Finish trim out
balcony install
Attic floor install – pending engineering review
Attic and wine cave insulation – yes, we are that bourgeoisie
New basement door and back door – both will be dutch doors
Main floor hardwood floor refinish
Basement drywall finish and paint – pending city inspection
New carpet in Basement
Garage build

Tools I brought with me from the old country…

When planning our move to Toulouse, I came to the realization that I would not be able to take my entire shop with me. I didn’t relish the idea of replacing all my power tools and saws with 220vt/60Hz versions, only to have to sell them in a couple of years when we move back to Seattle. I decided that I would bring mostly my hand tools and and spend some quality time working small projects, cutting dovetails, tuning my planes, etc… There were three 24″X24″ boxes and one wooden chest full of edge moulding planes, Stanley Bench Planes, 4 rolls of chisels, mallets, Japanese saws, hand drills, dovetail tools, axes, draw knives, my half set (#2 – #18 even) of 1850ish Gleave hollows and rounds, squares, jigs, rasps, and assorted joinery paraphernalia.

My plan is to use the time here to do the detail work that I am usually in too much of a rush to even contemplate: carved scroll-work, mortised frames, insets, layered stain finishes, edging with the moulding planes, some light carving, maybe even cutting a few linen-fold panels. I have done a couple of little things already, but my first big task is to build a HEAVY work bench so that I will have a proper work space: I am going with a split top Neo-Roubo without a leg vise. I will be installing a cast iron Front Vise and a Screw Vise on the tail of the bench instead. No cabinets underneath so that I can store a shooting board and a Moxon vise. It WILL BE coming home to Seattle with us.

In the interest of full disclosure: I am not a neo-Luddite – I did buy an orbital sander right after we got here and I shipped my Ryobi 18vt tool set (circle saw, 2 drills, reciprocating saw, flashlight, & jig saw). The same sets are sold here and I got a 220vt charger that works with my existing batteries and picked up a couple of fresh new lithium-ion batteries in the process. Aside from the battery tools, I ordered a large wood lathe so that I can make furniture legs, tool handles, bowls, jar lids, platters, etc. I brought all my lathe chisels and chucks with me and I got a model that uses a DC motor that I can change over to one that runs on US current when we move back. It is much larger than my lathe in Seattle and will be a valuable addition to the shop there when we return.