It seems that La Maison du Talley is in constant project mode. There are two furniture refinishing projects happening in the unfinished side of our basement, there is an inch of sawdust on my shop floor, the front and back yards are still in various stages of completion, and my project idea/sketch book is quickly filling with new stuff.
I have finished a good number of things on my plate and have vowed to finish everything currently under construction or re-construction before beginning anything new. I decided that as winter closes and spring dawns to take advantage of the better weather and rising temperatures (better for painting and finishing) and get some stuff knocked off. In that vein, I had a very productive weekend:
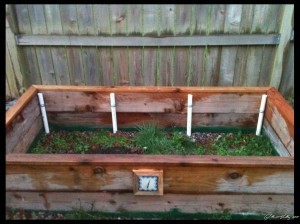
I built and installed an irrigation system for the backyard made with ¾ PVC. There are drip hose attachment points, ball valves, and splitters for ancillary hose attachments. I built it so that I can later install a timer for watering the fruit trees and veggies when we are out of town and a coupler to flush the pipes with compressed air before the first freeze every year. The total cost was less than a $100, I spent maybe 8 hours of labor from concept design to finish, and the shear convenience of it will pay off in spades in the years to come.
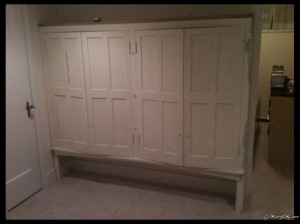
Last spring I acquired the top half of a built-in dish cabinet/hutch that had been ripped/sawed out of a 1920’s house. It was missing one side, had no back, covered a thick coat of unknown layers of paint, and scrapes and gouges all over it. I looked past its current state and saw some potential for some period appropriate and beautiful basement storage, so I picked it up for a steal and brought it home. It languished there in the basement, covered with plastic and accumulating junk on top through my shoulder recovery, the excitement of the summer, and during our fall of rest and relaxation.
I got serious about it a couple of weeks ago and after, squaring the cabinet with joined pipe clamps, I installed a beadboard back – real beadboard and not the plywood facsimile. I had Stamp-With-Foot help glue and drive a few nails so she would get an appreciation of the scope of the rebuild. I also took her with me to the millwork store and she picked out some decorative edge molding that I incorporated into a built up crown detail. I really appreciated her input as it made the project seem more like ours than just mine. After re-gluing and adding screws to all the joints, I installed a new side piece and 3” structural beams for mounting it to the wall – it will be holding a good bit of weight and I wanted the load evenly distributed on the whole piece.
My little wife helped me man-handle it into place and attach it to the walls. I spent an evening last week gluing up a custom top with clear grained popular and pine – it will have additional recessed storage in the top. While milling the edges on the top edge, I realized that I had used my father’s tools to do almost the entire job. I made me both smile and a little sad. My father helped give me the skill to build cabinets and furniture; he taught me that doing something right and making it beautiful were one and the same. I am using his tools because they became mine when he passed away and it made me wish that he were still here to see my adult ability to build and create, to help teach my son (his namesake) the same lessons I learned, and to just sit quietly and listen to him talk about his day and experience his warm smile.
I spent Saturday night and Sunday evening installing the new top and bits of trim. I built all the pieces perfectly square and there was a hiccup during installation as the walls of our 1928 house and the actual dimensions of our “new” 1920 cabinet are anything but… I called the wife down, she gave me her opinion (better than my own in this case) and I spent some quality time with a razor-sharp draw knife, a svelte jack plane, and creatively used a couple of long shims to make it all both work and look good. All the trim is now installed and the whole thing turned out really nice. We will do a little more scraping before priming the bare wood and paint it all with a gloss white trim paint. I will ost about it again when the finished cabinet is ready for unveiling.
Note: Stamps-With –Foot has now informed me that this is the last project that I will do in the house until I install a dishwasher and build the additional cabinets in the kitchen. I will NOT complete the 1942 Philco Radio refinish, nope to reseeding the grass, the nook table remake will wait, no new fruit tree planting, the crown and headboard in our bedroom has been pushed and gym entertainment/storage cabinet is nixed until the Kitchen is done…


It looks like it will turn out nice – the cabinet. Man, you really need to stop “working” in the raised beds and actually plant something. Pretty soon it will be cheaper to buy a grocery store than to grow your own.
Don’t let the wife dictate your schedule, the next step is you not allowed into the mountains and permanent toilet cleaning duty!
“If Momma ain’t happy, ain’t nobody happy…”
She wants a nice kitchen. I get it. Who is to say that I can’t build a little table or a jointer-plane case while the glue on a cabinet box is drying? I will take care of the kitchen for her, but in reality it is for both of us. I love building cabinets and matching the style and built of or originals while putting in updates like shelf slides, vertical storage, and lighting will make me happy as well.
~Matt