Labor Day Weekend – 2017

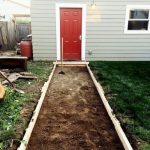
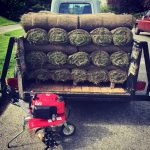
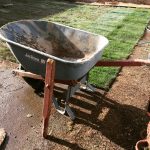
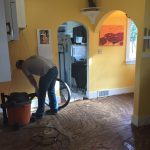
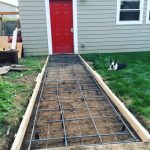
I was at home for Labor Day weekend this year and spend the time working on the house and yard. I dug up a cubic yard+ of dirt where the garage walkway will be and then built concrete forms, added rebar, and welded wire for a 20′ X 4′ sidewalk pour next week.


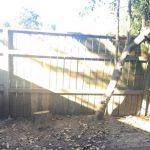
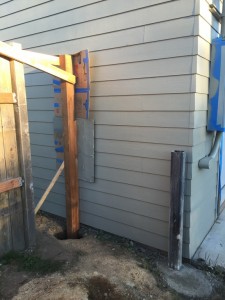
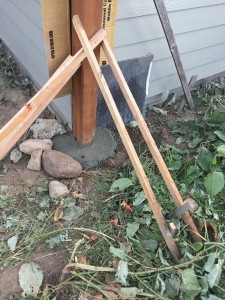
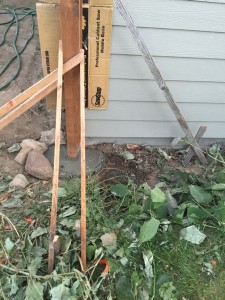
I also took a couple of hours to rebuild a 10′ section of fence on our south side. A 40′ (12.2m) tree had grown through it from the neighbor’s yard. He let me cut it down a couple of weeks ago and rebuilding the fence was required.  Note: Stamps-With-Foot did not see me roped up, hanging in the harness, topping the tree, so I didn’t get in trouble for being a “stupid man” until later 🙂

Garage, lawn, and house work this weekend

Worked in the basement a bit to make Stamps-With-Foot’s sewing room/project space usable.
Made two trips to the dump.
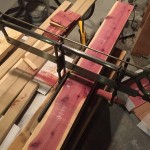
Built screw clamp holder.
Did a little Amazon shopping for a gift and a part that I needed.
Went shooting at the range – shot like a blind squirrel.
Cleaned pistol, muttering disappointment in self whole time.
Hip super-hurt all weekend.
Went to see Atomic Blond for date night. Great movie.
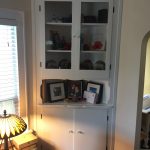
Bought two bookshelf cabinets for garage at Second Use – got a super good deal (hard to do these days at Second Use)
Picked up 2 cases of oil at discount from NAPA
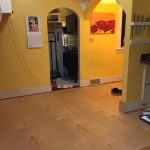
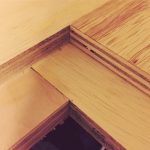
Put down a little 1/4 round trim in dining room.
Washed Stamps-With-Foot’s car.
Filled the washer fluid.
Worked on a couple of films.
Cleaned lighting contacts on the trailer light harness.
Took a load of recycling to the dump.
Organized shop a little and hung the two cabinets.
My shop now has all the storage I will ever need – until I fill it all up 🙂
Consumed some rosé while sitting in sunshine in back yard.
Snuggled wife and puppies.
Installed my welding cabinet and filled it with helms, jacket, gloves, sticks, and welding tools.
Made a happy face.
Did not mow lawn…
Ran two lighting circuits and one 220VAC circuit in garage.
Need to install the 4 florescent lights.
One 220VAC circuit to run and all shop wiring will be complete!
Flew drone a bit to work out new firmware update.
Took a few macro photos with camera
Spent too long on Instagram and Twitter.
Ignored the grass some more.
Changed oil in my father-in-law’s truck.
Picked-up/was given wrong oil filter!
Said dirty words…
Made it to parts store 3 minutes before they closed for new filter.
41 more oil changes and the lift pays for itself!

Film Friday – Hatchet Handle Replacement

I seem to be keeping with a theme – another Handle replacement. I promises that this is the last one for a while 🙂 My next film will be from an adventure in China or a snowboarding mishap.

This hatchet was given to me by a neighbor a little while ago. It had a hard life: the handle was chipped and split and the heel had been used for driving God only knows what and had mushroomed out a bit. Twenty minutes of my time, $12.00 in total cost, and I have a repaired tool that will outlast me. It is destined for a kindling chopper and glamping chores when my wife and I venture into the wilds “roughing it” with a camper trailer.

Film Friday – Hammer fix

We are well on our way to becoming a doomed and disposable society. Example: After trying in vain to buy a handle replacement locally for my broken framing hammer, I had to buy one online and have it shipped to Seattle from the East Coast. I didn’t need the fancy matching OEM handle. Most any would have worked with a little shaping using a rasp and file. Neither Home Depot nor Lowes sells replacement handles for hammers or hatchets anymore – just handles for garden tools. I had four people try to sell me a new hammer while searching though. Apparently, just spending $80+ is easier than fixing a tool with a replaceable part designed into it. Lazy mother f….. Son of a …

The hammer holds no special value or spot in my heart or personal history. It wasn’t smuggled into the US 300 years ago by a ancestor who built and defended his home with it… Nope, just a framing hammer that someone gave me once. It had already been used and abused for years before it fell into my hands. The point was/is the thing is mine. A tool that I use to make stuff with. A tool that is MADE to have the handle replaced and somehow there are not enough people with the skill and drive to do such a simple task to keep them stocked on the shelves of multiple large national chain building supply stores. I stand by my statement that the movie Idiocracy is a documentary filmed by time travelers.

The whole replacement cost me $12 for the handle and shipping + 20 minutes of my time. A lot better deal than $80+ for a new hammer. As an added bonus, I get to rant a little and make a slide show 🙂

Going Topless

I made a short film showing all the steps in removing the Hard Top from my 1986 CJ7 Jeep for the first time in 1.5 years. I couldn’t round up the help to pull it off, so I put on my thunking’ cap and used the lift. The garage is a MESS, but my excuse is that we are still remodeling the house and it has been a wet winter and spring so there are materials and projects in work everywhere.

Film Friday – Corner Cabinet Up-Cycle/Rebuild

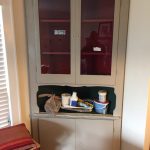
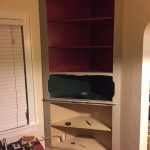
Way back in November of 2015, just after our return from living abroad for two years, I bought a set of hard used, little loved corner cabinets from a local salvage place. I have spent an hour and there installing, building trim, sanding, de-gunking, stripping old paint, priming, painting, and more painting. It has only taken 18 months, but they are now installed and look like they have been in our living room since the very first day.

Here is a slideshow/video tale of the steps taken in the project: What it was to what it became.

My Week in Review

This past week has been a week of mish-mash happenings:

90-day Post-surgery hip appointment: Could have gone better.
Fruit tree pruning
I built a lid for the compost boxes
A rat didn’t like my lid and chewed through the side to get at the worms in the compost bin
I said dirty words
Mounted 7 up-cycled cabinets in the garage
Finished painting 80 liner feet of 1/4 round trim.
Sweep and cleaned GROP
Organized some stuff into new shelves and cabinets.
Finished painting the corner shelf doors – 5 total coats of fresh paint
Installed the hinges and hung the doors on wrong cabinets
Said dirty words
Re-hung doors on the correct cabinet.
Scratched paint
More dirty words
Touched up paint
Finished corner cabinet install
Did some Physical Therapy for my Old Man hip
Mowed and edged the yard
Read a book
Made a few Instagram and Twitter posts
Amazon sent me a new tool!
Flew drone one afternoon after J-O-B
Planted the boxwood shrubs
Bought garden starts at Nursery: tomatoes, corn, squash, zucchini, peppers,herbs, lettuce, etc…
50+ hours at my J-O-B, hustlin’ to keep us fed and the lights on
Watched about 2 hours of NetFlix
Gave away a bed in our home office
Had to delver it to new owner
Drank some French wine
Worked on cedar log garden table
Bought couch/guest bed for the office/TV room
Braved the gauntlet at IKEA – three hours to pick up a pre-ordered couch 🙁
IKEA gave me a $50 discount for the trouble
Had to source clear glass Victorian-style pull knobs for the corner cabinet doors
Spoke to both of my children for Father’s Day
Heart Happy
Planted summer garden
There was some coffee drinking and puppy snuggling
Took top off of Jeep for the first time in 1.5 years
Started Raining the second I took it out of the Garage
Made grumpy noises
Had coffee and listened to a bluegrass jam session at favorite coffee shop
Watched a movie
Was prolific on Twitter and Instagram
Murdered some dandelions
Rode around neighborhood on errands in topless Jeep when it stopped raining
Made happy noises
Sent some J-O-B e-mails from home
Started reading American Gods out loud with my awesome wife
Went to bed to start it all over again on Monday morning

Matt Talley_garden_Seattle_2017 (2)

Matt Talley_Corner Cabinet Rebuild_2017

Matt Talley_garden_Seattle_2017 (1)

Making the yard pretty for 2017

Our back yard has been a mess for over a year: Stacked with left over construction debris, seriously over-grown raised garden beds, unturned compost bins, blackberries along both fences, piles of landscaping stones, weeds, etc.… The front yard was presentable, but only just barely. 2016 was the year of house and garage construction and 2017 was meant to be the year that we focused on the yard. Surgery delayed that a bit and the state of the grounds at La Maison du Talley was getting embarrassing.

I had a couple of guys come out and take a look at our mess to see what it would cost to get it back in home-show worthy shape. I didn’t like either answer.  Without going into too much detail about the different bids, the low one was $3500 and the high was almost $5000. There was no way in Hell that the frugal DNA coursing through my veins, passed down from both the Talley and Webster lines, would biologically allow me to spend that kind of money on grass, mulch, and a few flowers.

After I was well on the mend and cleared by my physical therapist, I did some planning, logistic estimation, material cost math, and decided to do it myself with a bit of casual day labor.  I also decided that the mature ornamental cherry trees I wanted for the parking strip would have to wait, that I didn’t need to bring in topsoil and plant grass seed. I scaled back the dream a little bit, bought 86 rolls of sod, 19 bags of mulch, 8 bags of garden soil, some boxwood shrubs, 15 Spanish lavender plants, and let my sweet wife buy all the pretty flowers that her heart desired.

In two days, the front and back yards were transformed!  I hauled away 1600 pounds of yard waste, made one dump run for trash, one run full of recyclables, and we spent less than $1000.  We will spend the next few weeks watering and fussing over little details, but by July 4th, we should have Ireland-green grass, pretty flowers, healthy fruit trees and the BBQ grill roaring. Money and time well spent.

matt-talley_yard-redo_-may-2017-1 matt-talley_yard-redo_-may-2017-2matt-talley_yard-redo_-may-2017-3 matt-talley_yard-redo_-may-2017-7matt-talley_yard-redo_-may-2017-4matt-talley_yard-redo_-may-2017-5 matt-talley_yard-redo_-may-2017-15matt-talley_yard-redo_-may-2017-11matt-talley_yard-redo_-may-2017-6matt-talley_yard-redo_-may-2017-8 matt-talley_yard-redo_-may-2017-9 matt-talley_yard-redo_-may-2017-10matt-talley_yard-redo_-may-2017-12 matt-talley_yard-redo_-may-2017-13 matt-talley_yard-redo_-may-2017-14

Film Friday – The Garage Build Film Part 1

I’ve had a number of people on various web forums, 6 sets of neighbors, a few friends, and a ton of folks in our area ask me some detailed questions about our garage build: size, foundation, demo, siding, wiring, roof, the car lift, etc…  As I have been making some videos while rehabbing the hip, I thought that I would turn my garage build into a three part YouTube series to answer most of the questions and have all of the information documented in one spot. The first one is done and up now and the second should be done in a few weeks.

This one and the next are from pictures taken during the build, with a voice over.  The third will be a mix of videos, stills and some drone shots.  I learn something every single time I put a video or slide show together, so my hope is they get more and more watchable.

I didn’t have the time or facilities to do it in this video, but I would like to use my own guitar, banjo, ukulele, fiddle, and mandolin picking for the soundtrack on future videos. My son, brother-in-law, and any friends I can con into it will also be future soundtrack contributors.

Boat Lust

So, you may or may not know this about me, but even though I currently own a couple of small boats, I have MAD Boat Lust.  I am a member of the Center for Wooden Boats, I get Wooden Boat Magazine & Small Craft Adviser Magazine every month, go to the Lake Union, Seattle, Portland, and Port Townsend boat shows every year…  I follow four sets of Blue Water sailors on YouTube, am trying to con my wife into taking a sailing vacation (I am getting a hard NO! on that one currently), and almost bought a used 22′ lead keel sailboat last summer for “my son.”  I tried to sell it as his “learner Boat” and play up the father/son bonding time angle with it and my wife saw right through it.  To date, however, I have not come home to tell my with that “We” just purchased an Amel 55 blue water sailboat, a 47′ diesel powered Cabin Cruiser, a Chris-Craft in need of some “light repair”, or a Hans Christian 33 kept in Bristol Fashion that “I” am planning to live on since said purchase would leave me homeless, devoid of my puppies, and divorced.

If my son, The Ruminator, lived in Seattle I wouldn’t mind a swing keel Columbia 22 or a Catalina 22 to gunk hole around the Sound in with him.  A Catalina 270 LE would make my heart go pitter-patter as well, but I am a realist (-ish) and very aware of my current budget and available storage space.   A sailboat that I would only use a few times a year and have to pay moorage on, would make me very unpopular at home.  But, if someone has a 19′ WW Potter taking up space in their life that needs a new home, I would be game…

While what I WANT is a sweet little sailboat, what I NEED is a small outboard that that sits on a trailer in or beside the garage, that I can pop over to Blake or Vashion Island on, run up the Duwamish River a little piece, do a little salmon fishing on with my son or friends, haul a crab pot or three in season, find a secluded weekend beach for summer camping, etc…   It needs to have a cuddy cabin to get out of the shifty weather here in Puget Sound, some storage space to keep gear dry, needs to be light enough to be pulled behind the jeep when fully loaded, and fast enough to handle the tidal flow in the PNW.

Buying a finished boat, even used, like a Ranger Tug 21, a C-Dory 19, or a Boston Whaler 21′ Cuddy are WAY out of my price range, I have been perusing Craigslist for a 16′ -21′ hardtops, but the ones I have found are either gold plated & upholstered in unicorn foreskin or needs to be sunk.  So, in due course, I have been thinking about building the boat of need mentioned above.  I know, I know… I have a shit ton of projects already with the shop and house, but I won’t start the boat until Stamps-With-Foot agrees that the house is good and all the little projects at home are squared away.  Happy wife, happy life.

To digress a bit, my current home-built boat want is a Devlin Boats Dunlin 22 Cruiser with all the bells and whistles, but that too would be spendy, require me to quit my J-O-B to obsess over the details properly, I would have to rent out boathouse space for the duration of the build, have the time to build it, and would probably cause my sweet bride to up my life insurance just before “accidentally” pushing me into a wood chipper.

dunlin22side-1024x721 dunlin22top-1024x841


Back in reality, I am looking hard at building a couple of boats, including a Devlin Noddy 18.  It is something realistic to build over the fall and winter, in the space I have available in the F-Bomb Garage, and within my current budget.  Powered by a 4 stroke 50HP Honda or Yamaha, with homey little extras like: a sardine wood stove in the cabin, a crab pot winch arm on the stern, and lots of LED lights.  noddy16plan-devlin-boats_2017Devlin Boat Works in just south of us in Olympia and in addition to being a design house, they are a boat works and build all manner of craft there at any given time.  I sent a couple of e-mails and made some calls about the possibility of going down this summer if they have a Noddy or similar hull under construction.  We will see if it can be arranged.

I will have to wait just lust a little while longer to satiate my boat lust…

Update: May 2017

Nope.  Devlin is off the list.  I can’t find anyone on the boat forums that has built the Noddy AND I have not had a single phone call or e-mail replied to.  I don’t need to do business with someone who I have to beg to take my money.
The New Kitchen Floor is Now Installed

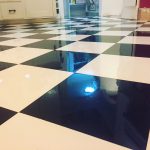
It has been a while since I laid a floor tile – like 18 years.  Things haven’t changed though and while time consuming and very detailed – lots of steps – I still remember how it is done.  There was no way that I was going to pay someone to do a job that I can/could do, so I took on the task of installing a new kitchen floor in our house.  the last of the major projects that I took on during our home remodel.

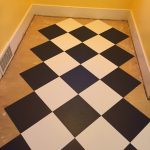
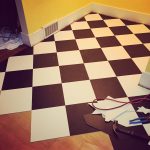
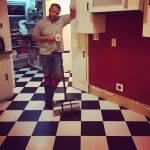
The job is now done and looks great.  Most importantly though, my wife is happy.  She has a new kitchen floor and it is exactly what she has wanted for years: a black and white checker board kitchen floor that is laid on the diagonal.  I am glad she is happy, because I REALLY don’t want to redo it for the next 90 years or so.

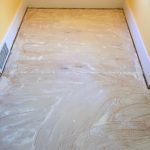
After ripping off 7 layers of old flooring, filling holes, patching a couple sections, removing 40+ screws and 100+ staples, and scrubbing the sub-floor clean, we were ready to start.  Starting about 9:00 one Saturday morning, I cut and laid ¼ inch water resistant underlayment – stapling in the field every 4” and along the seams every 2” with narrow gauge crown staples.  Starting about 10:00 the next morning, I vacuumed the whole space 3 times to clear any and all debris and locked the puppies out of the kitchen.

Because there is not ONE SINGLE square or plumb wall in my entire 90 year old house, I snapped a grid in the middle of the floor, squared from the doorway leading from the living-room, so that it would look square as viewed from the main room of the house.  I applied glue on ½ of the floor and started in the middle of the room and worked toward the south wall/breakfast nook.  Stamps-With-Foot cleaned tile as she pulled it from the cardboard boxes (success is in the details) and handed me them as I laid the field and she cut most of the edge pieces as I marked them.  Her help was GREATLY appreciated.  We laid the other half of the floor, starting about 6:00pm Sunday evening and finished the last piece about 11:30pm.  Not too shabby for one weekend’s worth of labor.

I let the glue cure for five days before sealing and then applying 5 coats of satin floor wax.  Pre-painted (by me) ¼ round trim was applied around the edges of the walls and cabinets before I very carefully brought the appliances back in and reinstalled.  The VC tile I used should outlast my grandchildren and just needs to be scrubbed every other week, then stripped and re-waxed once a year if so.

matt-talley-_-new-kitchen-floor-2017-6matt-talley-_-new-kitchen-floor-2017-7matt-talley-_-new-kitchen-floor-2017-3matt-talley-_-new-kitchen-floor-2017-2matt-talley-_-new-kitchen-floor-2017-4matt-talley-_-new-kitchen-floor-2017-8matt-talley-_-new-kitchen-floor-2017-9matt-talley-_-new-kitchen-floor-2017-1

My Wife’s Prized Chandelier Almost Made Me Poop Myself

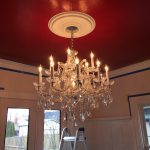
We are in the house remodel home stretch. Just small trim details left on the main floor. One of them being my wife’s chandelier installation. I had planned to install the kitchen floor this past weekend, but Stamps-With-Foot had other plans. She sat me down over coffee Saturday morning and made it clear that my plan was out and that her sparkly lamp was in. Always a fan of choosing my battles wisely – into the dining room I went.

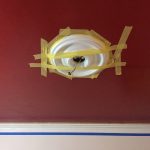
I needed to caulk the new dining room crown molding and prep it for paint before I could install the ceiling medallion/escutcheon for the light. It took two passes and some light sanding, but all the cracks and gaps are filled and we were ready to hang the crystal and steel behemoth around 4:00pm on Saturday. I had my wife sitting in the attic holding the chandelier by its safety cable while I wired it to the ceiling junction box. Like in a really bad sit-com, there was a “ping” noise, the safety wire popped, and the stupid-expensive hunk of cut glass and metal headed to the floor. It happened like it was all in slow motion. Now this thing is not small. It is not light. It did not come with handles. From the top of a six-foot ladder, I instinctively reached way out and grabbed her prized chandelier as it fell. I teetered for a second on the top of the ladder, having flashes of crashing to earth and how many stitches I would be getting, before the ladder stopped moving and I was able to slowly walked the beast down to the floor. I did have to check my britches as it was a rough couple of seconds, anything could have happened. Thankfully, just one single tiny glass bit cracked in half from the jolt – super glue will be the answer. The ceiling medallion also popped loose and I had to pull it down, remove the adhesive and remount it, afterward clamping it to the electrical box and taping the edges to the ceiling so that the glue would set up overnight.

After getting the medallion in the air, I went to Home Depot, purchased some 1/8” stainless steel cable and with a swaging tool -everyone should have their own… 🙂 , I remade the safety cable. After waiting until the next morning, I spent an hour installing the beast. My wife danced around with giddy joy when I flipped the switch after all twenty of the 45watt bulbs were installed. Happy wife, happy life…

I will be done painting the trim this week, the blue and yellow tape will come down,  and then the dining room is 100% done. On to the Kitchen.

matt-talley-chandileir-install_2017-1 matt-talley-chandileir-install_2017-2 matt-talley-chandileir-install_2017-3

Christmas Vacation 2016

Christmas vacation this year was pretty good. I got great stuff Christmas morning, my mom stayed over Christmas Eve, and Stamps-With-Foot made a yummy Honey-baked ham for dinner on Christmas Day. I took the week between Christmas and New Year’s off from my J-O-B. The time was spent just hanging out with The Ruminator, finding a little adventure in the mountains, and getting some stuff done around the house and garage. My vacation this year looked like this:

Up at 6:00 Christmas morning and made coffee.
I got an XBox One and Battlefield 1 for I could play with my 40-year old adolescent friends online.
Got lots of other great stuff!
Worked a little in the basement on Boxing Day (the 26th).
My son, The Ruminator, flew in the day after Christmas.
Second Christmas morning with son on the 27th.
I put him to work that afternoon moving stuff in the garage and basement.
Pulled 4 circuits worth of wire in the garage.
Hung 3/4 of crown molding in the dining room.
Hired a carpenter to help with the finish of the crown molding and window install in dining room.
Hung pocket door and built last wall for bathroom downstairs with carpenter.
Installed structure in attic for chandelier installation.
Went to see Rogue One.
Loved it.
Snowboarding trip to Crystal Mountain in the Jeep.
The Ruminator rode really well
I am a fat old guy, but can still ride.
Owners rented the cabin we had reserved to someone else – insert grumpy face
Drove home.
Snuggled with wife.
Up early and drove to Snoqualmie for 2nd day of riding.
Glorious day in the mountains!
Watch a movie all together for New Year’s Eve.
Had family over on the 1st for long lunch.
Tried to edit snowboarding trip film.
Failed.
GoPro Studio sucks balls!
Serious online gaming session.
Brunch at Easy Street.
Got The Ruminator’s cracked iPhone glass fixed.
Picked up new kitchen floor tiles at Lowe’s special order desk.
Dinner with Nana.
Dropped off Ruminator at Airport.
Teared up in Jeep on the way to work.
Worked late first full day back to work in 2017 – an inauspicious start.

matt-talley_snowboarding_christmas-2016-1

matt-talley_easystreetrecords_12-2016

matt-talley_christmas-morning-wife_-2016

matt-and-carlton-talley_christmas-2016

matt-talley_snowboarding_christmas-2016-3

matt-talley_snowboarding_christmas-2016-2

2017 New Year’s Resolutions:

Stuff I will do in 2017:

Eat my veggies
Lose weight – back to 175!
Go to the gym regularly
Box more
Write more: Blog, letters, notes, fiction, non-fiction
Take a lunch at least 4 days a week at work
Show up to yoga at least once a week
Take a pottery class
Take a Blacksmithing class at the Pratt
Read 1 book every 2 weeks – minimum
Play my uke, banjo, and guitar with others
build a skin-on-frame canoe
Run and bike
Start a guitar building class
Pay off all credit cards
Go Sailing
Give lots of $$ to Heifer and MFS
Make movies and post: Adventure, craftsmanship, and family.
Lessen my Social Media presence (Blog doesn’t count)
See my kids and granddaughter more
Be involved in popitics more: financally and time wise
Work on my Genealogy database a little
Finish the house remodel
Finish the garage/shop/GROP build
Make Stuff!!
Ride my skateboard because I am not too old or too fat
Road trip in WA more
Have two hives of healthy, happy bees
Kayak lots!
See my friends more
Take my wife on vacation
Plant a spring garden
Fix up the front and back yards
Climb more inside and outside
Have an awesome Griswald-like Christmas light display!

Working on my day off

The house remodel seems to never end…  I will be so glad to just be and live in our space at some point.  We are close, but there are still details left undone – enough that I am trying to concentrate on one room at a time.  My plan is to get each done in turn and then move on to the next.  I wasn’t as successful at that as I wanted to be this weekend as I bounced back and forth between the living room and our bedroom closet, but I did get a ton done.

I installed the upper shelves and corner shelf in the walk-in closet, laminating two layers of 3/4″ plywood for really strong support over a 54″ span and in the unsupported corner.  In addition to using copious amount of glue and screws, I attached the butted plywood edges together with wood biscuits – it is always a fine day when I get to crank up the biscuit joiner.

matt-talley_-notebook_11-2016-3 matt-talley_closet-build_11-2016-2 matt-talley_closet-build_11-2016-1 matt-talley_-notebook_11-2016-2


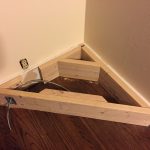
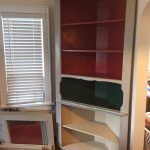
Almost a year ago, I sourced some corner shelves at one of the local architectural salvage places for less than $200 – far cheaper than what it would have taken me to build them.  They came out of a 1930-40’s house and were painted Christmas colors, but I knew that they would be perfect for our living room, which was stripped of its built-ins at some point in the last 88 years.  They have sat in storage and until this past week when I pulled them out and got some material together to permanently mount them.  Stamps-With-Foot helped me set them in place after I built sturdy bases.  Each of them cover a wall plug, so I am in the process of re-routing the receptacle using armored cable.  I also have to build in an air-return duct under one and that has taken some serious brain power to get right.  I will add trim this week and my wife and Mother-in-law will paint them cabinet white this weekend.

matt-talley_corner-builtin_11-2016-4 matt-talley_corner-builtin_11-2016-1 matt-talley_corner-builtin_11-2016-2 matt-talley_corner-builtin_11-2016-3 matt-talley_-notebook_11-2016-1


While I was at it, I punched out a rubber washer for a pot lid knob.  I made the knob a couple years ago out of some scrap cherry firewood after the original plastic one broke.  The original washer had corroded, so I made a new one and installed it.

matt-talley_new-washer-for-pan-lid

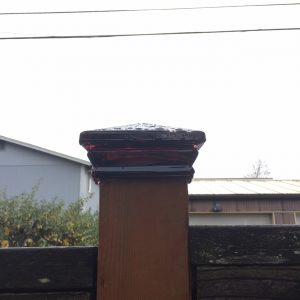
I also took a couple minutes to mount the red glass post topper on the back fence.  It was ordered (along with a spare) months ago and have meant to put it on every weekend since.  There is always an excuse for why I didn’t, so I marched right out first thing Saturday with a tube of clear silicone and finally just got it done.  It is the little victories that keep me going.

matt-talley_glass-post-top_11-16


A Walk-in Closet for My Wife

As part of the now 10 month rehab, remodel, rebuild of our house my wife wanted some space to hang her clothes and put her shoes and boots that was not an afterthought.  A place that, for once was not crammed or disorganized and was purpose built.  It was decided that we turn a small bedroom/office into a walk-in closet.

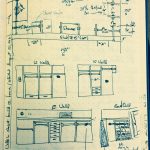
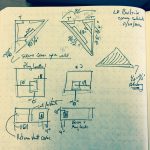
I sketched out a few ideas in my notebook and went over them with her.  She removed a large shoe rack and opted for more clothes bar space.  She also wanted a bunch of drawers to store smaller stuff in.  I initially drew everything with a built in dresser, but changed it a little and made room for a free-standing French dresser made in Revel in the 1930’s that we acquired while living in Toulouse. There is 27 feet of linear hanging space using iron pipe (no sag), 24+ shoe cubbies, shelves, drawers, storage, and two full length mirrors.

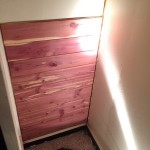
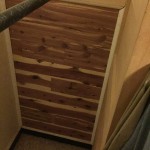
I spent most of this past weekend getting the flat panel section dividers up, installing the clothes bars and adding top shelves.  There are three areas that are made for off-season storage: coats in the summers/short sleeves in the winter.  For these spaces, I decided to line one wall each with cedar.  While some people might line the whole closet with cedar, I would advise against it unless you and your significant other wants to smell like a lumberjack constantly.  Too much and the smell, while pleasing for me, pervades everything.

I lined two of the three spaces this weekend and got to use my old-school hand miter saw. While manual, it is faster to use in the closet – no dragging in a stand and cords and creates a LOT less dust than my big power Bosch miter saw.

I still need to add shelving on one side, put up all of the upper and lower panel trim, fill my nail holes, sand, paint, and bring the dresser in, but the space is usable and has allowed us to unpack all the boxes that have sat in our bedroom full of clothes. I will take the clothes back out on the day that I sand and paint.

Here is the progress to this point:

Matt Talley_closet build_2016_01
Matt Talley_closet build_2016_05
Matt Talley_closet build_2016_04
Matt Talley_closet build_2016_02
Matt Talley_closet build_2016_03

Using My Dad’s Tools

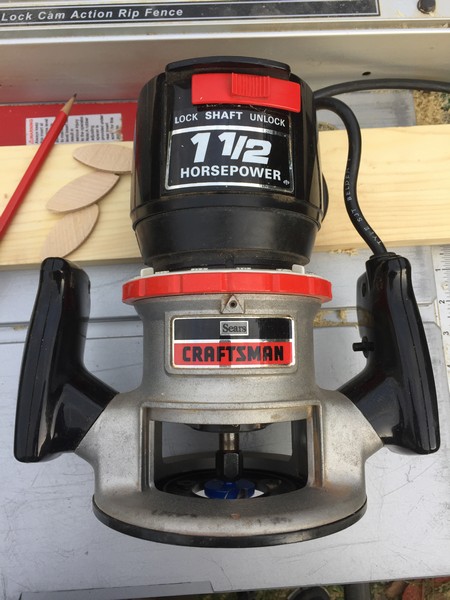
In 1982 or 1983 my dad made me a ball, bat, and glove rack for Christmas. I was super into baseball and it was cool to have your gear up on the wall ready and waiting for you to be able to grab it all and run out the door to a game at a moments notice. Getting the pocket for the ball cut correctly and rounding over all the edges and corners took him forever. He decided that he HAD to have a router and for that same Christmas, my mom bought him a Craftsman 1-1/2 HP, Model #315.17492 Double Insulated router. He was as happy as a puppy with a new bone and looked for stuff to round over, “ease the edge…” everywhere in our lives for months. He was so proud of that router and for years a wood project around the house wasn’t complete until it had been kissed by a 1/4′ shank bit, whirling at 25,000 RPM.

When my dad passed, I got all his tools and the router was part of the deal. I have used it for years and while it is a little funky to adjust and has a base that isn’t perfectly round, it still does a fine job of “easing the edge” on shelves and cabinets. For the most part I use a 1/2 or 3/4 round-over bit in it and use my trim router for 1/4 and 1/8 round overs. Technology has much improved since the early ’80s and I have other routers to do fancy stuff these days but, Daddy’s still gets used a good bit.

I few years ago I had a garage break-in and a bunch of tools were stolen. I lost a lot of Daddy’s wrenches, power tools, my grandfather’s chisels, all sorts of stuff, but the big funky router happened to be in the basement where I had left it sitting for weeks on a long undone project. I am thankful it didn’t end up in a pawnshop somewhere and I am still able to use it to do a little work and connect with my dad, all these years later, just by using the router that he so badly wanted. I used Daddy’s router today, while building a walk-in closet for my wife. I thought about my dad, his smile, his quiet manner, and his patient love for his small son.

Matt Talley_Dads router_2016_1

New yellow Mustard-Monster Lathe up and running

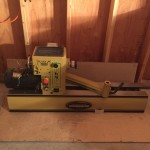
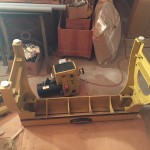
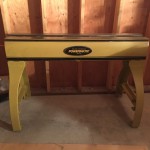
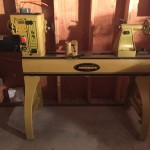
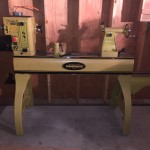
When building The F-Bomb Garage, I bought some new tools in which to fill it.  One of those hunks of iron delight was a Powermatic PM3520b wood lathe with a bed extension and lots of accessories.  It was a replacement for the three lathes of varying sizes I had sold before the original garage was torn down. I didn’t have the room or desire to store equipment that I wanted to upgrade anyway.  The new lathe had been boxed up for 4 months waiting for me to clear some room, unpack boxes, and for the power to be hooked up.

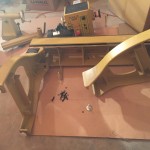
I spent all of Saturday afternoon, the weekend after power was finally turned on,  putting together my sweet lathe. The thing is a beast, so I had to start out with the bed upside down and install the legs.  I carefully rolled it on its side after all the leg bolts were torqued down and girded up my loins for some heavy lifting.  Now, what I should of done was hook a block and tackle to the rafters and pulled it up right, but I am hard-headed, so I put on wrist straps and dead-lifted the bed onto a 2′ wood block.  Then, after psyching myself up a little, I lifted it the rest of the way vertical.  If my sweet wife would have caught me, she would have said dirty words and i would have been in serious – grounded form the shop – trouble.

Anyway, after the base was upright, the head-stock/motor, banjo (tool rest holder), and tail-stock went on.  I installed the 18″ bed extension while I was at it and made sure to check everything over one more time.

It is 710lbs of mustard-yellow sexy.

Matt Talley_PM3520b_lathe_2016 (3) Matt Talley_PM3520b_lathe_2016 (4) Matt Talley_PM3520b_lathe_2016 (5) Matt Talley_PM3520b_lathe_2016 (7) Matt Talley_PM3520b_lathe_2016 (8)Matt Talley_PM3520b_lathe_2016 (1)Matt Talley_PM3520b_lathe_2016 (2)

We Have LIGHTS!!!

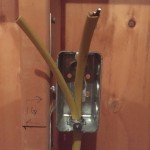
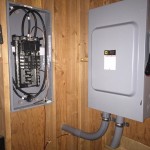
HOLY Bejesus… I have Electricity in the F-Bomb Garage!! Only 4 months after permit pulled and 9 months after garage build began. I have lights that are not hooked up to an extension cord, the auto door openers work, there are five 110VAC plugs ready for power tools, and my lift is now working without the aid of a 220VAC extension cord running from the drier plug in the basement of the house.

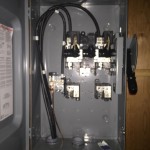
I just had the bare minimum done to get the panel and transfer switch in place and have the city sign off on the garage. Now, that is not to say that all is well in the electrical department: I am still waiting for final permit sign off for the work already done, which is on hold. Apparently, my electrician screwed up the wire routing in the meter box and SCL cannot install a meter. Thankfully they are letting me keep the lights on until my current electrician can come back and address.

I am now prepping in all the other 110 plugs myself – at 4′ high, putting in 2 additional 220 plugs and a 50amp plug for my welder. There is no way I am going to pay an hourly fee to have romex run, holes drilled, staples put in, and plugs & switches wired in. Nope. I will be paying electrician that my company contracts for industrial work to sign off on my install and run the lines into the panel and install breakers – already arranged and the price isn’t too bad at all. While I can do this in my sleep, I am not licensed and my insurance would not pay a dime is something happened, regardless of fault.

Matt Talley_wiring Garage_2016

Matt Talley_Garage elect panel 1

Matt Talley_Garage Transfer switch_2016


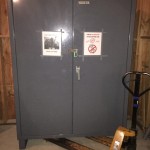
Additionally, My J-O-B was getting rid of a huge organizer bin cabinet: 1/8″ steel, 72″X24″X84″ and 350+ lbs. There was no way I was going to watch that beast go to the recycling center, so I asked if I could have it. Yep, the facilities guy said “load it up” and btw “I have a pallet jack that is wonky if you want it…” Yes, please. Got them both home and the cabinet fits perfectly and will be amazing for climbing, boarding, camping gear organization – keeping all the shop dust and debris off of my gear and making it so I don’t have to dig for small parts ever again.

The pallet jack was low on hydraulic fluid. I filled it up, put a weighted pallet on it overnight and this morning I found the pallet still in the air and no fluid on the floor. Win-win.

Matt talley_Garage locker_2016

F-Bomb Garage Build Update: Mid-September 2016

Still no electricity… long sad story from the electrician: too much work, not enough people, confusion with the city, scheduling snafu… No show at all last week. I have watched an entire house, with a garage, be built and sold 3 streets away since my garage project started…

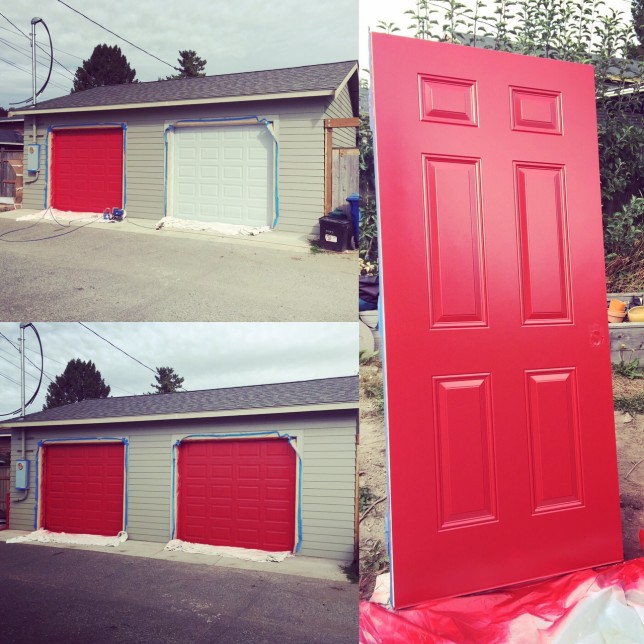
Fall is here and the rain is coming soon, so I spent an afternoon last week with the Airless Spray Rig and painted the garage doors, bollard post, and man-door Benjamin Moore Heritage red. The door & building trim will be bright white and will go on after work one day next week. Gutters go on after.

Matt Talley_Garage Paint_2016

House Remodel Status September 2, 2016 – 7.5 months in

Here is the house/garage re-build/build status for the 1st part of September.

  1. The F-Bomb Garage has been painted – at least the outside walls.  I need to paint the trim and doors next.
  2. Repaired some major issues with the trim and siding on garage – real unhappy with my garage builder!
  3. Front yard is still green, but need to clean and re-seed the back yard.
  4. There oar only 2 rooms in the house that are complete and need no work at this point.  Stamps-With-Foot could be happier with me right now…
  5. The mounting brackets for the granite in the basement are done and I will install them this weekend.
  6. Our washing machine went out…  fuck.  The bearings finally gave up the ghost.  need to haul it out and put another in.
  7. No garage power yet.  Huge load of confusion between the City of Seattle and my electrician.  Maybe worked out now, but we will see.
  8. The yard is completely fenced in and the rear gate is installed.  just a couple of tweaks and then power wash and polyurethane coat.
  9. The living room corner cabinets are in place, but not painted or installed.
  10. We have a small roof leak – motherfvcker!!!  it is around the kitchen vent and from where the moss removal team got too eager with the power washer.  I will go up there this weekend and seal it.
  11. Got a huge bill from our plumber for work that they didn’t do before abandoning the job.  wanted to scan my ass into the 3D printer and send them a copy.  Called a lawyer instead.  we have a plan forward.

The yard is now secure for the puppies

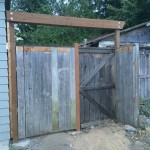
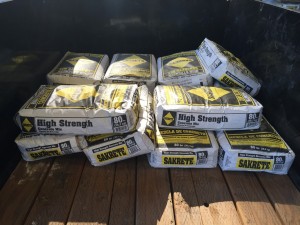
I spent my evenings after work this week rebuilding 35’ of fence, connecting it to the corners of the new garage, and installing two gates using reclaimed boards and stringers from the original fence that I carefully tore down back in January.  I reused the screws and most of the hardware, but had to buy 7 new treated posts, 2160 lbs of Sakrete, 4 bolts and two 2x8x10s. Total cost was $160 and 14 hours of labor including the tear down and hole digging.

My neighbor has been INCREDIBLY patient with me, my mess, noise, and building debris.  When I rebuilt the fence on her side of the yard, I tore out some more of the existing, replaced two rotten posts and then leveled the tops of each section to make it look nicer.  There were a couple of solid posts left from the previous fence location – about 2′ from the new garage – that I just couldn’t chop down or pull out so, I leveled them up and built her a simple trellis for honey suckle or wisteria.  I also bought her a $50 Starbucks card as a small ‘Thank you!’.

The back gate and adjoining section is a nice mix of mostly reclaimed and reused hardware, boards, bits mixed with new posts and structural support. I did double up on the facing boards (set on both sides) for some additional privacy as our hot tub is right on the other side.  The gate itself used to be on the opposite side of the yard.  I had to trim it a bit to get it to hang plumb, and move some hardware around a little.  I will be adding an additional hinge in the middle for added support and some face boards on the outside as well, so it gives the same amount of privacy and so it matches the fence.   The whole thing then will get a power washing and a coat of polyurethane in the coming weeks.


Matt Talley Fence re-build 2016 (3)Matt Talley Fence re-build 2016 (2)Matt Talley Fence re-build 2016 (5) Matt Talley Fence re-build 2016 (6)

Matt Talley Fence re-build 2016 (1)

Painting The F-Bomb Garage

The Garage build is coming along. Still waiting for Seattle City Light to connect the power from the transformer. 5 weeks now…Delay has been just a factor of this build. I would have more patience with City Light if one of their crews hadn’t been sitting at a bikini coffee stand for 30+ minutes on Monday while I was eating a late lunch across the street. I like boobs and bikinis and coffee even more than the average bear, but come on – don’t tell tell everybody how swamped your crews are if they have time to have a philosophical discussion with a nearly naked barista…

(For those of you not in the PacNW – bikini coffee here is a thing and some stands are really open to the definition of what a bikini is – an eye patch and pasties are the rule and some stands.)

I can’t continue with the interior wiring until that connection happens and the electrical inspection is OKed. No insulation or drywall/T1-11 until it get the “OK to Cover” from the electric inspector. I am not one to sit on my butt, so I wheeled out the airless spray rig for the first time in like forever and put two coats of quality Benjamin Moore paint on the outside of the garage – matches the house. I will paint the doors and trim this weekend.

Matt Talley_Garage 2016_087 Matt Talley_Garage 2016_088Matt Talley_Garage_build_2016_78


Building fences and pouring concrete

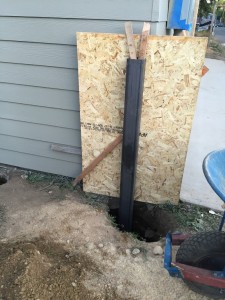
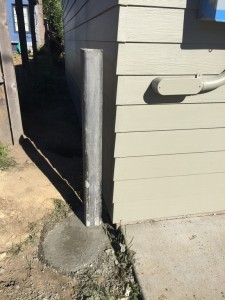
I need to tie the wooden fence back into the new structure so the dogs can roam in the back yard again. While backing up to unload concrete and posts for the fence, I barely tapped the corner of the garage with my trailer. Not a single scratch or dent or ding, but it made me say DIRTY words. I put my thunkin’ cap on and decided that if I did it once, I would do it again, and someone else would definitely smack the corner. A Bollard was in order. I went by Pacific Metals and picked up a 6’X5″X5/16″ wall hunk of square tubing and 4 sections of 3/8X10′ rebar.

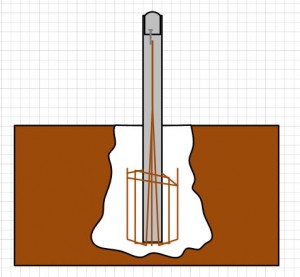
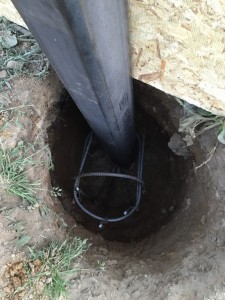
I rented an auger to dig the needed 7 post holes and dropped in 1 more for the bollard. The fence post holes are 18-14″ deep, but the bollard hole is 38″ deep and after chipping away at it with a post hole digger, maybe 14-16″ in diameter with a bell-shaped bottom. I cut 3 of the rebars to 7’ and bent the three pieces into a fishhook shape, wire tying the tops together in 3 places. I then took the off cuts and bent them into a “U.”

I put the rebar in the hole, sitting on plastic rebar chairs and placed the post over them. I splayed out the “hook” sections and wire-tied the U-shaped pieced around the rebar and around the bollard. I then added another hoop around the original section and the tied hoop. Concrete was poured in and vibrated to get all the air and voids out. I filled the bollard with concrete and used a scrap section of rebar to agitate and pack down the concrete in the bollard.

I left 4” of the top of the square tubing free of concrete and dropped in a 6” lag bolt with to 3” sticking out of the wet concrete, but still in the tube. After the concrete dried and while I was setting some fence posts, I went back and finished off the top of the bollard with a bit more concrete. I will paint it red when I paint the doors to the garage. The thing won’t stop a tank, but it might save the corner of my garage from a moment of inattention…
matt talley Bollard detailMatt Talley_Garage 2016_089 Matt Talley_Garage 2016_090Matt Talley_Garage 2016_082Matt Talley_Garage 2016_084Matt Talley_Garage 2016_081 Matt Talley_Garage 2016_083Matt Talley_Garage 2016_085 Matt Talley_Garage 2016_086