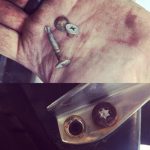
I had a tired, old, home-made, second-hand chipping hammer that was broken and had been so for years. So, I MIG-welded the busted joint, ground the transition, and added a reclaimed hickory handle, which came from a hatchet rebuild shown in a previous video that I posted on YouTube. With the re-weld and addition of copper handle rivets, it should last a few decades now.
Tag: The F-Bomb Garage
Film Friday – Home Garage Car Lift Details
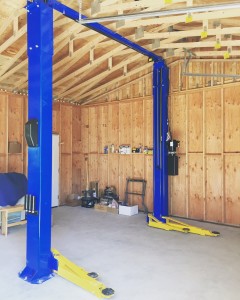
The short film below is part on my on-going series on YouTube discussing and showing my garage/shop build process. It details my experience of having a 2-post Rotary Revolution RTP10 vehicle lift, why I went with the type/brand/style that I did, thoughts after using it for 9 months, and what I might do differently if I could go back in time.
As Always, likes are really appreciated on my YouTube Channel!
Weekend in the shop
I got some serious crap done in the garage and at home this weekend:
Cleaned, swept, and put away tools for over an hour Saturday morning
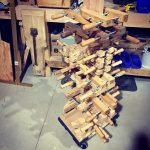
Added wheels to my screw-clamp stand
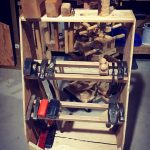
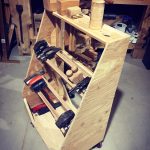
Built a hammer stand – I have a lot of hammers
Organized 4 drawers on my tool cabinet
Organized a drawer for just camera mounts and cables
Hung 22 small blue U-Line organization bins
Cleaned off table saw
Installed new table saw blade
Re-tensioned bandsaw
Cleaned off bench for 1st time in MONTHS!
Put all the miscellaneous screws, bolts, and hardware in the proper organization bin
Sanded the carcass for a bathroom cabinet installation
Moved some angle-iron into the metal storage rack
Carried 2 of the 3 cabinet sections in the house
Cranked on the lathe to reduce the diameter of a dowel
Blew 30 amp breaker
Said the f-word at least 3 times
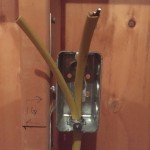
Took a look and original electrician did not fully terminate one of the “hot” wire legs, which led to the failure.
Said dirty words
Drove to Home Depot and back for breaker
Swapped out a blown breaker
Ran 75 linier feet of 12-2 Romex wiring
Installed 12 electrical boxes
Only dropped 1 on my head/face
Installed a couple of runs of CAT-6 ethernet cable for the PoE camera system
Jesus, CAT-6 is expensive!!
Moved some firewood into the house
Built and installed butcher paper roll noteboard on a cabinet front
Re-set wall clock
Worked on chipping hammer re-build
Shot a couple of videos
Sanded a couple spots on the jeep under windshield
Wished I had a bathroom in the garage at 3 different points during the weekend
Started on pizza peel build for Father-in-law
Film Friday – The Garage Sidewalk Pour
Below is a short film documenting all the steps taken in pouring a walkway between our existing patio and my garage/shop, as also discussed in less detail in a previous post. I MAY have overbuilt it… a little… maybe…
Film Friday – Jeep Paint Prep
…And so begins my plan for interweb domination… This is the 1st in a series of videos detailing my Jeep re-painting project. I am doing the prep work and getting ready for my 1986 CJ-7 to go into the shop for a little cosmetic make-over. It was painted black at the factory in Toledo, has been black ever since, and will stay black until they make something darker. I also give a little bit of an update to what I have been up to of late, some projects that are in the works, and a quick pan view of part of a dirty, disorganized, and cluttered shop.
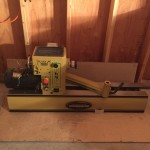
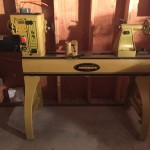
New yellow Mustard-Monster Lathe up and running
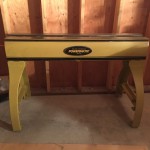
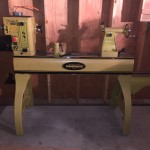
When building The F-Bomb Garage, I bought some new tools in which to fill it. One of those hunks of iron delight was a Powermatic PM3520b wood lathe with a bed extension and lots of accessories. It was a replacement for the three lathes of varying sizes I had sold before the original garage was torn down. I didn’t have the room or desire to store equipment that I wanted to upgrade anyway. The new lathe had been boxed up for 4 months waiting for me to clear some room, unpack boxes, and for the power to be hooked up.
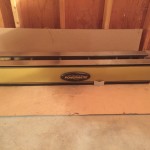
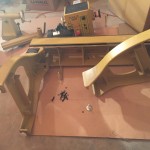
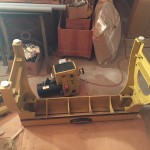
I spent all of Saturday afternoon, the weekend after power was finally turned on, putting together my sweet lathe. The thing is a beast, so I had to start out with the bed upside down and install the legs. I carefully rolled it on its side after all the leg bolts were torqued down and girded up my loins for some heavy lifting. Now, what I should of done was hook a block and tackle to the rafters and pulled it up right, but I am hard-headed, so I put on wrist straps and dead-lifted the bed onto a 2′ wood block. Then, after psyching myself up a little, I lifted it the rest of the way vertical. If my sweet wife would have caught me, she would have said dirty words and i would have been in serious – grounded form the shop – trouble.
Anyway, after the base was upright, the head-stock/motor, banjo (tool rest holder), and tail-stock went on. I installed the 18″ bed extension while I was at it and made sure to check everything over one more time.
It is 710lbs of mustard-yellow sexy.
We Have LIGHTS!!!
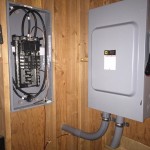
HOLY Bejesus… I have Electricity in the F-Bomb Garage!! Only 4 months after permit pulled and 9 months after garage build began. I have lights that are not hooked up to an extension cord, the auto door openers work, there are five 110VAC plugs ready for power tools, and my lift is now working without the aid of a 220VAC extension cord running from the drier plug in the basement of the house.
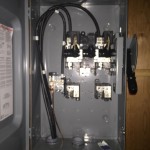
I just had the bare minimum done to get the panel and transfer switch in place and have the city sign off on the garage. Now, that is not to say that all is well in the electrical department: I am still waiting for final permit sign off for the work already done, which is on hold. Apparently, my electrician screwed up the wire routing in the meter box and SCL cannot install a meter. Thankfully they are letting me keep the lights on until my current electrician can come back and address.
I am now prepping in all the other 110 plugs myself – at 4′ high, putting in 2 additional 220 plugs and a 50amp plug for my welder. There is no way I am going to pay an hourly fee to have romex run, holes drilled, staples put in, and plugs & switches wired in. Nope. I will be paying electrician that my company contracts for industrial work to sign off on my install and run the lines into the panel and install breakers – already arranged and the price isn’t too bad at all. While I can do this in my sleep, I am not licensed and my insurance would not pay a dime is something happened, regardless of fault.
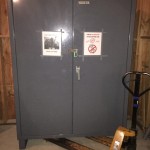
Additionally, My J-O-B was getting rid of a huge organizer bin cabinet: 1/8″ steel, 72″X24″X84″ and 350+ lbs. There was no way I was going to watch that beast go to the recycling center, so I asked if I could have it. Yep, the facilities guy said “load it up” and btw “I have a pallet jack that is wonky if you want it…” Yes, please. Got them both home and the cabinet fits perfectly and will be amazing for climbing, boarding, camping gear organization – keeping all the shop dust and debris off of my gear and making it so I don’t have to dig for small parts ever again.
The pallet jack was low on hydraulic fluid. I filled it up, put a weighted pallet on it overnight and this morning I found the pallet still in the air and no fluid on the floor. Win-win.
F-Bomb Garage Build Update: Mid-September 2016
Still no electricity… long sad story from the electrician: too much work, not enough people, confusion with the city, scheduling snafu… No show at all last week. I have watched an entire house, with a garage, be built and sold 3 streets away since my garage project started…
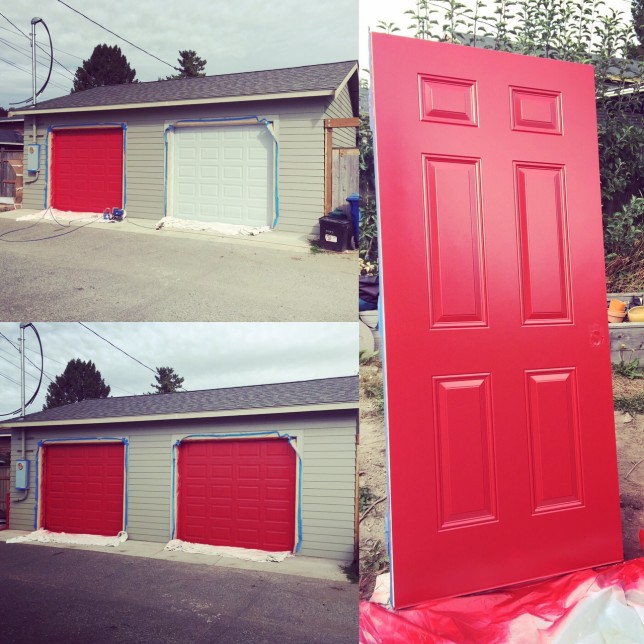
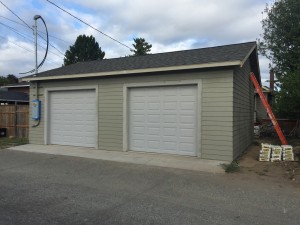
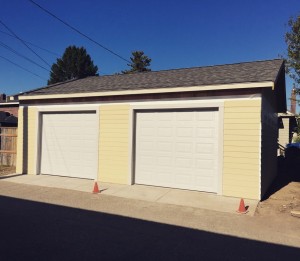
Fall is here and the rain is coming soon, so I spent an afternoon last week with the Airless Spray Rig and painted the garage doors, bollard post, and man-door Benjamin Moore Heritage red. The door & building trim will be bright white and will go on after work one day next week. Gutters go on after.
Painting The F-Bomb Garage
The Garage build is coming along. Still waiting for Seattle City Light to connect the power from the transformer. 5 weeks now…Delay has been just a factor of this build. I would have more patience with City Light if one of their crews hadn’t been sitting at a bikini coffee stand for 30+ minutes on Monday while I was eating a late lunch across the street. I like boobs and bikinis and coffee even more than the average bear, but come on – don’t tell tell everybody how swamped your crews are if they have time to have a philosophical discussion with a nearly naked barista…
(For those of you not in the PacNW – bikini coffee here is a thing and some stands are really open to the definition of what a bikini is – an eye patch and pasties are the rule and some stands.)
I can’t continue with the interior wiring until that connection happens and the electrical inspection is OKed. No insulation or drywall/T1-11 until it get the “OK to Cover” from the electric inspector. I am not one to sit on my butt, so I wheeled out the airless spray rig for the first time in like forever and put two coats of quality Benjamin Moore paint on the outside of the garage – matches the house. I will paint the doors and trim this weekend.
Building fences and pouring concrete
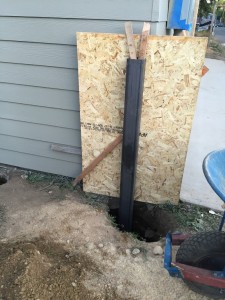
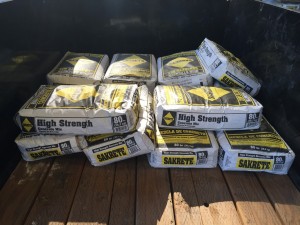
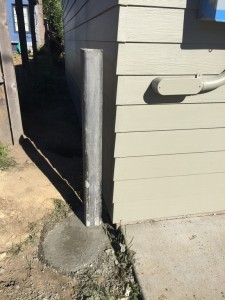
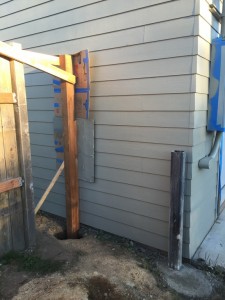
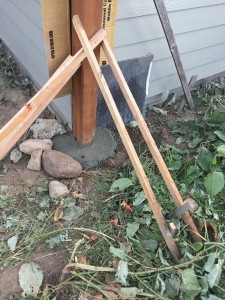
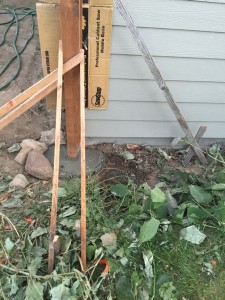
I need to tie the wooden fence back into the new structure so the dogs can roam in the back yard again. While backing up to unload concrete and posts for the fence, I barely tapped the corner of the garage with my trailer. Not a single scratch or dent or ding, but it made me say DIRTY words. I put my thunkin’ cap on and decided that if I did it once, I would do it again, and someone else would definitely smack the corner. A Bollard was in order. I went by Pacific Metals and picked up a 6’X5″X5/16″ wall hunk of square tubing and 4 sections of 3/8X10′ rebar.
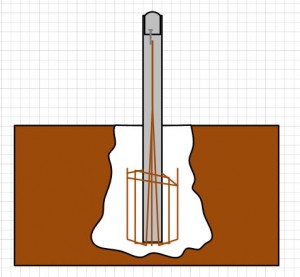
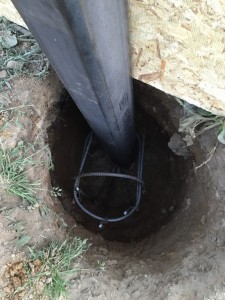
I rented an auger to dig the needed 7 post holes and dropped in 1 more for the bollard. The fence post holes are 18-14″ deep, but the bollard hole is 38″ deep and after chipping away at it with a post hole digger, maybe 14-16″ in diameter with a bell-shaped bottom. I cut 3 of the rebars to 7’ and bent the three pieces into a fishhook shape, wire tying the tops together in 3 places. I then took the off cuts and bent them into a “U.”
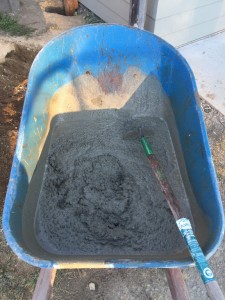
I put the rebar in the hole, sitting on plastic rebar chairs and placed the post over them. I splayed out the “hook” sections and wire-tied the U-shaped pieced around the rebar and around the bollard. I then added another hoop around the original section and the tied hoop. Concrete was poured in and vibrated to get all the air and voids out. I filled the bollard with concrete and used a scrap section of rebar to agitate and pack down the concrete in the bollard.
I left 4” of the top of the square tubing free of concrete and dropped in a 6” lag bolt with to 3” sticking out of the wet concrete, but still in the tube. After the concrete dried and while I was setting some fence posts, I went back and finished off the top of the bollard with a bit more concrete. I will paint it red when I paint the doors to the garage. The thing won’t stop a tank, but it might save the corner of my garage from a moment of inattention…
Not so short contractor rant
We are so close to being done with the garage and the house (yard is still a disaster, which will have to wait ‘til next year, but the stress of dealing with crappy, disorganized, and/or no show contractors throughout this process has been and is so frustrating. This is not a post to rail on all contractors or even all of our contractors…
We had same great ones:
- Maranatha Hardwood Floors showed up on time for the quote. The owner was personable and the quote was reasonable. They showed up on time, did a beautiful job, listened to a specific request from my wife, there were no extra charges, cleaned up after themselves, and our floor looks great.
- RCS Fire Place was A-1: On time, good pricing, no add-on charges, etc…
- After an initial sales rep flub, Greenwood Heating & Air did a nice job on our heat pump. Very professional installers. No complaints.
- Vehicle Equipment Solutions was awesome on the lift order and install. I couldn’t be happier with their work.
- Our Drywall guys were top notch. Very professional, great price, showed up when they were supposed to and finished right on time.
- The carpet guys that did our bedroom were fast, professional, and did a nice job.
- I had some custom wrought iron brackets made and the blacksmith listen to our wants and delivered a beautiful product.
- Pacific RIM equipment rental was great in supplying heavy equipment for the garage tear out and site prep. When there was a breakdown, they delivered a new machine and I wasn’t charged for any gas use for the entire weekend.
- Bryan at Squak Box was a rock star when it came time to haul out the debris from the old garage and all the old concrete. On time, no hidden costs, dropped the containers perfectly. Couldn’t ask for more.
And the not so great:
My garage contractor has now quit. There is little I can do at this point besides shake my head in wonder and disgust. It has been a bumpy road from almost the start, but I figured that with a little bit of work it would all be OK. A bit of work turned into a part time job and time spent on the garage was time not spent on the house and that made Stamps-With-Foot grumble. In addition to the garage tear down and the site preparation that had to be done (40+ hours of my time and ~$3000. I had to do 4-5 hours of slab/rebar prep when the contractor’s guy messed up, then had to ask for poly burlap to cure the slab, apparently not standard. I ended up keeping the slab wet for the entire 10-day cure (to limit cracking and allow it to fully harden, then apply the concrete densifier after my normal workday and the end of the cure process.
Installation of fire blocking isn’t required per code in Seattle for a wall less than 10’, but it is the right thing to do. It was out of scope for the contractor and an additional cost, so The Ruminator and I ended up doing it while he was here on summer vacation. I had to install two forgotten kicker studs, tighten missed/forgotten anchor bolt nuts, added nails to the hurricane straps, and had to go over punch list items twice before they were addressed.
The windows and door trim were installed incorrectly – I could see daylight in the corners of the windows and I asked that they be re-installed. When that was being done, my siding got cracked. I also found that instead of every 16” per code, the siding was nailed every 4’ in some locations. I called and the foreman came out. He addressed some issues but caused others. I then called the owner and he came out. He agreed with every point I had. They crew came back and while some items were fixed, others were not and new problems popped up. I let the owner know and this was his response:
“Unfortunately we’ve succeeded in messing up again. ____ had no excuse for why he didn’t read my email, about taking the siding out from the bottom of the windows, and what they were thinking with the screws into the bottom of the fascia’s. If they’d pre-drilled the holes it would have worked and been clean.
I don’t have anyone else in my employee who I could send down to make any corrections, and I don’t think you would trust anyone I sent to do any more work. What I’d like to offer is to forego our final payment and let you clean up any items by your self. I don’t like doing this, I really want to get the job done for you but we’ve already had three try’s. I know you might not be as happy as you should be but I want to at least make you satisfied with _____________.”
I am not happy and while I agree that I don’t trust his guys to come back a third time, the keeping of a few hundred bucks does not make it all better. Now, I either have to find and pay someone else or do it myself. Frustrating.
I have looked at this. Am I just an asshole? Am I too picky or do I expect too much? I really have looked at this hard and yes, I can be an asshole, but not in this and not with a single contractor or tradesman on my site. We provided lunches, Gator-aid, and beer for all the guys working, I talked to every contractor that has been on our property like I would want to be spoken to, If I wanted something different or changed, I addressed it right then by ASKING and wasn’t the least bit of a shit about it. I cleaned up the job site in the afternoons after I got off work to save them all time and effort.
Is needing someone to stick to a schedule, be on time, and not halfway do something too particular? I don’t think so. Is asking that a contractor meet minimum code requirements, pull permits, and do the job they agreed to for the agreed to price crazy? apparently so.
Other issues:
In addition to the plumbing circus that we had in the spring, we had a carpentry crew that abandoned us for a job where the other customer was screaming louder. They left tools, work unfinished, material, you name it. My electrician has been a little flakey – uncashed checks, no shows, showing up unannounced and unscheduled, really hard to get a hold of, etc., but at least this one hasn’t broken into our house while we were gone… I have had 3 contractors come out for quotes on our basement bathroom tile and never heard from two of them again. The third guy finally called me back and said the job was just way too small and “not worth the time it would take to set up his wet-saw.”
I get it, all the contractors in Seattle are busier than a puppy with two peckers. That means that 1. they can be super picky, 2. charge what they want, 3. if they fuck up, no worries, there are three other jobs waiting.
The F-Bomb Garage completion is getting closer!
I was out of town this past week on a work trip to merry ol’ England. I came home to a sweet surprise: I have a new 10,000lb two-post lift installed in the F-Bomb Garage. I got a decent deal on a . Went with the Rotary Revolution RPT10 because there is a local dealer, local support, I got a decent deal on the lift+install, and some experience that some friends and colleagues have had with this and other lifts.
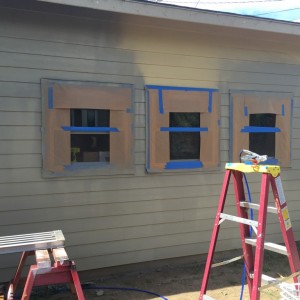
We are getting closer to finally building some stuff inside/voiding warranties/modifying the jeep. My contractor had a foreman out last week to deal with the framing punch-list items: a couple of anchor bolts, some trim, loose siding, a funky corner, and I had him re-install my three windows with the proper flashing tape – I could see light in all the corners. A leaky window after I have stressed the importance of proper installation and showed them what I needed twice would throw me into fits. He also swapped the door trim, but not everything on the list got done and now there is more stuff that needs attention. I have the contractor stopping by to go over it all tonight. Very frustrating to spend this sort of cash and to deal with all the little things over and over.
The electrician is 3 weeks out – everyone is building and remodeling in Seattle and contractors are super swamped, so I am going to concentrate on the outside in the mean time: Paint and gutters as soon as the siding issues are dealt with.
The F-Bomb Garage Lives!!
My garage/shop now has a name, but first: Story Time.
I have agonized over what to call it since the early planning stages began almost 3 years ago: The Place Warranties Go to Die, The Jeep Warren, The Briar Patch, The Shiznit Garage, My Little ADHD Shed, etc…
I was out on the slab one night a few weeks ago moving around the poly-burlab curing cover, the boards holding it down, and rearranging the soaker hoses when I smacked myself in the side of the head with a wet 2X6 – really f’n hard, right behind the temple. I saw stars and staggered around holding the side of my head saying F%$#!! loudly, over & over in a machine gun staccato manner. It was all that would come out. This scene may have just lasted a few seconds or more than a minute – the timeline is a little fuzzy. My sweet wife, Stamps-With-Foot, did not see the initial head strike, just my wobbling around and apparent sudden affliction of turrets. I stumbled in the kitchen door a few minutes later and she said over her shoulder while standing at the sink: “I am sure the neighbors will be glad when your little playhouse is built so they will not have to listen to all the dropping of F-Bombs…” I was about to take gross offence to her characterization of physical culmination of my fabrication dreams as a “little playhouse” when I realized that she had provided the perfect name: The F-Bomb Garage.
I have searched the Garage Forum and the Fabrication Forums that I frequent and no one has claimed it and I have found no others, so it is mine, I call it. I found a few stickers and images that I like for a logo, but I will be making my own to apply to projects, the Jeep, the Jeep Trailer, tool boxes, etc.
