Getting a new garage in 2016!!!

Woohoo!!  It looks like we are a go for a new garage and some needed updates to our heat, plumbing, and wiring at the house.  I am meeting our builder this weekend and passing him a check (two checks actually, one is for the City of Seattle permit office…) and I will have a real garage and wood-shop by spring.  I will have room for a big lathe, cabinet saws, wood storage , my joiners workbench, room to assemble projects/furniture, a real dust collection system, and all my planes/saws/chisels/hand tools on one side.  On the other side of the shop will be a mini-machine/fabrication shop with a two post lift, lathe, end mill, welder, mobile paint booth, and work table…

I cannot tell you how stoked I am!  Seriously, I am all giddy about it.  I plan to make cool stuff, descend into super-nerdy, and will be voiding the shit out of warranties!

Here are the prelim drawings that are being submitted and a lay out of the shop floor.

Garage floor 3 Garage Floor 1 copy Garage floor 2 copy

Update:

Drawings sent to the city. Cross your fingers and pray with me that Planning is having a good day/week/month and these babies get a stamp.

image

image

Wood Lathe for sale in Cornebarrieu – SOLD

The move is ON!  we have two weeks until the packers and movers get here and Stamps-With-Foot and I spent the morning and part of the afternoon going through stuff and listing stuff for sale  the largest of which is my lathe.  It hurts me a little to see it go, but I know that a huge old gap-bed lathe waits patiently for me in Seattle.

Below is the add that my wife is posting on the local English-speaking forums here in the Toulouse area:

FAR TOOL TBF 1000 Wood Lathe for sale in Cornebarrieu: 

FAR Lathe_Main

I bought this lathe brand new from a local shop 18 months ago.   Since it came unassembled, I reinforced the standard steel base with additional shelving, cross-braces to remove any possible flex.  I then sheathed three sides for extra rigidity and added a strong bottom platform for ballast.  I have turned everything from honey dippers, to bowls (large, small, & huge), stools from tree trunks, stair balusters, platters, furniture feet, tiny wooden and acrylic ornaments, lids, etc.  It has been a great lathe and has NO PROBLEMS or “small issues.”  The bearing are true and tight and there is ZERO rust on the ways/bed.  This lathe is in perfect shape and the only reason I am parting with it is because we are moving back to the US and the power there will not work with the lathe’s 240/50Hz motor. 

 Here are the details and specs as well as a couple of links to shops that sell it:

  • Cast iron variable speed lathe features a 360 degree swivel headstock.
  • Solid cast iron headstock and lathe bed construction.
  • Extra bed extension for outboard turning.
  • Speed is fully variable between 450 – 2100 rpm.
  • Weighs ~120 kilos
  • 300mm width capacity over bed and 900mm between centers.
  • Have turned 600mm platters with headstock swiveled 90 degrees
  • 550W enclosed fan-cooled motor
  • hollow self-ejecting tailstock with #2MT
  • Cast iron offset tool rest and extension arm
  • Head Stock has MT2 Taper and 25.4mm (1:8TPI threading – industry standard for lathes this size – easy to find chucks and accessories
  • Includes reinforced/enclosed steel base, added powerstrip for lights and hand sanders, a 4-prong drive centre, bowl/platter faceplate, live tail center, 4 wrenches, knockout-bar, shop-made stead rest.

It will be perfect for your garage or shop or for your partner’s Christmas present since it is ready to work and you just have to plug it is.  I paid 520 Euros for this lathe 18 months ago and it currently lists for 550 – 745 Euro depending on the shop. I am asking 375 Euro.  Please give me a call if you have any questions and the lathe is available for demo if you would like.

FAR Lathe_04

FAR Lathe_05

FAR Lathe_3

FAR Lathe_02

FAR Lathe_12

FAR Lathe_11

FAR Lathe_06

FAR Lathe_08

FAR Lathe_09


UPDATE:

I sold the lathe to a nice English gent, who got a smoking deal. I helped him take it all apart and put it in his car. The rear springs were seriously loaded, but he looked happy as he pulled out of our drive.

A Modern Wedding Arch Build

My Brother-in-law and his then fiancé decided early this year that they would visit us in France and while here have a little wedding… Stamps-With-Foot freaked out and turned on the ‘Big-Sister Action Mode’ setting on her internal processor. She quickly organized the shipping logistics, helped with transportation, found lodging for all, located a restaurant for the reception, sourced champagne and wine, etc… I had two jobs. 1. Make sure the yard was a perfect/green as possible. 2. The wedding arch. It was implied that fvcking up either would have dire consequences.

I sketched a bunch of ideas up in my notebook and talked to the bride a little about her ideas and wants over Skype and e-mail. I had planned on doing a big natural arch with the pruned limbs of 70-100 apple and plum trees, but my source burned the branches before I could get to them. I went with Plan B and drew up a modern interpretation of a classic white wedding arch. The bride said ‘go’ and it was on.

The arch is made from 4 meter (13.14’) X 1.25”X1.25” pine sticks that I sourced at the local lumber yard. They are sold for fencing trim and to cut foundation stakes from. I painted each with two coats of white paint and the bottom is held together with 10mm all-thread. The top is screwed one stick to another – everything is pre-drilled.

All was finished one day before the ceremony with the bride’s brother, cousin and sister helped out with the final painting (taking turns with the one roller) and installation. I really couldn’t finished in time without their help and support.

The bride and groom seemed very happy with the work and allowed me to even officiate their wedding. Honored does not even begin to describe my feelings about being included in this way. It was my first time getting to use my Ordained Minister credentials and I am SO adding wedding officiate to my resume! I will add some pictures and wedding details later – after the bride has had a chance to flood her social media accounts with pictures to her little heart’s content. Out-doing of being faster than the bride to share “her day” with the world would be bad juju…

As you can see from the pictures – I succeeded in Job 1 as well: Greenest yard in Toulouse:-)

IMG_6211

IMG_6262

IMG_6241

IMG_6196

IMG_6177

IMG_6172

IMG_6173

Wedding Arch September 2015


Updated Materials list and build instructions:

Material:
2 – 3/8”X3’ sections of “all-thread” (Home Depot or Lowes)
4 – 3/8” nuts
4 – 3/8” washers
40-45 – 1”X1”X12’ garden stakes/lathe
These can be substituted by ripping down 2X6 or 2×8 boards on a table saw. The finished stakes will be 1.5”X1”
100ish 1.5” deck screws
White paint with primer

Tools:
Two saw horses or cinder blocks
Paint brush
Hand saw or circle saw
4 – hand clamps
hammer
Two battery drills
Socket set
Combination wrench set
½” drill bit
1/8” Drill bit for pilot holes
Two helpers that have not started drinking or toking

Directions:
1. Check with the bride and get her sign off before any purchase of build is started.
2. After acquiring your stakes or making them, leave them bundled or tie them with packing string. If you removed them from the bundle before assemble, they are likely to warp.
3. Paint all available sides with thick coat of white paint
4. Put on second thick coat
a. You can let you helpers do this and it does not have to be a sober day project. It is better if they are altered. They will paint each other. It will happen.
5. Let paint dry overnight and out of the weather
6. Cut the bundle, retie the stakes with packing string with the unpainted side out.
7. Drill ½” hole in the bottoms of all the stakes about 1/2” from the bottom and on the centerline.
8. Measure up from the top of that hole ½ to 1” and cut what are now your spacer blocks off.
9. Drill ½” hole in the new bottoms of all the stakes about 1/2” from the bottom and on the centerline. Or you can drill both holes in all your stakes at the same time and cut between them.
10. Figure out the spacing of the “floor” of you arch by standing bride, groom and officiate up and seeing what that width is.
11. Add 18”-24” on each side. 10’ is great normally, but you decide.
12. Move all material and tools to the spot where the arch will be erected.
13. Mark out you width on a spate stake and place it in your desired location.
14. Double check with the bride if this is what she wants.
15. Cut your now fully painted bundles
16. Lay you first two sections and have them cross with 6-10” left at the top.
17. Clamp the bottoms to the stake, leaving the ½” hole uncovered.
18. Check the top again and if correct, drill a pilot hole in the top over-lapping stake.
a. This is super important! ALL screw holes must be pre drilled or you will split the wood.
b. This will piss the bride off and you will have a bad day.
19. Insert the all-tread into the bottom hole and put the washer on from the front (under), followed by the nut. Just tighten till the threads are covered on the end.
a. Have one of you sober helpers hold this all-thread until the 5th or 6th course of stakes are laid. If not, then you will split the stakes at the bottom and the bride will find out. You will get into trouble.
20. Slide a spacer block on after each stake is put on.
21. With your sober helpers holding the All-thread, lower another stake into place.
22. You will want to lower both ends at the same time or something will crack.
23. Move to the peak and space the second set.
a. I used a scrap bit of stake so that I would have 1” stakes and 1” spacing between, but if I had to do it again, I would use a 1+1/2” block (skinny part of a 2X4) as the spacer. It makes for a more dramatic fan when done.
24. Drill pilot hold and repeat step 17 – 22 until you have about ½” left on the end of the all thread.
25. Assembly is easier from inside the arch.
26. At some point your sober helpers will start looking for a cooler or a lighter. Do not let them wander off. Trust me.
27. Put on your next par of washers and nuts and hand tighten.
28. Use second set of hand clamps to put another stake across the bottom of the back of the arch. This and the one on front will be removed after you stand it up, but they will help keep everything ridged until it is up.
29. Cut four 18-24” sections of a spare stake and either have a still sober helper sharpen the end (the proper instruction is “like a Vampire stake…”) or you can cut it at an angle with a hand saw
30. Now with all available help stand the arch up, gently.
31. Have the bride sign off on the build and location. Not the bride’s mother. The lady in white herself. Seriously.
32. After you have the OK, then carefully insert a “vampire stake” between two stakes and hammer it into the ground until there is 2” sticking up above the side of the arch.
a. Don’t screw this up and hit the arch with the hammer. You might break something and then you will have to go into witness protection or move to Bulgaria.
33. Predrill a hole in the stake and arch and attach the two.
34. Do this on all four corners.
35. Remove the clamped on temporary bottom sections.
36. You may now release the helpers to become a chemically altered as they so desire.
37. Touch up any or the missing paint from the cords or the assembly.
38. Bask in glory of your accomplishment with a cold malted beverage.

Puttering around in the shop

I had a super shitty trip home from Morocco and was stressed out & pissed off when I got up Saturday morning.

First Coffee.

I then decided that and working on some current projects, a couple of little things on the lathe, and making lots of sawdust and wood shavings would make it all better.

I am in the process of building an old-school 6-board chest (now 8-board as I added a skirt to front and rear…)  and had some white pine scrap sections left from the two sides and the bottom.  I glued them up before I left for Casablanca and when I got home I decided to turn a quick fruit dish for the kitchen/my wife.  It took all of about 20 minutes and is 10.5″ in diameter and 2″ tall.  I am pretty happy with the results.

Scrap Bowl Aug 2015 (1)

Scrap Bowl Aug 2015 (3)

Scrap Bowl Aug 2015 (4)

Scrap Bowl Aug 2015 (5)

Scrap Bowl Aug 2015 (6)

Obsessing Over a Possible House Remodel & Letting My OCD Shine Bright

We are currently going through a make/buy decision concerning our house in Seattle.  Meaning, do we spend $200-$250K plus, months of time, and lots of sweat equity on updating our house, adding a garage/shop and dining room, and refitting the basement into an apartment for my mom.  Or, do we spend $5K getting the house ready to sell and find another house that has what  we want already done and complete.  Do we keep the house as a rental and build an entirely new one…?  We have met with our estate agent, a builder, a draftsman, an architect, a landscape company, a second builder, and now a third builder in our quest, but really are not any closer to making a decision.  As said before, Stamps-With-Foot and I are going over it all and trying to decide what is best for our finances, future possible family expansion, and quality of life.

I drew our lot and house just after we moved in and have spent more than a few hours modeling all our crap – to scale – and seeing how it would all fit in the possible expansion of our existing house with the new garage build.  Part of this on-going decision process is looking at all the possibilities and modifying the existing drawings into a “someday-maybe state”.  I have a touch of OCD…  If I am working on something or especially in the planning stages, I will drill WAY DOWN into the project.  Evidenced by the below images and the included timeline.

I have modeled sewing machines, yard tools, bikes, my 1986 Jeep, my wife’s Subaru WRX, hand tools, bikes, , machine tools, trees, bushes, furniture, lathes, saws, wiring diagrams, rugs, even our puppies… all to scale…  I may have a problem.

Overview copy

House elev copy

Main Floor copy

Basement ADU copy

Attic Master Suite copy

Garage Over View copy

Garage Interior Detail copy

Shop Interior copy

Attic Interior copy

Garage Garden Shed copy

Wiring detail copy

Time Line copy

Tooling Detail copy

Brodie Detail copy

Sand Box copy

Blanket Chest Rebuild

Early last year, Stamps-With-Foot and I bought a few pieces of furniture from an English couple moving out of France.  One of the pieces was a pine drawer-front blanket chest that someone in the UK had built in their garage out of decking material.  It was constructed with dovetails, screws, and lots of glue, so it was a stout little piece and for $50, I couldn’t pass it up.  The finish was originally 1980’s fabulous stain and it was semi-sloppily finished with a brushed on polyurethane topcoat, but all and all not so bad as to ruin the chest.  Just right for a little refinishing.

It sat in the house for a year or so, covered with a runner, before I dragged it into the GROP and tore into it.  I cut the funky curved feature off the base, added some corner reinforcement, re-worked the drawer slides, removed the fat awkward drawer knobs, turned and added bun feet to the front, and installed square feet on the rear (going for the 17th century Furniture of Necessity look).  I sanded the whole thing down to remove some of the gloppy poly and painted it with an undercoat of red and an overcoat of flat black – also period appropriate.  When the top coat gets a ding, the red shows through.  I have a number of chairs and other chests done in the same manner.  I added brushed antiqued solid brass handles and called it done.

The chest now sits behind the couch, near the door for the back garden and holds a couple blankets for TV watching comfort and two cotton hammocks for lounging the yard.

Drawer Chest Rebuild 2015_2

Drawer Chest Rebuild 2015_7

Drawer Chest Rebuild 2015_1

Drawer Chest Rebuild 2015_5

Drawer Chest Rebuild 2015_4

What I want Thursday – Birthday Addition 2015

In about 4 weeks I will celebrate the 13th anniversary of my 29th birthday and the current plan is to spend the weekend in Rome and Venice or Florence.  While there, I want cake (moist yellow cake with chocolate butter-cream frosting), snuggling, a nice glass or 6 of fine wine and lots of tiny cups of Coffee, laughter, and a few well thought out gifts. I will NOT work that day – just not going to happen – and I plan to pamper myself with a haircut and a strait-razor shave if it can be found.

Below is my birthday wish list – mostly for my wife, family and children, but feel free to peruse and suggest.

I already have a bunch of crap, so my first request is that people give to a worthy cause.

  1. Heifer International:
  2. Doctors Without Borders/MSF
  3. Diabetes Research

If you DO happen to maybe want to get me a little tangible token of your love and appreciation:

Updated after the occasion with strike-throughs for the stuff I got 🙂 

Books:
A signed hardbound copy of Campaign Furniture 
Theodore Roosevelt: a Strenous Life
I would like a signed copy of Chris Schwartz’s The Anarchist’s Tool Chest
Founding Foodies
Mahogany: The Costs of Luxury in Early America by Jennifer L. Anderson
Benjamin Franklin by Edmund S. Morgan
A volume on handplanes or a tome on traditional woodworking
Twilight at Monticello
Bees of the World by Mitchner
Bees of N. America Santa got this book and two others for me early
A Lost Art Press volume of The Essential Woodworker
Washington: A Life by Ron Chernow
James Krenov’s Cabinet Maker’s Notebook
Two Classic books on Shaker Furniture: here and here.

Stuff:
A yearly subscription to Monocle Magazine My wife is Awesome!!  I have wanted this for YEARS!
Permission to buy a sweet fountain pen
Amber 2ga. Plugs
2ga. Dark Jade plugs
A handsome tweed vest
a large Isle of Lewis Chess Set I got this set after-the-fact and my wife is now playing chess with me weekly! Win-Win
Brown Redwing Engineer’s boots
A banjo mute Found for cheap in a local Toulouse shop
These new bad-ass cufflinks or these My wife had these made for me with a sweet message on the reverse.  Love her.
New House Shoes  My mom is cooler the yours!  She sent me these house-shoes and I have worn them almost every day since!
A Global Chef’s knifebread knife, and ceramic sharpener Another score from Mom.
Classic Cartoon DVDs (Bugs, Tom&Jerry, Loony Toons, Road Runner, etc…)

Tools:
A pair of 1/2 round molding planes
A Pair of Snipe Bill molding planes
A Grizzly G0602 Benchtop Lathe


Musée du bois et de la Marqueterie in Revel, France

Last summer My Father-in-law, my son, and I made a road trip to the Musée du bois et de la Marqueterie (Museum of Wood and Marquetry) in Revel, France (about an hour from our house if you don’t get lost or almost run out of gas…).  The town is one of the noted centers of high quality furniture production and has historically specialized in wood marquetry.  It goes back to 1888, when Alexandre Monoury – a master cabinetmaker – left the workshops of Versailles and settled in Revel.  Under his influence, several workshops were set up there and many of those origional shops are still going strong today.  

The museum highlights the work of the area, new and old, and we spent a couple of hours marveling at the tools, example pieces and shear artistry of furniture, sculptures and marquetry examples on the second floor of the facility.  

As a note – this part of France is stunning with sunflower and wheat fields(the Tour du France rides through or by every year) and the town has an stunning 13th century market square and a beautiful central market hall with a quadrangle of historic buildings around it that are home to restaurants, a fabulous bakery/pastry shop and antique shops.

Matt Talley _ Musée du bois et de la Marqueterie - 2014 (11) Matt Talley _ Musée du bois et de la Marqueterie - 2014 (1) Matt Talley _ Musée du bois et de la Marqueterie - 2014 (2) IMG_2374 Matt Talley _ Musée du bois et de la Marqueterie - 2014 (3) Matt Talley _ Musée du bois et de la Marqueterie - 2014 (4) Matt Talley _ Musée du bois et de la Marqueterie - 2014 (5) Matt Talley _ Musée du bois et de la Marqueterie - 2014 (6) Matt Talley _ Musée du bois et de la Marqueterie - 2014 (7) Matt Talley _ Musée du bois et de la Marqueterie - 2014 (8) Matt Talley _ Musée du bois et de la Marqueterie - 2014 (9) Matt Talley _ Musée du bois et de la Marqueterie - 2014 (10)

Desks France Revel 2014 (4) Desks France Revel 2014 (5) French Lathe 2014 (7) French Lathe 2014 (1) Work Bench france 2014 French Work Benches 2014 (4) Desks France Revel 2014 (9)

IMG_2455

Lectern rebuild and re-thinking the plan

Early last year, I picked up an antique copyist’s lectern (the top part only) that originated in a French Abby.  The lectern was riddled with worm holes, a couple pieces were missing, and there was some damage to repair, but the first thing was to make it bug free so not to infect all our other furniture with wood worm.  The thing spent a couple of months in a plastic bag full of insecticide and chemicals that makes for square babies. According to the interwebs two months bathing in said concoction would make the piece safe to bring out see the light of day again, so after fumigation, it sat in our living-room as decoration for 12 months before I started the rebuild in earnest.

Initially, I sketched up a few column profiles in my ubiquitous little black notebook and settled on a somewhat simple design that matched the overall style and period of the piece.  Next, I spent a little time one Sunday turning a new pedestal out of beech scraps from my workbench build. I glued them all up into a single 5″ X 5″ x 32″ hunk of wood. I then measured and turned matching intermediate supports from a scrap oak rolling pin with curves to match the column.   A couple of weeks later, I used the last of the beech scrap and turned the pedestal base, which ended up 16″ in diameter and 3″ tall.

After gluing it all together, applying matching stain, and putting 4 coats of polyurethane on the base, it was time to start on the lectern top.  All was going to plan right up to the moment that I removed a damaged shelf and saw what looked to be fresh wood damage… In one of the joints there was a small white bug larvae…  Son of a bitch…  I immediately put plastic on my bench top and took apart another joint.  I found more LIVING wood worm. I started picking at the capped holes here and there and more worm…  Shit!!!  I wrapped it up in a trash bag and out to the street it went.  It would seem that my lethal chemical treatment wasn’t that lethal.  Just REALLY, REALLY happy that the hatch hadn’t started and that my house was no full of bugs that would lay word worm eggs all over our other furniture. I took pictures and measurements and I am now planning on building a copy of the top over the next month or so and I will post the finished product here when I am done and it is installed in the living room.

Matt Talley - Projects 2015_06

Matt Talley - Projects 2015_07

Matt Talley - Projects 2015_16

Matt Talley - Projects 2015_15

Matt Talley - Projects 2015_12

Matt Talley - Projects 2015_11

Matt Talley - Projects 2015_10

Matt Talley - Projects 2015_09

Matt Talley - Projects 2015_08

Matt Talley - Projects 2015_05

Kitchen Island – Update

It has been almost a year since I built (with help from The Ruminator) Stamps-With-Foot a kitchen island and she has loved it (so I am told) and used the bejesus out of it.  I made a couple of additions and there are a a few observations:

  1. The wood I used as the base platform shelf was REALLY wet and I put 1/16″ spacing between the boards.  WAY too much.  I should have wedged them in as tight as possible because they have shrunk and now I have 1/8 gaps in a couple of places.  No big deal since it is tongue and groove, but I don’t like spacing that large.
  2. I installed an Arkansas Razorbacks bottle opener on one of the legs.  It was required.
  3. I had used a hunk of cherry tree trunk/firewood and turned it down as a lid/plug for the scrap hole.  I turned it too large since it was really wet and was bound to shrink/warp/crack.  My best guess is that it is done moving, so I put it back on the lathe and turned it down to size and changed the profile a little.
  4. The rolling pin is a great towel holder, but I should have/need to stop it from rolling – the towel slips off and onto the floor occasionally.
  5. I also originally finished the plug with walnut oil, but it gets handled a lot by wet hands and I had to oil it every couple of weeks.  This time I finished it with 3 coats outdoor polyurethane and then added a coat of wax.


Matt Talley Kitchen-Island-France-2014-1-262x300

Matt Talley - Projects 2015_03

Matt Talley - Projects 2015_02

Matt Talley Kitchen-Island-France-2014-2-300x263

Matt Talley - Projects 2015_29

Some small projects around the house

I have been swamped with work and travel for the last couple of months, so my shop time has been very limited. I have mostly been puttering around with my workbench, getting the last bits and bobbles done before calling it done and I have spent the off hour here and there on the lathe and doing stuff around the house:

  1. I had to fix a dishwasher leak and do some painting in the kitchen – still hate plumbing
  2. We did some re-arranging, so I had to fill some nail holes and then make new ones.
  3. Glued a cutting board back together after it split – craptastic glue didn’t hold, so it is back in the to-fix pile and will get some dowels this time
  4. Made a pot lid handle out of some scrap cherry.
  5. Tackled the jungle that was once my yard – twice
  6. Sharpened the lawnmower blade
  7. Turned the compost
  8. I bought a sheet of plywood and built a DVD shelf and a 8′ bookshelf for the lending library we run.
  9. There was been an oak log in my shop for months so I cut it in half and made a couple of stools for my office.
  10. Our puppies play a game called “run away from Mommy” when she takes them out, so I built two small fences to keep them in the back yard and away from the front gate.

I have do a few things in the shop just for organization and am working on a couple of little projects:

  1. We got a huge free wardrobe that I put in the GROP to organize non-tool/shop related items like climbing gear and life jackets
  2. My battery operated tools need a home, so I put together an organization center for them that mounts on the French cleat board
  3. I hung up my 6 heavy panel clamps to get them out of the way
  4. Made a Lathe chuck and tail-stock tool organizer for the French cleat organizer
  5. With a bonus from my J-O-B, I bought a few more molding planes, but they arrived in sad shape. I spent 6+ hours one Saturday cleaning, sharpening and fixing them.
  6. Started work on a blanket chest rebuild: cut here, snip there, new runners and new feet. Will get new milk paint finish when complete.
  7. Working on a copyist lectern rebuild. I made the base, pillar and other bits from some scrap beech left over from the bench build.
  8. Built a wooded top for the puppy Kennel so it blends better with the furniture in the Living Room.
  9. Putting together a 6-board chest for molding plane storage.  Will get re-purposed forged hardware and a Barn Red milk paint finish.

Matt Talley - Projects 2015_06 Matt Talley - Projects 2015_11 IMG_3410 Oak stool 23-2015 (2) Matt Talley - Projects 2015_24 Matt Talley - Projects 2015_22 Matt Talley - Projects 2015_23 Matt Talley - Projects 2015_25 Matt Talley - Projects 2015_17 Matt Talley - Projects 2015_18 Matt Talley _ Drill Organizer _ 2015

My workbench is DONE!!

I am about a month late in posting this – life and my J-O-B got in the way – but the Cornebarrieu Bench is done. Completely done! All bells and whistles added. It seems like it took me forever, but it fits perfectly in the shop and I started using the bench even before it was finished. I am very happy with the outcome and am currently working on projects that have been piling up all winter. Just in case you haven’t been following along for the past year and a half or so:

My GROP (garage and shop combo) in Seattle was too small for a proper joiner’s bench. I made due with a slim, high, wall-mounted work counter, a bolted on machinist-vise, Quick Clamps, and the top of my table saw. It worked – mostly/sort of – but was a pain in the ass a good bit of the time: I never once planed a board on a stable, solid surface. My GROP here in France is roughly the same size as the one in Seattle, but is absent the huge cast iron machines and saws. I have some room to move and finally have the space for a big, heavy, proper work bench as well as some time to build one – or so I thought.

It is an amalgamation of benches by M. Roubo, Roy Underhill, Chris Schwartz, and Bill Schenher. I am calling it the “Cornebarrieu Bench” after the small village in southern France where we live, where the lumber has been sourced, and where the bench was made and first used.

For anyone interested, here is a documented build process, build notes, and step by step guide – 115 steps – to build this beast.

Cornebarrieu Bench 2015  (30)_sm - Copy

Cornebarrieu Bench 2015  (31)_sm

Cornebarrieu Bench 2015  (29)_sm - Copy

Let down by an online tool seller with GIANT balls.

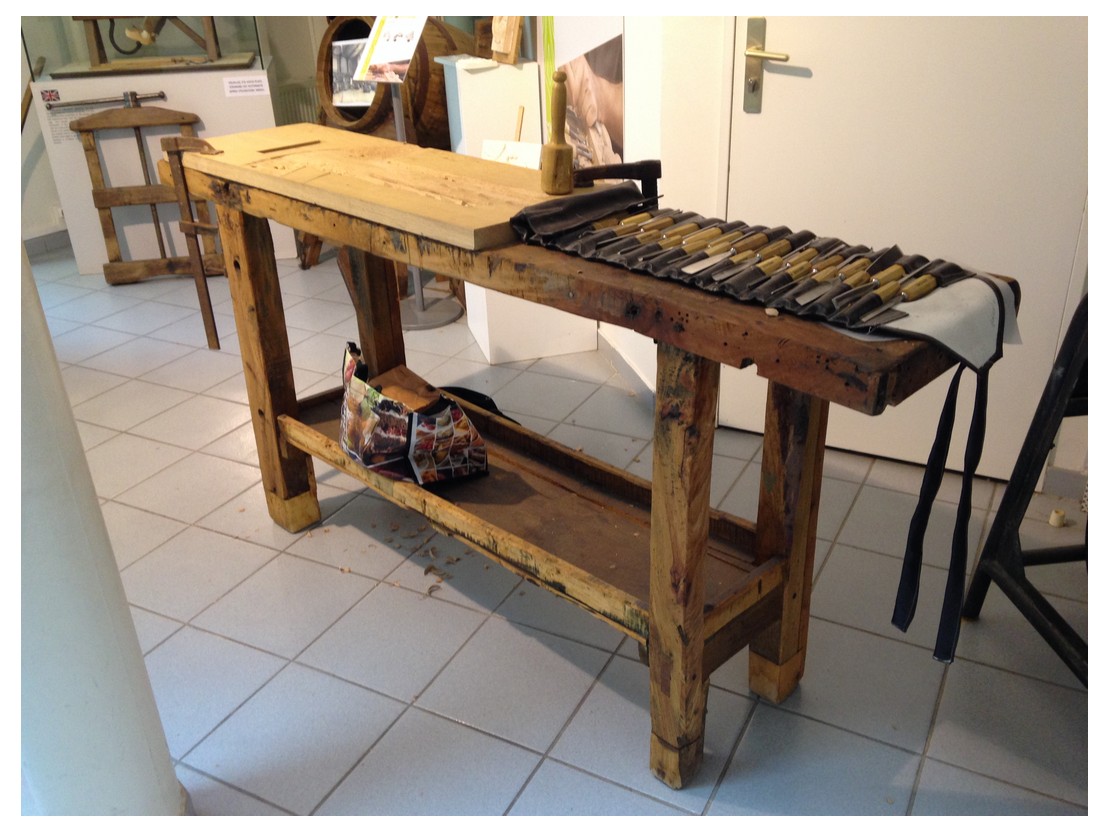
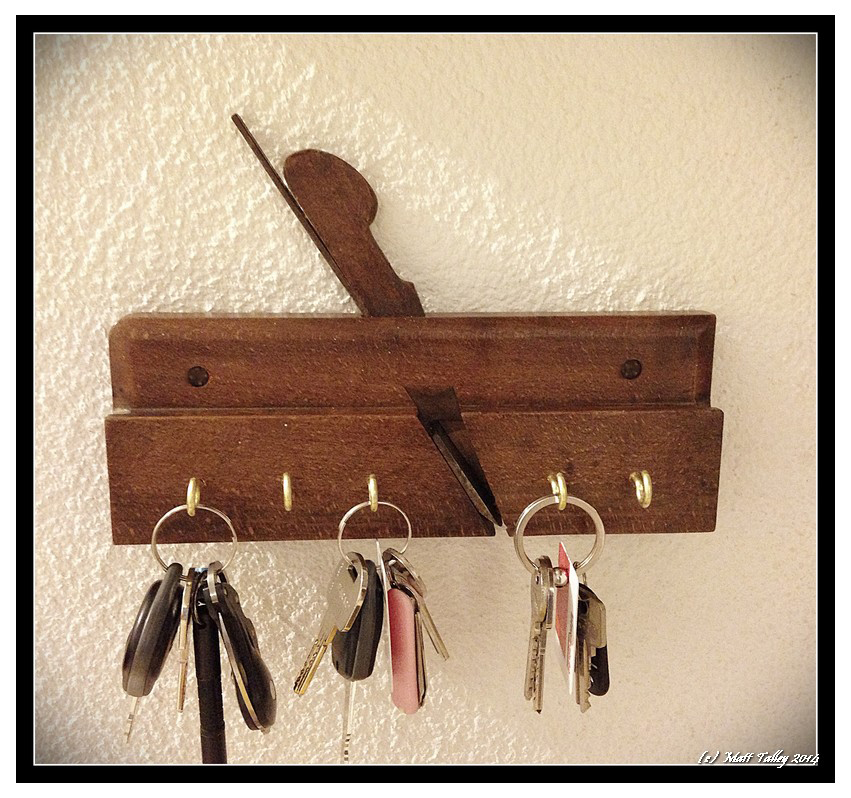
So, I am a little tweaked… I got a small bonus at work and sent a little money to my mom and daughter, got something for my wife, paid to have a tree taken out, sent Heifer and MSF some funds, paid off my last student loan (FREEDOM!!), put a little money back for a rainy day, and with the last bit decided to do a little something small just for me: I bought a few beech molding planes and 3 mortise chisels from a guy with a web store in the Scotland. I will call him UK Tool Guy. I have bought twice from him before and it all went really smooth and my purchases were exactly as expected. I bought a toothing plane from him at a good price that was in perfect working order and arrived exactly as pictured on his site.

My experience this time around was different. The order part was normal, but when I received my stuff it was all kinds of wrong. Painted parts, broken pieces, condition received was NOT as advertised, etc… I spent 4 hours cleaning and fixing and will have to spend another 4-5 repairing 2 chisels and 2 of the planes. 8-9 hours is a lot of time to unexpectedly fix stuff that I just bought. I am not super-important in the grand scheme of things, but my time is worth something to me.

Anyway, I took a few pictures and wrote the guy to let him know about the issues, asking about the possibility of some remuneration. He sends me back a mail offering me a little credit instead of a refund. I take him up on it, not knowing what the shipping will be I choose a couple of items from his web store that equals to less than £50 (~$78) that he offered up. I think my time and frustration was worth more, but I didn’t press the point.

He sent me a response that informed me that I had gone over budget and that he would “…let me off for now…” Seriously‽‽ Was this guy born with an extra set of balls? This is the third time I have done business with him. I check his site regularly for stuff I am looking for – I am even on his MF mailing list. The bottom line is that I got an unexpected crappy deal, I was gracious and completely undemanding and he will “…let me off for now…”. It took over three weeks for him to send the stuff two new items out. So much for the “Shortly” time frame he referenced in his last mail. I believe that this is the last time I will be doing business with the UK Tool Guy

For the sake of Transparency, I have included the whole chain I sent below – only deleting names and contact info.
___________________________________________________________________________
Hi Matt

Thanks for your response.
Those two items actually come to £63.50 with postage which is a bit over
£50 but I’ll let you off for now, we can maybe adjust slightly with any
future order. I will get these off to you shortly.

THANKS

> On 17 March 2015 at 11:20, drivenoutside wrote:

Hi _____,

Sorry, I didn’t mean to come off as someone that can’t be pleased. It is
not that at all and my two previous purchases were really spot on.

Thank you for your immediate response and offer for credit. I would love
to have the boxwood rule and the upholstery hammer if you are OK with that.

Thank you and regards,
Matt

> On March 16, 2015 at 4:18 AM UK Tool Guy wrote:

Hi Matt

Thanks for your e-mail and I am sorry you had so much to complain about.
Not that it is an excuse on my part but I have a funny feeling I didn’t
pack your order up as otherwise I would have picked up on some if not all
of these points as I check everything properly when I am packing it. I
understand your frustrations when you get something that is not quite what
you were expecting and once again I am sorry for this. Rather than
refunding you some monies why don’t you instead have a look at the site and
see if there is something there around the £50 mark including postage that
you might like FREE. If there is just drop me an e-mail with the product
number so I can remove it off the site and send it over to you.

THANKS

> On 15 March 2015 at 20:36, drivenoutside wrote:

Hi _____,

I received the molding planes and chisels a couple of weeks ago, but as I
travel a good bit for work, I just this weekend had the time to open the
packaging up and take a look. What I found was a little surprising as I
have ordered a couple of planes from you before and condition was spot on
as advertised. I did not expect like-new condition as some of this
material is over 200 years old, but some of it was not as stated.

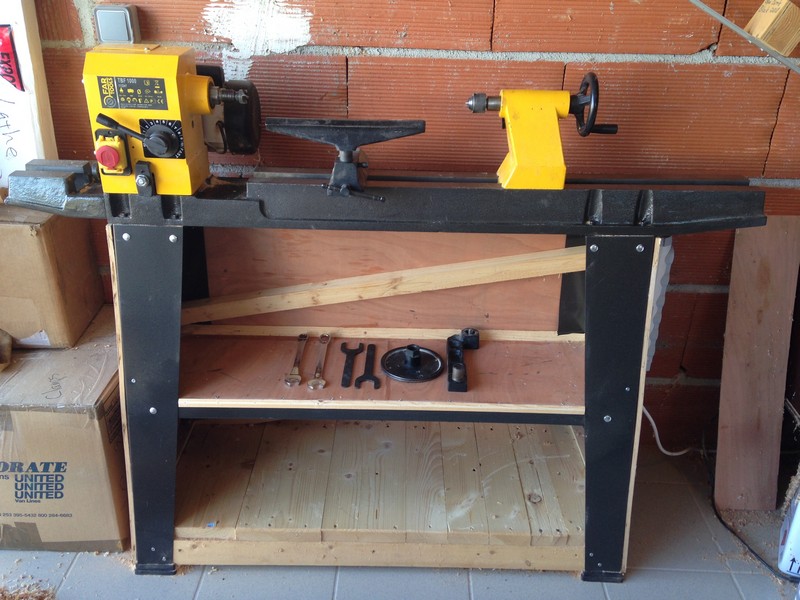
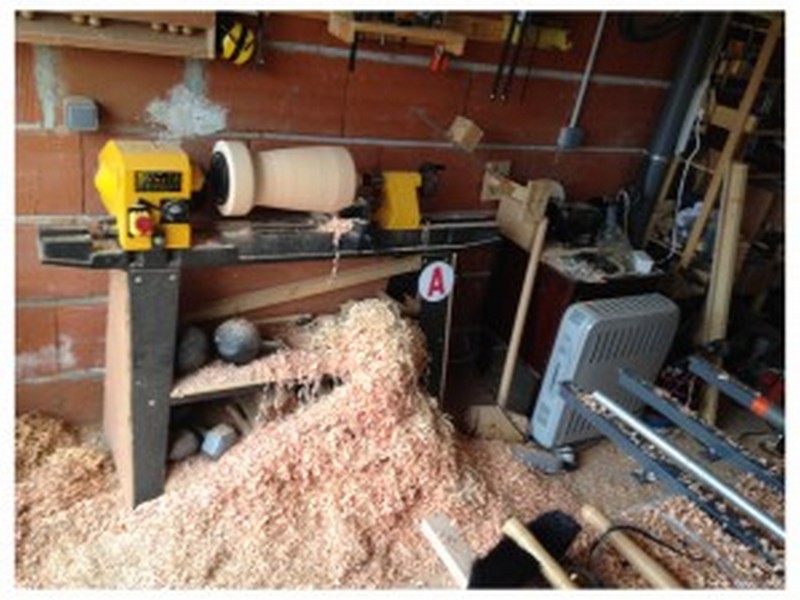
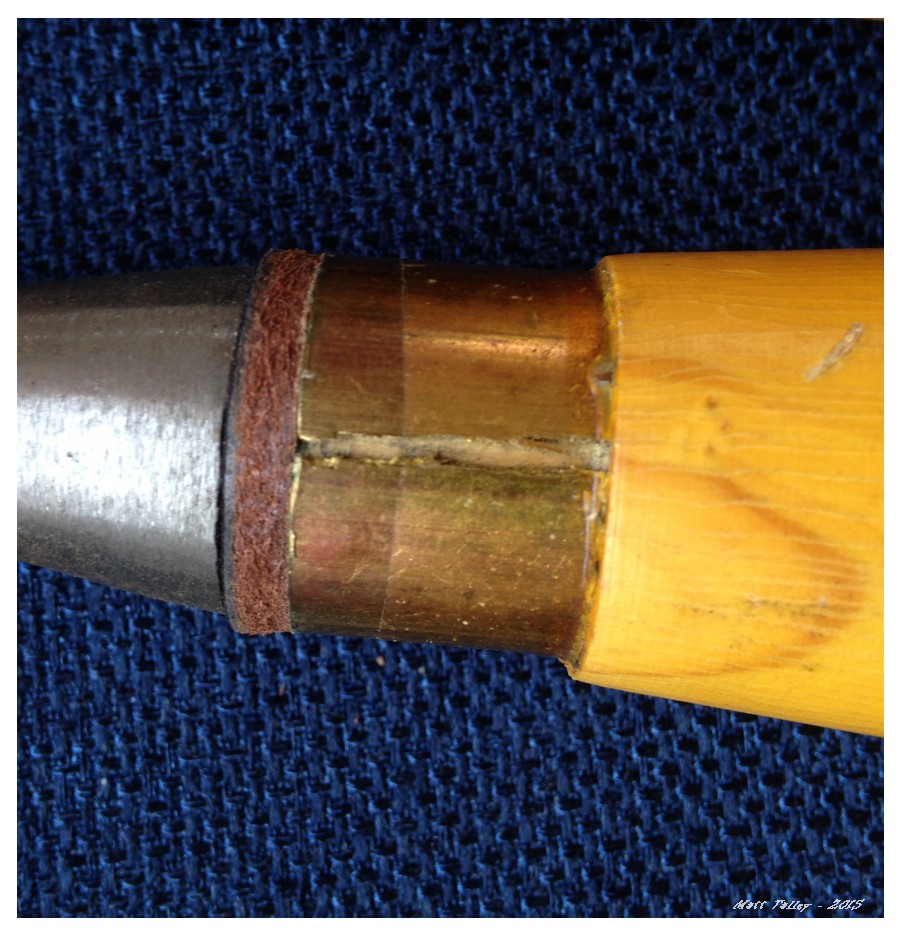
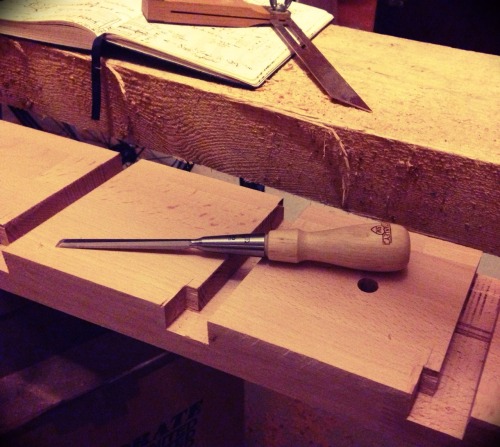
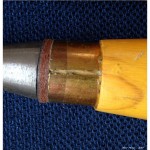
Two of the collars on the sash chisels are cracked, one completely. I am
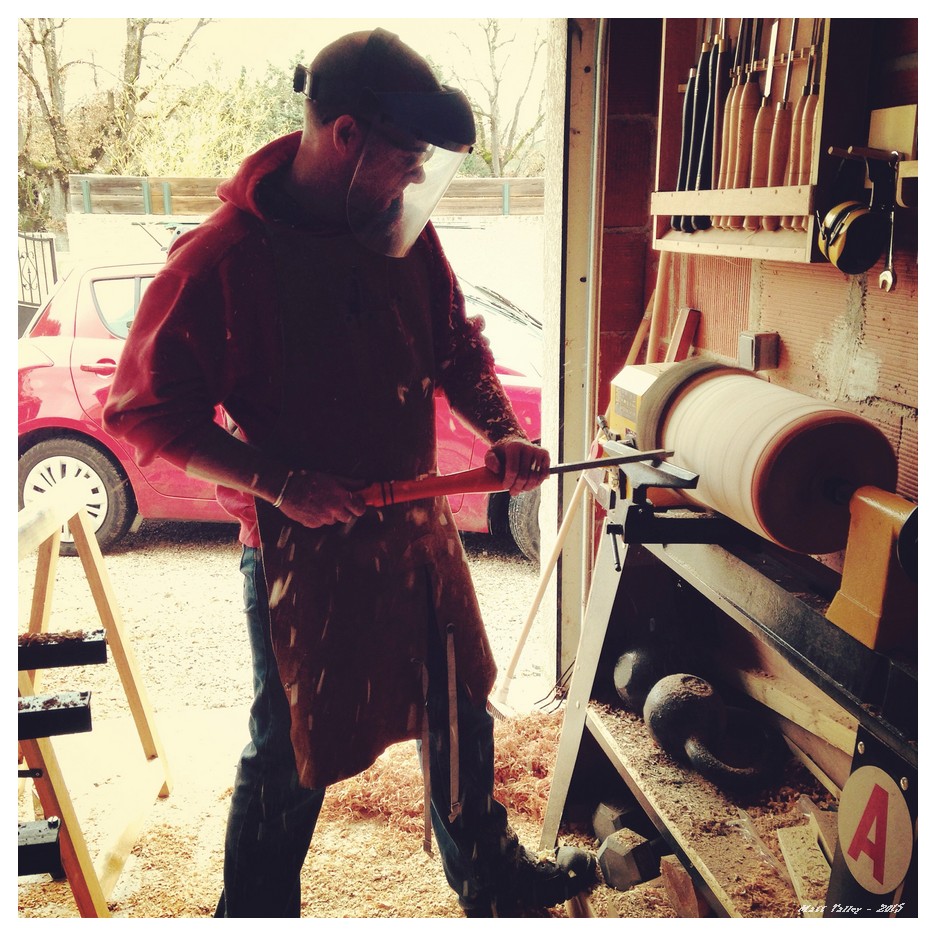
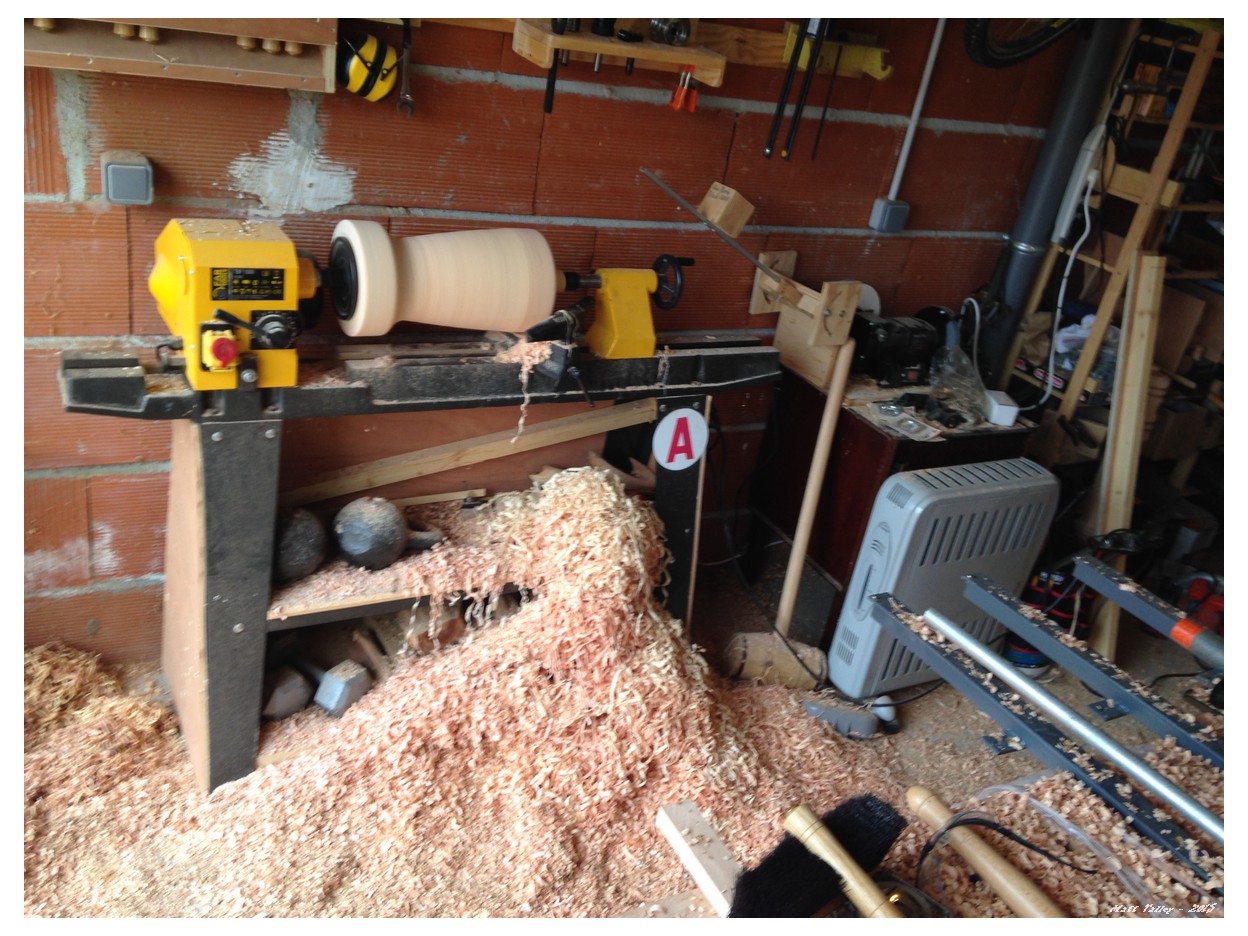
going to have to tear them apart and replace the collars. I guess I will
either see if I can source from Marples or turn down some brass stock on
the lathe.

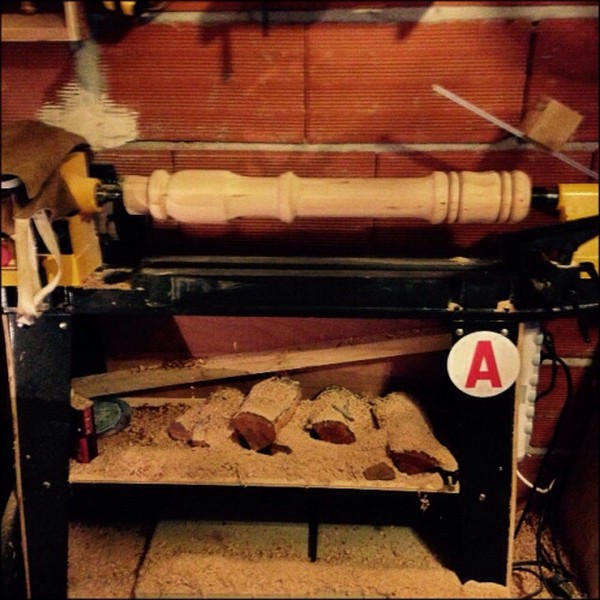
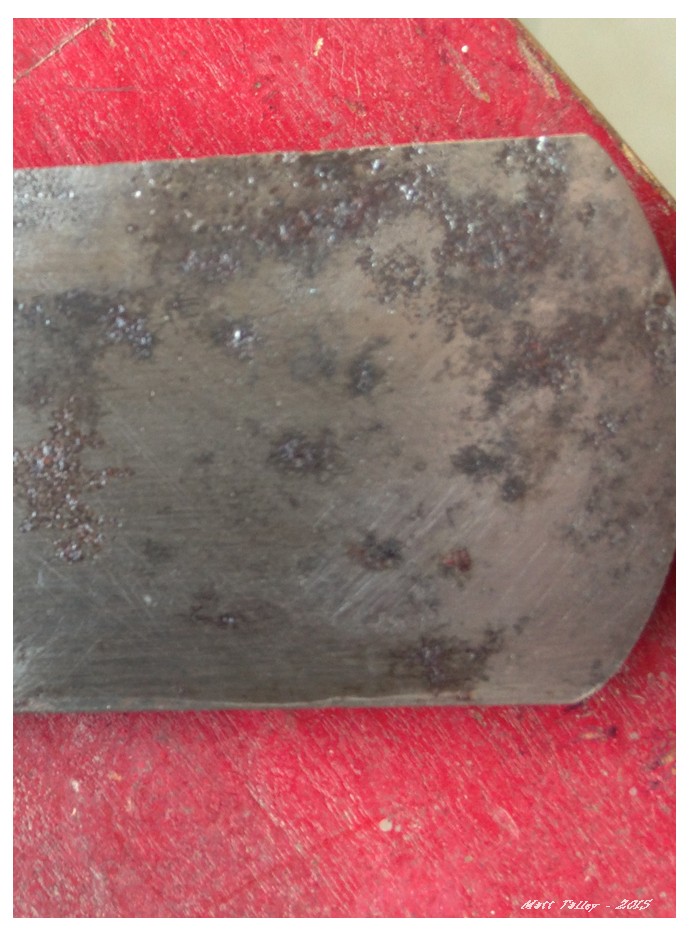
I spent most of yesterday flattening, polishing, sharpening, and oiling
the plane blades. There is a good deal of pitting on some of them and I
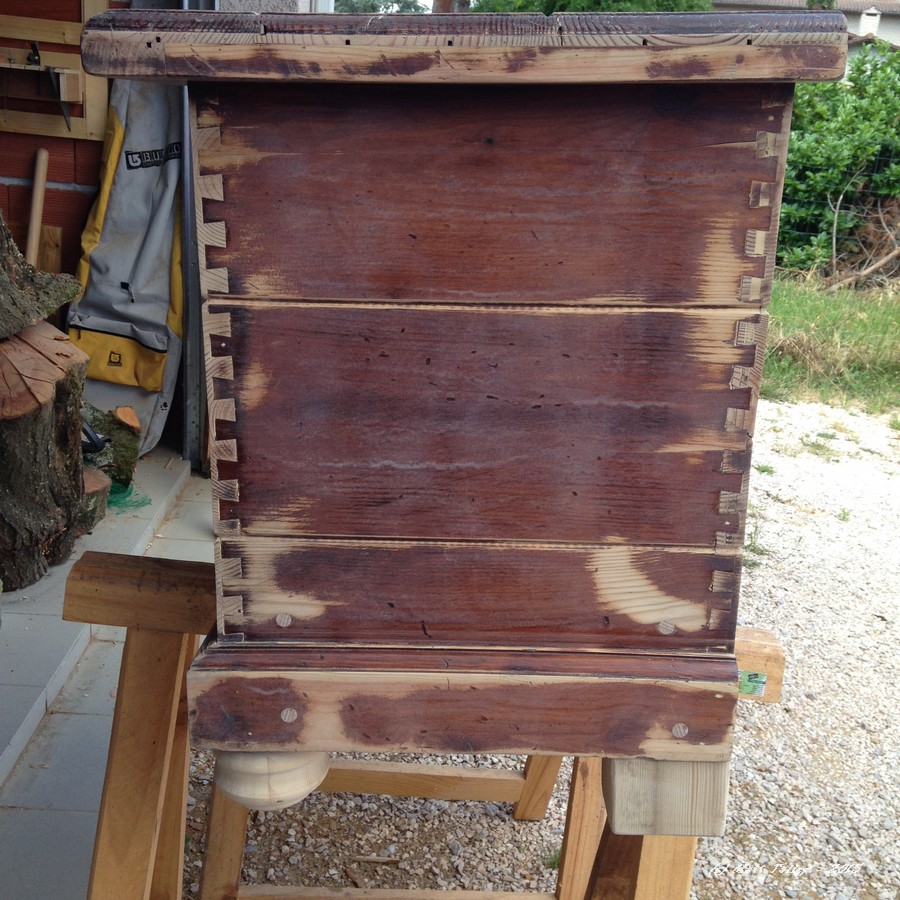
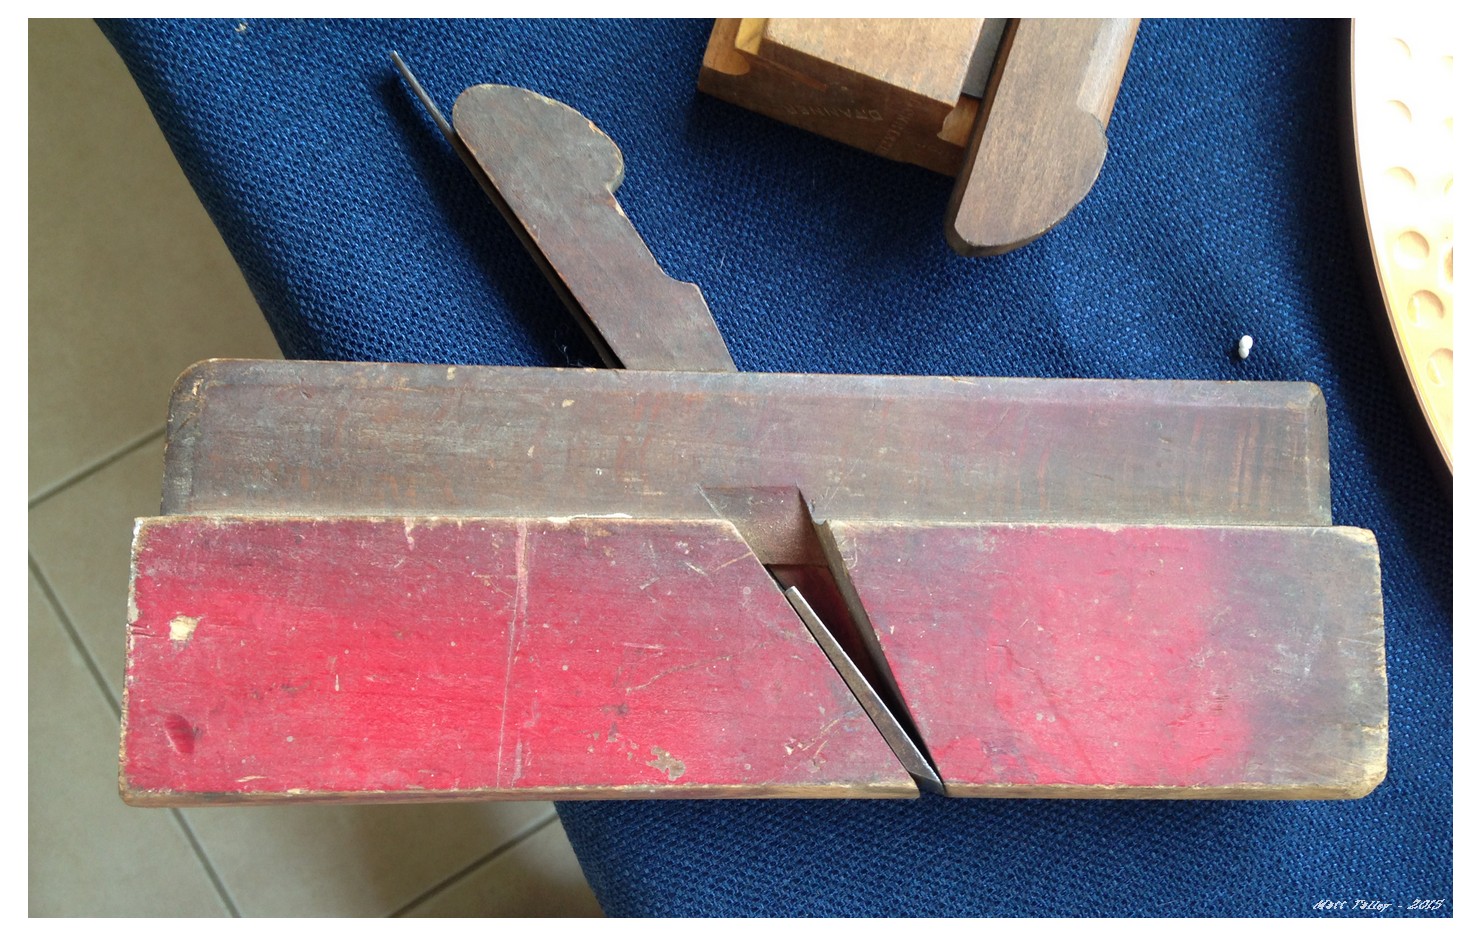
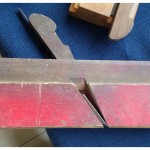
will need to replace two. Most of the plane bodies were fine, but the #12
was painted red and the #16 had a screw holding a crack in the body
together. I drilled it, filled with hide glue and inserted a beech dowel.
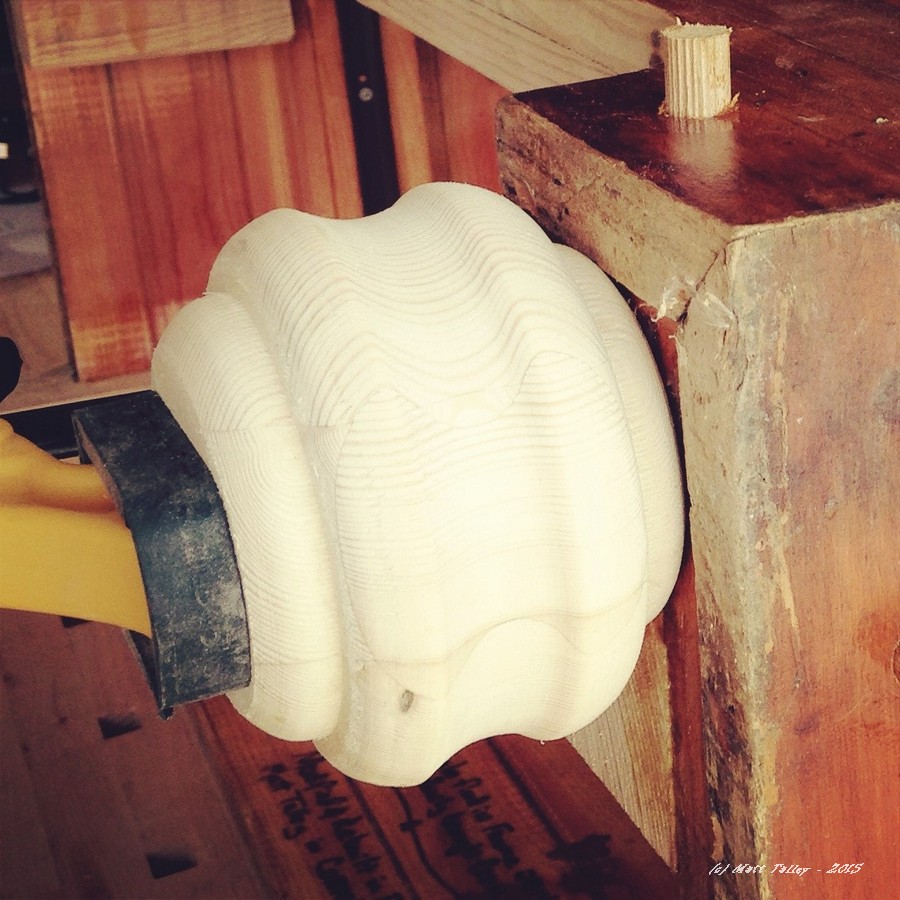
The #1 round’s wedge is cracked in half and has been glued back together
by a previous owner. I am going to have to make a copy of it and replace.
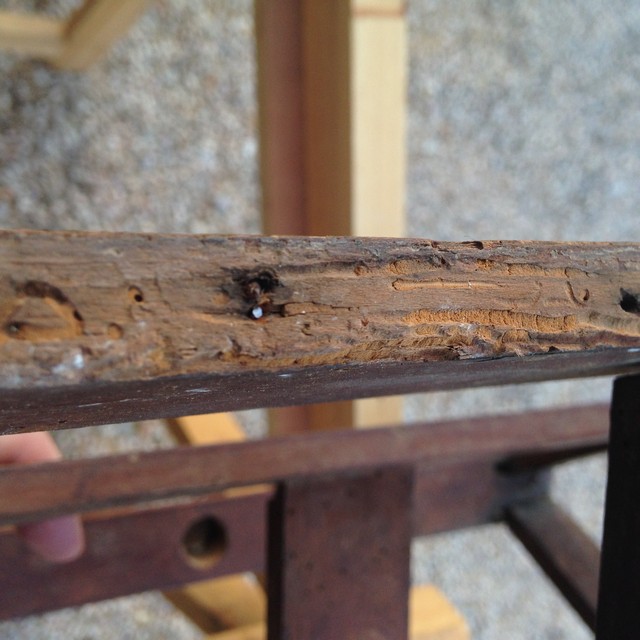
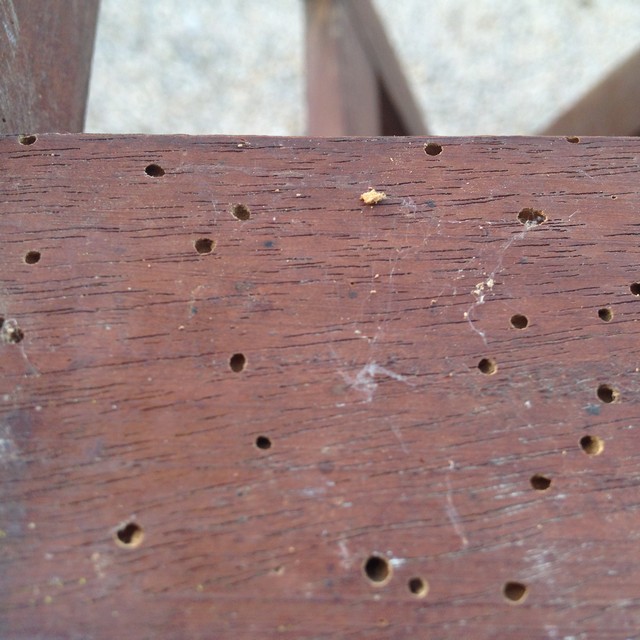
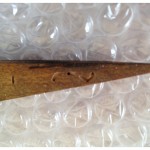
When I unwrapped the #9 there was wood worm in the packaging. Not just old
holes, but a live worm in the plastic. There was damage to the plane and
the wedge. I took the whole lot to our local vet and had her x-ray the box
4 times. It is a Luthier’s trick and it kills any worm/moth larva.

Take a look at the attached pictures and let me know what you think and if
you think it is fair to refund me a little of the purchase price and
shipping.

Thanks,

Matt

IMG_4583

IMG_4586

IMG_4580

IMG_4581


On 23 February 2015 at 15:51, drivenoutside wrote:

Hi _____,

The ship to address is: __________
My phone number is: ___________

Please send me the tracking number so that if there is a problem with the
shipper or customs, I can call right away

Thank you again,
Matt

——– Original message ——–
From: UK Tool Guy
Date:02/22/2015 2:30 PM (GMT+02:00)
To: Driven Outside
Cc:
Subject: Re: Tool Order

Hi Matt

Just written out your invoice for the tools ordered. The grand total
including postage comes to £metric shit-ton. An invoice / receipt will be included with the tools. I’m in the shop today until 4:30pm if you want to ring with card details for payment.

MANY THANKS

New stools from an oak tree

This weekend I finished up a “little” lathe project I started in early February – I made a couple of stools out of a hunk of oak tree that was cut after a storm in our village. They are about 15.5″ (39cm) tall and 10″ (26cm) around and getting it that way pushed my Chinese lathe to its absolute max. It walked all over the floor when I first started it up – hence the kettle bells thrown on the middle shelf to add mass. It super did not like the out of balance logs. It would have been fine at a slower speed, but the slowest my lathe goes is 400 RPM and that is too fast for this size project. I managed, but there was lots of starting and stopping.

I really like both how the turned out and how comfy they are to sit on – just the right height for a quick stop-and-rest. I will add bow-tie joint if needed as they dry out and split, maybe out of some walnut that I have. They will make a nice addition to my home office.

Oak stool 23-2015 (2)

Oak stool 23-2015 (3)

Oak stool 23-2015 (1)

Oak stool 23-2015 (4)

Used my workbench today!

Today was the official first use of my workbench. I used it as a work table to lay out the shape of the leg vise, I cut the dados for the tail vise, cleaned them with a chisel, and after spreading plastic used the bench top as a glue-up table for the vice pieces. I had enough room at the other end of the bench to put together a French-cleat mounted battery drill organizer that I cut the parts out for yesterday afternoon. I have trouble staying with one project and do 3-5 at a time. It makes my wife crazy.

The bench top height is perfect and I am super stoked to have a real workbench here in France. I can finally get down to serious business and make some moldings and a small linen-fold panel chest.

Happy!

The contents of my checked luggage

Every time I come back to the US for work or vacation, I go back to France with maxed-out checked luggage.  Not smuggling contraband or anything, just comfort food, hand tools, and stuff we cant get there. I have only been stopped at customs once and it was an hour long “what is this” game.  All sorts of fun explaining what an 8TPI lathe chuck was….

If customs decides to stop me this time they will find the following in my 2 huge duffle bags:

1 thermarest mattress pad
4 bags of Vashon Roasters Coffee
2 Starbucks mugs from home
1 giant 5/8″ bowl gouge (lathe chisel)
3 sets of Queen sheets
1 end grain lathe chisel tool
New snowboard boots.
Found pocket knife
2 jars of Coconut oil
Multi Vitamins
1 ziplock bag full of shelled pecans from my aunt.
Bottle of Tums
Christmas presents from my mom for my wife
A new hat (Heisenburg-ish and green)
17mm combo wrench and 17mm socket
2 sets of workshop/garage plans
Specialty hardware from Woodcraft
A second notebook computer
4 months worth of mail
7 books
End grain specific lathe chisel
75mm bowl jaws (for previously mentioned lathe chuck)

Workbench Progress

Progress on the Cornebarrieu Bench is coming along.  It has been slow going – I have been swamped with work, travel, lack of allowance (I spent it on Christmas and a classic fiddle/violin…), more work, etc…

Stamps-With-Foot gave me a gift card for our local Home Center/hardware big-box as a Christmas present that took care of the price for the last section of the top. I got a lot accomplished this last two weeks:

  1. The final sections of the top were glued up just before New Years eve- using every single clamp I brought to France and more than a little ingenuity.
  2. Installed (2 hours of cutting, drilling and chiseling) a pricey German-made cast iron end vice that I got on 65% sale – was missing two small metric bolts and the wood handle.
  3. Made final leg cuts: the tenons that go inside the bench top.
  4. Put 5/16 oak dowels in to the pieces that have cracked, even a little, to make sure that the cracks do not spread.
  5. Gave all the base parts an 80 grit sanding.
  6. Really like the sawmill marks on some of the pieces.  Am going to put clear poly on the base instead of milk paint to preserve the marks.
  7. The legs and stretchers shrunk and warped just a touch in the six months since I cut them even though I had it all clamped together.  It will be fine and could have been worse.
  8. Made the first dry-fit of the base to the top: Everything lined up , fit perfectly, and is as square as I could ask for.
  9. Drilled holes for connector bolts and lag screws.
  10. Installed base shelf cleats
  11. Cut the 12 sections of 5/8″ tongue & groove pine that will be the base shelf

Cornebarrieu Bench 08-2014 Cornebarrieu Bench 09-2014 Cornebarrieubench 12-2014 Cornebarrieu Bench 1-2015


Before I head to the US in a couple of weeks, I hope to have installed the end-vise block, given the base a 120 grit sanding, polyurethane the base &shelf, cut the hole for the leg vise screw and the rectangle cut for the vices’ parallel guide. I also want to install the leg vise nut in a pocket behind the leg while the bench is upside down.

2014: My year in Review

Moved into house in small village near Toulouse France
Started running and lifting again
Set up office at home
Had to deal with broken furniture from move – Insurance company was fairly easy to deal with
Fixed some stuff, got other new stuff
Flight to Florida for work
At least 10 hours a day spend at J-O-B
Work Laptop stolen in Paris hotel Room – Super pissed!!
Met friend both new and Old in and around Toulouse.
Trip to China for a week
More work, more coffee
Cut down a deceased cherry tree and made 3 big bowls
Gave two away
Played Pétanque with the old guys in my village
Built 5 benches for the house over a 5–week period
Work crazy hours
Flight back to Seattle for 2 weeks work/vacation
Visit to Carcassonne and Limoux
Found amazing French junk shop in the middle of nowhere
Joined a French beekeeping group
Bought a wood Lathe
Worked more crazy hours
Rode my bikes a little – not enough.
Made stuff for house: instrument hangers, book shelves, lids, kitchen island, etc…
Running and lifting again somehow stopped and work increased…
Got a new Banjo
Horribly addicted to coffee
Blogged a good bit
Started setting up small hand tool work shop in garage
Son in France for 2 months
Got a canoe for Father’s Day
Bastille Day in Carcassonne
Began building 450# traditional work bench
Quit Facebook
Spent way too much at local wood supply house
Made 4-5 small pieces of furniture for the house
Father in law in France for a month
Fixed some furniture for a co-worker and another piece for a neighbor
Adopted new puppy – Truffle
Flights to Germany, Marseilles and Paris
Super stressed – J-O-B
Getting fat(er)
41st Birthday trip to Porto, Portugal
Got an awesome watch as a gift from sweet wife
Trip to Morocco for J-O-B – bought 2 fantastic carpets while there
Thanksgiving in Turkey – sort of funny sounding. Was working
Grew a beard – wife disgruntled
Flight to Arkansas
Became a Grandfather!!
A beautiful baby girl!
Feel super-old
Tried to bribe a Friend’s parents into selling me his old jeep
Enacted a diabolical plan to make the jeep mine
Spent 14th Birthday with Son
Got most of Christmas shopping done in US
Came home to France with new mandolin and vintage violin
Cut down another cherry, and apricot and a plum and started making bowl blanks
Back to work and back to more 10-12 hour days and calls until 10pm
Christmas snuck up on me again.
Read 20 books in 2014 – almost shameful. Will read more next year
Spent holiday in Pau, France at a friend’s parent’s place and ate and drank until I was ready to pop
Finished top for new work bench – only took six months
Had two friends from London come over for New Years
Spent first weekend of 2015 snowboarding with two friends in Andorra

Chinese Lathe Build Update – Pimp My Lathe Edition

As mentioned in a previous post, I purchased a Chinese manufactured wood lathe shortly after moving to France. Putting it together and getting it running true was not a Herculean task, but it wasn’t a plug and play affair either. In addition to the initial setup, I have taken an hour here and there to make it bit more ridged and add some features that did not come stock, just to pimp it out a little:

  1. The base is now sheathed in 1/2″ plywood, glued to the wood supports and screwed into the sheet metal legs.  It makes the base a LOT stiffer and clean-up is much faster.
  2. After 4 months of weekly run-time, I have had to replace a couple of set screws and re-tighten the short bed extension outboard of the head-stock. The clamp bolt holding the head stock shattered and caused me some grief.  Chinese bolt quality sucks.
  3. The bottom of the base was finished with 2″ thick scraps and I added a couple hundred pounds of pavers, gravel, and crushed brick to add even more stability.  It is not enough when I try to turn a 15″ hunk of cherry outboard,  It still wobbles and jumps around a bit.  There is just no way to make the sheet metal frame more ridged.
  4. On the French cleats above the lathe, I added a tool holder and chuck/drive center/tail center tool mount for convenience.
  5. I hung a long compact florescent over the work area and on the side there is an IKEA floor lamp/spot light that I can move about.  Scored it used for $8.00!
  6. A tool grinder the I picked up for about $45 is mounted are the end of the lathe on a small table for easy mid-project tool sharpening.
  7. The capacity is only 12″ and that is not the magic number.  16″ – 18″ would be perfect for the bowls and bases and platters that I am doing here.  If I added 2″ iron risers to the head and tail stocks, then it would give me a 16″ turning capacity (swing).  I have thought long and hard about doing it, but haven’t yet as it might be a complication that is more headache than useful AND I don’t want to put anymore time or money into the thing.  I just want it to work.
  8. I designed a steel bed extension – modeled it in 3D and everything, but I am not going to have it made… I would be trying to turn an under powered Hyundai into a V8 4X4 Toyota Truck.
  9. For tuning large objects with the head swiveled, I designed a sweet swing arm tool post as well.  I modeled it up too, and decided not to have it built for the same reasons.  I will use the tool post arm that came with the lathe with a wood post under for support when I turn bigger stuff outboard.
  10. This Lathe will get me by for the next couple of years and I will go over it and repair/replace any worn parts before we leave France to ensure the next owner has relatively trouble free tool, but This is my last “cheap” lathe.  I am going to plop down some funds and get a Robust, Vicmarc, a huge Powermatic, Oneway, Oliver, or a Stubby – Something with power, mass, lots of heavy cast iron and reliable parts that I don’t have to screw with.


IMG_3410 Lathe Chisel rack 2014 Lathe clean aug 2014


Rainy Day Projects

I spent a few hours this past Saturday cleaning up and re-arranging the GROP. I had bits and pieces of projects strewn about everywhere and I had to wiggle my way in through both the garage door and the door from the house – like I was in need of a hoarder intervention. It just took a couple of hours and only two utterances of the F-word to make sure that my on-going and future tasks were staged for completion and arranged in an orderly fashion.

Months ago, I picked up an antique copyist’s lectern (the top part only) taken from a French Abby. It was in ruins and the wood was full of worm holes, but I saw treasure and have planned on rebuilding it “…when I have time...” This is what rain days are for! Running and biking would have beeen cold and muddy, the dogs wouldn’t budge from the warmth of the pillow filled couch, I had already slept late and there was serious wife snuggling, so might as well make some wood shavings!

I sketched up a few column profiles in my ubiquitous little black notebook (currently a Rhodia Webbie) and decided on a somewhat simple design that MIGHT have been found when the piece was made. It is not some object of high art – no Gothic arches, no carvings and it seems to have been made for a specific task which didn’t require flourishes. I tried to follow that ascetic and kept it all fairly simple, only using a gouge, parting tool, and skew to work the column. While my lathe is modern, the tools are the same that have been used since the ancient Egyptians turned on their horizontal lathes, so I figure that the re-made version would be recognizable to both the maker and user of the original piece – that and it feeds my own mild form of wood working OCD.

The lectern top is now stabilized and bug free after months of treatment and I spent a little time on Sunday turning a new pedestal out of beech scraps from my workbench build that I had. I glued them all up into a single 5″ X 5″ x 32″ hunk of wood. I then measured and turned matching intermediate supports so that it all blends in as one piece. I need to give it a good all-over sanding before I remove it from the lathe. What I have left to do before I call it done is to replace one book ledge, rebuild (or find at junk shop) the second tin candle holder to match the single original that is left, turn and fit the pedestal base plate, and then everything gets stained and oil-finished to match.

It will look amazing in living room next to the book press with a reprinted copy of one of the four volumes of Roubo’s L’Art Du Menuisier on one side and Viollet-le-duc’s Dictionary of French Architecture from 11th to 16th Century on the other side, tall beeswax candles in the holders… Jesus, I am getting nerdier with each passing year!

Lectern rebuild 11-2014 (1)

Lectern rebuild 11-2014 (2)

Lectern rebuild 11-2014 (3)

Lectern rebuild 11-2014 (4)

Making Little Stuff Around the House

I have been remiss in posting for the last couple of weeks – my J-O-B has been sort of nuts and I have been trying to stay on top of things and stay employed 🙂 I have been putting around in the shop here and there at night before and after dinner though.  Recently I have completed:

  1. A salt cellar for my wife made from scrap red and white oak because I was tired of seeing the IKEA glass dish on the table.
  2. A jar lid or two for the kitchen.
  3. There have been a couple of honey dippers for turned gifts.
  4. Specifically for my wife, I made rolling pins for fettuccine and ravioli pasta (or pie crust if my sweet bride happened to want to bake me a lattice top apple pie…)  We had a friend who is a food blogger come over that LOVED them and I think that I am going to do one or two for her as well.
  5. I added some wood-bling to a plunger handle – Why have mass-produced stuff sitting around like everyone else when 8 minutes of lathe time and a little oil/wax turns the mundane into the custom.
  6. A glass bottle cutter so I can take the pile of bottles we generate and make candle covers, tumblers, and glass funnels for my wife and for Christmas gifts.  It was a non-specific request from her that has won me brownie-points.
  7. A book shelf made from a small 1931 cast-iron lathe and a hunk of reclaimed barn/house beam from here in France.  I cleaned both the beam and lathe up a little, added a little stain to the wood, light sanding, and a coat of poly.  I mortised in a couple of reclaimed oak runners to serve as feet and the keep the ends of the beam from splitting.  The lathe was then bolted down and I added one of my bowls to give the books a proper purchase.  The tool rest is turned and mounted on the other side to keep the books upright.  I think it looks awesome and everyone who have come over in the last month has either asked where I got it of how I thought of it.  Make my ego swell a bit….


IMG_3146 IMG_3144 Jar lid 8-14 Kitched 2014 IMG_3465 IMG_3897 IMG_3900 IMG_3302 IMG_3301

Inaugural Hand Tool Tuesday Post

Being a child of the 1980’s, my early tool and joinery education from my own father was augmented by two TV craftsman – Norm and Roy. I have a foot in each of their worlds: My table saw, miter saw, and lathe get the lion’s share of work done in my shop, but I am giddy whenever I can whip out a chisel, Japanese saw, or molding plane. My lathe gets a lot of press as it is my only power tool here in France and I recently realized that I am not highlighting hand tools enough in my shop work posts. Additionally, I see a lot of very cool old tools here in France that need to be shared. I will be posting pictures, videos, details, openions, thoughts, etc… here.

For today, enjoy Roy and Norm

Disclosure Note: The choice of the Roy video was solely due to the heady mix of Jefferson and Roubo. In the future, I will include more videos of people actually using the tools 🙂

Desk Fetish – Revel, France

I may have mentioned before that I have a certain unnatural attraction to desks – a lust if you will. We have five desks in our house in France home, three in our Seattle house, and I still NEED more. I love me a Victorian Wooten, a Danish cabinet-desk will cause me to pant, fire screen panel desks start me to sweat, roll-tops make me smile, and the smooth curves of an Art Nouveau model will make me twitch.

Whenever I travel or go to a museum or furniture shop, I have a wandering eye for desk-like furniture – I almost feel like I am cheating on my desks at home. It happened again recently, when I went to Revel, France on a road trip with my son and Father-in-law. When we got home and started looking at the pictures, I realized that more then half were of desks, desk drawers, the corner joint of a desk, image after image of drop leafs… I with we had more rooms…

Here are a few pictures from that trip:

Desks France Revel 2014 (14)

Desks France Revel 2014 (15)

Desks France Revel 2014 (1)

Desks France Revel 2014 (2)

Desks France Revel 2014 (3)

Desks France Revel 2014 (4)

Desks France Revel 2014 (5)

Desks France Revel 2014 (6)

Desks France Revel 2014 (7)

Desks France Revel 2014 (8)

Desks France Revel 2014 (9)

Desks France Revel 2014 (10)

Desks France Revel 2014 (11)

Desks France Revel 2014 (12)

Desks France Revel 2014 (13)

Reusing/remaking old tools

I love me some old tools. I love looking at them, touching their surfaces, using them… Most of my hand planes, some of my chisels, and all of my molding planes are older them my grandfather. I will push people down in a junk/antique shoppe to get to a wooden plane or socket chisel peeping out from behind a Paint-By-Numbers masterpiece.

Occasionally, I find a beautiful tool that is beyond repair and cannot be brought back to life. I lament its loss. There have been a couple of pieces lately that I just couldn’t let go into the burn pile or let sit to languish as food for wood-worms. The molding plane pictured below was/is a 1860s-ish Gleave #8 round and was split and has warped at the split to the point that there was no bringing it back from the dead. So I cleaned it up, applied a little walnut oil, and added a VERY pitted iron to make a key holder for our living room. It subtly tells first-time visitors that a carpenter/Ébéniste lives here.

The 23″ walnut joiner plane, also below, was the property of a C. Wanger, and used just outside the village of Cornebarrieu, France. It bears the marks of his hand on the foreend and his thumb and index fingers have left deep indentions on the tote. It has been repaired a couple of times, the wedge has been cut off and worms got to it years ago. The poor thing is now held together with hope, spit, and a little epoxy. I loved the size and color, so I turned it into a desk organizer for my office.

Before you all start collecting scrap so you can roast me alive for desecrating beautiful tools, know that I rescued them from a fiery fate and have given these tools a useful and meaningful after-life.

Keys 2014 - France

IMG_3450

Small job for the neighbors

Just finished a curio cabinet rework/repair for my next-door neighbor. It was the husband’s parents and as best as I can tell/find it is from 1910ish. It was really well made and a fine piece of small furniture to display dolls, tea cups, and such. At some point, 2 shelves were added and the corner trim blocks were lost. I turned some 7/8″ X 7/8″ X 3/8″ blocks down, and added rosettes with a skew chisel point. As my neighbor was handing me the cabinet to install the blocks, he also asked that I put in a third shelf. OK… I used an old fruit crate bottom for the shelf material and planed it down a touch to match the thickness of the other two. I then cleaned up the front edge of one of the “original: shelves so it matched the other and the new.

After the repair and rework, I mixed and fiddled with 3 different stains I had to color match the original finish; I didn’t want the rosettes looking out of place. After touching-up all the dings and scrapes, I added an oil finish and 2 coats of wax. It only took 10 minutes or so to buff it up to a high shine.

I took it over to his wife Monday morning and she was thrilled at the transformation. The Talley motto (at least my house-hold) is “Be Helpful when you can” and I feel this qualifies. I am glad I could do this little thing for them and hope they continue to use it and pass it to their kids.

IMG_3444

IMG_3442

Rosettes for neighbor

Need a trash can lid? Make it on the Lathe

We have a Art Deco flower pot in the guest bathroom that is used as a trash can. is about 9″ high and 8″ in diameter, so it doesn’t hold a lot. However, our new puppy is VERY interested in the contents of that vessel. To stem any possible and eventual messes, I took some pine scrap, chucked it up in the lathe and made a heavy wooden lid. I stained and finished to match the pot. Simple fast jobs like this make it so I can buy new tools without my sweet wife flipping out.

IMG_3436

IMG_3449

IMG_3448

Medieval Benches in Art

As I have mentioned in previous posts, I have been on a 5-board bench kick this year. I have built five so far and two more are in the works. I am also putting together at least three 6-board benches in the next 6-8 months, which share similar design and construction. Both items are classified as “Furniture of Necessity” or “Early Rustic” if you go shopping for one or the other. The patterns for them are roughly the same now are they were 2000 years ago and they lend themselves to hand-tool only construction.

I am not a Luddite that eschews a table saw, not in the least. I just don’t have one in France and am not buying one (If someone dropped off a new 10” cabinet saw and a compound sliding miter saw at my door, I guarantee that I could shoe-horn them nicely into the GROP). It has taken me almost 10 months to decide that I need a plug-in circle saw, but only to speed up the breakdown of thick planks and beams – I will be shopping at a pawnshop in the city though. I am just not spending the money to set up a new cabinet shop when we are leaving in a couple of years. Tools here are CRAZY expensive and most of the stuff available to non-professionals is crap. A Ridged-type contractors saw (bottom rung of what I consider acceptable for cabinet work) here with a real fence and a solid top will set you back the equivalent of $1100.00. Same saw at any Home Depot in the USA is about $500.00. A 7.25” Makita circle saw is the equivalent of $230.00 and an 18vt Ryobi drill with two batteries? $195.00!

Anyway, back to benches and chests… While in Paris last month we visited a plethora of museums and I kept finding little nuggets in the paintings, tapestries, and stained glass: top edge profiles, proportions, leg cutouts, etc… I am going to incorporate a couple of the details into my planed remaining work this year and next – just because I can. Below are a few of those details. They were for sure more to see, but not all museums allow pictures in their halls.

IMG_2729

stools from Book of hours 2

stools from Book of hours 1

IMG_2823

IMG_2825

IMG_2789

IMG_2791

IMG_2736

IMG_2742

IMG_2752

Making stuff with My Son

It is one of my duties in this life to make sure that my children can do for themselves. Having to call a plumber for a clogged drain or an electrician to replace a switch just is not the Talley way. We are fixers, tinkers, builders, and warranty voiders by practice and nature. I cannot have it on my conscience that such a path would end with me, so part of the summertime ritual is to fix and build stuff.

This year was no different. The Ruminator work on the lathe a bit, helped me build a kitchen island, and helped design and construct a hanging shelf system for my wife’s sewing room. We hung a storage rack in the garage, built a snowboard rack for his room, hung stuff up in the living room, applied a little spray paint and finish, learned about milk paint, refurbished a miter-box saw, cut up some andirons, went over tool identification, sunk a bunch of screws, put some all-thread to use, made sparks with the grinder, and that sort of thing.

Just little bits at a time… Next year we will do a little metal work and wood carving. The year after, we might build a deck and do a little welding. At some point he will learn to sew and mend a little – not to be a seamstress, but enough to make simple stuff and put a button back on a coat. If he wants to be a carpenter or a cobbler or a tailor or a machinist or a welder fine, then I am equipping him with early skills to build from. But if he wants to be an architect, teacher, engineer, lawyer, doctor, or whatever – I still want him to have the knowledge base of how things work, how they are put together, and how they should be fixed.

tumblr_n7kr78lFbZ1sk0b4eo1_500

IMG_3192

IMG_3199

IMG_3200

andirons 2014 (1)

IMG_9726

IMG_9727

IMG_2607

tumblr_n8evrlmWZw1sk0b4eo1_500

IMG_9566


UPDATE: Shortly after my son left to go back home, I was cleaning up the GROP and I found this message below written in saw dust. It made me both humble and very proud.

IMG_3209