I NEED a Lister Diesel Engine

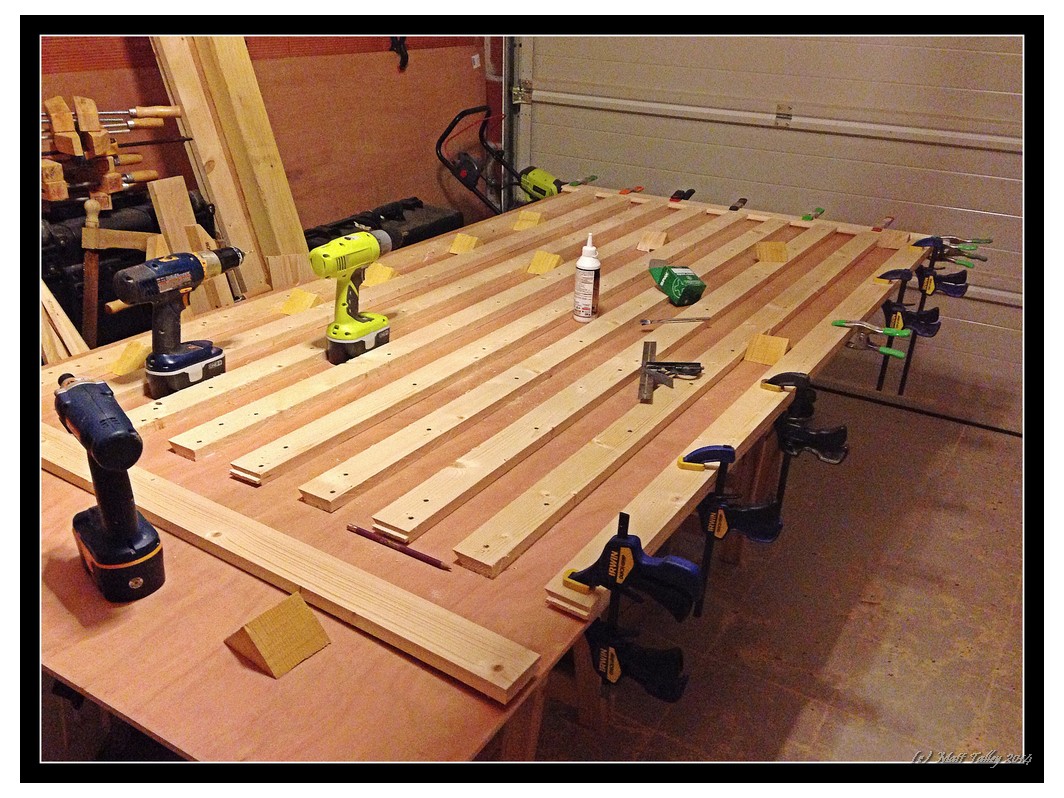
I have a big ol’ crush in Lister single-cylinder diesel engines.  These stationary work horses were made from 1926 to about 1985 and were used for pumping water, power generation, inboard flat-water boat engines, and all manner of other uses.  They came in 1.5-12 horsepower and would/will burn Diesel, paraffin, kerosene (as a mix), waste motor oil (WMO) fresh or waste veggie oil (WVO), bio Diesel, etc…  They were and are so reliable that many of the originals are still running today after 90+ years of just regular maintenance.

Lister Lister_D_2


After the parent company stopped making them, Indian firms started making clones for Asian and Southeast Asian use due to their inherent long life, simplicity, and ease of maintenance.  These are called Listeriods, and they are fairly plentiful, but the quality swings widely.

Why do I want or need a Lister?  Reasons.  Why did I need a Millennium Falcon in the second grade?  Why did I need all those Legos?  I just did.  Just like I just need a small Lister (or two) in my garage to tinker with and run various other machines that I just need as well.

I have been thwarted in my attempt while living in the US due to EPA regulations making importation verboten.  There are some, both original and clones, around, but they command top dollar as they are VERY popular with the off-grid/prepper folks.  I like “The Grid” just fine.  I am not building a bunker, planning for any sort of societal collapse or EMP weapon defense, I just need a Lister.

I have found a couple here in France, but either the owner has been unwilling to sell or the logistics in getting it have proved difficult – hauling it 30 vertical feet up and 2km down a mountain path sort of daunting.  I still haven’t given up.  We know a British couple that have been here long term and the husband is a classic car/truck guy – he has a 1962 Unimog fire truck as a daily driver…  I spoke to him this weekend about my need and he might know a guy who knows a guy sort of thing.  I have my fingers crossed.

Enjoy a few videos of Listers in action below:

10/7/2015 Update

So, I found an engine here in France that was the right size and type, with an outstanding price tag – basically free.  But, there is NO way I can bring it back to the US with me.  We are bringing home Wine and other stuff that are customs red flags and they are going to go through our shipment container with a microscope.  I think I might have a way to get an Indian import once we are back in Seattle, so I will deal with it there.


Obsessing Over a Possible House Remodel & Letting My OCD Shine Bright

We are currently going through a make/buy decision concerning our house in Seattle.  Meaning, do we spend $200-$250K plus, months of time, and lots of sweat equity on updating our house, adding a garage/shop and dining room, and refitting the basement into an apartment for my mom.  Or, do we spend $5K getting the house ready to sell and find another house that has what  we want already done and complete.  Do we keep the house as a rental and build an entirely new one…?  We have met with our estate agent, a builder, a draftsman, an architect, a landscape company, a second builder, and now a third builder in our quest, but really are not any closer to making a decision.  As said before, Stamps-With-Foot and I are going over it all and trying to decide what is best for our finances, future possible family expansion, and quality of life.

I drew our lot and house just after we moved in and have spent more than a few hours modeling all our crap – to scale – and seeing how it would all fit in the possible expansion of our existing house with the new garage build.  Part of this on-going decision process is looking at all the possibilities and modifying the existing drawings into a “someday-maybe state”.  I have a touch of OCD…  If I am working on something or especially in the planning stages, I will drill WAY DOWN into the project.  Evidenced by the below images and the included timeline.

I have modeled sewing machines, yard tools, bikes, my 1986 Jeep, my wife’s Subaru WRX, hand tools, bikes, , machine tools, trees, bushes, furniture, lathes, saws, wiring diagrams, rugs, even our puppies… all to scale…  I may have a problem.

Overview copy

House elev copy

Main Floor copy

Basement ADU copy

Attic Master Suite copy

Garage Over View copy

Garage Interior Detail copy

Shop Interior copy

Attic Interior copy

Garage Garden Shed copy

Wiring detail copy

Time Line copy

Tooling Detail copy

Brodie Detail copy

Sand Box copy

Blanket Chest Rebuild

Early last year, Stamps-With-Foot and I bought a few pieces of furniture from an English couple moving out of France.  One of the pieces was a pine drawer-front blanket chest that someone in the UK had built in their garage out of decking material.  It was constructed with dovetails, screws, and lots of glue, so it was a stout little piece and for $50, I couldn’t pass it up.  The finish was originally 1980’s fabulous stain and it was semi-sloppily finished with a brushed on polyurethane topcoat, but all and all not so bad as to ruin the chest.  Just right for a little refinishing.

It sat in the house for a year or so, covered with a runner, before I dragged it into the GROP and tore into it.  I cut the funky curved feature off the base, added some corner reinforcement, re-worked the drawer slides, removed the fat awkward drawer knobs, turned and added bun feet to the front, and installed square feet on the rear (going for the 17th century Furniture of Necessity look).  I sanded the whole thing down to remove some of the gloppy poly and painted it with an undercoat of red and an overcoat of flat black – also period appropriate.  When the top coat gets a ding, the red shows through.  I have a number of chairs and other chests done in the same manner.  I added brushed antiqued solid brass handles and called it done.

The chest now sits behind the couch, near the door for the back garden and holds a couple blankets for TV watching comfort and two cotton hammocks for lounging the yard.

Drawer Chest Rebuild 2015_2

Drawer Chest Rebuild 2015_7

Drawer Chest Rebuild 2015_1

Drawer Chest Rebuild 2015_5

Drawer Chest Rebuild 2015_4

Lectern rebuild and re-thinking the plan

Early last year, I picked up an antique copyist’s lectern (the top part only) that originated in a French Abby.  The lectern was riddled with worm holes, a couple pieces were missing, and there was some damage to repair, but the first thing was to make it bug free so not to infect all our other furniture with wood worm.  The thing spent a couple of months in a plastic bag full of insecticide and chemicals that makes for square babies. According to the interwebs two months bathing in said concoction would make the piece safe to bring out see the light of day again, so after fumigation, it sat in our living-room as decoration for 12 months before I started the rebuild in earnest.

Initially, I sketched up a few column profiles in my ubiquitous little black notebook and settled on a somewhat simple design that matched the overall style and period of the piece.  Next, I spent a little time one Sunday turning a new pedestal out of beech scraps from my workbench build. I glued them all up into a single 5″ X 5″ x 32″ hunk of wood. I then measured and turned matching intermediate supports from a scrap oak rolling pin with curves to match the column.   A couple of weeks later, I used the last of the beech scrap and turned the pedestal base, which ended up 16″ in diameter and 3″ tall.

After gluing it all together, applying matching stain, and putting 4 coats of polyurethane on the base, it was time to start on the lectern top.  All was going to plan right up to the moment that I removed a damaged shelf and saw what looked to be fresh wood damage… In one of the joints there was a small white bug larvae…  Son of a bitch…  I immediately put plastic on my bench top and took apart another joint.  I found more LIVING wood worm. I started picking at the capped holes here and there and more worm…  Shit!!!  I wrapped it up in a trash bag and out to the street it went.  It would seem that my lethal chemical treatment wasn’t that lethal.  Just REALLY, REALLY happy that the hatch hadn’t started and that my house was no full of bugs that would lay word worm eggs all over our other furniture. I took pictures and measurements and I am now planning on building a copy of the top over the next month or so and I will post the finished product here when I am done and it is installed in the living room.

Matt Talley - Projects 2015_06

Matt Talley - Projects 2015_07

Matt Talley - Projects 2015_16

Matt Talley - Projects 2015_15

Matt Talley - Projects 2015_12

Matt Talley - Projects 2015_11

Matt Talley - Projects 2015_10

Matt Talley - Projects 2015_09

Matt Talley - Projects 2015_08

Matt Talley - Projects 2015_05

Kitchen Island – Update

It has been almost a year since I built (with help from The Ruminator) Stamps-With-Foot a kitchen island and she has loved it (so I am told) and used the bejesus out of it.  I made a couple of additions and there are a a few observations:

  1. The wood I used as the base platform shelf was REALLY wet and I put 1/16″ spacing between the boards.  WAY too much.  I should have wedged them in as tight as possible because they have shrunk and now I have 1/8 gaps in a couple of places.  No big deal since it is tongue and groove, but I don’t like spacing that large.
  2. I installed an Arkansas Razorbacks bottle opener on one of the legs.  It was required.
  3. I had used a hunk of cherry tree trunk/firewood and turned it down as a lid/plug for the scrap hole.  I turned it too large since it was really wet and was bound to shrink/warp/crack.  My best guess is that it is done moving, so I put it back on the lathe and turned it down to size and changed the profile a little.
  4. The rolling pin is a great towel holder, but I should have/need to stop it from rolling – the towel slips off and onto the floor occasionally.
  5. I also originally finished the plug with walnut oil, but it gets handled a lot by wet hands and I had to oil it every couple of weeks.  This time I finished it with 3 coats outdoor polyurethane and then added a coat of wax.


Matt Talley Kitchen-Island-France-2014-1-262x300

Matt Talley - Projects 2015_03

Matt Talley - Projects 2015_02

Matt Talley Kitchen-Island-France-2014-2-300x263

Matt Talley - Projects 2015_29

Some small projects around the house

I have been swamped with work and travel for the last couple of months, so my shop time has been very limited. I have mostly been puttering around with my workbench, getting the last bits and bobbles done before calling it done and I have spent the off hour here and there on the lathe and doing stuff around the house:

  1. I had to fix a dishwasher leak and do some painting in the kitchen – still hate plumbing
  2. We did some re-arranging, so I had to fill some nail holes and then make new ones.
  3. Glued a cutting board back together after it split – craptastic glue didn’t hold, so it is back in the to-fix pile and will get some dowels this time
  4. Made a pot lid handle out of some scrap cherry.
  5. Tackled the jungle that was once my yard – twice
  6. Sharpened the lawnmower blade
  7. Turned the compost
  8. I bought a sheet of plywood and built a DVD shelf and a 8′ bookshelf for the lending library we run.
  9. There was been an oak log in my shop for months so I cut it in half and made a couple of stools for my office.
  10. Our puppies play a game called “run away from Mommy” when she takes them out, so I built two small fences to keep them in the back yard and away from the front gate.

I have do a few things in the shop just for organization and am working on a couple of little projects:

  1. We got a huge free wardrobe that I put in the GROP to organize non-tool/shop related items like climbing gear and life jackets
  2. My battery operated tools need a home, so I put together an organization center for them that mounts on the French cleat board
  3. I hung up my 6 heavy panel clamps to get them out of the way
  4. Made a Lathe chuck and tail-stock tool organizer for the French cleat organizer
  5. With a bonus from my J-O-B, I bought a few more molding planes, but they arrived in sad shape. I spent 6+ hours one Saturday cleaning, sharpening and fixing them.
  6. Started work on a blanket chest rebuild: cut here, snip there, new runners and new feet. Will get new milk paint finish when complete.
  7. Working on a copyist lectern rebuild. I made the base, pillar and other bits from some scrap beech left over from the bench build.
  8. Built a wooded top for the puppy Kennel so it blends better with the furniture in the Living Room.
  9. Putting together a 6-board chest for molding plane storage.  Will get re-purposed forged hardware and a Barn Red milk paint finish.

Matt Talley - Projects 2015_06 Matt Talley - Projects 2015_11 IMG_3410 Oak stool 23-2015 (2) Matt Talley - Projects 2015_24 Matt Talley - Projects 2015_22 Matt Talley - Projects 2015_23 Matt Talley - Projects 2015_25 Matt Talley - Projects 2015_17 Matt Talley - Projects 2015_18 Matt Talley _ Drill Organizer _ 2015

My workbench is DONE!!

I am about a month late in posting this – life and my J-O-B got in the way – but the Cornebarrieu Bench is done. Completely done! All bells and whistles added. It seems like it took me forever, but it fits perfectly in the shop and I started using the bench even before it was finished. I am very happy with the outcome and am currently working on projects that have been piling up all winter. Just in case you haven’t been following along for the past year and a half or so:

My GROP (garage and shop combo) in Seattle was too small for a proper joiner’s bench. I made due with a slim, high, wall-mounted work counter, a bolted on machinist-vise, Quick Clamps, and the top of my table saw. It worked – mostly/sort of – but was a pain in the ass a good bit of the time: I never once planed a board on a stable, solid surface. My GROP here in France is roughly the same size as the one in Seattle, but is absent the huge cast iron machines and saws. I have some room to move and finally have the space for a big, heavy, proper work bench as well as some time to build one – or so I thought.

It is an amalgamation of benches by M. Roubo, Roy Underhill, Chris Schwartz, and Bill Schenher. I am calling it the “Cornebarrieu Bench” after the small village in southern France where we live, where the lumber has been sourced, and where the bench was made and first used.

For anyone interested, here is a documented build process, build notes, and step by step guide – 115 steps – to build this beast.

Cornebarrieu Bench 2015  (30)_sm - Copy

Cornebarrieu Bench 2015  (31)_sm

Cornebarrieu Bench 2015  (29)_sm - Copy

New stools from an oak tree

This weekend I finished up a “little” lathe project I started in early February – I made a couple of stools out of a hunk of oak tree that was cut after a storm in our village. They are about 15.5″ (39cm) tall and 10″ (26cm) around and getting it that way pushed my Chinese lathe to its absolute max. It walked all over the floor when I first started it up – hence the kettle bells thrown on the middle shelf to add mass. It super did not like the out of balance logs. It would have been fine at a slower speed, but the slowest my lathe goes is 400 RPM and that is too fast for this size project. I managed, but there was lots of starting and stopping.

I really like both how the turned out and how comfy they are to sit on – just the right height for a quick stop-and-rest. I will add bow-tie joint if needed as they dry out and split, maybe out of some walnut that I have. They will make a nice addition to my home office.

Oak stool 23-2015 (2)

Oak stool 23-2015 (3)

Oak stool 23-2015 (1)

Oak stool 23-2015 (4)

Used my workbench today!

Today was the official first use of my workbench. I used it as a work table to lay out the shape of the leg vise, I cut the dados for the tail vise, cleaned them with a chisel, and after spreading plastic used the bench top as a glue-up table for the vice pieces. I had enough room at the other end of the bench to put together a French-cleat mounted battery drill organizer that I cut the parts out for yesterday afternoon. I have trouble staying with one project and do 3-5 at a time. It makes my wife crazy.

The bench top height is perfect and I am super stoked to have a real workbench here in France. I can finally get down to serious business and make some moldings and a small linen-fold panel chest.

Happy!

Being the proprietor of a urban wildlife kibbutz

I was home in Seattle taking care of a couple of things and my mom mentioned skratching noises on the roof… hmmm… DAMMIT! WE HAVE SQUIRRELS IN THE ATTIC!! They chewed between the gutter and the shingles and have been living the easy life all fall and winter in my attic. I called a contractor to fix the initial damage and the secondary water damage on the soffet.

In addition to the squirrels, I also have the urban wildlife equivalent of a kibbutz in the attic: Rats and bees have also decided to move in. There was a swarm on the eve of the front porch this summer, but my mother said that they sort of went away. What that actually meant is that I have a small colony that has settled in the eyebrow eve above the front door.

Then there are the other furry residents…

While going over yard design plans with my gardening contractor, I noticed that we were being observed from above by two beadly little eyes. I tagged a medium brown rat (8″ body) with my son’s pellet rifle as it was making a run at the hole in the soffet – Headshot. It makes my heart happy that I could send him off to his eternal reward.

I almost welcome the bees, but rats and squirrels…  I bet they had dinner parties, board game nights, and cross species orgies to cement the truce and draw up the boundaries of their respective territory in MY attic.

I swear by the GOT god’s, old and new, and by the hairy feet of Bilbo Baggins, that if I build another house it will be concrete and steel.  I found myself cruising for property again this morning and there is an old titan missile silo for sale near Yakima that is speaking to me.

Rats in Attic 2015

Diabolical plans for arborcide are coming to fruition

Holy sh1t, my neighbor has finally agreed to let me cut a pine tree out of his yard that has been the bane of my existence in Seattle for 5 years! It has been my 50′ foot nemesis.

It hangs over my roof – branches like spiky swords of Damocles, waiting to fall into my living room.  Pine needles and cones litter my yard and get tracked into the house.  My view of Mt. Rainier is obscured.  It has grown a fine crop of moss on my roof, a secondary crop in my front yard, and fills my gutters to the point that they have to be cleaned 6 times a year.

The thing has now grown over my fireplace and it is a fire hazard for our house and his.  That is what won him finally over to the Dark Side – the possibility that his house could burn.

Now, I have to pay for 100% of it, but it is a check that I will gladly write. And if nothing else, this revelation has made my trip home 100% worth it.

You truly have no idea how happy I am about this!  I wish my wife were here – This make me so giddy, that I want to conceive a child to commemorate this victory!

In Seattle taking care of house related stuff

I am in Seattle working this week and have taken a couple of days off to take care of some stuff with the house.  We are trying to decide whither we need to invest and build an addition or to sell and look for something already done and dusted.

I have met with our estate agent, a builder, a draftsman, an architect, a landscape company, and a second builder in our quest to make a decision. At this point, if we want to to buy something else and stay in our neighborhood, then we are looking at $650k to $750k and would still have to build a $40K garage/shop.  If we stay put, then we need about $250k to build a garage, update systems, finish the attic, and move an interior wall.

Stamps-With-Foot and I are going over it all and trying to decide what is best for our finances, future possible family expansion, and quality of life.  The weight of love we feel for our house and the blood I have spilled so for in the kitchen and basement adds a little weight to the decision as well.

I hate being a grown up…

Garage Plan 2015 (3)

Garage Plan 2015 (1)

Garage Plan 2015 (2)

Workbench Progress

Progress on the Cornebarrieu Bench is coming along.  It has been slow going – I have been swamped with work, travel, lack of allowance (I spent it on Christmas and a classic fiddle/violin…), more work, etc…

Stamps-With-Foot gave me a gift card for our local Home Center/hardware big-box as a Christmas present that took care of the price for the last section of the top. I got a lot accomplished this last two weeks:

  1. The final sections of the top were glued up just before New Years eve- using every single clamp I brought to France and more than a little ingenuity.
  2. Installed (2 hours of cutting, drilling and chiseling) a pricey German-made cast iron end vice that I got on 65% sale – was missing two small metric bolts and the wood handle.
  3. Made final leg cuts: the tenons that go inside the bench top.
  4. Put 5/16 oak dowels in to the pieces that have cracked, even a little, to make sure that the cracks do not spread.
  5. Gave all the base parts an 80 grit sanding.
  6. Really like the sawmill marks on some of the pieces.  Am going to put clear poly on the base instead of milk paint to preserve the marks.
  7. The legs and stretchers shrunk and warped just a touch in the six months since I cut them even though I had it all clamped together.  It will be fine and could have been worse.
  8. Made the first dry-fit of the base to the top: Everything lined up , fit perfectly, and is as square as I could ask for.
  9. Drilled holes for connector bolts and lag screws.
  10. Installed base shelf cleats
  11. Cut the 12 sections of 5/8″ tongue & groove pine that will be the base shelf

Cornebarrieu Bench 08-2014 Cornebarrieu Bench 09-2014 Cornebarrieubench 12-2014 Cornebarrieu Bench 1-2015


Before I head to the US in a couple of weeks, I hope to have installed the end-vise block, given the base a 120 grit sanding, polyurethane the base &shelf, cut the hole for the leg vise screw and the rectangle cut for the vices’ parallel guide. I also want to install the leg vise nut in a pocket behind the leg while the bench is upside down.

Chinese Lathe Build Update – Pimp My Lathe Edition

As mentioned in a previous post, I purchased a Chinese manufactured wood lathe shortly after moving to France. Putting it together and getting it running true was not a Herculean task, but it wasn’t a plug and play affair either. In addition to the initial setup, I have taken an hour here and there to make it bit more ridged and add some features that did not come stock, just to pimp it out a little:

  1. The base is now sheathed in 1/2″ plywood, glued to the wood supports and screwed into the sheet metal legs.  It makes the base a LOT stiffer and clean-up is much faster.
  2. After 4 months of weekly run-time, I have had to replace a couple of set screws and re-tighten the short bed extension outboard of the head-stock. The clamp bolt holding the head stock shattered and caused me some grief.  Chinese bolt quality sucks.
  3. The bottom of the base was finished with 2″ thick scraps and I added a couple hundred pounds of pavers, gravel, and crushed brick to add even more stability.  It is not enough when I try to turn a 15″ hunk of cherry outboard,  It still wobbles and jumps around a bit.  There is just no way to make the sheet metal frame more ridged.
  4. On the French cleats above the lathe, I added a tool holder and chuck/drive center/tail center tool mount for convenience.
  5. I hung a long compact florescent over the work area and on the side there is an IKEA floor lamp/spot light that I can move about.  Scored it used for $8.00!
  6. A tool grinder the I picked up for about $45 is mounted are the end of the lathe on a small table for easy mid-project tool sharpening.
  7. The capacity is only 12″ and that is not the magic number.  16″ – 18″ would be perfect for the bowls and bases and platters that I am doing here.  If I added 2″ iron risers to the head and tail stocks, then it would give me a 16″ turning capacity (swing).  I have thought long and hard about doing it, but haven’t yet as it might be a complication that is more headache than useful AND I don’t want to put anymore time or money into the thing.  I just want it to work.
  8. I designed a steel bed extension – modeled it in 3D and everything, but I am not going to have it made… I would be trying to turn an under powered Hyundai into a V8 4X4 Toyota Truck.
  9. For tuning large objects with the head swiveled, I designed a sweet swing arm tool post as well.  I modeled it up too, and decided not to have it built for the same reasons.  I will use the tool post arm that came with the lathe with a wood post under for support when I turn bigger stuff outboard.
  10. This Lathe will get me by for the next couple of years and I will go over it and repair/replace any worn parts before we leave France to ensure the next owner has relatively trouble free tool, but This is my last “cheap” lathe.  I am going to plop down some funds and get a Robust, Vicmarc, a huge Powermatic, Oneway, Oliver, or a Stubby – Something with power, mass, lots of heavy cast iron and reliable parts that I don’t have to screw with.


IMG_3410 Lathe Chisel rack 2014 Lathe clean aug 2014


Rainy Day Projects

I spent a few hours this past Saturday cleaning up and re-arranging the GROP. I had bits and pieces of projects strewn about everywhere and I had to wiggle my way in through both the garage door and the door from the house – like I was in need of a hoarder intervention. It just took a couple of hours and only two utterances of the F-word to make sure that my on-going and future tasks were staged for completion and arranged in an orderly fashion.

Months ago, I picked up an antique copyist’s lectern (the top part only) taken from a French Abby. It was in ruins and the wood was full of worm holes, but I saw treasure and have planned on rebuilding it “…when I have time...” This is what rain days are for! Running and biking would have beeen cold and muddy, the dogs wouldn’t budge from the warmth of the pillow filled couch, I had already slept late and there was serious wife snuggling, so might as well make some wood shavings!

I sketched up a few column profiles in my ubiquitous little black notebook (currently a Rhodia Webbie) and decided on a somewhat simple design that MIGHT have been found when the piece was made. It is not some object of high art – no Gothic arches, no carvings and it seems to have been made for a specific task which didn’t require flourishes. I tried to follow that ascetic and kept it all fairly simple, only using a gouge, parting tool, and skew to work the column. While my lathe is modern, the tools are the same that have been used since the ancient Egyptians turned on their horizontal lathes, so I figure that the re-made version would be recognizable to both the maker and user of the original piece – that and it feeds my own mild form of wood working OCD.

The lectern top is now stabilized and bug free after months of treatment and I spent a little time on Sunday turning a new pedestal out of beech scraps from my workbench build that I had. I glued them all up into a single 5″ X 5″ x 32″ hunk of wood. I then measured and turned matching intermediate supports so that it all blends in as one piece. I need to give it a good all-over sanding before I remove it from the lathe. What I have left to do before I call it done is to replace one book ledge, rebuild (or find at junk shop) the second tin candle holder to match the single original that is left, turn and fit the pedestal base plate, and then everything gets stained and oil-finished to match.

It will look amazing in living room next to the book press with a reprinted copy of one of the four volumes of Roubo’s L’Art Du Menuisier on one side and Viollet-le-duc’s Dictionary of French Architecture from 11th to 16th Century on the other side, tall beeswax candles in the holders… Jesus, I am getting nerdier with each passing year!

Lectern rebuild 11-2014 (1)

Lectern rebuild 11-2014 (2)

Lectern rebuild 11-2014 (3)

Lectern rebuild 11-2014 (4)

Free Wood is the Best Wood!

Prospects for Fall wood-turning are looking up!  I am 98% done with the Chinese lathe build-up into a proper tool. I am waiting on the arrival (had to resort amazon.uk.co as there are not turning shops in a 100 mile radius?!) of two huge bowl gouges and I will be set up to make shavings all winter. I was also given a free electric oil-filled heater for the garage, which should keep things toasty!  On the raw material front: I am taking an old apricot tree out of a small orchard for some friends a few villages away tomorrow (National Holiday) and I am really excited to turn some bowls and jar tops out of it.  A few weeks ago, I mentioned the project to a friend of my wife’s and a couple of hours later she called and said that her husband was cutting an old ornamental cherry down and would I like the wood? Like the Pope wants Jesus, I did!! I went over with the chainsaw and helped him take it down and to cut a few larger limbs and the trunk into sections.  Some of the images below are what it looked like inside the tree just after my chainsaw went through. We were stunned. Not just the center was beautiful – a fire purple, but there are bright reds and oranges in the outer wood as well. The tree had over 70 rings and grew next to a couple of big cedars so the rings are real tight and as I had to sharpen my chain twice during the cutting, the wood is VERY hard and dense.

It took two loads in the car to get it all home.  I sealed the ends right away and stacked everything in the GROP near the lathe. They had cut a plum down earlier this week and I scored two 12” rounds from that as well – the ones with the flame purple center in the pictures below. I told the couple that I would make them a vessel or large bowl out of a hunk of the tree in trade for the lumber.

Fast forward to this past Saturday: I rough turned 6 bowls (one not pictured) in about 2.5 hours from the large limbs. The trunk sections will be cut into starting next weekend.   I will let the small pieces dry for 4-6 months and then finish turning them. The larger bowls from the trunk will take a year to dry.

Am feeling reasonably optimistic about upcoming projects :-)

IMG_4075

IMG_4076

IMG_4077

IMG_4078

IMG_4079

IMG_4092

IMG_4103


Update 11-9-14:

Well, the apricot tree wood harvesting didn’t quite go as planned. I had chainsaw issues right away – needed to tear it down before the first cut and unclog the chain oil hole. Holy crap the wood was hard. It had 65+ growth rings that were stacked in tight. It was slow going with a couple stops to sharpen my chain. The clincher though was that there were two twisting veins of rot that went from crown to root ball with lots of bug damage spidering out from the rot as well. Dammit! There was was maybe 12” of trunk that I can spin a bowl out of. Per my agreement with the owner, I cut up the other trunk & big limb sections to a length that will fit in a fireplace and stacked it up for them. You win some you lose some. If not for this tree I wouldn’t have the amazing wood from the ornamental cherry and plum tree and maybe karma will smile on me the next time I lug my saw into a field.

Apricot Tree 11-2014 (3)

Apricot Tree 11-2014 (1)

Apricot Tree 11-2014 (2)

What I Want Thursday – 11/6/14

Below are the things that I find are present for me today:

1. More time with my children and my mom.

2. I want to stick to my diet and workout schedule and not fall off the wagon and back into the cookie/café Mocha/lethargic/big-belly/back-hurting abyss.

3. For my wife to finish some long ago promised sewing tasks for me – I would really like those shorts, pants, and shirts back…

4. a Fine large set (only 2) of Easy Wood carbide insert lathe chisels for all the fall and winter bowl work I have planned

5. For my proper car camping/glamping kitchen set up to be finished – it is about 1/2 the way done and sitting in the GROP.

6. A leisurely trip to Rome and Venice with my wife – no puppies, no family, no friends – just us for a week or so.

7. For my Joiners workbench to be done and set up and in use.  I am only about 1/3 of the way done and only have 8 of the 17 sections of the top laminated up.

8. A few booksFranklin Bio by Wood,  Paris Between the Wars 1919-1939: Art, Life & CultureErnest Hemmingway bio and a two books of his letters (1&2), A signed hardbound copy of Campaign Furniture 
Theodore Roosevelt: a Strenuous Life,  The Anarchist’s Tool Chest etc…

9. A whole Metric crap-ton (my favorite unit of measure) of wooden wine crates for a couple of open projects at home.

10. To give Heifer International a menagerie of animals for Christmas – That is my charity goal for the year.  We give monthly, but I would like to be able to do more this year.

11.  For our 2015 French Visas to be finished so we can get on with plans for next year.

Making Little Stuff Around the House

I have been remiss in posting for the last couple of weeks – my J-O-B has been sort of nuts and I have been trying to stay on top of things and stay employed 🙂 I have been putting around in the shop here and there at night before and after dinner though.  Recently I have completed:

  1. A salt cellar for my wife made from scrap red and white oak because I was tired of seeing the IKEA glass dish on the table.
  2. A jar lid or two for the kitchen.
  3. There have been a couple of honey dippers for turned gifts.
  4. Specifically for my wife, I made rolling pins for fettuccine and ravioli pasta (or pie crust if my sweet bride happened to want to bake me a lattice top apple pie…)  We had a friend who is a food blogger come over that LOVED them and I think that I am going to do one or two for her as well.
  5. I added some wood-bling to a plunger handle – Why have mass-produced stuff sitting around like everyone else when 8 minutes of lathe time and a little oil/wax turns the mundane into the custom.
  6. A glass bottle cutter so I can take the pile of bottles we generate and make candle covers, tumblers, and glass funnels for my wife and for Christmas gifts.  It was a non-specific request from her that has won me brownie-points.
  7. A book shelf made from a small 1931 cast-iron lathe and a hunk of reclaimed barn/house beam from here in France.  I cleaned both the beam and lathe up a little, added a little stain to the wood, light sanding, and a coat of poly.  I mortised in a couple of reclaimed oak runners to serve as feet and the keep the ends of the beam from splitting.  The lathe was then bolted down and I added one of my bowls to give the books a proper purchase.  The tool rest is turned and mounted on the other side to keep the books upright.  I think it looks awesome and everyone who have come over in the last month has either asked where I got it of how I thought of it.  Make my ego swell a bit….


IMG_3146 IMG_3144 Jar lid 8-14 Kitched 2014 IMG_3465 IMG_3897 IMG_3900 IMG_3302 IMG_3301

Reusing/remaking old tools

I love me some old tools. I love looking at them, touching their surfaces, using them… Most of my hand planes, some of my chisels, and all of my molding planes are older them my grandfather. I will push people down in a junk/antique shoppe to get to a wooden plane or socket chisel peeping out from behind a Paint-By-Numbers masterpiece.

Occasionally, I find a beautiful tool that is beyond repair and cannot be brought back to life. I lament its loss. There have been a couple of pieces lately that I just couldn’t let go into the burn pile or let sit to languish as food for wood-worms. The molding plane pictured below was/is a 1860s-ish Gleave #8 round and was split and has warped at the split to the point that there was no bringing it back from the dead. So I cleaned it up, applied a little walnut oil, and added a VERY pitted iron to make a key holder for our living room. It subtly tells first-time visitors that a carpenter/Ébéniste lives here.

The 23″ walnut joiner plane, also below, was the property of a C. Wanger, and used just outside the village of Cornebarrieu, France. It bears the marks of his hand on the foreend and his thumb and index fingers have left deep indentions on the tote. It has been repaired a couple of times, the wedge has been cut off and worms got to it years ago. The poor thing is now held together with hope, spit, and a little epoxy. I loved the size and color, so I turned it into a desk organizer for my office.

Before you all start collecting scrap so you can roast me alive for desecrating beautiful tools, know that I rescued them from a fiery fate and have given these tools a useful and meaningful after-life.

Keys 2014 - France

IMG_3450

Small parts holder for French Cleat wall

What happens when you are 99.98% done turning a bowl, there is a millisecond of inattention and BAM! And the bowl explodes off the chuck?? After you check your britches and finish saying dirty words, you pick up the pieces and make lemonade from lemons.

I thought about tossing it all in a fire, but decided to use the largest intact piece to make a small parts holder that mounts on a French Cleat. I am forever looking for a jar or a can to put small parts in while I am voiding a warranty or rebuilding something small and complicated.

Bowl to French Cleat 2014 (1)

Bowl to French Cleat 2014 (3)

Bowl to French Cleat 2014 (2)

Everyone needs a circus tent stake maul…

I have a good number of wooden stakes to drive into the ground – garden project, long story. In the early stages of planning, I realized that I didn’t have a proper maul and did nor relish driving any of them with a claw hammer. Hummm….


To remedy that tool deficit, I finished turning one from a piece of oak firewood after work the other day – instead of mowing the yard… The steel bands are cut from a 5″ iron pipe and they are held on by 15 or so long brass nails. It seemed like a good use of my time and was a nice end to a very stressful day.

Old tent stake Maul (2)

Old tent stake Maul (1)

Old tent stake Maul (5)


Old tent stake Maul (3)

Weekend Update – the gods of lawn maintenance are displeased

We had a national holiday in France on Friday and I made the most of my 3-day weekend.

Instead of the stuff I needed to do I did this:

1. Got up at 7:30 on a holiday
2. Went up into the mountains with a group of Expats for a hike and a picnic – got some great pictures and had fine food
3. Worked on a design for wooden wine box/kitchen cabinets
4. Completely filled my Leuctterm1917 design sketch notebook – took 2 years
5. Watched a girlie movie with my sweet wife
6. Started a new notebook – a Rhodia Webbie this time (I like the paper better)
7. Spent too much time on the interwebs
8. Started formal permit process for garage shop and apartment above at our place in Seattle
9. Sanded, sealed and painted the “T” supports for the workbench/buffet table
10. Rough turned 4 oak bowls from a piece of tree blown down in a storm
11. Sent some e-mails out that I had let sit too long
12. Coated the bowls in wax and will let them cure for a year.
13. Cleaned and organized GROP – oak shavings were EVERY where
14. Composted the shavings with some grass and kitchen scraps
15. Sharpened all my lathe chisels
16. Brained myself on a low hanging bike – said f-word more than once
17. Went to a run along the river
18. Called my Mom and talked for a bit
19. Checked on the kids
20. Cut first 5” top sections for Cornebarrieu Workbench
21. Need a proper circle saw… the 18v battery saw is out of it league on 1.5” beech
22. Worked on the small cabinet rosettes for our neighbor – he also asked me to install a shelf while I was at it…
23. Played with the puppies – while Stamps-With-Foot had a girls night
24. Got sucked into Pinterest
25. Updated website a little (here and Tumblr)
26. Watched a little too much TV/YouTube
27. Took puppies for a walk around neighborhood a couple of times
28. Rode my bike about 10 miles – muddy
29. Cleaned and tuned single-speed bike
30. Played with puppies
31. Did some grilling with beer in hand 
32. Got up Sunday morning and worked for a few hours, – because I thought it was Monday. Damn it!
33. Closed office door and did not return for 24 hours
34. Told wife her hair was very pretty
35. Went for a walk with wife and puppies
36. Made a small parts organizer out of a broken wood bowl
37. Got glue on my favorite shorts
38. Wrote some snail-mail
39. Surfed the interwebs until I fell asleep with the iPad on my chest…
40. I did not mow the yard again. The gods of lawn maintenance are displeased with me.

Hiking august 2014 (3)

Hiking august 2014 (1)

Hiking august 2014 (5)

Hiking august 2014 (2)

Hiking august 2014 (4)

Rosettes for neighbor

Oak Bowls Aug 2014 (5)

Oak Bowls Aug 2014 (7)

Lathe clean aug 2014

Oak Bowls Aug 2014 (1)

IMG_3121

IMG_3122

Last page of notebook Aug 2014

yard not mowed this weekend 2014

T-beams for bench-buffet table aug 2014

found trivet 2014

making shavings aug 2014

Cornebarrieu Bench – Redesign & first cuts made

I did a full redesign of the Cornebarrieu bench… As per my normal modus operandi, I was over designing/building it. With all the tweaks and gadgets and new parts, it was going to take me 6 months to build, some serious math to layout the interlocking joint angles and cost $1900 in material – I may have priced solid 4” thick seasoned Eastern European beech and walnut for the top and legs…
Anyway, I came to my senses and decided on using the pine I had already purchased for the legs and stretchers, lap joints with bolts instead of compound dovetails, a liberal amount of hide glue here and there, and a top made from re-purposed IKEA counter tops and will install a leg vice salvaged from a junk shop near Limoux, France instead of the $300 Benchcraft scissor vise that I was eyeballin’. The top will be solid all the way across instead of the split-top design.

The pine slabs have been drying in my GROP for 5 months and were ready to be cut down into their rough size. I had a little time this last weekend and spent 4 hours making all the leg and stretcher joint cuts – hogging out the material with successive circle-saw cuts and then chiseling them out. I am waiting to cut the tenon that fits into the top on each leg until I have the top in-hand. I chiseled and planed all the joint cuts smooth and I really wished I would have had a timber framing slick. When I do another bench or some large furniture with this type of joint anytime again, I will pick one up as it will pay for itself with the labor saved, in comparison to a 1.5” bench chisel, on 4 lap joints. I did the rough math and I think that I will have made 1023 total handsaw and circle saw cuts by the time the bench is done. There will be 16 bolts, 6 sections of 7/16” all-thread, 12 large screws, one 2’ ACME thread rod, 2 large dowels, 4 lag screws, 32 nuts & washers, and some sweat, blood, and curse words that will all go into it by the end. The new dimensions of the bench will be 25.5” wide, 34” tall, and 8.2 feet long. I believe the finished weight will be around 320 pounds.

My next milestone is the dreaded IKEA run. It will be a couple of weeks before I have the enough spending money horded together from my allowance (I want to be debt free in two years and retire at 55 so yes, I have an allowance…) and get the top cut out and fitted. I will update as I go.

Cornebarrieu Bench update (2)

Cornebarrieu Bench update (1)

bench drawings 2014 (3)

bench drawings 2014 top detail

Up-cycled present for my wife

On our way to Carcassonne a few weeks ago for the Bastille Day festivities, we stopped by one of our favorite used furniture/junk shops and I found a few pieces of treasure (Cast iron miter saw, a forged hold-fast, etc…) and Stamps-With-Foot found a set of badly weathered Victorian andirons (the things that hold logs in a fireplace) with a female costumed figurehead bust. She took one look and immediately thought “book-ends!” We paid 5 Euros ($7.50) and put them in the car trunk. I researched them a little later on and found that they were cast in France between 1870 and 1880. Even in the condition we found them in, they go for 90-120 Euros ($121-162) on eBay, so I was pretty pleased with her find.

After coming home from the vacation weekend, my son and I cut the rusted rear beam off one of them, cleaned the sharp edges of the cut with a file, and used a bronze wire brush to mostly clear the surface rust off the bust. My saw blade was dull and we couldn’t cut the second one, so we put all the pieces up a shelf for me to take care of later. Fast-forward 3 weeks and after buying a new blade, I made the second cut, filed the edges, took all the rust off both, primed, painted them with 3 coats of matte black paint, and 2 coats of clear matte finish.

Stamps_with_Foot had a big smile and skipped a little when I gave her the finished pieces.

Laurel's Bookends (1)

andirons 2014 (1)

Very Productive Weekend – except in the yard.

I did not mow the yard this weekend. It just didn’t happen. I meant to and I wanted to… I even took the mower and cord out, but it just didn’t happen. Instead I did this:

1. Redesigned the top of the workbench that I am building.
2. Threatened for 148th time to quit Facebook.
3. Didn’t quite
4. Updated status
5. Cleaned and organized GROP a little while grumbling about my lack of willpower
6. Worked on a J-O-B related spreadsheet
7. Finished bookends for wife – made from Victorian andirons.
8. Cut the base (legs and stretchers) for my workbench.
9. Turned two sets of TINY rosettes for our neighbor to replace a couple that are missing from a piece of furniture – help the neighbors when you can.
10. Put together a set of I-beams to reinforce a table top that is warping – they do that after 250-300 years…
11. Gave my wife a foot rub.
12. Glued up some maple blanks to turn later on
13. Played with the puppies – there are two now.
14. Got sucked into Pinterest
15. Watched a little TV/YouTube
16. Took puppies for a walk around neighborhood
17. Turned a small jar lid for wife out of some scrap cherry
18. Drank some Spanish rosé with wife and had a nice home cooked Thai meal
19. Fixed front door lock at 1:00am
20. Had weird dreams Saturday night
21. Slept in – new puppy had first good night’s sleep 🙂
22. Puppy sat while wife got her hair cut.
23. Told wife her hair was very pretty
24. We took puppies into Toulouse to meet some friends for coffee
25. Walked in park with wife and puppies.
26. Cut and chiseled joints in to ½ of the workbench legs
27. Sucked into Pinterest vortex again
28. Sent some J-O-B e-mail
29. Talked to my mom
30. Text messaged with my daughter
31. Tried to call my son – he was out with friends. Teenagers… 🙂
32. Played with puppies
33. Sent some more work-related e-mail
34. Told wife hair was pretty again
35. Made a tiny adjustment to kitchen island at wife’s request
36. Wrote a snail-mail letter to my aunt and son
37. Filled out a couple of post cards
38. Updated website a little
39. Looked at work calendar for tomorrow – very full.
40. Said dirty words…
41. Went downstairs to snuggle wife, puppies and to stay up too late on Pinterest or stupid Facebook.

Cornebarrieu Bench update (2)

Cornebarrieu Bench update (1)

IMG_2976

andirons 2014 (1)

Truffle 8 -2014 (3)

TRuffle and Brodie 7-2014

Chopping Block Kitchen Island – IKEA Hack

Stamps-With_Foot has wanted a chopping block island for years. Our kitchen in Seattle just didn’t have the room for one, but the kitchen in France was PLENTY big enough. I looked into taking some 5/4 maple and gluing it up for her, but without a table saw and a power planer it would have been REALLY difficult. We found a couple that were already built, but they were between 400 and 900 Euros. No.Thank.You. After some deliberation, I decided on an IKEA island – the Groland. Stop Laughing and put down the stones…

While my son (The Ruminator) was here in France on his summer vacation, we bought one in a box, strapped it to the top of the car, drug it home, and started putting it together. I couldn’t leave it stock though, that is just not how I operate 🙂 We added a few flourishes to make it “better.”

1. Turned the legs on the lathe to give it bun feet
2. Glued it all together and added some extra dowels for reinforcement
3. Removed the steel rods on the original and plugged the holes with Dowels
4. Painted the base with a Sea Green Milk Paint
5. Added an additional block section to the bottom of the top panel – to make it super-solid
6. Cut a 6″ hole in the top for sweeping scraps off the work surface
7. Put a large plastic bin – removable from both sides – under scrap hole
8. Bolted rolling pin to one side to towels and placed 2 brass hooks on the other side
9. Scrapped the wood lattice bottom panel and used 7/8″ tongue and groove clear pine decking boards instead.
10. Polyurethaned the top – 5 coats – and bottom shelf so they match and make the painted base “pop”
11. Took a hunk of cherry tree trunk and turned it down as a lid for the scrap hole.

My Son and I had it installed just in time for my chef Father-in-Law, The Chatty Buddha, to visit and whip up a few fine meals using it as a work platform

Kitchen Island France 2014 (1)

Kitchen Island France 2014 (2)

Kitchen Island France 2014 (3)

Kitchen Island France 2014 (4)

Kitchen Island pieces 2014 (1)

Kitchen Island pieces 2014 (3)

Kitchen Island pieces 2014 (2)

GROP update – French Cleats

Since I live in France, it only makes sense for me to have a shop organization wall that using French Cleats. I have wanted to do it for years, but just never found the time between house and furniture projects when we were in Seattle.

I ripped down some pine sub-flooring that came from the local French Big Box (Leroy Merlin), cut the edges at a 45, ripped the board in half, and glued/screwed them to a section of 1/2-ish (13mm) plywood. Exterior water-based poly was added to both the back and front before it went up on my clay-block garage shop wall with 8 large anchors. For my first French Cleat accessory: I had three small cut-off sections left from a picture shelf wall I did in my home office that I tacked to section of scrap ply to hold my #5 1/4 Jack, #4 smoother, and a couple of block planes. I keep the rest of my planes in a chest, but I use these constantly and wanted to have them in reach. I was so happy with how it all tuned out that I started building all sort of other holders and organizers: ones for squares, chisel rolls, Mallets, cords, apron hooks, saw horses, clamps, Japanese saws, etc… I ringed the garage with a single cleat about 6′ up for all sorts of diabolical organization plans, then hung two more above the lathe so that I would have a place to suspend my lathe chisel rack that is currently in progress and for a spot light that shines down on projects as they are turning.

I will update and post as I add new stuff.

French Cleat 2014 (2)

French Cleat 2014 (3)

French Cleat 2014 (4)

French Cleat 2014 (5)

French Cleat 2014 (6)

Talley - French Cleat attachments 2014 (1)

Talley - French Cleat attachments 2014 (2)

Talley - French Cleat attachments 2014 (3)

Talley - French Cleat attachments 2014 (4)

Talley - French Cleat attachments 2014 (5)

Talley - French Cleat attachments 2014 (6)

Talley - French Cleat attachments 2014 (7)

Talley - French Cleat attachments 2014 (8)

Ukulele holder for my office

I have the most of the instruments hanging downstairs, but I spend the lion’s share of my day (sometimes night too 🙁 ) in my home-office upstairs. I decided that I needed a little diversion from my computer every now and then and brought a ukulele up to strum and pick when thinking hard or if the J-O-B gets me down – no one can be unhappy while playing the uke, it is physically and psychologically impossible!

I already had the perfect piece for the task: Last year in Seattle I was playing with some scrap oak flooring on the table saw and I made a modern-ish mount for some tool in my shop that I didn’t end up using. Somehow, it got lumped in with the stuff sent to France and I found it while unpacking some hand-planes. I touched it up a little, added a hanger, and mounted it on the wall under my office window – well within reach while I am sitting at either of my desks (drafting & computer). It looks great and matches my office decor AND I have found my self already absently-mindedly finger-picking while thinking on a problem or figuring out why something isn’t working right.

A Bench Building Machine

In addition to the 5-board bench by our front door, I have built a large bench for our dining table and one for our entry-way with shoe storage, per my sweet wife’s request. I have a couple of saw benches for the GROP and 2 narrow ones for my office all cut out as well, but not put together. These benches are traditionally “furniture of necessity” and not meant to be fine furnishings, but I think that there is still beauty in their simplicity and usefulness (useful and helpful are the highest Talley-family compliments). Additionally, they are simple, cheap to build, and lend themselves to hand-tool only construction. Not a single screw or nail is used: I used through-tenons, oak wedges, and dowels. With almost instant tangible results, the whole process in building these is therapeutic. When and if I have a super-crappy day at my J-O-B, I can go into the Garage/Shop/GROP after dinner and make some wood shavings and improve the bejesus out of my mood. Cheaper than counseling and less bloody than a rampage 🙂

7/3/14 Update:

So… The bench built for the dining table had ends that extended a little too far from the legs. It made the bench tippy if someone either sat on just the end or got up with someone also sitting on the other end. There were a couple of incidents where a butt almost hit the ground. I removed 7″ from either side and changed the stretcher detail a bit as the plain 45 degree cut didn’t really match the curl detail on the feet.

IMG_1906

IMG_1908

Guitar and Ukulele wall mounts

One of the last things to deal with at our place in France was all the stringed instruments propped in corners or laying precariously on top of furniture. I wanted them out in view so they would be played instead of put in a closet somewhere, forgotten about. We want a home that is filled with music and if there is a loaner guitar or uke (LOVE the ukulele – have two) about, someone is going to pick one of them up and strum a few cords. There is nothing like a cool evening, sitting outside after a BBQ with someone softly playing a tune or two. I looked at a couple of commercial wall mounts that were pricey and didn’t really go with our decor and decided to make my own. I am sure they would look great in a studio and there was one model that would have been killer in my 15-year-old self’s poster-filled bedroom, but nothing I looked at screamed “hand-crafted” or “classy.” I went through a couple of ideas in my head that wouldn’t have really worked out for various reasons before having a light bulb moment while on a work trip in China: scrap wood + my lathe + U-hooks and some silicone tape = sweet instrument hangers that both blend with our home AND that no one else has.

This past weekend (Easter holiday), I cut five octagon blocks out of some left-over 5 inch thick pine timber and rounded the first one on the lathe. It was meant to be a prototype so I free-handed the curves without really having a design in mind before I started. It looked so great after the stain and wax went on that I took it right in and mounted it to the wall. I turned the others all with different patterns and hung them in a living-room hallway that has an awkward corner. They look great there – if my opinion counts for anything. Now there is room for 2 ukuleles, an acoustic guitar, an electric cigar-box blues machine, and a resonator banjo.

I am working on a Uke hanger for my home office as well.  I spend 10+ hours on my computer or on the phone and find that it helps if I can take a little break or strum while thinking about a technical problem that is pissing me off.  I wouldn’t be able to do that in a cube.