Rainy Day Projects

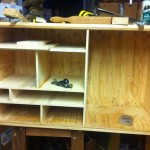
I spent a few hours this past Saturday cleaning up and re-arranging the GROP. I had bits and pieces of projects strewn about everywhere and I had to wiggle my way in through both the garage door and the door from the house – like I was in need of a hoarder intervention. It just took a couple of hours and only two utterances of the F-word to make sure that my on-going and future tasks were staged for completion and arranged in an orderly fashion.

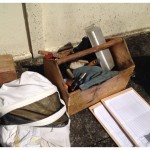
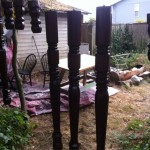
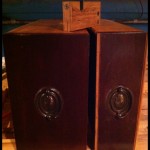
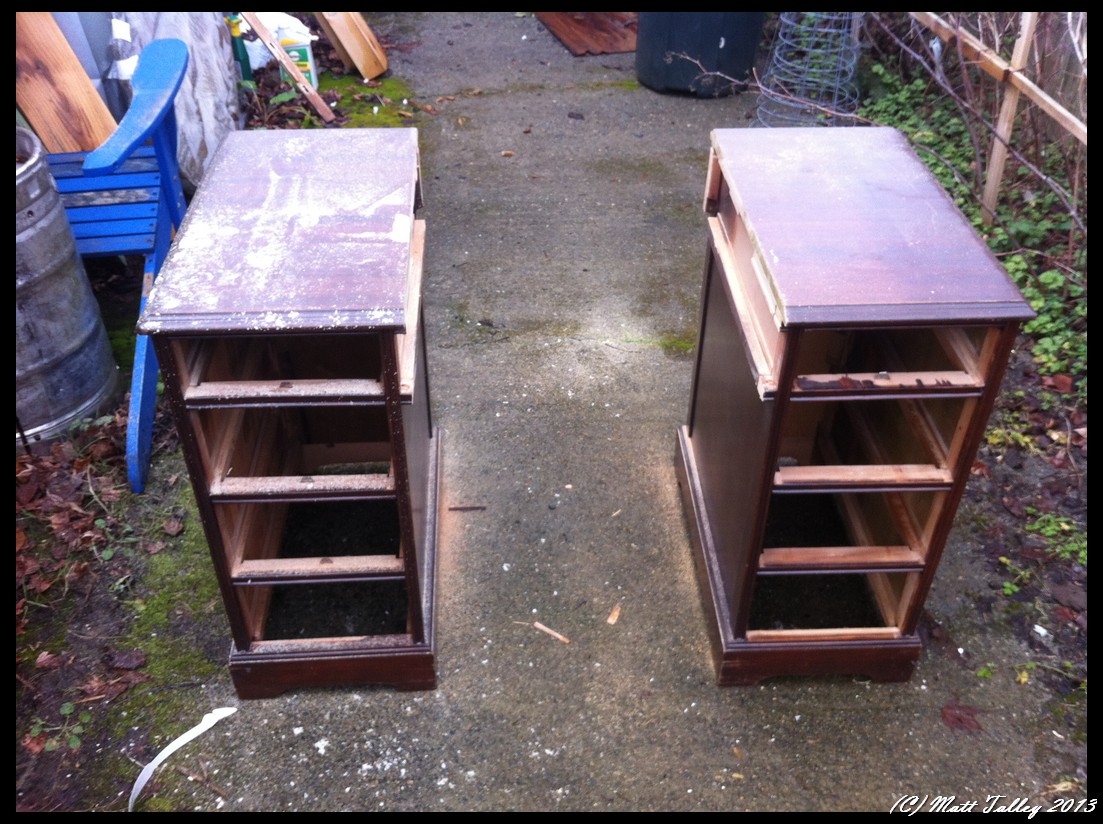
Months ago, I picked up an antique copyist’s lectern (the top part only) taken from a French Abby. It was in ruins and the wood was full of worm holes, but I saw treasure and have planned on rebuilding it “…when I have time...” This is what rain days are for! Running and biking would have beeen cold and muddy, the dogs wouldn’t budge from the warmth of the pillow filled couch, I had already slept late and there was serious wife snuggling, so might as well make some wood shavings!

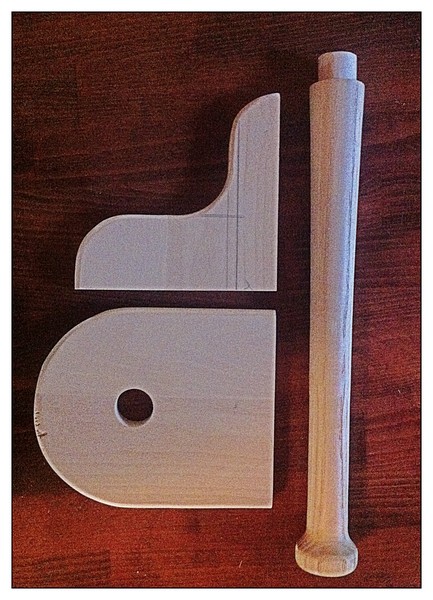
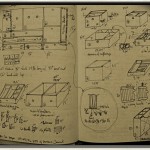
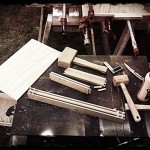
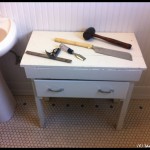
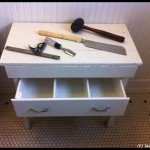
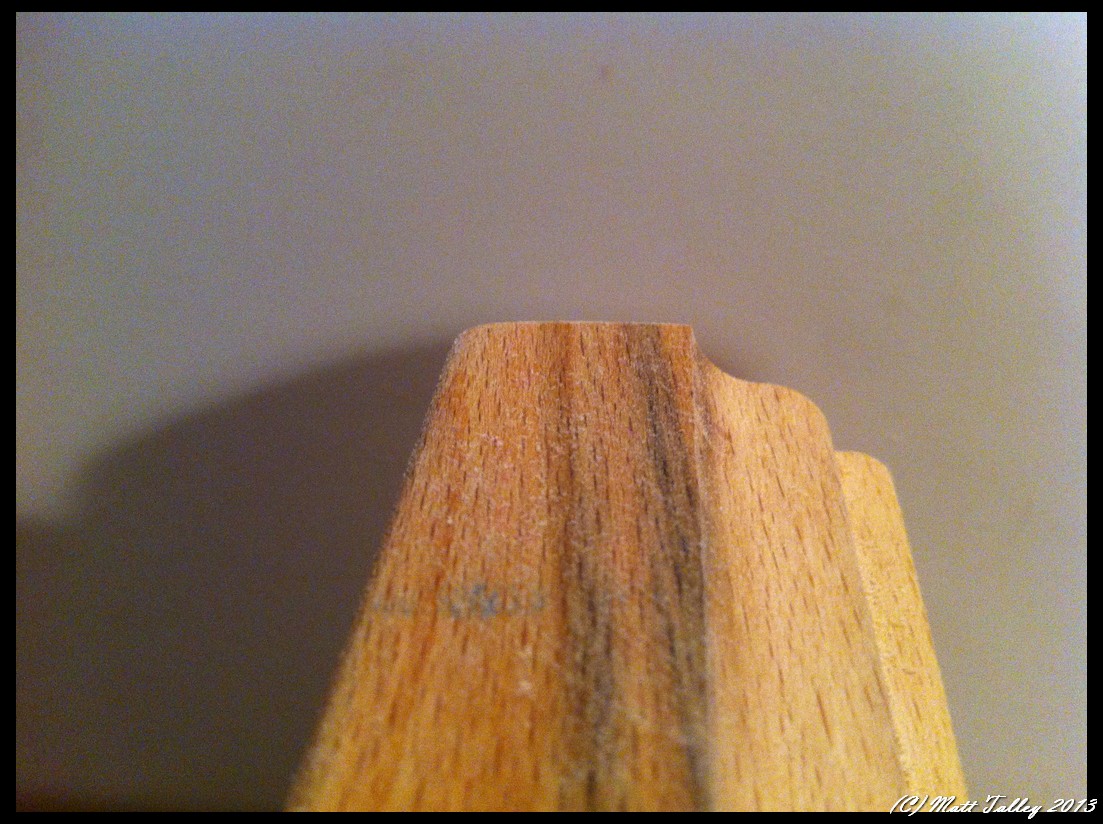
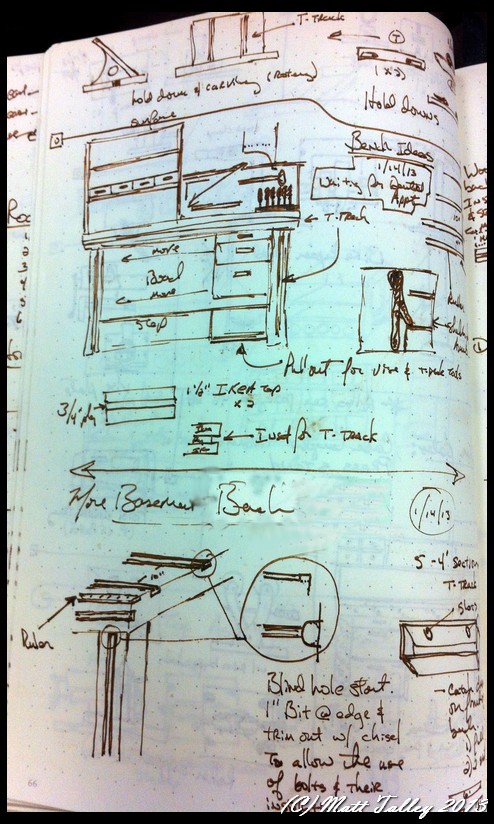
I sketched up a few column profiles in my ubiquitous little black notebook (currently a Rhodia Webbie) and decided on a somewhat simple design that MIGHT have been found when the piece was made. It is not some object of high art – no Gothic arches, no carvings and it seems to have been made for a specific task which didn’t require flourishes. I tried to follow that ascetic and kept it all fairly simple, only using a gouge, parting tool, and skew to work the column. While my lathe is modern, the tools are the same that have been used since the ancient Egyptians turned on their horizontal lathes, so I figure that the re-made version would be recognizable to both the maker and user of the original piece – that and it feeds my own mild form of wood working OCD.

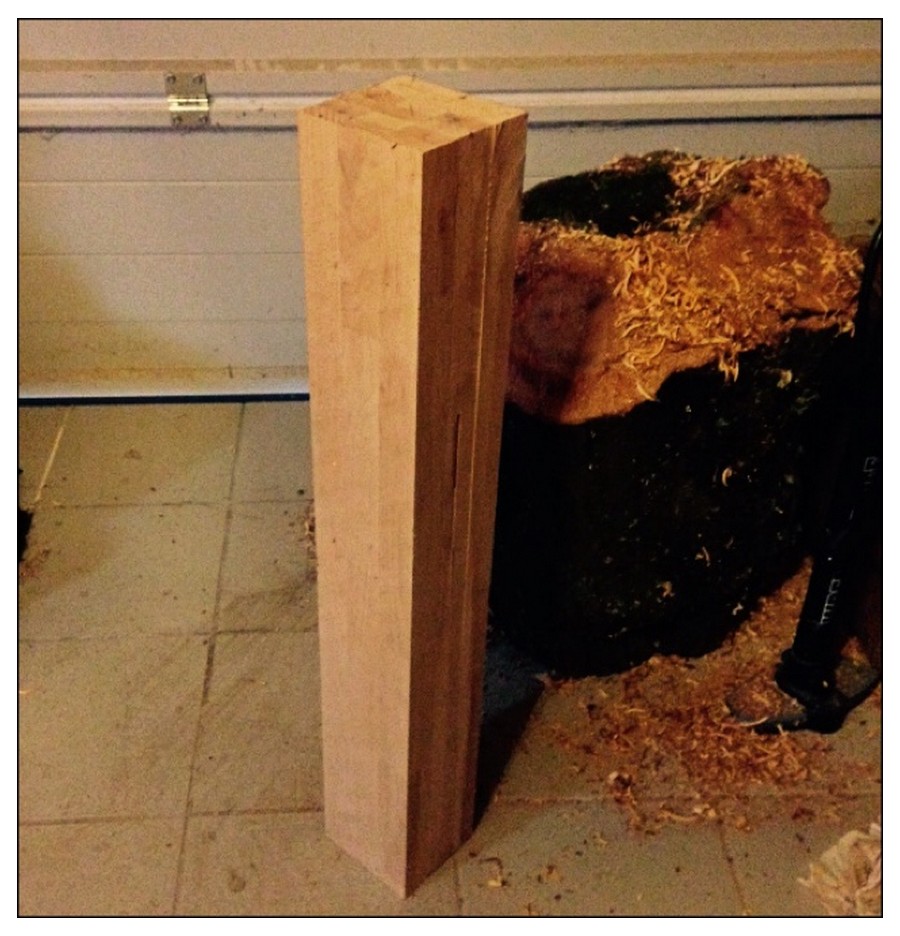
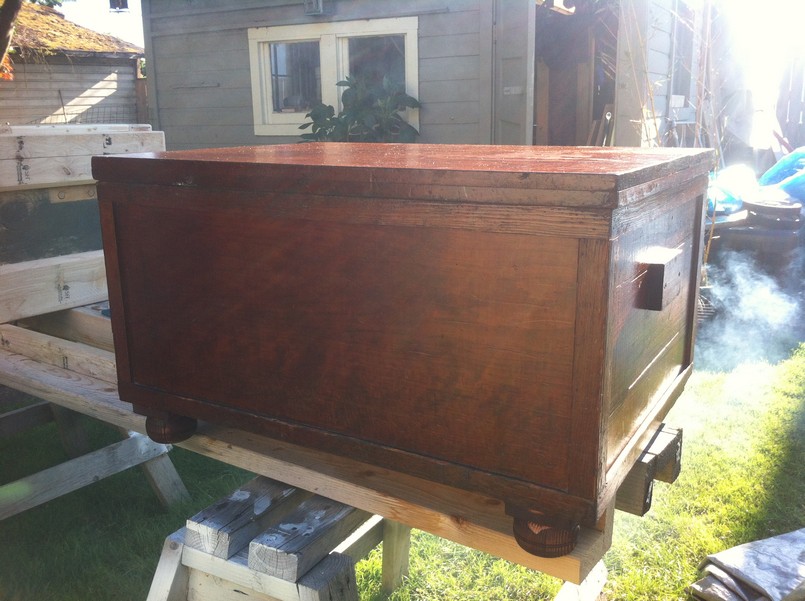
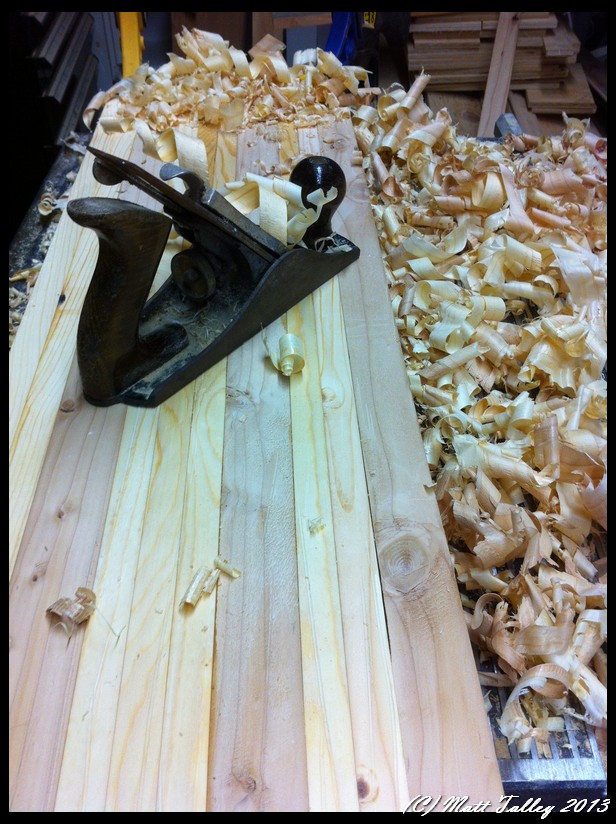
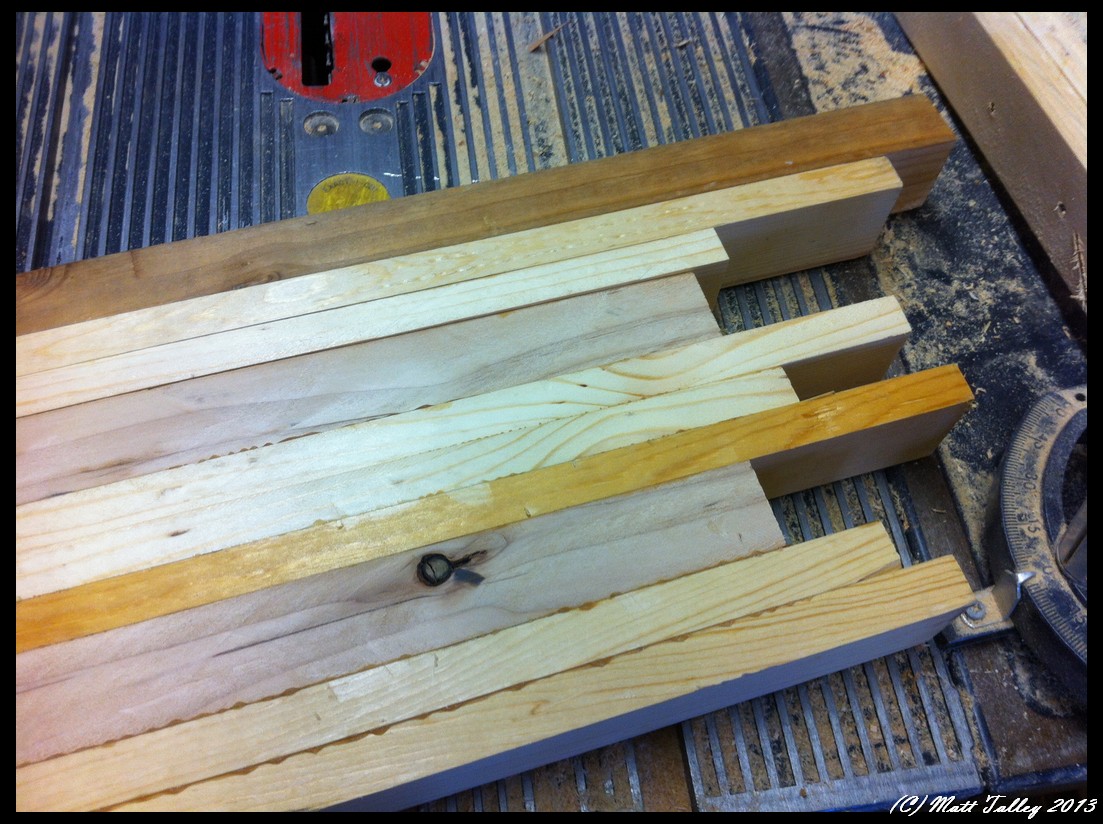
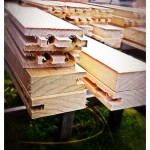
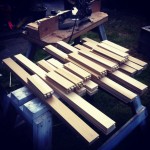
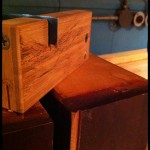
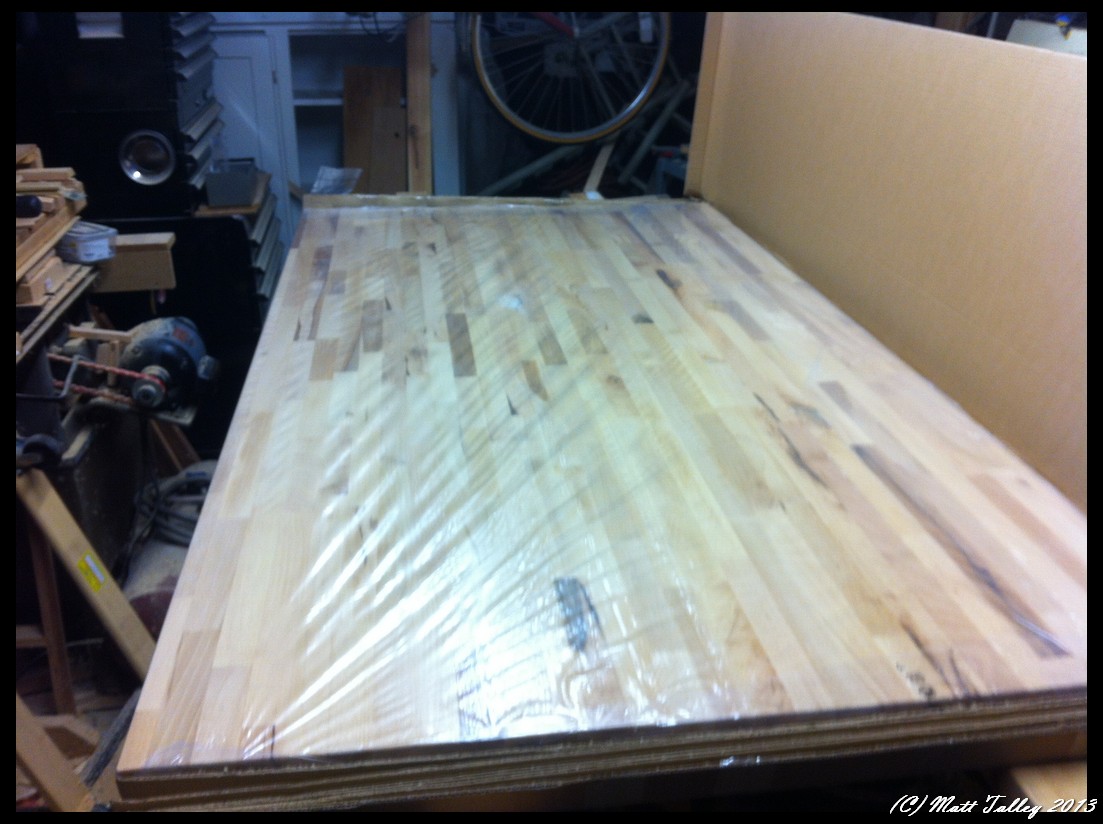
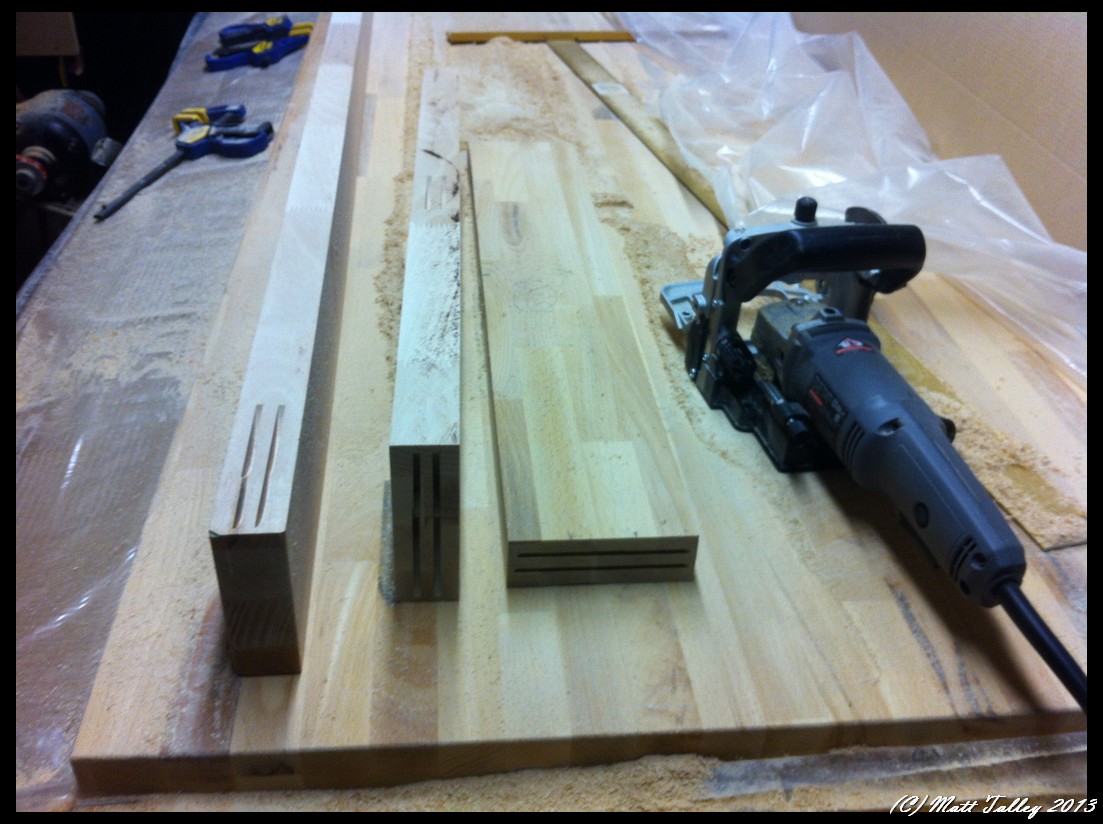
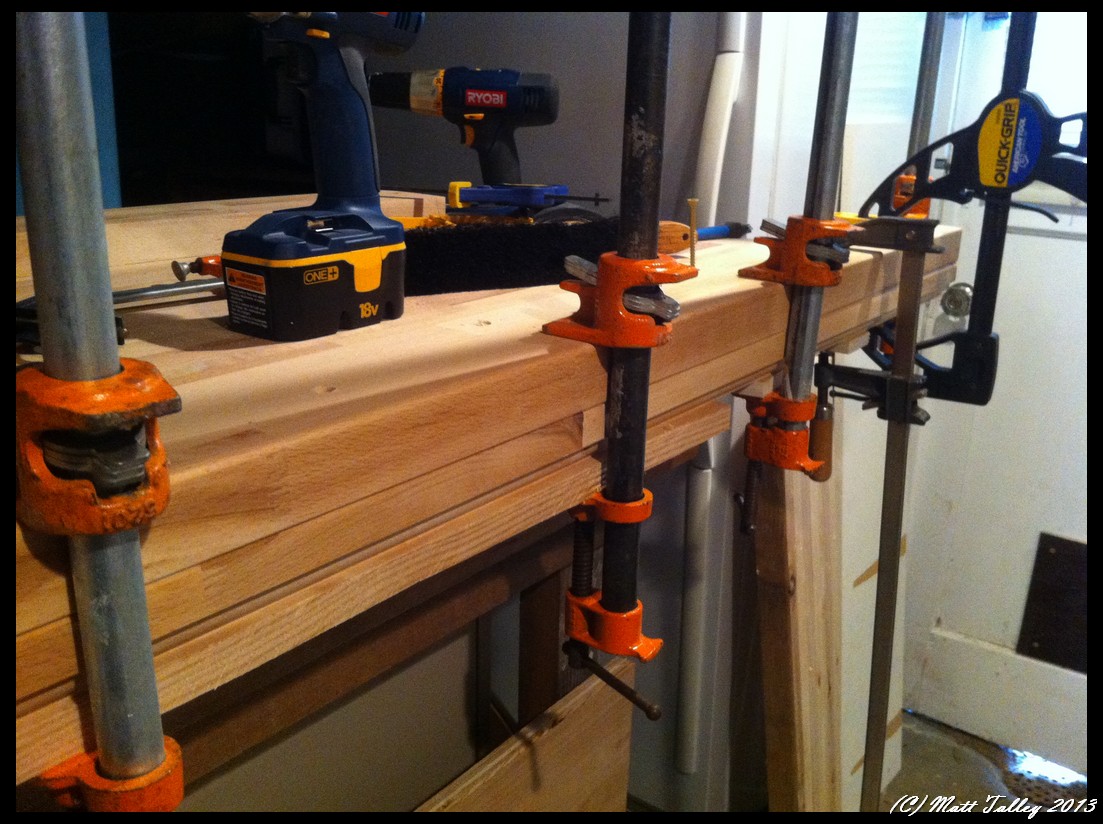
The lectern top is now stabilized and bug free after months of treatment and I spent a little time on Sunday turning a new pedestal out of beech scraps from my workbench build that I had. I glued them all up into a single 5″ X 5″ x 32″ hunk of wood. I then measured and turned matching intermediate supports so that it all blends in as one piece. I need to give it a good all-over sanding before I remove it from the lathe. What I have left to do before I call it done is to replace one book ledge, rebuild (or find at junk shop) the second tin candle holder to match the single original that is left, turn and fit the pedestal base plate, and then everything gets stained and oil-finished to match.

It will look amazing in living room next to the book press with a reprinted copy of one of the four volumes of Roubo’s L’Art Du Menuisier on one side and Viollet-le-duc’s Dictionary of French Architecture from 11th to 16th Century on the other side, tall beeswax candles in the holders… Jesus, I am getting nerdier with each passing year!

Lectern rebuild 11-2014 (1)

Lectern rebuild 11-2014 (2)

Lectern rebuild 11-2014 (3)

Lectern rebuild 11-2014 (4)

Free Wood is the Best Wood!

Prospects for Fall wood-turning are looking up!  I am 98% done with the Chinese lathe build-up into a proper tool. I am waiting on the arrival (had to resort amazon.uk.co as there are not turning shops in a 100 mile radius?!) of two huge bowl gouges and I will be set up to make shavings all winter. I was also given a free electric oil-filled heater for the garage, which should keep things toasty!  On the raw material front: I am taking an old apricot tree out of a small orchard for some friends a few villages away tomorrow (National Holiday) and I am really excited to turn some bowls and jar tops out of it.  A few weeks ago, I mentioned the project to a friend of my wife’s and a couple of hours later she called and said that her husband was cutting an old ornamental cherry down and would I like the wood? Like the Pope wants Jesus, I did!! I went over with the chainsaw and helped him take it down and to cut a few larger limbs and the trunk into sections.  Some of the images below are what it looked like inside the tree just after my chainsaw went through. We were stunned. Not just the center was beautiful – a fire purple, but there are bright reds and oranges in the outer wood as well. The tree had over 70 rings and grew next to a couple of big cedars so the rings are real tight and as I had to sharpen my chain twice during the cutting, the wood is VERY hard and dense.

It took two loads in the car to get it all home.  I sealed the ends right away and stacked everything in the GROP near the lathe. They had cut a plum down earlier this week and I scored two 12” rounds from that as well – the ones with the flame purple center in the pictures below. I told the couple that I would make them a vessel or large bowl out of a hunk of the tree in trade for the lumber.

Fast forward to this past Saturday: I rough turned 6 bowls (one not pictured) in about 2.5 hours from the large limbs. The trunk sections will be cut into starting next weekend.   I will let the small pieces dry for 4-6 months and then finish turning them. The larger bowls from the trunk will take a year to dry.

Am feeling reasonably optimistic about upcoming projects :-)

IMG_4075

IMG_4076

IMG_4077

IMG_4078

IMG_4079

IMG_4092

IMG_4103


Update 11-9-14:

Well, the apricot tree wood harvesting didn’t quite go as planned. I had chainsaw issues right away – needed to tear it down before the first cut and unclog the chain oil hole. Holy crap the wood was hard. It had 65+ growth rings that were stacked in tight. It was slow going with a couple stops to sharpen my chain. The clincher though was that there were two twisting veins of rot that went from crown to root ball with lots of bug damage spidering out from the rot as well. Dammit! There was was maybe 12” of trunk that I can spin a bowl out of. Per my agreement with the owner, I cut up the other trunk & big limb sections to a length that will fit in a fireplace and stacked it up for them. You win some you lose some. If not for this tree I wouldn’t have the amazing wood from the ornamental cherry and plum tree and maybe karma will smile on me the next time I lug my saw into a field.

Apricot Tree 11-2014 (3)

Apricot Tree 11-2014 (1)

Apricot Tree 11-2014 (2)

Beer: Quality over Quantity

I was flipping through my Instacrack feed today and I noticed that in the last couple on months that I have had some really good beer.  I am such a raving wino that we can buy a 6-pack and 4 of them will sit in the fridge for a month before I finally give them away to guests one at a time.  More often than not, I will buy one or two promising looking beers at the store and put them in the back of our euro-fridge (tiny) to reward myself with after a day of yard work in the hot sun, when I am finally done with some long-term shop project, or if a project goes horribly wrong – like destroying a saw blade on an unseen nail, anytime I have run a chainsaw that day, after a grueling hike, finishing a monster drawing or spreadsheet, a bowl flies apart on a spinning lathe, multiple parts cut too short….  All that stuff deserves a beer

Tripple Beer

spreadsheet beer

Peche Beer

Leff Beer

Donalld Beer

Weissbeer

IMG_0881

IMG_4028

IMG_0453

Reusing/remaking old tools

I love me some old tools. I love looking at them, touching their surfaces, using them… Most of my hand planes, some of my chisels, and all of my molding planes are older them my grandfather. I will push people down in a junk/antique shoppe to get to a wooden plane or socket chisel peeping out from behind a Paint-By-Numbers masterpiece.

Occasionally, I find a beautiful tool that is beyond repair and cannot be brought back to life. I lament its loss. There have been a couple of pieces lately that I just couldn’t let go into the burn pile or let sit to languish as food for wood-worms. The molding plane pictured below was/is a 1860s-ish Gleave #8 round and was split and has warped at the split to the point that there was no bringing it back from the dead. So I cleaned it up, applied a little walnut oil, and added a VERY pitted iron to make a key holder for our living room. It subtly tells first-time visitors that a carpenter/Ébéniste lives here.

The 23″ walnut joiner plane, also below, was the property of a C. Wanger, and used just outside the village of Cornebarrieu, France. It bears the marks of his hand on the foreend and his thumb and index fingers have left deep indentions on the tote. It has been repaired a couple of times, the wedge has been cut off and worms got to it years ago. The poor thing is now held together with hope, spit, and a little epoxy. I loved the size and color, so I turned it into a desk organizer for my office.

Before you all start collecting scrap so you can roast me alive for desecrating beautiful tools, know that I rescued them from a fiery fate and have given these tools a useful and meaningful after-life.

Keys 2014 - France

IMG_3450

Our new puppy is part cat…

Truffle has some cat DNA in there somewhere:

1. If you want to sleep and she doesn’t want you to there is a slobber attack. Don’t try to hide your head under the pillow – it won’t help you.
2. She will chase the laser pointer up the concrete column in the living room and go back to look for it an hour later.
3. Why would she eat her food, sleep in her bed, play with her toys? Brodie’s are so much better.
4. Apparently, her assigned spot in the bed is between my wife and me at shoulder level.
5. Oh, you want to write an email or get some work done? Nope, not on her watch. She will sit in your lap, lick the keyboard and grunt until you pet her full-time.
6. Yoga Mat? Wrong. Puppy play space. Move over.
7. You want to watch “your show”? Not during designated playtime you don’t. When is designated play time? What time does your show start?
8. Why would my wife want to put make-up on by herself when Truffle can help?
9. A relaxing bath for the Mrs…. Sure if she doesn’t mind Truffle standing at the side of the tub whimpering or lying beside it passing gas.
10. “What do you mean there is a no dogs on the table rule?!” We have learned that chairs and benches have to be pushed in so that we do have to share our meals.
11. She CAN get in the bed by herself, but why would she do that? Standing beside the bed with her nose and front paws on the mattress and whining until the bald pink monkeys put her up there is a winning strategy, so why should she expand the energy?

tumblr_nak10om8MU1sk0b4eo1_500

tumblr_nanfqlsyJg1sk0b4eo1_500

tumblr_nas092W8LB1sxm9epo1_500

tumblr_nb8grdaTNK1sk0b4eo1_500

tumblr_nabdhkypRt1sk0b4eo1_500

tumblr_nak0rjsvi81sk0b4eo1_500

tumblr_na4xt7OaP61sk0b4eo1_500

tumblr_na8q48uecK1sk0b4eo1_500

tumblr_nabapjx5kh1sk0b4eo1_500

tumblr_nahttvtUQ01sk0b4eo1_500

tumblr_najt4yrHyO1sk0b4eo1_500

Need a trash can lid? Make it on the Lathe

We have a Art Deco flower pot in the guest bathroom that is used as a trash can. is about 9″ high and 8″ in diameter, so it doesn’t hold a lot. However, our new puppy is VERY interested in the contents of that vessel. To stem any possible and eventual messes, I took some pine scrap, chucked it up in the lathe and made a heavy wooden lid. I stained and finished to match the pot. Simple fast jobs like this make it so I can buy new tools without my sweet wife flipping out.

IMG_3436

IMG_3449

IMG_3448

Making stuff with My Son

It is one of my duties in this life to make sure that my children can do for themselves. Having to call a plumber for a clogged drain or an electrician to replace a switch just is not the Talley way. We are fixers, tinkers, builders, and warranty voiders by practice and nature. I cannot have it on my conscience that such a path would end with me, so part of the summertime ritual is to fix and build stuff.

This year was no different. The Ruminator work on the lathe a bit, helped me build a kitchen island, and helped design and construct a hanging shelf system for my wife’s sewing room. We hung a storage rack in the garage, built a snowboard rack for his room, hung stuff up in the living room, applied a little spray paint and finish, learned about milk paint, refurbished a miter-box saw, cut up some andirons, went over tool identification, sunk a bunch of screws, put some all-thread to use, made sparks with the grinder, and that sort of thing.

Just little bits at a time… Next year we will do a little metal work and wood carving. The year after, we might build a deck and do a little welding. At some point he will learn to sew and mend a little – not to be a seamstress, but enough to make simple stuff and put a button back on a coat. If he wants to be a carpenter or a cobbler or a tailor or a machinist or a welder fine, then I am equipping him with early skills to build from. But if he wants to be an architect, teacher, engineer, lawyer, doctor, or whatever – I still want him to have the knowledge base of how things work, how they are put together, and how they should be fixed.

tumblr_n7kr78lFbZ1sk0b4eo1_500

IMG_3192

IMG_3199

IMG_3200

andirons 2014 (1)

IMG_9726

IMG_9727

IMG_2607

tumblr_n8evrlmWZw1sk0b4eo1_500

IMG_9566


UPDATE: Shortly after my son left to go back home, I was cleaning up the GROP and I found this message below written in saw dust. It made me both humble and very proud.

IMG_3209

Puppy Narcissism

Our dog is awesome. Everyone that we know likes him and he is even allowed in peoples’ homes that don’t even allow other dogs in their yard! His happiness means a lot to us and we take really good care of him: Warmed gourmet food, toys, lovin’, walks, cheese under the table, loads of attention, snugglein’, fur rugs to nap on, etc… I have told my wife repeatedly, that if I am reincarnated, my first choice would be to come back as her puppy (minus the whole neutering thing…)

Anyway, when we fist adopted Brodie, he had leash aggression issues and DID NOT play well with others. There were beat downs, bloody lips, flying fur, and all out brawls with much larger dogs. It has meant that he has had only us to hang out with and sometimes he gets a little board of the pink monkeys that share his space. I am sure that he now views me as his combination butler/chauffeur…

We have spent years socializing him so that he could have puppy-friends or siblings. A recent week+ visit to the puppy spa (really) while we were in Paris convinced us that he was finally ready for a full time buddy – he did great, made multiple friends of different breeds and there was not one incident of bullying or aggression. Right then, the stars aligned and we heard about a female French bulldog puppy that was being re-homed due to an allergy in her family.

When we went to meet her, it was like when my wife met Brodie for the first time: the puppy latched onto Stamps-With-foot, sat down in her lap, applied wet kisses, decided we were good people, and staked her claim. We introduced her to Brodie and they immediately got along. The deal was sealed.

Meet Truffle. She is the newest member of the family.

TRuffle and Brodie 7-2014

IMG_2930

Truffle 2

TRuffle 2014

Truffle and Brodie - 2014 (2)

Truffle 8 -2014 (1)

Truffle 8 -2014 (2)

Truffle 8 -2014 (3)

Truffle and Brodie - 2014 (1)

I just threw the waterlily picture in because it was pretty and from Truffle’s first walk in Toulouse.

Up-cycled present for my wife

On our way to Carcassonne a few weeks ago for the Bastille Day festivities, we stopped by one of our favorite used furniture/junk shops and I found a few pieces of treasure (Cast iron miter saw, a forged hold-fast, etc…) and Stamps-With-Foot found a set of badly weathered Victorian andirons (the things that hold logs in a fireplace) with a female costumed figurehead bust. She took one look and immediately thought “book-ends!” We paid 5 Euros ($7.50) and put them in the car trunk. I researched them a little later on and found that they were cast in France between 1870 and 1880. Even in the condition we found them in, they go for 90-120 Euros ($121-162) on eBay, so I was pretty pleased with her find.

After coming home from the vacation weekend, my son and I cut the rusted rear beam off one of them, cleaned the sharp edges of the cut with a file, and used a bronze wire brush to mostly clear the surface rust off the bust. My saw blade was dull and we couldn’t cut the second one, so we put all the pieces up a shelf for me to take care of later. Fast-forward 3 weeks and after buying a new blade, I made the second cut, filed the edges, took all the rust off both, primed, painted them with 3 coats of matte black paint, and 2 coats of clear matte finish.

Stamps_with_Foot had a big smile and skipped a little when I gave her the finished pieces.

Laurel's Bookends (1)

andirons 2014 (1)

My Mom

When we were in Seattle in June, My mom gave me these two pictures. In the first she is a year old and her older sisters took her to school to have her picture made while they were taking yearbook shots – it was at small country school and in a different time… The second is from when she was 5. I now have one in my office and one downstairs on our family picture wall. I am really proud to have them and that they are out and not filed away in a box somewhere.

Nana (1)

Nana (2)

Our French Jardin

With my J-O-B and all that we have going on here in France (work, travel, guests, work, work…) there is NO WAY that I can have a proper garden. To scratch my farming itch, I have been medium obsessive over the grass (I have not found the desire to begin a campaign of slaughter for the dandelions as yet) and have made our outside living space as nice a possible. The prior occupants of our house planted rosemary, sage, lavender (we have 5 different bee types on it right now), a couple of fruit trees and some bulbs that we are nursing a little the the color and life help with my primal need to make stuff grow.

We eat outside in the evenings a couple nights a week and I bought a sweet masonry grill from an English couple that were moving to Spain. The thing weighed a ton, but it works and looks great. In addition to grilling on weekend afternoons, I REALLY like to have my coffee in the shade of the porch out back if my schedule allows and the hammock has an assign spot in the shade. We see our back yard here as more of an outdoor room and have furnished it with a teak table set and the Adirondack lawn furniture that I made for Stamps-With-Foot a couple of years ago – she insisted we bring it from Seattle 🙂

Back yard 3 2014

Spring 2014 (1)

back yard (2) 2014

Grilling 2014

brodie hammoch 2014

Yard in France 2014 (2)

Yard in France 2014 (1)

Yard in France 2014 (3)

Yard in France 2014 (4)

flowers 2 2014

Spring 2014 (2)

Flowers 3 - 2014

flowers 4 2014

Flowers 2014

back yard 2014

GROP update – French Cleats

Since I live in France, it only makes sense for me to have a shop organization wall that using French Cleats. I have wanted to do it for years, but just never found the time between house and furniture projects when we were in Seattle.

I ripped down some pine sub-flooring that came from the local French Big Box (Leroy Merlin), cut the edges at a 45, ripped the board in half, and glued/screwed them to a section of 1/2-ish (13mm) plywood. Exterior water-based poly was added to both the back and front before it went up on my clay-block garage shop wall with 8 large anchors. For my first French Cleat accessory: I had three small cut-off sections left from a picture shelf wall I did in my home office that I tacked to section of scrap ply to hold my #5 1/4 Jack, #4 smoother, and a couple of block planes. I keep the rest of my planes in a chest, but I use these constantly and wanted to have them in reach. I was so happy with how it all tuned out that I started building all sort of other holders and organizers: ones for squares, chisel rolls, Mallets, cords, apron hooks, saw horses, clamps, Japanese saws, etc… I ringed the garage with a single cleat about 6′ up for all sorts of diabolical organization plans, then hung two more above the lathe so that I would have a place to suspend my lathe chisel rack that is currently in progress and for a spot light that shines down on projects as they are turning.

I will update and post as I add new stuff.

French Cleat 2014 (2)

French Cleat 2014 (3)

French Cleat 2014 (4)

French Cleat 2014 (5)

French Cleat 2014 (6)

Talley - French Cleat attachments 2014 (1)

Talley - French Cleat attachments 2014 (2)

Talley - French Cleat attachments 2014 (3)

Talley - French Cleat attachments 2014 (4)

Talley - French Cleat attachments 2014 (5)

Talley - French Cleat attachments 2014 (6)

Talley - French Cleat attachments 2014 (7)

Talley - French Cleat attachments 2014 (8)

Beekeeping – Making New Queens

A couple weekends ago I worked the hives, checking their overall health and seeing if any were thinking about swarming. Swarming = bad. If there is more than one Queen in a hive, the ladies will either duke it out and both could die – dead hive bad – or the hive will swarm, taking possibly more than half of the precious worker bees that make all the yummy honey. There are some things that can be done to prevent swarming:

1. If two queens are found or if there are new queens about to be born (they have a uniquely shaped chamber that other bees make specifically for queens) AND the hive is doing really well, you can manually split the hive into two hive boxes.
2. If the hive is not doing great, remove the old queen and let the new one be born.
3. If the hive is doing fine and you don’t want another, then you can snip the new queen chamber in half – assuring that the original queen will preside a little longer.

Sometimes though, you will need a new queen if old one not producing, she dies unexpectedly, if the hive is aggressive, etc… When this happens, you typically buy/order a new one from your local bee supply store, online, or from a local apiarist who makes a little side money raising them in specially maintained hives. I had never actually witnessed the process of “Making Queens”, so when one of the older gents with Syndicat Apiculteur, held a lecture after the hives were checked, I sat in and tried my hand at it.

The simplified version:

1. Take a fresh brood comb out of a gentle hive that is doing well and has historically been a great honey producer.
2. Prepare “Queen Cups” with Royal Jelly.
3. Gather lights and tools and an assortment of magnifying glasses.
4. Uncap the comb and prop it under a light on a 45 degree stand.
5. Make sure no bees are in the room as an uncapped brood comb WILL piss them off and you WILL get stung.
6. Remove any stingers from skin while quietly cursing.
7. With a small dental scoop, remove one larva per cup. Look for a small one no larger than 1.5mm.
8. When cups are filled, place in special “Queen Frame”
9. Place frame in hive with no Queen – there is more to it than that, but for the sake of brevity…
10. Add a sugar water mixture to a feeder frame next to the “Queen Frame” in the hive.
11. Check back and when the queen cells are fully closed and the new queens are growing, place a purpose built cage over the cell and wait for them to emerge.
12. Re-queen some hives or sell them to your nerdy bee-keeping friends.

Bee - Making Queens 2014 (1) Bee - Making Queens 2014 (2)

Bee - Making Queens 2014 (3)

Bee - Making Queens 2014 (4)

Bee - Making Queens 2014 (5)

Bee Larva into cup

Queen Cell 4 Queen Cell

queen cell2

Ukulele holder for my office

I have the most of the instruments hanging downstairs, but I spend the lion’s share of my day (sometimes night too 🙁 ) in my home-office upstairs. I decided that I needed a little diversion from my computer every now and then and brought a ukulele up to strum and pick when thinking hard or if the J-O-B gets me down – no one can be unhappy while playing the uke, it is physically and psychologically impossible!

I already had the perfect piece for the task: Last year in Seattle I was playing with some scrap oak flooring on the table saw and I made a modern-ish mount for some tool in my shop that I didn’t end up using. Somehow, it got lumped in with the stuff sent to France and I found it while unpacking some hand-planes. I touched it up a little, added a hanger, and mounted it on the wall under my office window – well within reach while I am sitting at either of my desks (drafting & computer). It looks great and matches my office decor AND I have found my self already absently-mindedly finger-picking while thinking on a problem or figuring out why something isn’t working right.

Weekend Update – 4/14/14

Really good weekend with just a couple of bumps…

Out late Friday night in Toulouse
Slept in Saturday morning
Stamps-With-Foot made yummy breakfast – great croissants!
Surfed the Interwebs and lost an hour or two to Pinterest
Worked on a dining table bench for about an hour
Used smoothing plane and made tissue paper-thin shavings 🙂
Drove to Toulouse for 1st outdoor beekeeping class – waking up the hives from the Winter
Warm sunshine, blue skies, perfect weather!
Hives were in good condition and got to split one hive that was doing really well – already completely filled the hive box with pollen and honey.
Stopped by Lumber store on way home to buy some dust masks.
I can’t be trusted in Lumber/Hardware stores…
Bought 60 Euros worth of lumber, glue and screws
Forgot dust masks…
Came home to cuddle wife
Wife accidentally kneed me in the baby-maker and ¼ of a second later, put weight on the same knee, smashing the boys…
Rolled around on the ground in pain for at least a full minute
Limped outside
Mowed lawn and turned the compost
Limped a little while doing so – boys still hurt.
Helped wife make steak fajitas
Was on guard for any errant knees…
Drank a glass of wine and snuggled while watching 6 episodes of the last season of HIMYM
More Pinterest and sleep
Slept till 10:00 and leisurely breakfast
Went into Village to market and found a very nice oak printer tray for 10 Euro.
Immediately bought it without haggling over the price
Spent an hour in shop patching a small section of bench where plane slipped while joining two boards.
Found where a cat had marked some lumber when garage door was open night before.
Said hateful things about cats.
Had lunch with a friend that is healing from a cracked collarbone
Came home and finished putting together the teak patio
Bought wrong oil for the patio furniture – Grrr…
Fixed one of the broken arms (from move) on the Adirondack chairs
Had coffee in the shade
Hung hammock and tested it out.
Place feels like home now!
Sweet wife made dinner and we ate for first time on our new patio table – first of many meals
Snuggled in hammock with wife and listened to birds, neighbors, bees, etc…

Very happy

Found Trunk

Last spring (2013), I was at the West Seattle Fruit Market and asked if I could snag an oak pallet that was sticking out of their dumpster. “No worries. Sure. Take whatever.” When I pulled out the pallet, I found an old trunk/chest under it that had the top ripped off and was in sad shape. I almost left it where it was, but then decided it would be good for tool storage in the shop as the top was under the box and all the pieces were there. I drug it all home and after I cleaned some old lettuce and a rotten beet out, stuck the thing under a wing of the table saw where it promptly started collecting sawdust.

While working on my own version of the Anarchist’s Tool Chest a few months later, I decided to fix the found trunk up as well. It took maybe a total of 2 hours was strait forward:

Vacuum job
Removal of the old bent and broken hardware
old hinges from some other scavenged project installed
Top refitted and put on
a little glue was applied to some trim
1″X4″ slats to reinforce the bottom…
A few well-placed screws
From the pieces of left-over pallet wood found on the same day, I glued up some 5″ blocks and turned them down to make bun feet.
Installation of the new feet
a quick light all-over sanding
Two coats of Teak tinted tung oil.
….and done…

Stamps-With-Foot saw it up on saw horses in the yard and claimed it for the house. Apparently, it was too “rustic & French & crafty” to be vanquished to warrens of my dark little shop to be abused with tools, dirt, dust, grease and boyness. When I first started putting it back together, I found stained receipt from a outdoor store (no date) and a cub scout pin wedged in the bottom. I surmised that this was a young man’s camping/scouting trunk that he or his dad or both built it together. From the construction and the materials used, it looks like it was put made in the late ’40’s or early 1950’s. It now sits in our living room in the south of France and serves as a coffee table and blanket/hammock storage chest.

Tools I brought with me from the old country…

When planning our move to Toulouse, I came to the realization that I would not be able to take my entire shop with me. I didn’t relish the idea of replacing all my power tools and saws with 220vt/60Hz versions, only to have to sell them in a couple of years when we move back to Seattle. I decided that I would bring mostly my hand tools and and spend some quality time working small projects, cutting dovetails, tuning my planes, etc… There were three 24″X24″ boxes and one wooden chest full of edge moulding planes, Stanley Bench Planes, 4 rolls of chisels, mallets, Japanese saws, hand drills, dovetail tools, axes, draw knives, my half set (#2 – #18 even) of 1850ish Gleave hollows and rounds, squares, jigs, rasps, and assorted joinery paraphernalia.

My plan is to use the time here to do the detail work that I am usually in too much of a rush to even contemplate: carved scroll-work, mortised frames, insets, layered stain finishes, edging with the moulding planes, some light carving, maybe even cutting a few linen-fold panels. I have done a couple of little things already, but my first big task is to build a HEAVY work bench so that I will have a proper work space: I am going with a split top Neo-Roubo without a leg vise. I will be installing a cast iron Front Vise and a Screw Vise on the tail of the bench instead. No cabinets underneath so that I can store a shooting board and a Moxon vise. It WILL BE coming home to Seattle with us.

In the interest of full disclosure: I am not a neo-Luddite – I did buy an orbital sander right after we got here and I shipped my Ryobi 18vt tool set (circle saw, 2 drills, reciprocating saw, flashlight, & jig saw). The same sets are sold here and I got a 220vt charger that works with my existing batteries and picked up a couple of fresh new lithium-ion batteries in the process. Aside from the battery tools, I ordered a large wood lathe so that I can make furniture legs, tool handles, bowls, jar lids, platters, etc. I brought all my lathe chisels and chucks with me and I got a model that uses a DC motor that I can change over to one that runs on US current when we move back. It is much larger than my lathe in Seattle and will be a valuable addition to the shop there when we return.

France – The first 30 days.

Still Love France.
My French has gotten SO bad.
I did forget how slow things are to get done here. 
You want a buy/lease a car?  Three weeks-ish. 
You want cable and internet? 1 month.
Want it to work? 1 more week and 14 phone calls
Love my J-O-B
No such thing as coffee to go… even if you get it in a tiny paper/plastic cup, there is no lid.
Really like the house here. The 16″ thick concrete walls and steel shutters give it a homey crypt-like feeling.
Miss our house in Seattle.
There are doctors who speak English, but their receptionists who book the appointments don’t… 
You want groceries on Sunday?  Nope, not going to happen
I also forgot how amazing the eggs and meet are. 
Want to sit and have coffee and talk to my mom, miss that.
Bread goes with EVERYTHING! Awesome bread.
Having a really hard time finding a shop that sells wood lathes – only power tool I want/need here.
The weather here in winter is better than summer in Hamburg.
Miss my furniture. We have been “Camping” since Halloween and I am about 99.9999% done sitting on the floor to eat my dinner.
Want my tools like a junkie wants their cooking spoon.
Stamps-With-Foot is buying enough cheese to make the regional sale figures blip. 
Our dog< Brodie, has fully integrated and will cop a squat in the middle of the street, sneering at anyone who dares to question his right to do so. He goes to restaurants with us like he is a little prince. The wife slips him duck breast, cote of Beaof, and aged cheese under the table.  I had 2 glasses of $4 wine that we bought at the grocery store with dinner tonight.  It was awesome.  No, truly.  Wish my kids were here. I miss Starbucks, but I have a Killer espresso machine in the kitchen.  Can now watch Netflix and BBC One with country specific VPN accounts - sticking it to the man! Miss my bikes. Can't wait for them to arrive next week (insert giddy face) The designer dog food here is sold in breed specific bags - really. It is crap, but it is packaged well. I have lost a little weight because I am not eating crap and started running again. Very, very nice wooded trail near house - miles and miles long. Flying to Florida for work next week and am bringing home coffee beans, dry dog food, and Cajun Seasoning. Packed an extra duffle bag... Went for a drive in the country today and happened by a 16th century chalet with turrets and a moat about an hour form the house. 
The thought of Stamps-With-Foot driving in France scares the Hell out of me!
Life is damn fine on the whole.

Kitchen Cabinet Work Update

There was a flurry of activity to get our kitchen done before our move to France.  I got it 99% of the way – with serious help from Mr. Flood and my sweet wife.  It just needs a little paint on the overhead fridge pullouts, slight pull-out slide adjustment and the installation of the custom milled and matched cove molding.  That will all keep until we get back to Seattle though.  My mom will be able to cook in there just fine as-is.

I feel that the upper cookbook shelf ties the old and new sides together and adds that part of the overall kitchen that was missing.  The shelf also seems to lighten up the space a little as well.  The wine rack was put in specifically for my wife.  It started as a discussion in the breakfast nook one mid-morning, transitioned to a napkin sketch, and four hours later, the carcass was built, bottom brackets cut, and block top was in the clamps with the glue drying.  After the paint was on and top installed, my wife swooned.  It made me smile from ear to ear!

The paper towel holder was a bit of a conundrum.  With low upper cabinets, there was just no good spot either on the counter or under the cabinet.  I toyed around with a couple of ideas before I decided to mount the paper towels on the old ironing board (now spice cabinet) lower door.  I used some scrap popular and turned a section of oak down on the lathe for the rod.  It is inserted all the way through the shelf and both wedged and glued in place.  My grand kids will still be able to use that towel holder when they are my age.  yes, I over built something again…  On the brighter side, the paper town holder bracket, the small round shelf brackets, the cookbook shelf brackets, and the wine rack brackets all match, again marrying all the different kitchen elements together.

Almost as important to her as the wine rack was the trash and recycling can drawer.  After it was in and painted I caught her pulling it open and closing it over and over with a giggly smile.  The curves on the side match all the shelf brackets – I couldn’t help myself.

“New” Midcentury Modern bookcase in the bedroom – left undone

We are a house of books. Every room of our home – including the kitchen and bathroom – has books living there; on the shelf, tucked into a nook, behind a cabinet door… It feels like there will be a raid from Ray Bradbury’s Firemen at any time. Years ago we shared a home where a huge pile sat at the end of the bed, there were mounds in the living room, and stacks on the kitchen table. It drove my wife insane. Taking a lesson from that, I have tried very hard in the ensuing years to not do that again by building of buying bookcases and shelves aplenty – happy wife, happy life.

To that end, we have a bookshelf that has now lived three distinct lives: it started its existence as a staircase bookcase in our first rental house in Washington State. It was the very first thing I built when we moved back to the US and my wife was amazed at my woodworking ability – she had never seen me really do anything beyond fix a chair or hang a picture. She was super impressed with the recessed dados and the router work. I removed it from our rental and cut it down in size when we bought our house in Seattle, putting it in my wife’s basement sewing room for pattern and costume book storage. I just couldn’t stand to see the work put into it go to waste. It now lives on our bedroom wall, after being cut down once again. It has been painted to match our bedroom furniture and I sheathed the outside in 3/4″ birch recycled from existing shelves with edge banding.  Both will eventually be stained and finished to match our headboard – giving it a mid-century modern look. Reusing original pieces and re-purposing the parts of existing furniture makes my heart happy. It offers about 14 feet of shelf space and keeps Stamps-With-Foot’s Harry Potter and Twilight out of the living-room – sure make fun…. He who is without literary sin cast the first stone…

It was one of the MANY projects that I just did not get finished before our move to France.  The bookshelf is completely usable and when Last I saw it, my mother had filled it with James A. Mitchener, Deddie McComber, and biographies galore.  It will keep until we get back to Seattle in a few years.

Dreams of My Own Little Shop of Curiosities..

I have a dream: I want to open a small to medium sized antique shop and have a place for my wife to work where she can take the babies and puppies. A place where I could indulge in my love of furniture/design/history and still keep my day job and health insurance. This is not a pipe dream, I have a written draft business plan, have worked out a logo and ethos (solid wood only) and have a special savings account for the start-up costs. In addition to classic and choice mid-century pieces, I would sprinkle in a few of my own newly constructed items and the occasional consignment.

I found the perfect place a couple of years ago: an existing antique shop where the owners were thinking of retiring and had good open space with FANTASTIC ambiance. I found out recently that the shop had closed forever and that the space was being converted to some other purpose. I snuck over and took pictures of the interior before it was sold or leased and some idiot rips it apart, installs IKEA cabinets, and opens an ironic hipster shop…

It hurts my heart a little to see someone else get the spot that I have long coveted, but I will find or make just as good of a space when the time comes.

Summer Garden 2013

Fall will be on us in a couple of weeks and this has been a fairly productive garden year, though not quite as bountiful as last year. I blame it on my travel schedule since the weather this year has been fantastic. We have less tomatoes, but a bunch of corn – 40+ stalks that are a week or so away from harvesting. A huge running squash plant, but only a few actual squash – it should have nipped it. Since rhubarb and Swiss chard are disgusting weeds that I feel has no place in my garden, the two plants that my lovely wife planted are going gang-busters…

The crows found the cherry trees up front and within two days ate EVERY single cherry – green or otherwise, and left pits scatted about the lawn to taunt me. Grumble, grumble, grumble… A particular squirrel found our raspberries & thorn-less blackberries and our harvest was cut by 50% or so. We grew TWO LEMONS!! Total cost for time, the tree, energy to keep it alive for two winters, water, etc.., means that my lemons are worth $500 each. The Apple trees are healthy and we have a few apples – we need more bees. The fig did well and we are going to plant it in a sunny spot in the front. No blueberries to speak of. We will plant our two Sunshine verities along the side of the south front fence and see how they do for the next couple of years.

On the flower front, we are awash in dahlias and lilies and poppies. The kitchen and bathroom have been filled almost all summer with various cuttings. Stamps-With-Foot is giddy about her progression from plant murderer (she once killed a jade plant… How do you kill jade?!) into a budding flower gardener. Giddy. Below are some pictures of some of the fruit, veggies, flowers, and berries from our garden at home so far this year:

Campaign Furniture Love and Build

I am a sucker for campaign furniture – the real stuff not the 1970’s MDF, lime green crap with cheapo plated straps and corners applied. Nope, I am talking about furniture that could have been broken down and loaded in a wagon, put on a mule, or strapped to a camel and toted around the world to reside in an officer’s tent in the high mountains of the Hindu Kush, the plains of the Ganges, or on the savannas of the Rift Valley. There is a single modern volume – now out of print – that I have checked out of the local library (through inter-library loan) 4 times and have scanned it in it’s entirety. I also have a 19th century catalog that is printed on pulp paper and completely falling apart that I peruse a good bit. I have even planned a couple of days off while traveling around seeing particular pieces and collections: there is a small shop in the Charleston, SC antique district that I spent hours in and while in London last year I found a shop that I wanted to move into. To tempt me even more, I have read rumors that Chris Schwartz, author of The Anarchist’s Tool Chest, is working on a new book and I am vibrating with anticipation.

There is a bit of both romance and leisurely comfort when one spends time afield surrounded by real furniture. I have a couple of original pieces, but they were dear enough that they cannot leave the house and won’t be spending any time glamping with us in the summer or in a high-country elk camp. Instead, I have been working on some modern versions that can be thrown in the back of a truck, hauled at high speed down goat trails, and opened up like Optimus Prime to reveal stout, useful, pleasing furniture. I have a source for solid wood shipping crates of different sizes that I have cut, stained, altered, and added to for this purpose. The limiting factor in all of this, is that every single piece has to break down, or fold up so that everything together fits in the bed of a small truck: 4’X6′

Right now, I have the cast iron cookware box, a candle box, 2 small tables, and a field desk done. I am 90% done with the wet bar (you NEED booze while glamping…) and an oil lamp/lantern box. The camp kitchen is in work, but will not be near complete or usable by the time we move. I have also designed a linen trunk, small chest of drawers, and a full-sized bed, but these haven’t even been started. The Campaign Furniture build is an on-going task and I hope to finish it all while we are in France. We are actually contemplating using it to furnish our guest room there.

Building Custom Cabinet Doors

1. Buy dimensional 3/4″ poplar boards.
2. Plane to uniform thickness.
3. Rip 2″ and 3″ strips on the table saw.
4. Two dado cuts on table saw for 1/4″X 3/8″ panel groove.
5. Run each section on router because table saw is a POS and there is depth variation in all the grooves…
6. Threaten table saw with large iron maul – mean it.
7. Grumble a little.
8. Cut door stiles (sides) to length – Measure opening for stiles, subtract 4″ for stile width and add 3/4″ for double 3/8″ panel slot.
9. Write all measurements down on a non-descript sheet of paper.
10. Put measurements somewhere safe.
11. Take a 2 week to 4 month break because life gets busy.
12. Lose paper with measurements.
13. Tear house and shop apart looking.
14. Give up and re-measure.
15. Cut rails.
16. Lay all parts out and label, check sizing, trim two pieces, and pray a little.
17. Set up horizontal drill press to drill for dowel joints.
18. Screw up at least 4 initial holes.
19. Hit head in shop at least 3 times.
20. Build sweet dowel trimming jig for table saw – let head swell a little.
21. Cut 3/8″ off each dowel (8 per door).
22. Drill 16 holes per door.
23. Sand the cut-off end of dowel.
24. Dry fit first door.
25. Success!
26. Get out every bar clamp, hand clamp, and Quick-clamp that you own and set up clamping station.
27. Find original measurements for doors in the “safe place.”
28. Say dirty words very loudly. Repeat.
29. Add glue to dowels and joints and assemble door.
30. Apply judicious blows from wooden mallet to seat parts.
31. Get glue on hands and in hair.
32. Clamp up.
33. Wipe extra glue on door off with wet rag.
34. Repeat last 6 steps 8 more times.
35. Scrape clue, plane joints, and sand doors with 3 different paper grits.
36. Check and adjust door fit to openings and prime after more planning.
37. Re-prime and paint with two coats of white cabinet paint.
38. Mark, mortise, and install hinges on door.
39. Install red glass pulls.
40. Mark and mortise hinge/door onto cabinet.
41. Check fit and adjust 2 to 9 times.
42. Repeat steps 28 thru 41 eight more times
43. Drink three beers and swear to never build your own kitchen cabinets from scratch ever again!

Some Big News…

So… My J-O-B has made us an offer that is very hard to refuse: a two year stint in the south of France and they will fly us home 3 times a year. We get to keep our house and I get to come back to my job in Seattle when that period ends. THE SOUTH OF FRANCE!! Warm weather, amazing wine, spectacular cheese, lavender, honey, the French vacation plan. We would be living outside of Toulouse – the third largest city in France. It sits at the foot of the Pyrenees Mountains, is an hour from the coast, has one of the 10 best Saturday markets in Europe (so says the interwebs), and has more sunshine in 6 weeks of summer than Seattle has all year. We are so freaking doing this!

There is some red tape that we have to cut through, namely a work permit. Since around 27% of the French population under 30 is out of work, getting a permit right now, even in the aerospace field, is tres difficile. Fingers crossed. If this happens, then The Nana will move into La Maison du Talley, pay the utilities, and keep the zombie horde away. Visualize a sweet grandmother rocking away on the front porch with a shotgun across her lap. Add a Marlboro hanging from the corner of her mouth and you will have an accurate picture of The Nana.

I will miss my shop and my yard for those two years, but I will plug the hole in my heart with Cote du Rhone, Comte, a day trip or 6 to the Mediterranean coast, weekends in Paris/Rome, sunshine, and a yearly vacation to Morocco. I will be taking a chest of hand tools and am planning on making some small detailed pieces while there. I also plan on scouring the flea markets over that two year period for planes, chisels, and joinery tools.

Stamps-With-Foot is not concerned about logistics or housing or much of anything other than “How is Brodie going to handle that long flight?!” She feels that we will be taking Brodie back to ancestral homeland and has spent some amount of time talking to the dog about this possibility – trying to get him psyched about the proposition…

Roller Derby, St. Paddy, Dresser Building and an Anniversary Weekend

This weekend was busy with friends, a dinner out, St. Paddy’s Day activities, an outing to the Roller Derby (?!), and the 9th anniversary of the day that my sweet wife and I met was on Sunday. Even with all that, we still got bunches done around the house: Our under-bed dresser finished, bathroom table drawer installed (a little work on that left), wine crate storage boxes made, basement lighting installed, and the basement work bench is moving along.

The drawers for the under-bed dresser and the one for the bathroom all came from a wooden donor-dresser that my father-in-law drug home from a garage sale last summer. He paid $4 for it and it was in pretty bad shape, but it was solid wood and had potential. It was mistakenly left in the weather (plastic cover leaked) for a month before I salvaged the drawers, cut out off the top and used the sides for kitchen cabinet door panels. I re-squared the drawers, added dividers in the fall, and over the Christmas break sealed the insides (The Ruminator helped). After lots of filling and sanding and more sanding, I stained the fronts to match our bedroom furniture, then built ¾” plywood beams to hang the drawers from bed frame and used some scrap oak flooring as drawer guides/runners. The final product really looks good and is super functional. While some husbands bug their wives by filling the house with brought-home junk – I give my wife more and more and more storage and organization space.

On Sunday, I put the final coat of finish on the basement workbench top, let it dry, and then installed the three runs of aluminum t-track. Stamps-With-Foot bucked up and helped me wrestle its 200 pound beech and maple mass onto the steel base. I secured it with screws and covered the top with carpet squares while I finish the upper shelf/cabinet. I installed a outlet power strip under the main body of the topper and removed the old drawer dividers. I will soon add a plywood back with a mirror, a light under, a dedicated air supply line, install the desk drawers under the bench and mount 4 reclaimed letterpress drawers directly under the top as well. Happy with the progress so far.

Basement Bench and Winter Workshop

I have found that my workshop productivity goes way down in the winter/the six months of Seattle rainy season.  My garage shop is small and quickly fills with material, lumber, tools, and projects.  To add to the handicap of the small size, the lack of heat means that I can’t do any finish-work because of wood humidity, shrinkage/swell, and moisture.  I have made do in the unfinished side of our basement for the past three winters, but I am done my wife is done with the mess and clutter and my bitching about an inadequate work area when the weather turns crappy.  I need a little bit of dedicated space that I can work on the small stuff year round that doesn’t require power tools and a little bit of assembly/finish  space where I can glue and clamp some projects up, a solder station, a spot to reload ammo, work on my bikes, and  a clean/dry/warm space to apply stain or a hand-laid finish coat.  Add to this my current want of a small metal lathe and mill and I will have the makings of a nice little hobby shop from which to launch my plans for world domination …er, I mean a spot where I can make small parts, solder, or tinker.

Anyway, instead of buying a crazy expensive cabinet bench or making do with a thin metal and partial board Home Depot bench, I have decided to build the sturdiest all-around hobby bench that I can with the funds and material I have available (~$130.00), add some really nice features (aluminum t-track, lots of drawers, removable vises, power, lights, etc…) and make it into a finished piece of furniture that I will be proud to sit at and show off to friends for the next 30+ years.  To start the process off, I found a cheap older thick steel framed 6′ workbench at Second Use that I felt would make a bombproof, rock solid base.  I sourced a used IKEA cutting-board counter top that I cut down to the appropriate size and then used the trimmed pieces to add thickness and rigidity (I am still going to add some angle iron).  I thought about and sketched 3-9 different ways to add some shelving and some organization to the top and was still tossing around options in my head when a realized that an old buffet that my mom had just might work.  I took some measurements and looked into reinforcing here and there and realized that not only would it work, but that its style would set the tone and color for the entire bench build.

I decided that the drawers to be added under the bench top needed to be narrow and at least partially match the newly planned top section, so I looked for an older desk or vanity that I could cut apart.  I struck out at Goodwill, the Salvation Army, and Craig’s List, but Second Use came through again and hooked me up with exactly what I needed at a decently fair price, well decent after I haggled a bit…

The current state of the build is that the bench top is 2/3 done, the desk is cut apart, the steel legs are up and in place and I am 1/4 of the way done with reinforcing the buffet/top shelving unit.  I will update the build as it is completed and share some more pictures.

Christmas Redecorating

Each year after Thanksgiving, we take an afternoon, go to our local tree-seller and pick out a fine Noble Fir for our Christmas tree. I then pull out our integrated reservoir tree stand, a carpenter’s level, and set the whole assemblage on top of our large, round, lipped Christmas tree spill pan – I have very vivid nightmares about water stains on my wood floor…

Like most households that celebrate Santa/Christmas/Yule/Midwinter/etc…: The tree goes up, the ornaments come out, stockings are hung, etc. The only twist in our home is that in all reality, I am relegated to unpacking the 4 boxes of our handmade glass, pewter, and pine German ornaments and my participation in hanging them on the tree is verboten due to Stamps-With-Foot’s Tannenbaum OCD. Here is how it goes:

Tree in stand.
Wife surveys the straightness.
Tree adjusted.
Christmas music marathon begins
Dog trots in and notices tree.
Gets pissed off, turns his back to us and the tree and stares at the wall.
Slinks away after 30 minutes – Brodie HATES Christmas.
Tree adjusted again.
Tree must be turned to see which side is the best.
Decision made.
Lights put on.
Tree turned again.
Light strands removed.
Lights put back on in almost exactly the same place.
Light cords hidden.
Ornaments come out.
Lights on.
I have to turn the tree again.
Re-adjust.
Move some of the lights around.
Possible trimming of branches will happen at this point.
Hand wife ornaments – glass balls first.
Wife will walk back and forth and back and forth searching for perfect branch.
Previous step repeats about 150 times.
I am banned from giving her camping or climbing themed ornaments to place.
I sneak one onto the tree in the midst of her frenzy.
I go away and hang lights outside or hide from her Yuletide decorating wrath.
Find dog brooding over the nasty tree in HIS house and plotting to bite this Kris Kringle guy.
Toward the end of the evening, I am called back and I am allowed to hang 2-4 ornaments in a place I see fit.
Wife then moves them at least twice.
Tree trimming done 2-4 hours later.
I go to bed and twitch in my sleep to the beat of Nat King Cole, Elvis, Perry Como, and Sinatra as holiday music plays into the night…
Dog watches me sleep with hate in his heart because I was the one who carried the tree in.
Wake up sometime later and tree has been moved and completely rearranged.
Camping/Climbing ornament that I surreptitiously placed has been found, removed and place conspicuously on the table.
I look sheepish and she gives me the stink-eye over my transgression.
Presents are arranged by wife in a “certain order.”
Christmas music back on – maybe it never went off…
Brodie is put into his Santa outfit.
He somehow looks sad and furious at the same time.
There will be consequences for the red elf jacket that was forced upon him!
Am not allowed to touch area near tree until pictures are made.
Wife giggly happy.
Presents and ornaments rearranged at least once every three days until Christmas morning.

To save myself some work and time, I told her this year that I “could build” a lockable turning base so that she could move the tree over and over during initial setup and for decorating. You should of seen her face light up. The mere thought of it led to her running over and jumping on me saying “YES, YES, PLEASE, PLEASE!” I do love her.