A Bench Building Machine

In addition to the 5-board bench by our front door, I have built a large bench for our dining table and one for our entry-way with shoe storage, per my sweet wife’s request. I have a couple of saw benches for the GROP and 2 narrow ones for my office all cut out as well, but not put together. These benches are traditionally “furniture of necessity” and not meant to be fine furnishings, but I think that there is still beauty in their simplicity and usefulness (useful and helpful are the highest Talley-family compliments). Additionally, they are simple, cheap to build, and lend themselves to hand-tool only construction. Not a single screw or nail is used: I used through-tenons, oak wedges, and dowels. With almost instant tangible results, the whole process in building these is therapeutic. When and if I have a super-crappy day at my J-O-B, I can go into the Garage/Shop/GROP after dinner and make some wood shavings and improve the bejesus out of my mood. Cheaper than counseling and less bloody than a rampage 🙂

7/3/14 Update:

So… The bench built for the dining table had ends that extended a little too far from the legs. It made the bench tippy if someone either sat on just the end or got up with someone also sitting on the other end. There were a couple of incidents where a butt almost hit the ground. I removed 7″ from either side and changed the stretcher detail a bit as the plain 45 degree cut didn’t really match the curl detail on the feet.

IMG_1906

IMG_1908

Weekend Update – 4/14/14

Really good weekend with just a couple of bumps…

Out late Friday night in Toulouse
Slept in Saturday morning
Stamps-With-Foot made yummy breakfast – great croissants!
Surfed the Interwebs and lost an hour or two to Pinterest
Worked on a dining table bench for about an hour
Used smoothing plane and made tissue paper-thin shavings 🙂
Drove to Toulouse for 1st outdoor beekeeping class – waking up the hives from the Winter
Warm sunshine, blue skies, perfect weather!
Hives were in good condition and got to split one hive that was doing really well – already completely filled the hive box with pollen and honey.
Stopped by Lumber store on way home to buy some dust masks.
I can’t be trusted in Lumber/Hardware stores…
Bought 60 Euros worth of lumber, glue and screws
Forgot dust masks…
Came home to cuddle wife
Wife accidentally kneed me in the baby-maker and ¼ of a second later, put weight on the same knee, smashing the boys…
Rolled around on the ground in pain for at least a full minute
Limped outside
Mowed lawn and turned the compost
Limped a little while doing so – boys still hurt.
Helped wife make steak fajitas
Was on guard for any errant knees…
Drank a glass of wine and snuggled while watching 6 episodes of the last season of HIMYM
More Pinterest and sleep
Slept till 10:00 and leisurely breakfast
Went into Village to market and found a very nice oak printer tray for 10 Euro.
Immediately bought it without haggling over the price
Spent an hour in shop patching a small section of bench where plane slipped while joining two boards.
Found where a cat had marked some lumber when garage door was open night before.
Said hateful things about cats.
Had lunch with a friend that is healing from a cracked collarbone
Came home and finished putting together the teak patio
Bought wrong oil for the patio furniture – Grrr…
Fixed one of the broken arms (from move) on the Adirondack chairs
Had coffee in the shade
Hung hammock and tested it out.
Place feels like home now!
Sweet wife made dinner and we ate for first time on our new patio table – first of many meals
Snuggled in hammock with wife and listened to birds, neighbors, bees, etc…

Very happy

Bench for the front entry – Project #4 in France

We are a “no shoes in the house” family. It is dry and dusty where we live in the summer and the trails near by that I run and that Stamps-With-Foot and Brodie walk on are shared with horses. We don’t want to track dirt and poo into the house. There is a great spot right by the front door to take your shoes off, but no place to sit down to do it. I decided a rustic little 5-board bench was in order. I spent five hours from the initial sketch design to putting on the final coat of polyurethane over a week’s time. No nails or screws were used, just through-mortises, wedges and dowels. We now have a small piece of furniture outside the front door that is functional and matches the house and the style of our other furniture – you never know it might someday find its way inside.

Found Trunk

Last spring (2013), I was at the West Seattle Fruit Market and asked if I could snag an oak pallet that was sticking out of their dumpster. “No worries. Sure. Take whatever.” When I pulled out the pallet, I found an old trunk/chest under it that had the top ripped off and was in sad shape. I almost left it where it was, but then decided it would be good for tool storage in the shop as the top was under the box and all the pieces were there. I drug it all home and after I cleaned some old lettuce and a rotten beet out, stuck the thing under a wing of the table saw where it promptly started collecting sawdust.

While working on my own version of the Anarchist’s Tool Chest a few months later, I decided to fix the found trunk up as well. It took maybe a total of 2 hours was strait forward:

Vacuum job
Removal of the old bent and broken hardware
old hinges from some other scavenged project installed
Top refitted and put on
a little glue was applied to some trim
1″X4″ slats to reinforce the bottom…
A few well-placed screws
From the pieces of left-over pallet wood found on the same day, I glued up some 5″ blocks and turned them down to make bun feet.
Installation of the new feet
a quick light all-over sanding
Two coats of Teak tinted tung oil.
….and done…

Stamps-With-Foot saw it up on saw horses in the yard and claimed it for the house. Apparently, it was too “rustic & French & crafty” to be vanquished to warrens of my dark little shop to be abused with tools, dirt, dust, grease and boyness. When I first started putting it back together, I found stained receipt from a outdoor store (no date) and a cub scout pin wedged in the bottom. I surmised that this was a young man’s camping/scouting trunk that he or his dad or both built it together. From the construction and the materials used, it looks like it was put made in the late ’40’s or early 1950’s. It now sits in our living room in the south of France and serves as a coffee table and blanket/hammock storage chest.

Hall Tree and Shoe Rack for My Bride

Soon after we moved into La Maison du Talley in Seattle, my lovely bride decided that “we” needed a place to hang coats by the front door. I looked a little at coat racks and hall trees in the shops close to the house, but I just couldn’t stomach paying $250-300 for a semi-crappy coat rack that was the wrong color or wood for our house. I had one of those “light bulb” moments and decided to build one for us. Normally, I would have cut the raised panels (I tried to convince Stamps-With-Foot to let me do linen-fold panels) and added a little fancy trip work, but as I was recovering from shoulder surgery (#4), I decided to go with the re-use route. Second Use is a used hardware and reclaimed building material store in Seattle that I frequent and I cruised over for a used fir 6-panel door. Right away, I found the perfect one that set me back a whole $30. While pushing the cart loaded with the door to the front, I found a couple of cast off cabinet doors, a few odd sections of trim, and a bundle of old tongue & groove fir flooring. A plan formed in my little head…

I cut two feet from the top of the door, then flipped it over. I built a bench and shoe rack from the cabinet doors (raised panels turned in to match the adjacent hutch and the flat panel cabinets in the rest of the house) and attached it to what became the bottom of the door/hall tree. I ringed the top with a flooring plank, tongue down, and then applied some 100 year old left over fir crown molding on the top. The whole thing was sanded down and stained a deep red mahogany and finished off with 3 coats of exterior grade polyurethane.

For the hooks, I sourced a set of coat and helmet hooks from an old Seattle firehouse and small round dog leash hooks from Rejuvenation Hardware. When all was said and done, this was the very first project finished for our home in Seattle, I spent a total of $94, and I wrote a little love note to Stamps-With-Foot on the top of it. My little wife was giddy when I brought it into the house and she raved to friends for weeks about handy and awesome her husband was – made me puff out my chest like a Banty rooster.

If I did this again, the only thing I would change would be to make the shoe shelves movable as they are about 1/4″ too narrow for my running shoes, but perfect for her shoes, which I guess is the most important feature.

Last Project in Seattle Shop for a While

Just before we left Seattle for Toulouse, Stamps-With-Foot and I went to San Francisco to secure our French Visas. While there, we spent an afternoon visiting friends and family. At one point, we found ourselves at my wife’s non-biological little sister’s house (Becca) and I noticed a couple of chunks of wood sitting out on her patio. My wood lust made me wonder over and take a look… HOLY CRAP! She had 4 huge chunks of Aromatic Cedar Burl – like $450+ in exotic wood sitting out in the rain. I immediately ran inside and told her to get it on eBay right then. She and her husband found the chunks sitting on the side of the road with the trash and just picked them up. I tried explaining to her how awesome and rare her find was, but Becca didn’t really have the will/time/interest to sell the pieces to some other lumber-jock and I was told to take some home if I wanted it.

I argued.
I tried to tell her how to sell it.
She was firm.
What was I to do??
I packed two hunks into a diaper box, taped it up, and checked it as luggage on the flight home.

The wood was a little wet still, but I couldn’t help myself – I HAD to cut into it to see what the figure looked like. I was a little heart sick on the first cut when my saw hit rotten heart wood. I managed to cut out a few (6) big wedges and a couple of blocks. I sanded one of the wedges smooth and applied a little walnut oil and OH MY!! I do not believe that I have ever fallen in love with a hunk of raw wood before that instant! I didn’t have the time to really do anything detailed, so I cleaned up the two sanded wedges and brought them in the house for bookends and left the other bits to dry and season in the garage until we move back and I can give them a some proper attention. I will make a little lidded bowel for Becca and maybe some bookends out of the other sections for her dad.

Tools I brought with me from the old country…

When planning our move to Toulouse, I came to the realization that I would not be able to take my entire shop with me. I didn’t relish the idea of replacing all my power tools and saws with 220vt/60Hz versions, only to have to sell them in a couple of years when we move back to Seattle. I decided that I would bring mostly my hand tools and and spend some quality time working small projects, cutting dovetails, tuning my planes, etc… There were three 24″X24″ boxes and one wooden chest full of edge moulding planes, Stanley Bench Planes, 4 rolls of chisels, mallets, Japanese saws, hand drills, dovetail tools, axes, draw knives, my half set (#2 – #18 even) of 1850ish Gleave hollows and rounds, squares, jigs, rasps, and assorted joinery paraphernalia.

My plan is to use the time here to do the detail work that I am usually in too much of a rush to even contemplate: carved scroll-work, mortised frames, insets, layered stain finishes, edging with the moulding planes, some light carving, maybe even cutting a few linen-fold panels. I have done a couple of little things already, but my first big task is to build a HEAVY work bench so that I will have a proper work space: I am going with a split top Neo-Roubo without a leg vise. I will be installing a cast iron Front Vise and a Screw Vise on the tail of the bench instead. No cabinets underneath so that I can store a shooting board and a Moxon vise. It WILL BE coming home to Seattle with us.

In the interest of full disclosure: I am not a neo-Luddite – I did buy an orbital sander right after we got here and I shipped my Ryobi 18vt tool set (circle saw, 2 drills, reciprocating saw, flashlight, & jig saw). The same sets are sold here and I got a 220vt charger that works with my existing batteries and picked up a couple of fresh new lithium-ion batteries in the process. Aside from the battery tools, I ordered a large wood lathe so that I can make furniture legs, tool handles, bowls, jar lids, platters, etc. I brought all my lathe chisels and chucks with me and I got a model that uses a DC motor that I can change over to one that runs on US current when we move back. It is much larger than my lathe in Seattle and will be a valuable addition to the shop there when we return.

Weekend

We had a pretty good weekend:

The house is coming together and I got a couple of small projects done. I hung a hand-tool only built pull-up bar outside to facilitate working out at home. With help from Stamps-With-Foot, I hung what used to be an old rickety wooden ladder in the living room. I sanded, stained, and varnished it into what is now a sweet bookshelf. We also picked up a couple of chairs, a wooden chest, and a large stone BBQ grill from a couple that are moving from France to Spain soon. The grill is moulded concrete and stone, came in 6 pieces, and weights close to 350 pounds. It super sucked getting it moved into place!

Part of Saturday was spent trying to update and setup my new work computer. There was some sort of sync error and all my previous back-ups are gone from the work server so I am starting with nothing. It is somewhat depressing and a metric shit-ton of work! At one point I had to take a break and we took Brodie for a long, muddy walk on a nearby trail. He was all in until it started raining and sleeting sideways on our way backup the house. He WANTS to be a giant farm dog right up until the reality of it smacks him in the face. Then, he wants to go home and snuggle under a blanket…

Saturday night was spent out in Toulouse. We had a Vietnamese dinner with 10+ people from an English speaking group. It was really nice to get out of the house and not think about my computer woes.

We went for a drive in the country Sunday, stopped by a craft market so that Stamps-With-Foot could peruse fabric for quilt pieces. After the crafty thing, we ate very long lunch in a tiny village restaurant 40 minutes north of Toulouse. We were seated at a table with a very sweet French couple who were very happy to talk to us, let my sweet/adorable wife try her new French vocabulary, and the food was Excellent! Brodie went and was perfectly mannered – he sat under the table the whole time while his mommy slipped him slivers duck breast.

Sunday night was filled with more work on my computer and some dirty words and wishes of bodily injury for the person that jacked my other computer.

20140210-101627.jpg

20140210-101700.jpg

20140210-101720.jpg

20140210-101745.jpg

20140210-101802.jpg

20140210-101833.jpg

20140210-101847.jpg

20140210-101858.jpg

20140210-101928.jpg

20140210-102221.jpg

From Trash to Basement Built-in

I was at one of the architectural salvage places in the SODO area of Seattle one fine summer day 3 years ago and as I was leaving with whatever small treasure I had found (picture Sméagol with his Precious…), I spied a bit of white cabinetry and what looked like a paneled cabinet door in their free/meant-for-the-dumpster pile so I went over and looked to see if I could salvage a bit of whatever it was.  The hope was for a door that I could re-purpose or some cool hardware left intact, but I struck gold!  Some idiot used a pry-bar and a Sawzall to rip a built-in painted hutch out of a house’s wall during a remodel.  It was taken to the salvage shop without a back, one side missing, no top, zero trim left, and with rough recent tool/pry marks all over it.  All the shelves were there and the door that I had seen was one of four heavily painted paneled oak doors.  I saw some promise and had an exact spot for it, so I piled the wreckage in the back of my truck, roped it down, and sped away before someone could tell me no.

It languished in the basement for part of a year before I tightened the joints, squared it all up, made a back from pine bead-board, built a matching side panel, reinforced the structure and installed it on one of our basement den walls.  What used to be the open counter-top space between the original built-in base and top, became storage for boots or snowboards or books (which is what is there now).

I wanted to include Stamp-With-Foot in the project, so I took her with me to pick out some trim.  She found a section of fancy scalloped-cut chair rail/case molding that she REALLY liked and I went home and used it in a custom buildup: adding a section of ripped down base molding and a length of popular wood that I ran over with two different router bits to make the top trim.

After getting the piece installed, I realized that I would have a 5″ gap of dead space between the inside top of the cabinet and the finished top, so I rabbited in two shelf lips and built matching hatch covers to provide storage for long or seldom used items in the top of the cabinet.  The hatches were finished with brass ring pulls from a local boat supply hardware shop.  After some light sanding, Stamps-With-Foot and I put two coats of white cabinet paint on it and I had The Ruminator help me install antiques glass pulls and keyed latches while he was visiting for Christmas.   The piece looks like it was built with the house, the top is already filled with mountaineering books, and is a fantastic addition to our basement and home.

“New” Midcentury Modern bookcase in the bedroom – left undone

We are a house of books. Every room of our home – including the kitchen and bathroom – has books living there; on the shelf, tucked into a nook, behind a cabinet door… It feels like there will be a raid from Ray Bradbury’s Firemen at any time. Years ago we shared a home where a huge pile sat at the end of the bed, there were mounds in the living room, and stacks on the kitchen table. It drove my wife insane. Taking a lesson from that, I have tried very hard in the ensuing years to not do that again by building of buying bookcases and shelves aplenty – happy wife, happy life.

To that end, we have a bookshelf that has now lived three distinct lives: it started its existence as a staircase bookcase in our first rental house in Washington State. It was the very first thing I built when we moved back to the US and my wife was amazed at my woodworking ability – she had never seen me really do anything beyond fix a chair or hang a picture. She was super impressed with the recessed dados and the router work. I removed it from our rental and cut it down in size when we bought our house in Seattle, putting it in my wife’s basement sewing room for pattern and costume book storage. I just couldn’t stand to see the work put into it go to waste. It now lives on our bedroom wall, after being cut down once again. It has been painted to match our bedroom furniture and I sheathed the outside in 3/4″ birch recycled from existing shelves with edge banding.  Both will eventually be stained and finished to match our headboard – giving it a mid-century modern look. Reusing original pieces and re-purposing the parts of existing furniture makes my heart happy. It offers about 14 feet of shelf space and keeps Stamps-With-Foot’s Harry Potter and Twilight out of the living-room – sure make fun…. He who is without literary sin cast the first stone…

It was one of the MANY projects that I just did not get finished before our move to France.  The bookshelf is completely usable and when Last I saw it, my mother had filled it with James A. Mitchener, Deddie McComber, and biographies galore.  It will keep until we get back to Seattle in a few years.

Dreams of My Own Little Shop of Curiosities..

I have a dream: I want to open a small to medium sized antique shop and have a place for my wife to work where she can take the babies and puppies. A place where I could indulge in my love of furniture/design/history and still keep my day job and health insurance. This is not a pipe dream, I have a written draft business plan, have worked out a logo and ethos (solid wood only) and have a special savings account for the start-up costs. In addition to classic and choice mid-century pieces, I would sprinkle in a few of my own newly constructed items and the occasional consignment.

I found the perfect place a couple of years ago: an existing antique shop where the owners were thinking of retiring and had good open space with FANTASTIC ambiance. I found out recently that the shop had closed forever and that the space was being converted to some other purpose. I snuck over and took pictures of the interior before it was sold or leased and some idiot rips it apart, installs IKEA cabinets, and opens an ironic hipster shop…

It hurts my heart a little to see someone else get the spot that I have long coveted, but I will find or make just as good of a space when the time comes.

Candle Box build

As part of my on-going campaign furniture project I decided that I needed a small box to hold beeswax candles and a few candle stick holders. I contemplated spending way too many hours crafting a small box with dovetails or finger joints, but good sense and my travel schedule won out and I happened on a wooden 2-bottle wine presentation box at Goodwill while I was there perusing for candle holders and baseball bats (for my lathe). I found four nice small Indian-made brass holders that fit in half the box with just the right amount of patina and beausage. I glued in a plywood separator in the middle of the box and cut down a piece of 1/4″ plywood scrap to cradle the holders. I glued that into one of the halves. A coat of red mahogany stain was rubbed on the outside and the box was finished off with two coats of polyurethane. An appropriately dinged-up brass handle was a sourced for $0.50 at a local reclaimed hardware shop and the box is now ready for a safari, Glamping, or romantic dinners in the back yard, etc..

Campaign Furniture Love and Build

I am a sucker for campaign furniture – the real stuff not the 1970’s MDF, lime green crap with cheapo plated straps and corners applied. Nope, I am talking about furniture that could have been broken down and loaded in a wagon, put on a mule, or strapped to a camel and toted around the world to reside in an officer’s tent in the high mountains of the Hindu Kush, the plains of the Ganges, or on the savannas of the Rift Valley. There is a single modern volume – now out of print – that I have checked out of the local library (through inter-library loan) 4 times and have scanned it in it’s entirety. I also have a 19th century catalog that is printed on pulp paper and completely falling apart that I peruse a good bit. I have even planned a couple of days off while traveling around seeing particular pieces and collections: there is a small shop in the Charleston, SC antique district that I spent hours in and while in London last year I found a shop that I wanted to move into. To tempt me even more, I have read rumors that Chris Schwartz, author of The Anarchist’s Tool Chest, is working on a new book and I am vibrating with anticipation.

There is a bit of both romance and leisurely comfort when one spends time afield surrounded by real furniture. I have a couple of original pieces, but they were dear enough that they cannot leave the house and won’t be spending any time glamping with us in the summer or in a high-country elk camp. Instead, I have been working on some modern versions that can be thrown in the back of a truck, hauled at high speed down goat trails, and opened up like Optimus Prime to reveal stout, useful, pleasing furniture. I have a source for solid wood shipping crates of different sizes that I have cut, stained, altered, and added to for this purpose. The limiting factor in all of this, is that every single piece has to break down, or fold up so that everything together fits in the bed of a small truck: 4’X6′

Right now, I have the cast iron cookware box, a candle box, 2 small tables, and a field desk done. I am 90% done with the wet bar (you NEED booze while glamping…) and an oil lamp/lantern box. The camp kitchen is in work, but will not be near complete or usable by the time we move. I have also designed a linen trunk, small chest of drawers, and a full-sized bed, but these haven’t even been started. The Campaign Furniture build is an on-going task and I hope to finish it all while we are in France. We are actually contemplating using it to furnish our guest room there.

Kitchen Cabinet Doors

I am super trying to finish up the kitchen cabinet doors and get them painted and hung. I was putting the last coat of paint on them this weekend and the cat decided to help… I said dirty words – loudly. The cat didn’t care and looked away like I was insane for questioning her right to sit in fresh white paint. Had to let the door dry and sand cat hair off and repaint. I said more dirty words. The cat didn’t care and laid on her side in the grass, I am sure thinking: ‘Ima gonna do it again, jus ’cause. Dirty pink bald monkey…’

Fvcking cat.

New Bench Chisels

The bottom chisel (originally my grandfather’s) is the only one I have left from my shop getting burgled/cleaned out over a year ago. I have saved my pennies and dimes for a while and two days ago I bought a set of Stanley Sweet Hearts. I mortised the hinges into the kitchen cabinet doors I am building for my wife. Having quality tools makes me happy.

20130717-135338.jpg

Building Custom Cabinet Doors

1. Buy dimensional 3/4″ poplar boards.
2. Plane to uniform thickness.
3. Rip 2″ and 3″ strips on the table saw.
4. Two dado cuts on table saw for 1/4″X 3/8″ panel groove.
5. Run each section on router because table saw is a POS and there is depth variation in all the grooves…
6. Threaten table saw with large iron maul – mean it.
7. Grumble a little.
8. Cut door stiles (sides) to length – Measure opening for stiles, subtract 4″ for stile width and add 3/4″ for double 3/8″ panel slot.
9. Write all measurements down on a non-descript sheet of paper.
10. Put measurements somewhere safe.
11. Take a 2 week to 4 month break because life gets busy.
12. Lose paper with measurements.
13. Tear house and shop apart looking.
14. Give up and re-measure.
15. Cut rails.
16. Lay all parts out and label, check sizing, trim two pieces, and pray a little.
17. Set up horizontal drill press to drill for dowel joints.
18. Screw up at least 4 initial holes.
19. Hit head in shop at least 3 times.
20. Build sweet dowel trimming jig for table saw – let head swell a little.
21. Cut 3/8″ off each dowel (8 per door).
22. Drill 16 holes per door.
23. Sand the cut-off end of dowel.
24. Dry fit first door.
25. Success!
26. Get out every bar clamp, hand clamp, and Quick-clamp that you own and set up clamping station.
27. Find original measurements for doors in the “safe place.”
28. Say dirty words very loudly. Repeat.
29. Add glue to dowels and joints and assemble door.
30. Apply judicious blows from wooden mallet to seat parts.
31. Get glue on hands and in hair.
32. Clamp up.
33. Wipe extra glue on door off with wet rag.
34. Repeat last 6 steps 8 more times.
35. Scrape clue, plane joints, and sand doors with 3 different paper grits.
36. Check and adjust door fit to openings and prime after more planning.
37. Re-prime and paint with two coats of white cabinet paint.
38. Mark, mortise, and install hinges on door.
39. Install red glass pulls.
40. Mark and mortise hinge/door onto cabinet.
41. Check fit and adjust 2 to 9 times.
42. Repeat steps 28 thru 41 eight more times
43. Drink three beers and swear to never build your own kitchen cabinets from scratch ever again!

Roller Derby, St. Paddy, Dresser Building and an Anniversary Weekend

This weekend was busy with friends, a dinner out, St. Paddy’s Day activities, an outing to the Roller Derby (?!), and the 9th anniversary of the day that my sweet wife and I met was on Sunday. Even with all that, we still got bunches done around the house: Our under-bed dresser finished, bathroom table drawer installed (a little work on that left), wine crate storage boxes made, basement lighting installed, and the basement work bench is moving along.

The drawers for the under-bed dresser and the one for the bathroom all came from a wooden donor-dresser that my father-in-law drug home from a garage sale last summer. He paid $4 for it and it was in pretty bad shape, but it was solid wood and had potential. It was mistakenly left in the weather (plastic cover leaked) for a month before I salvaged the drawers, cut out off the top and used the sides for kitchen cabinet door panels. I re-squared the drawers, added dividers in the fall, and over the Christmas break sealed the insides (The Ruminator helped). After lots of filling and sanding and more sanding, I stained the fronts to match our bedroom furniture, then built ¾” plywood beams to hang the drawers from bed frame and used some scrap oak flooring as drawer guides/runners. The final product really looks good and is super functional. While some husbands bug their wives by filling the house with brought-home junk – I give my wife more and more and more storage and organization space.

On Sunday, I put the final coat of finish on the basement workbench top, let it dry, and then installed the three runs of aluminum t-track. Stamps-With-Foot bucked up and helped me wrestle its 200 pound beech and maple mass onto the steel base. I secured it with screws and covered the top with carpet squares while I finish the upper shelf/cabinet. I installed a outlet power strip under the main body of the topper and removed the old drawer dividers. I will soon add a plywood back with a mirror, a light under, a dedicated air supply line, install the desk drawers under the bench and mount 4 reclaimed letterpress drawers directly under the top as well. Happy with the progress so far.

Rebuilding Daddy’s Bookcase

In 1969 or 1970, my father helped my grandfather build a rental house that my grandparents saw income from for the next 24 years. He came home at the end of the project with a truck bed full of spare/cut lumber and building supplies. Lumber was not wasted in our house. We didn’t go and buy a new 2X4 for a project… We rummaged through the cut-off bin or wood storage shelves for a piece that was the right size or that could be cut, planed, or trimmed to work – Wood was not wasted or thrown away in the Talley house! It is a lesson that I have taken to heart and most of the things I build for my own home are made, at least partially, out of used or recycled materials.

Anyway, Daddy took some of the lumber and built a set of bookshelves that in the next nine years held everything from encyclopedias to technical manuals. Four 12-inch shelves sat on a box base that my father stained and varnished with whatever color he had left over from the rental kitchen cabinet build. It sat in our living room and in the shop. In 1980 we moved back to Houston and somehow my aunt and uncle ended up with the shelves. They put them in their living room, knocked the bottom shelf back, drilled a hole for a cable and sat their 19″ TV on the base. It remained in their home until 2010, when my uncle passed away. My mother asked to have the shelf unit back and brought it to me when she moved to Seattle. It is the only object that I own that my father built with his own hands and I feel so very lucky and proud to have it.

I decided immediately give it an update to make it an everyday part of our home: add a little something here and there to update it and make it that much more useful. Plans are one thing and actually doing the work is quite another – it sat relegated in my overcrowded shop for almost a year before I finally got a chance to work on it. I put the knocked out shelf back, glued all the joints, added reinforcement and screws to hold it all together, and built a base with turned wooden bun feet for it to stand on. The original base box was 12″ X 30″ and I wanted to both maximize the space and add my own signature to the piece. I carefully cut an 8″ X 24″ opening in the front and added rails for a drawer. It was amazing working on the piece. I found my father’s 42 year old pencil marks, a divot from a hammer, saw marks, and I found part of a fingerprint from when it was stained – just on the inside of the bottom. Finding and touching these this tangible proof of my late father brought me more joy than I have words to describe.

I also added a face frame, edge trip, and crown mounding. The piece was sanded down with 120 grit, then all the holes and gaps were filled, sanded with 120 again and then with 220 grip. I then primed with two coats and finished it with 3 coats of white Benjamin Moore ultra-tough cabinet paint.

I think it turned out really nice and I think my dad would be really proud of the work that I did to it. I am taking the original brass corner trim and a piece of original shelving and turning it into a picture frame to hold my favorite picture of my father. I think that he would approve of that as well…

I will end up muttering to myself.

I have come to both love and accept my wife’s little quirks. I don’t understand them all and from time to time I have to just shake my head and mutter after finding something odd in the recycling or noticing that kitchen silverware was used to dig in the flower beds for example. I have also discovered that it is best to work within the confines of these quirks instead of confronting them/her with what most people would call reason. That confrontation would lead to a two hour discussion that would, in turn, lead nowhere. I would have to apologize for even bringing it up and then I would have to buy her something shiny for my transgression. In the end, I would be right back where I started – muttering to myself and slowly shaking my head with my lips pursed in an expression of both frustration and amazement.

Stamps-With-Foot is very visual and she has to SEE something for it to be real for her. Visualization of a concept like arranging pictures on the wall, where flowers COULD go in the yard, or where to move a chair in the living room is an exercise in frustration. This normally means that after a week+ of debating where a piece of furniture should go, I will move it 4-9 times before she decides that the original decision was the correct one. This comes up for me because we have been talking about to swapping offices at home. Her sewing/estrogen room will go upstairs to the sunny well-lit wood-floored bedroom at the front of our house and I will move my faux-Edwardian office/man-cave into the basement so that it will be co-located to my tiny hobby machine shop, work bench, and our den: A win/win for us both of us as long as I don’t have to move crap up and down and around for two days.

In the spirit of working with her previously addressed/documented traits, I formulated a plan to have it all work in my favor. I measured and drew a scale model of the room upstairs, showing locations of the doors, windows, and air vents. Then, I made scale cutouts of all the furniture that she could possibly have in the room. I left her with the drawing and cutout so that she could torment and second guess herself in peace while I went into the basement and worked on my new machine shop bench. 24 hours later and after looking at every possible combination at least 6 times, she had determined a location for each and every twig for her sewing nest and taped her choices for furniture location down on the drawing. I have elicited a promise that her decision is a final one and that if there is a change in any of the locations it will be made before the very first piece is picked up and humped upstairs.

Now all that is left for me to do is to bribe/con some friends and neighbors into helping move all the crap, putting it in its designated place and then to disappear in to my basement to plot my plan for world domination…. Mwahahahaha….

Basement Bench and Winter Workshop

I have found that my workshop productivity goes way down in the winter/the six months of Seattle rainy season.  My garage shop is small and quickly fills with material, lumber, tools, and projects.  To add to the handicap of the small size, the lack of heat means that I can’t do any finish-work because of wood humidity, shrinkage/swell, and moisture.  I have made do in the unfinished side of our basement for the past three winters, but I am done my wife is done with the mess and clutter and my bitching about an inadequate work area when the weather turns crappy.  I need a little bit of dedicated space that I can work on the small stuff year round that doesn’t require power tools and a little bit of assembly/finish  space where I can glue and clamp some projects up, a solder station, a spot to reload ammo, work on my bikes, and  a clean/dry/warm space to apply stain or a hand-laid finish coat.  Add to this my current want of a small metal lathe and mill and I will have the makings of a nice little hobby shop from which to launch my plans for world domination …er, I mean a spot where I can make small parts, solder, or tinker.

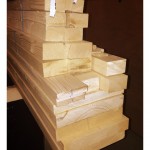
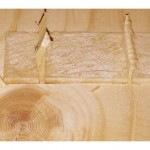
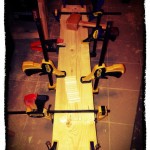
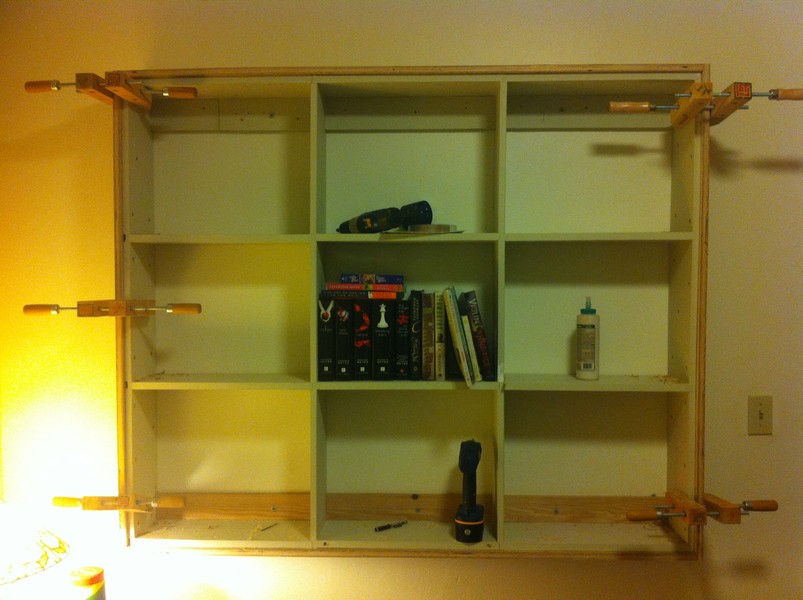
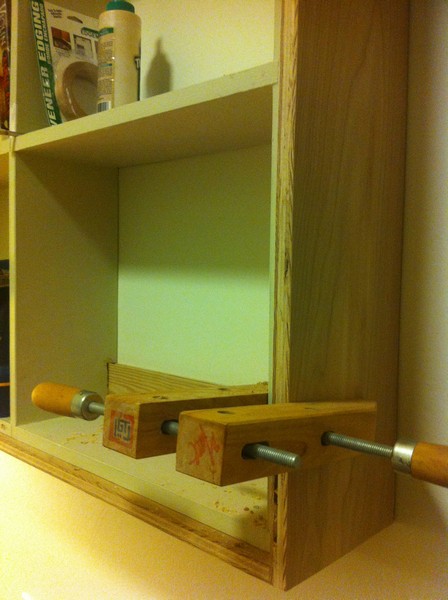
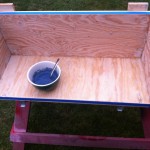
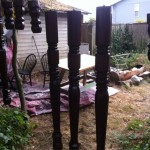
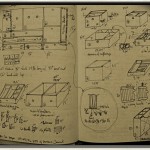
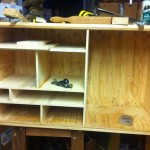
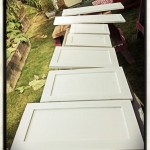
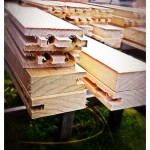
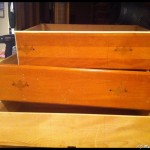
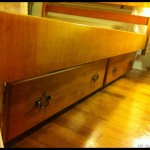
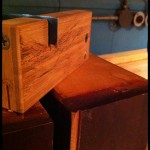
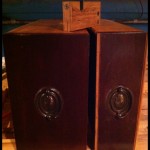
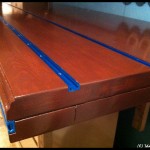
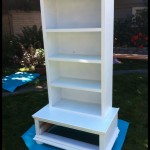
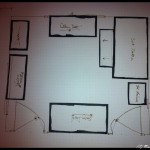
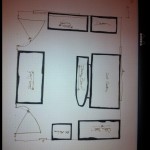
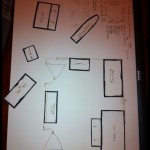
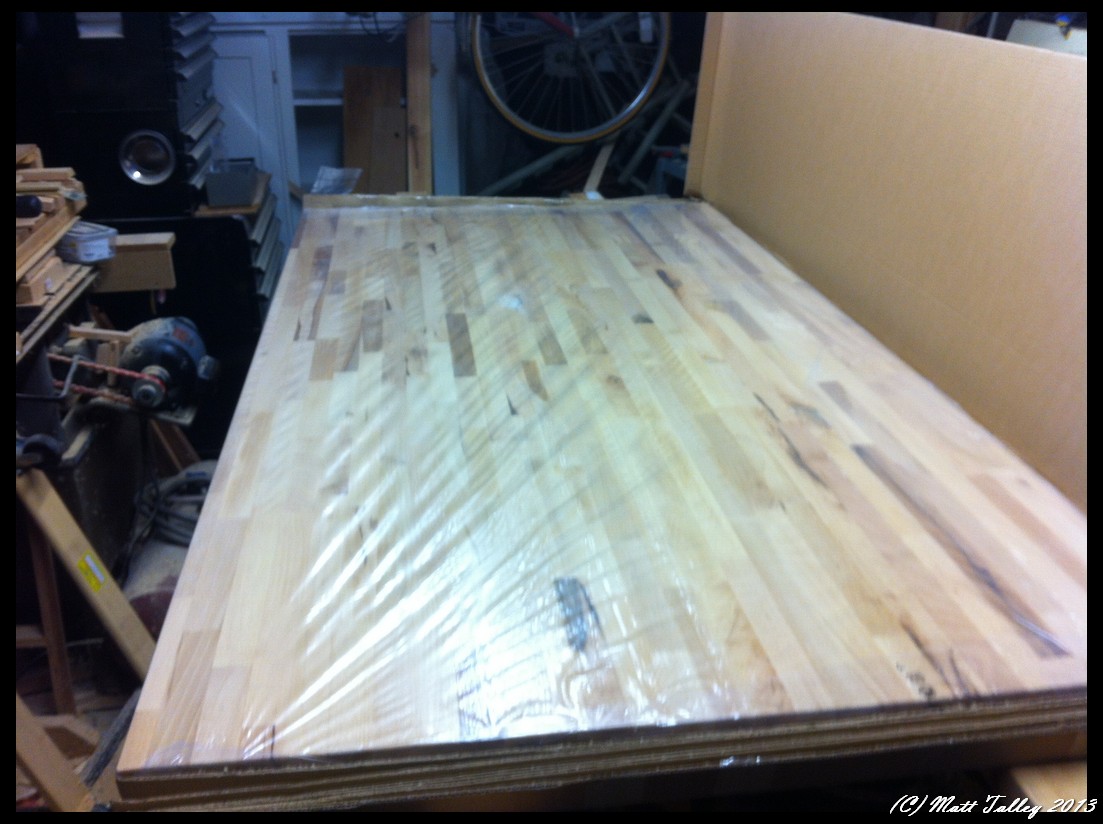
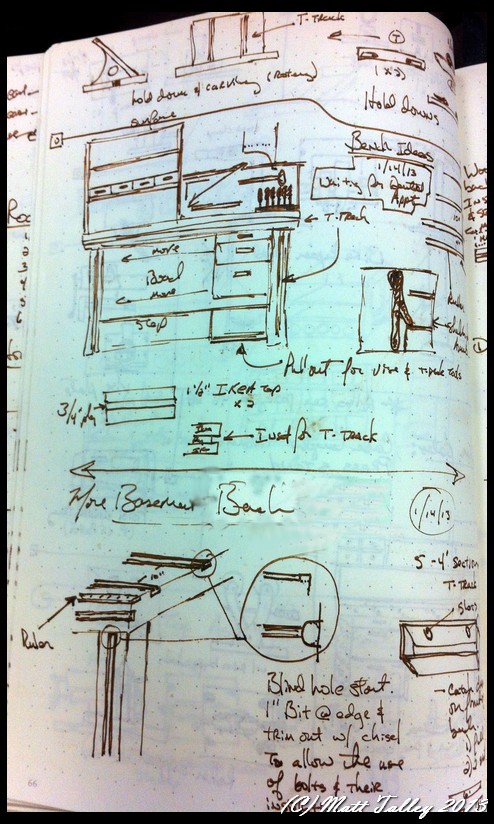
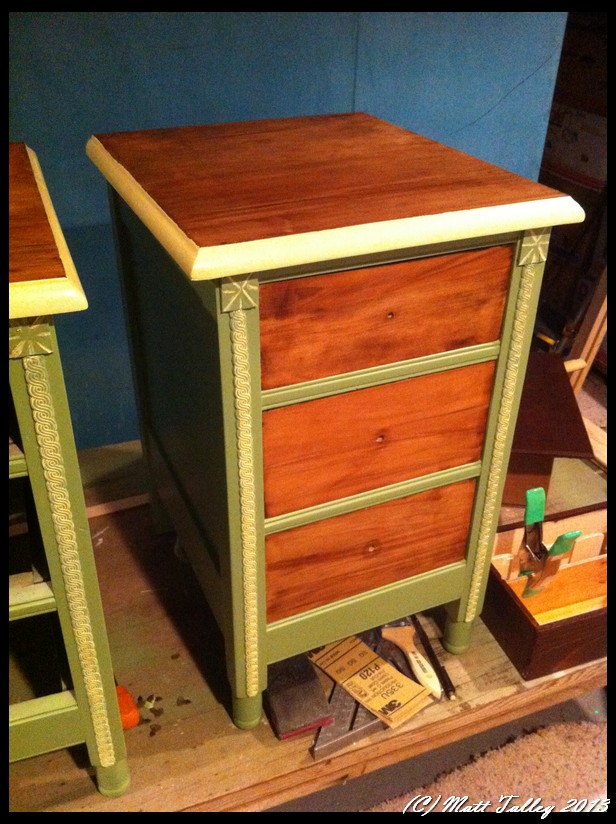
Anyway, instead of buying a crazy expensive cabinet bench or making do with a thin metal and partial board Home Depot bench, I have decided to build the sturdiest all-around hobby bench that I can with the funds and material I have available (~$130.00), add some really nice features (aluminum t-track, lots of drawers, removable vises, power, lights, etc…) and make it into a finished piece of furniture that I will be proud to sit at and show off to friends for the next 30+ years.  To start the process off, I found a cheap older thick steel framed 6′ workbench at Second Use that I felt would make a bombproof, rock solid base.  I sourced a used IKEA cutting-board counter top that I cut down to the appropriate size and then used the trimmed pieces to add thickness and rigidity (I am still going to add some angle iron).  I thought about and sketched 3-9 different ways to add some shelving and some organization to the top and was still tossing around options in my head when a realized that an old buffet that my mom had just might work.  I took some measurements and looked into reinforcing here and there and realized that not only would it work, but that its style would set the tone and color for the entire bench build.

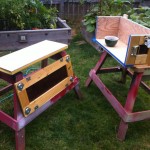
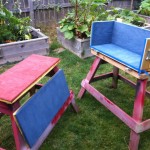
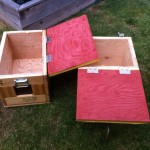
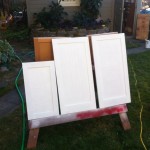
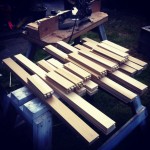
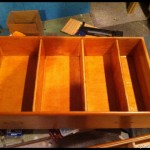
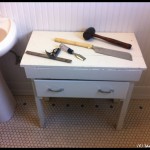
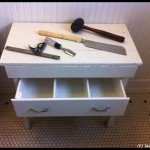
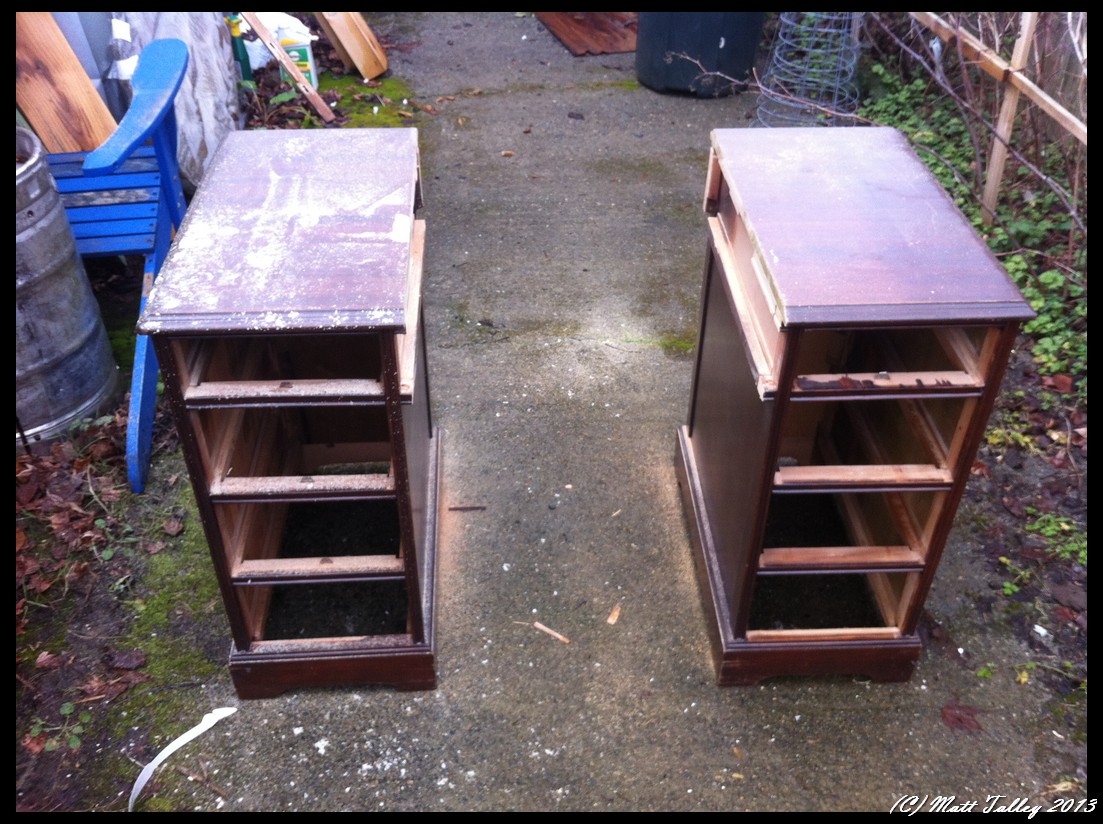
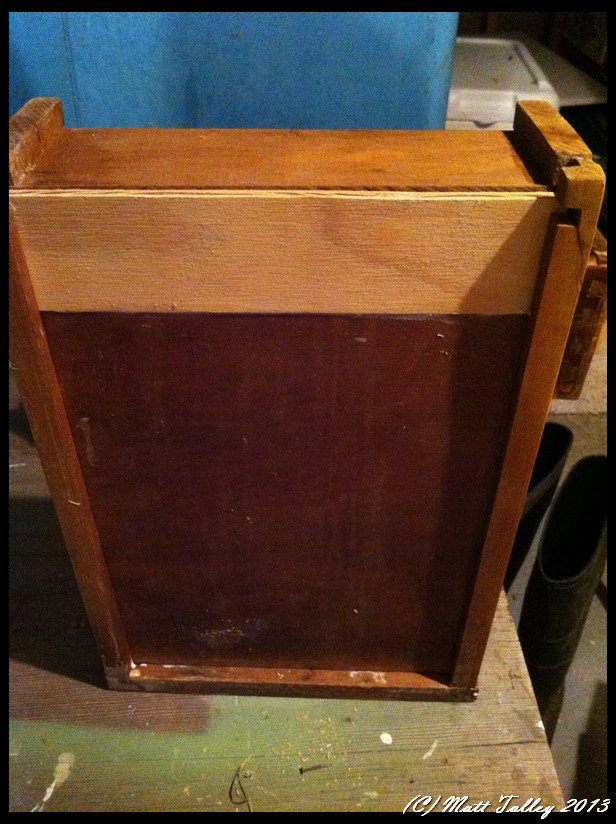
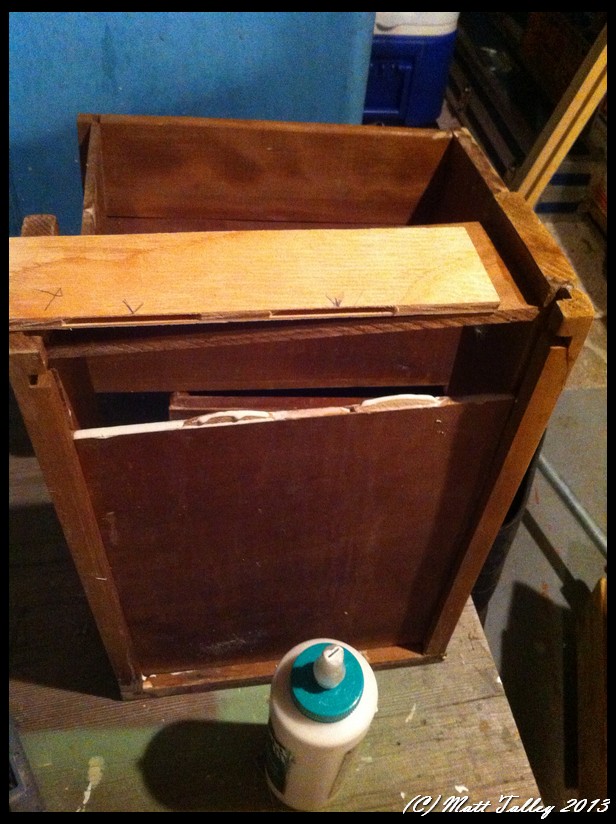
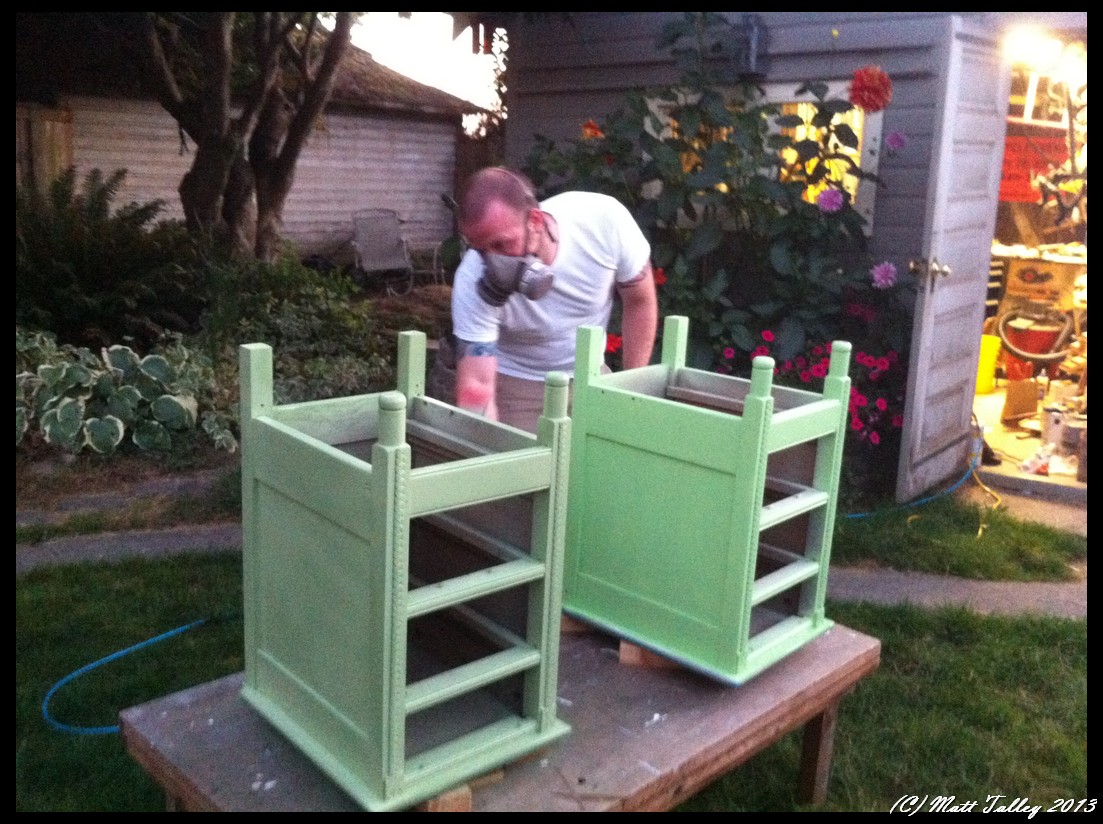
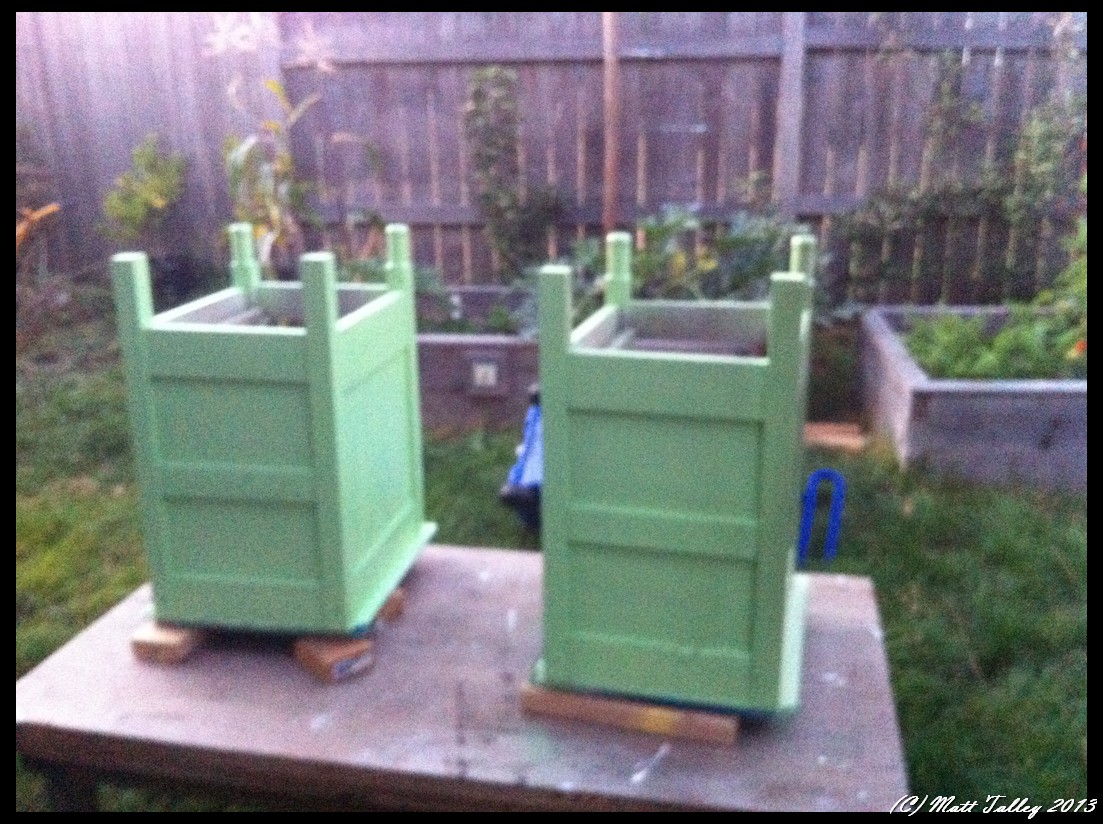
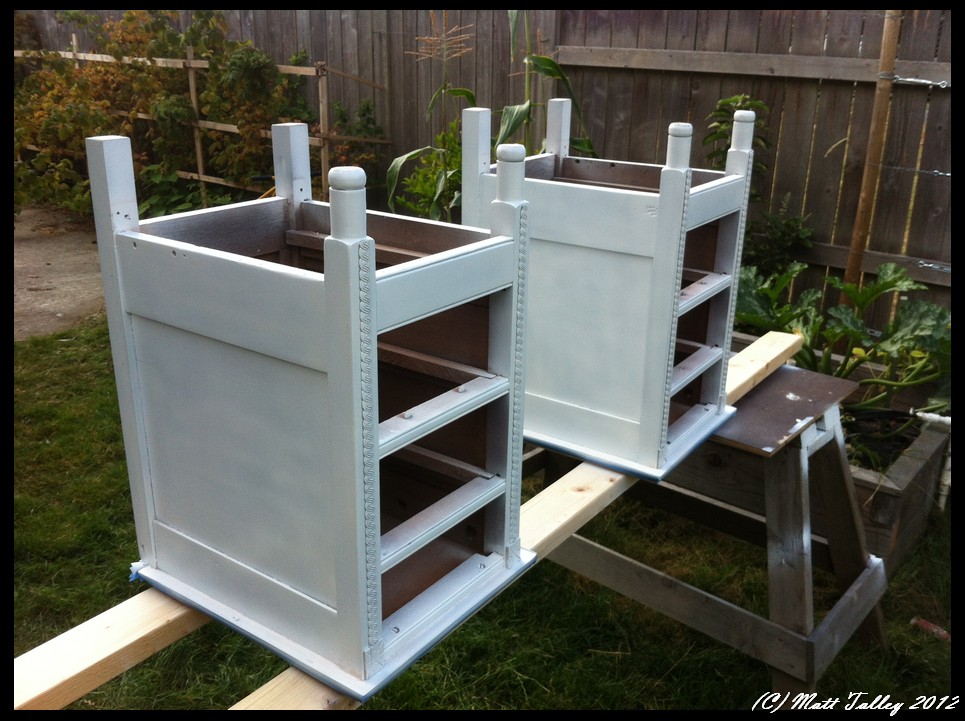
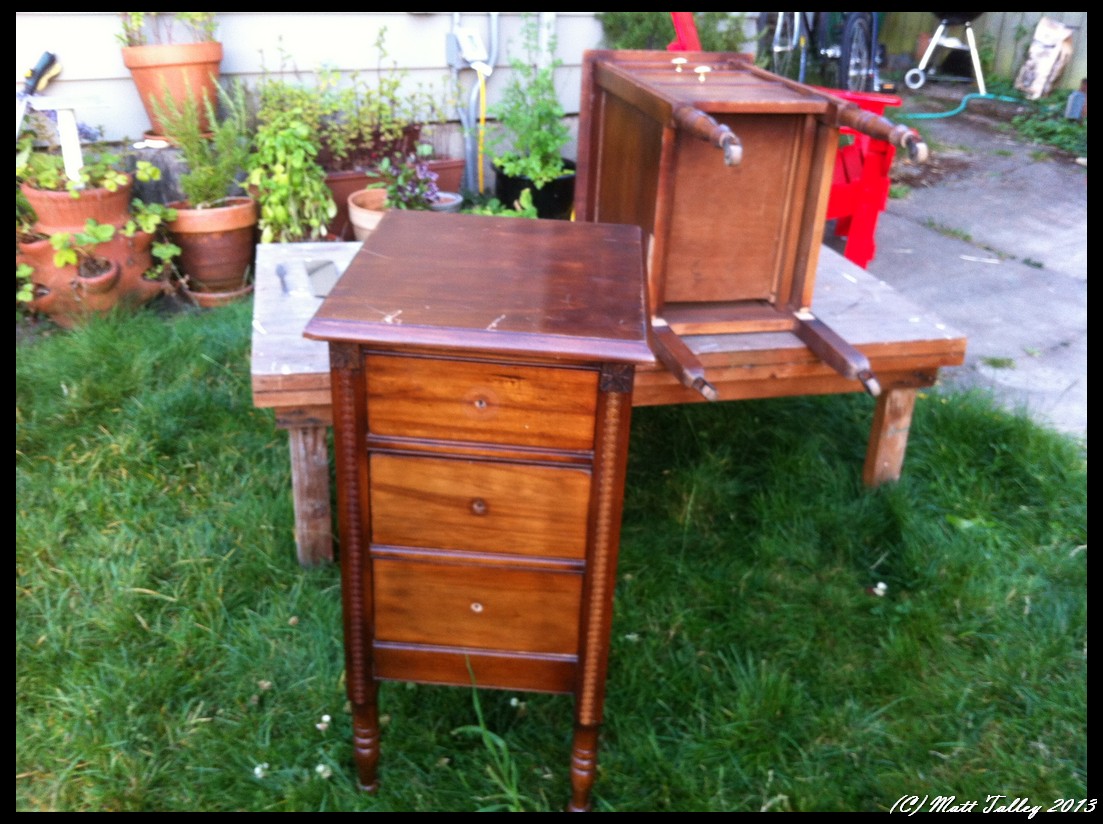
I decided that the drawers to be added under the bench top needed to be narrow and at least partially match the newly planned top section, so I looked for an older desk or vanity that I could cut apart.  I struck out at Goodwill, the Salvation Army, and Craig’s List, but Second Use came through again and hooked me up with exactly what I needed at a decently fair price, well decent after I haggled a bit…

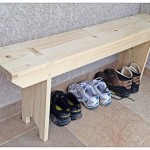
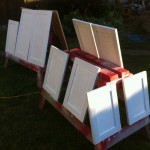
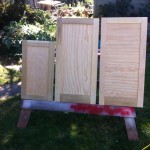
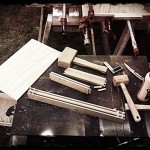
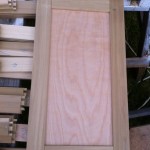
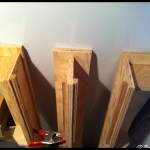
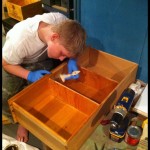
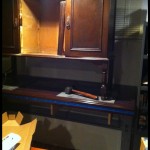
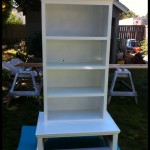
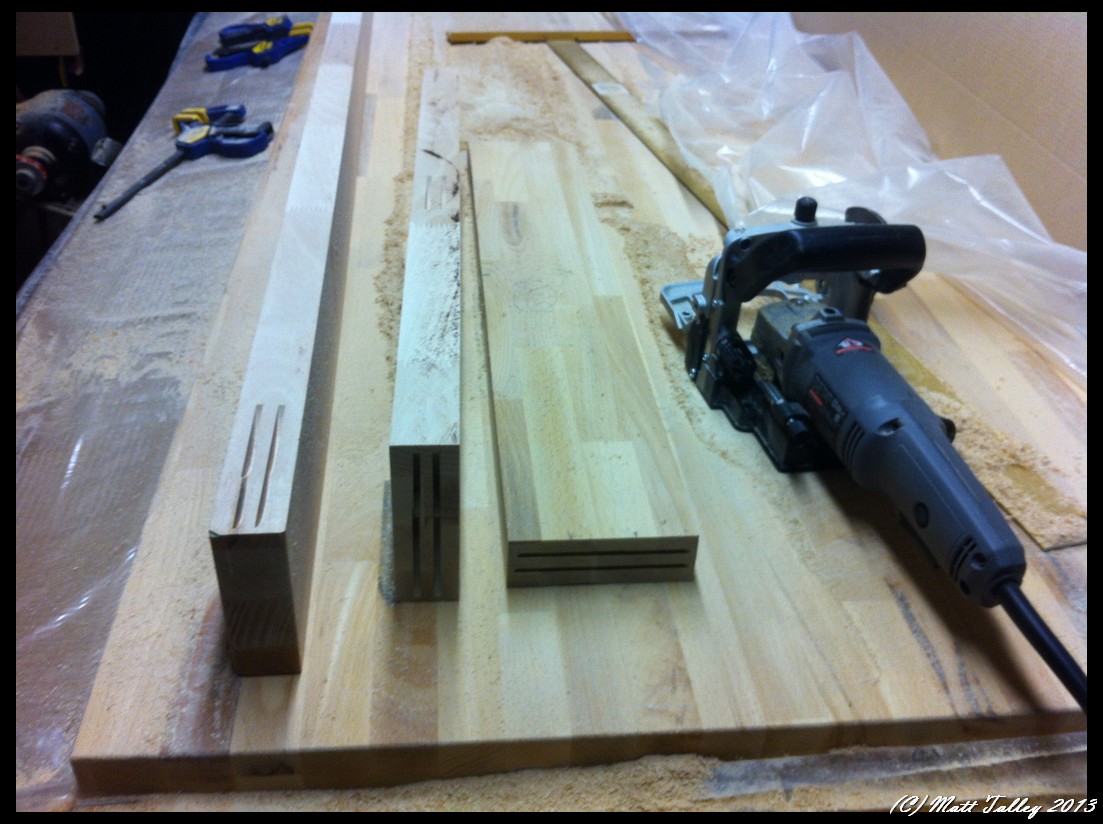
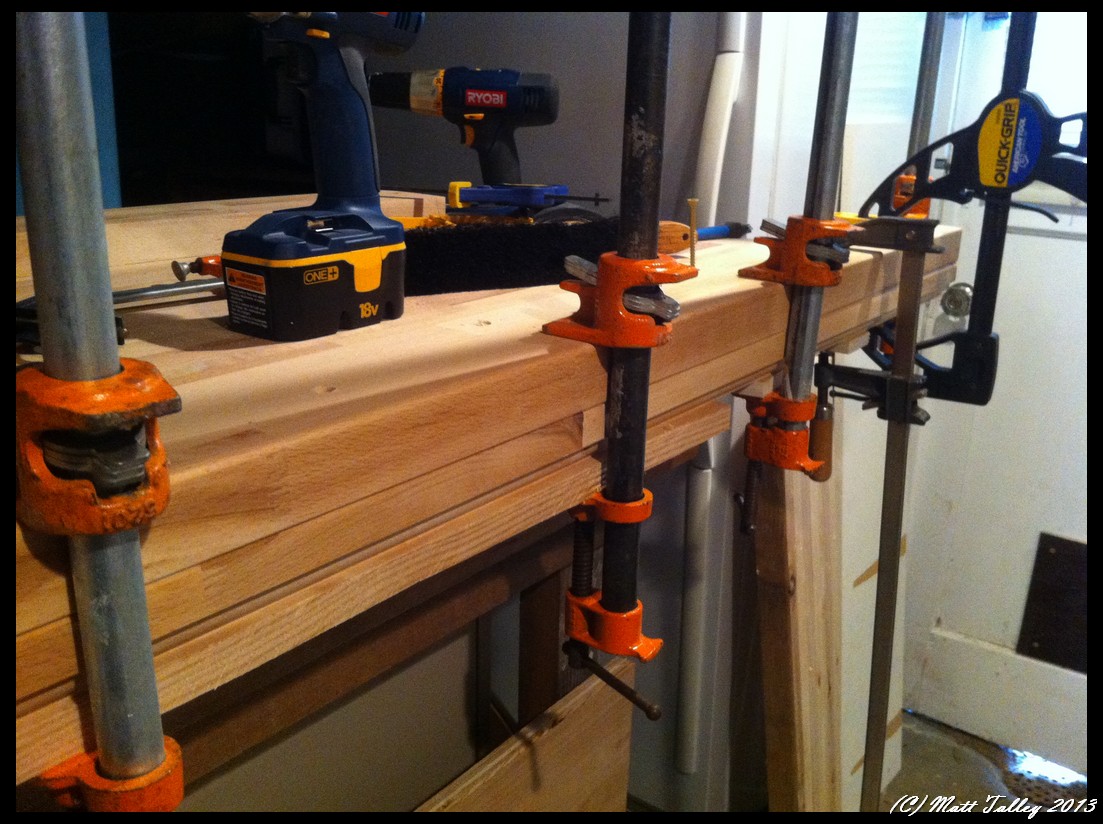
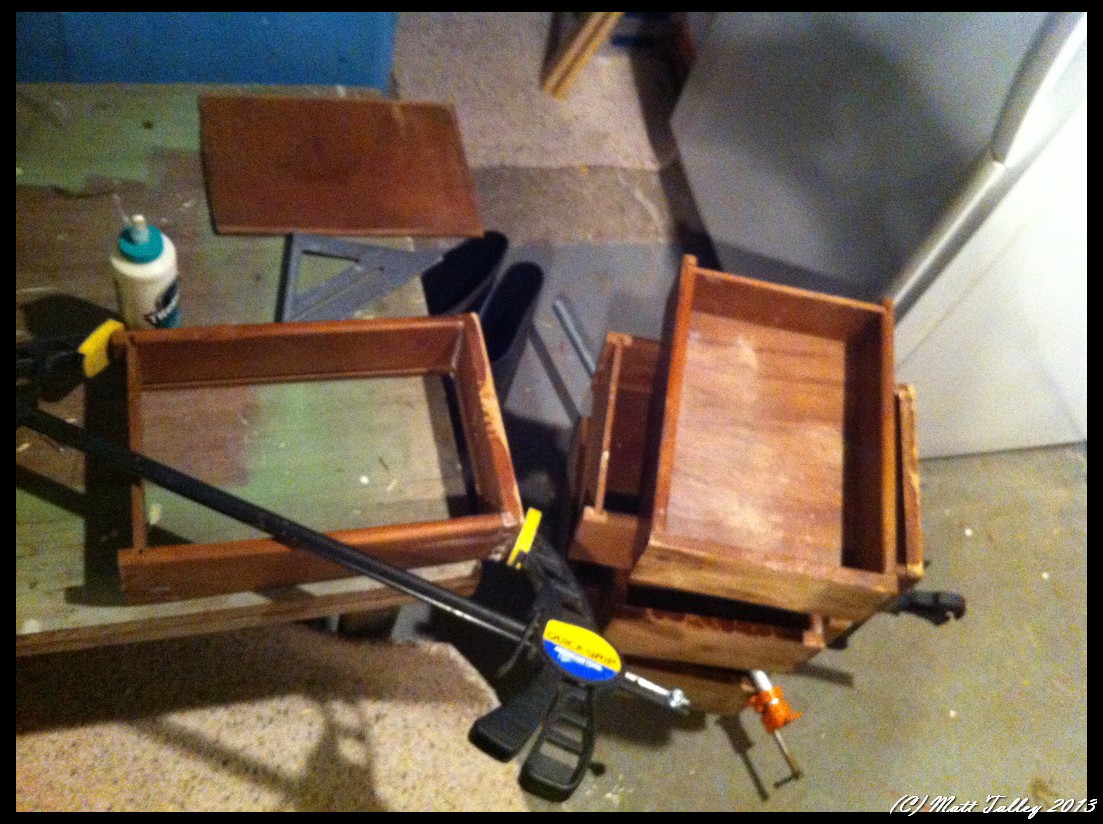
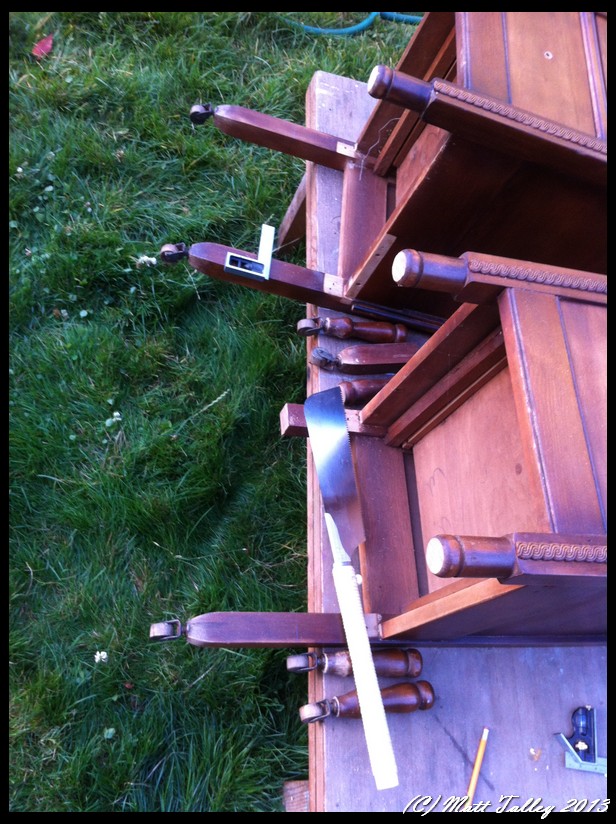
The current state of the build is that the bench top is 2/3 done, the desk is cut apart, the steel legs are up and in place and I am 1/4 of the way done with reinforcing the buffet/top shelving unit.  I will update the build as it is completed and share some more pictures.

The Never Ending Hutch

Right after we bought our place, I saw an add on Craig’s List for a huge hutch.  It piqued my interest and I went by to take a look at it.  A builder had pulled it out of a church school in Queen Anne, but it had been in the rectory library before that.  It was in really bad shape: paint splattered here and there, broken and missing trim, missing glass, dents, dings, scratches, etc…  Even with all that, I saw potential.  After some surprise haggling, I loaded it on my truck and brought it home.  This was right after I had shoulder surgery for the fourth time, so I would not be man-handling two 8 foot by 4 foot sections of furniture…  I picked up some laborers in the Home Depot parking lot by the house and had them load it into my basement where it sat taking up space for three months before I felt strong enough to tackle the job.  Below is the truncated build process in 67 easy steps:
  1. Looked at hutch for too long and decided to get it done.
  2. Started with bottom section – doors removed.
  3. Stripped off all old paint and varnish from outside with “environmentally friendly” orange stripper.
  4. Scraped and scraped stripper off.
  5. Cussed “environmentally friendly.”
  6. Put more stripper on.
  7. Scrubbed off again.
  8. Wife helped for 40 minutes, hated it and didn’t touch either section again.
  9. Shoved a 1″ splinter under one of my fingernails.
  10. Said the “F” word 5+ times, bled on base & floor and thought about cutting it all up for firewood.
  11. Washed whole thing with paint thinner to stop the stripper residue from working any more.
  12. Let dry and sanded whole case with 120 grit.
  13. Sanded with 220 grit.
  14. Sanded again with 220 grit.
  15. Stained with a crazy pricey, but color-matched mahogany tinted oil-based stain.
  16. Used wife’s special dish gloves.
  17. The old, old fir had issue with the stain and was a little splotchy in some really key spots.
  18. Was grumpy for two days.
  19. Second coat of stain used to blend some areas.
  20. Put on first coat of wipe-on poly acrylic semi-gloss finish.
  21. Wife found stain covered dish gloves and I got in trouble.
  22. Went to store and bought wife new gloves.
  23. 24 hours later, scuffed finish with white 3M pad and applied finish coat 7 more times.
  24. Spent HOURS on the final coat.
  25. Repeated all above steps with the four raised panel doors.
  26. Installed 100+ year old glass pull-knobs on doors.
  27. Whole process took two months.
  28. Moved base into finished side of basement for use as a media cabinet and LCD TV base.
  29. Went downtown to Chinese-owned granite shop on Seattle’s 1st Ave and haggled over granite for top.
  30. I am a poor negotiator in Chinese.
  31. Left and came back with Mandarin speaking co-worker.
  32. Got GREAT deal on custom top.  1/12th of the price that I was quoted at Home Depot – really!
  33. Built A-frame jig for back of truck to haul granite.
  34. Picked up top and hauled home.
  35. Bribed 4 neighbors to help move it into place.
  36. Neighbors won’t answer my call anymore…
  37. Four months from start to finish.
  38. Two weeks later I started the top section.
  39. Decided to make top section into a living room “built-in.”
  40. Built, painted and installed new 8″ base for the top section in our living room to match existing trim.
  41. Removed the doors, hardware, and hinges.
  42. Repeated steps above with the exception of splinter under nail and use of wife’s gloves: I learned my lesson the first time.
  43. Cut hole in back for outlet already on wall.
  44. Had other, unsuspecting neighbors help me move the top section up.
  45. New neighbors called me names after it was all done.
  46. Hole for outlet 1″ off to the left.
  47. Said hateful words.
  48. Grumpy again.
  49. Calmed down and used Dremel tool and coping saw to remove section from one side and glued it to other side.
  50. Trimmed out outlet hole.
  51. Stained and finished outlet trim.
  52. Had wedding and took 30 day break in the rebuild/refinish process.
  53. Started looking for matching trim and crown molding at reclaimed lumber yards.
  54. No Luck.
  55. Had crown custom milled at high cost by a shop in SODO that had 90 year old machines running on their floor (shop closed about a month after I was there last 🙁
  56. Started the process of refinishing the doors.
  57. Installed crown molding.
  58. Shot nail through molding and into palm on final piece of crown.
  59. Bled on top of hutch – no dirty words.
  60. Installed refinished doors.
  61. Built two interior shelves out of 80 year old fir floor boards.  Stained and finished – look original!
  62. Smacked the back of my head when installing shelves and almost knocked myself out.
  63. Sourced and purchased piece of wavy restoration glass to match original broken pane.
  64. Stained and finished the crown.
  65. Put final coat of trim paint on the new base.
  66. Installed the one missing glass pane.
  67. 5 months after base installed the top is done and looks like it has been in our place since 1928.
Never again.

Pottery Barn Blanket Chest Refinish/Resale

I was perusing the furniture isles of the Goodwill in South Seattle a few months back looking for a few pieces that I could put a little work into and turn for a profit.  I have found some amazing stuff there that has been donated:  an $800+ mid-century 8-drawer dresser for $59, solid wood buffets, a camel saddle, hand knotted carpets, two Morris chairs, etc..  It is not always a gold mine – I find something I can turn maybe  one out of three or four trips.  On this walk, I spied a solid wood and black iron hardware blanket chest that had some heavy water damage on the top.  I opened it up, twirled it around to look for a makers mark and any unseen damage.  Nope, it was a sound piece.  I hopped on my iPhone and looked it up on the Interwebs…  I found that it was originally sold at Pottery Barn for almost $400 and I whisked the thing to the front, dropped $39 off at the register and ran out the door.

I gave it a light sanding (320 grit) all over, gave the top some serious attention with 120 then 220 grit sand paper, and layered in some mixed mahogany and dark walnut stain to color match the top before putting on three coats of satin polyurethane finish a couple of days later.  After it was done, we were teetering on the fence about keeping what had been returned to a really nice piece of furniture, but our limited space and us not having a clear need for a blanket chest led to the decision to sell it.

I dropped it off at one of the local consignment shops on a Saturday morning and it was sold within two hours.  I pocketed $89 after paying for the chest, supplies and the store’s cut.  Not too shabby for a 3-mile drive, some stain/poly, and an hour of my labor.

Wooden Nightstand Build

My sweet sweet wife has issues with the color green – most shades. While living in Hamburg, we had a tiny bedroom that Stamps-With-Foot wanted to paint “sage green.” She bought the paint at Max Barr (a Teutonic version of Home Depot) brought it home and painted a little swatch on the wall. It was kinda dark, so she painted the whole wall. Still kinda dark. She then painted the whole room. I came home and my bedroom was Olive Drab, Army Green… It took me two coats of primer and three coats of paint to banish the darkness.

Flash forward a few years to Seattle. We have replaced all of our MDF particle board IKEA crap furniture with real wood pieces with the exception of our night stands. I hate them. Hate. I traded my mother a couple bookshelves for a former dressing table/vanity that was deeply scratched in places and had a couple of drawers that wouldn’t budge. It was in two pieces already and I shortened the legs, stripped off some of the old finish and prepped them for paint. Stamps-With-Foot wanted the pieces to match our 1930’s bedroom set, which has a sage green accent color. The plan is to have the bodies painted green, use a soft sunflower yellow for the accent and to completely strip the top and drawer fronts and coat them with a polyurethane so that the natural color and grain would pop. I had primed them, sanded, primed again, and grabbed some color swathes for her to choose from. She chose a fine green and I had it custom mixed at my local Benjamin Moore store (friends don’t let friends buy paint at Home Depot). I had two smooth coats sprayed on before my sweet wife decided they were the wrong color green. I tried in vain to talk her out of making me swap the color. I tried really hard – I even mentioned the Hamburg incident. No dice, the color WOULD be changed.

I showed up at the paint store with a picture frame for them to color-match, ignored their snickers, bought all new paint, went home, sanded, and resprayed both pieces with two coats of the “new” green. I painted the accent color and rubbed the color into the cracks before washing it off the high spots. The tops were polyurathaned, drawers were fixed, dividers installed, fronts refinished, 100+ year old glass knobs bought/installed, and then I carried them up to our Master Suite and my sweet bride gushed over them. Her delight made my heart happy.

In my heart of hearts I know she is still second guessing the 2nd color choice, but I have sworn to myself that if she changes her mind again she will be banned from deciding house/furniture/accent colors for the term of one year and that I will turn the basement into a mountain chalet-themed man cave- which might happen anyway, I am just really looking for an excuse to belay my guilt.

Weekend Update – 1/7/13

My son was here for a week+ for the holidays and we did cool stuff as he is the Igor to my Dr. Frankinstein. He left on Friday morning and to keep myself occupied so I wouldn’t mope around all weekend thinking about how much I missed him, I busied myself with a few on-going projects:

Underbed dresser – 95% done
Letterpress drawers made into occasional tables – 50%
The never ending kitchen remodel – 85%
Sofa table rebuild – 20%
Bathroom drawer for wife – 50%
Candle box – 100%
Glass cabinet handle installation – 45%
Hall mirror – 22%
Helping a friend move – 50%
Etc…

While fitting the final pieces of the under bed dresser (built from an 1980s $4.00 garage sale upright five drawer) for our room and I transposed  two numbers and cut something a touch too long. Grumble… Grumble…  I went out to the shop, measured for screw clearance and put it on the table saw to rip down just a touch. I missed one screw, but my $56 carbide tipped cabinet blade didn’t. Sparks and bits of carbide flew. I said dirty words and came into the house to drown my sorrows in a Mexican coke, Jack with honey and an old Clint Eastwood western while propped up in bed with my grumpy face on.

Weekend Update

We had an eventful, rain soaked weekend. Lots of stuff got done, but it wasn’t the sort of thing that great novelists write thought provoking prose about. Maybe a SNL skit though. Details below.

Friday:
Home from work and into jammies.
Sent some e-mail and web-surfed.
Yummy pizza for dinner.
Finished watching season 6 of Dexter – Debra KNOWS!!
Heard weird water noise outside of basement window…
SHIT!!! Gutters clogged!
Ran outside, pulled ladder out, said DIRTY WORDS.
Up on rickety old wooden extension ladder after midnight in a rainstorm…
Prayed for the death of my neighbor’s pine tree.
No, really. Prayed for the tree to die or for neighbor to sell me his house so I can have the pleasure of turning it into mulch.
Dried off and apologized to Stamps-With-Foot for snapping at her while 15′ in the air, digging out leaves from the clogged downspout.
Off to bed.
Passed out and dropped Kindle on the floor -still works.

Saturday:
Up at 10:00 – no time for coffee – grrrrrr…
Drove downtown with my mother to see a talk by Clay Jenkinson – a Jefferson and TR scholar – my two favorite presidents.
Coffee and half a cookie for brunch – health food…
Presentation was great – funny and enlightening.
Took Mother to grocery store then home.
Called The Ruminator and chatted about Christmas lists and school and stuff.
Cleaned living room floors and rug.
Cussed the neighbor’s tree again – pine needles everywhere.
HATE that tree.
Took sweet wife to see shiny vampire movie instead of new 007 – we suffer for those we love.
Snuck food and cookie into movie.
Came home and obsessively checked gutters for clogs and basement for water for the next 24 hours.
Cursed tree – shook fist at it like an old man.
Spent some time in the hot tub in the rain relaxing/fantasizing about a chainsaw, limbs on the ground, and wood chips everywhere while laughing maniacally.
Went to look at Pintrest “for a minute” before bed – closed iPad 4 hours later at 3:45am.

Sunday:
Slept late.
Breakfast.
Skype/FaceTime call with friends in Germany.
Miss them.
Worked on mid-century modern style bookshelf for bedroom.
Poked 20ish holes in wall looking for a studs. Stud-finder worthless on plaster walls.
Threw stud finder.
Hung shelf in a partial stage of completion. Will paint later.
Worked out Christmas budget with sweet wife.
Re-arranged living room to make room for Christmas tree.
Set iPad on top of built-in hutch to keep it out of the way and “safe.”
Watched helplessly as iPad slipped into crack and fell 5 feet and between hutch and wall.
Stared at wood, disbelieving.
Said foul, vile, hateful things.
Paused to collect myself.
Said foul, vile, hateful things again.
Contemplated getting the sledge hammer and splitting maul out.
Had to walk away before I broke stuff.
Went to Target: mood did not improve.
Shopped for Christmas tree in driving cold rain: mood still poor.
Found a nice, full 7′ tall Noble Fir.
Let tree air dry a bit and put it up in living room.
Worked on Christmas cards with sweet wife.
Wrote some funny stuff on cards to friends and family.
Went out to my little shop and cut two long 1/2″X5/8″ sticks of fir & popular.
Attached L-bracket to the ends.
Fished iPad out using the chopstick technique.
Wife so impressed, she bragged about my big ol’ brain on Facebook.
For just a second, I thought “When McGyver spends alone-time with a bottle of lotion, he is thinking of ME….”
Remembered that I was the dumb-ass that dropped it there in the first place and decided not to let me ego run rampant.
Mood improved.
More Christmas cards.
House smells like Christmas.
Hottubing.
Taught cat to hop onto edge of tub.
Fought internal demon to keep from teaching her to swim.
Also resisted the urge to splash.
Shower and shave – need new blades
Read kindle.
Dog snored like a 70 year old alcoholic man with sleep apnea.
Put him on wife’s side of the bed so they could snuggle.
Night-night time.

Cafe Table Refinish/Resale

I sort of inherited/acquired a beat up wood and iron cafe table set this summer.  While working on some other projects that I took some time and refinished both the table and chairs: sanding, adding some stain, and finishing it all with three coats of sprayed outdoor spar varnish.  I dropped the set off a a local consignment shop and it sold after a couple of weeks.  I was able to make about $95 after paying for the supplies that I used and the shop’s fee.  I put the money toward a a utility bill that wasn’t ours, but that we ended up responsible for.

In my head, a nice trendy couple will have coffee and croissants every Saturday morning on the porch or patio of their starter home, sitting at that little table for years to come….

Lawn Furniture done!

As I mentioned in a previous post, there had been parts for Adirondack lawn chairs all over the house and shop for 9+ months waiting on me to gather the will to glue them up and drive some weatherproof screws home.  The Ruminator and I put together when he was here this summer – he supervised while waxing poetic about dressing up like a viking – and I spent a combined 12 hours priming and painting them candy apple red.

Since I don’t want to repaint them every spring I used an oil-based exterior paint.   Holy crap, it was hard to find!   It seems that everyone has switched to latex based paint for homeowner use (ease of use, easy cleanup, better for the environment, etc…) and I had to resort to having gloss deck and concrete paint custom mixed.  It went on like glass though and should be impervious to our rainy long winter weather for three or four years.  My sweet wife super loves them and could barely wait until they were dry before giving them a proper, reading a book in the sun, test.

Below is a gallery of the whole build process:

Sawdust and paint fumes

It has been roughly eight months since my shop was robbed.  It is just now that I have found the will and desire to start building furniture again.  I have let projects and repairs pile up and let my garage shop digress into a sawdust filled junk-room.  There have been parts for Adirondack lawn chairs in my basement and shop since December.  I finally got around to gluing them up and screwing the pieces together when my son was here this summer.   That little project led me to start cleaning the shop and find all the stuff that has been waiting on me.  I dabbled with a couple of boxes, then started making pieces and organizing tools and supplies to tackle the larger stuff.  Below is a list of current projects that are in work:

  1. Painting the Adirondack chairs
  2. Re-build of my father’s 1971 bookshelves
  3. Kitchen cabinet doors
  4. Misc. Lathe tasks
  5. Kitchen cabinet pullouts
  6. Camp Kitchen box build and paint
  7. Campaign furniture for luxury car camping
  8. Hall mirror
  9. Copy of a 12th Century Abby oak door
  10. Fireplace surround and mantle
  11. New Kitchen cabinet pulls and knobs
  12. Garden tool shed
  13. Christmas gifts
  14. Garden table

The above are started and in-work.  I have plans to also build the below items soon:

  1. Small basement work bench (reloading and winter projects)
  2. Rebuild bookcase in master bedroom
  3. Murphy bed for my home office
  4. Box ceiling for master bedroom
  5. Home office bookshelves
  6. Chicken coop
  7. Ornamental planter box
  8. Cookbook shelf in kitchen
  9. Rebuild my standing desk
  10. Basement stairs rebuild