Working on my day off

The house remodel seems to never end…  I will be so glad to just be and live in our space at some point.  We are close, but there are still details left undone – enough that I am trying to concentrate on one room at a time.  My plan is to get each done in turn and then move on to the next.  I wasn’t as successful at that as I wanted to be this weekend as I bounced back and forth between the living room and our bedroom closet, but I did get a ton done.

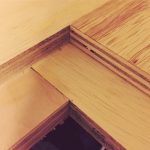
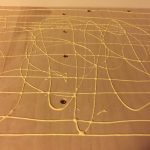
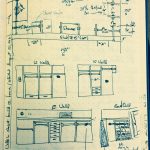
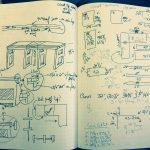
I installed the upper shelves and corner shelf in the walk-in closet, laminating two layers of 3/4″ plywood for really strong support over a 54″ span and in the unsupported corner.  In addition to using copious amount of glue and screws, I attached the butted plywood edges together with wood biscuits – it is always a fine day when I get to crank up the biscuit joiner.

matt-talley_-notebook_11-2016-3 matt-talley_closet-build_11-2016-2 matt-talley_closet-build_11-2016-1 matt-talley_-notebook_11-2016-2


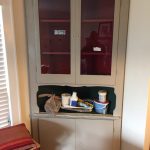
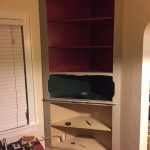
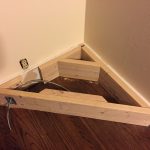
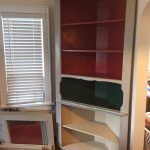
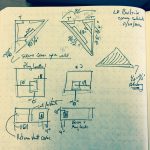
Almost a year ago, I sourced some corner shelves at one of the local architectural salvage places for less than $200 – far cheaper than what it would have taken me to build them.  They came out of a 1930-40’s house and were painted Christmas colors, but I knew that they would be perfect for our living room, which was stripped of its built-ins at some point in the last 88 years.  They have sat in storage and until this past week when I pulled them out and got some material together to permanently mount them.  Stamps-With-Foot helped me set them in place after I built sturdy bases.  Each of them cover a wall plug, so I am in the process of re-routing the receptacle using armored cable.  I also have to build in an air-return duct under one and that has taken some serious brain power to get right.  I will add trim this week and my wife and Mother-in-law will paint them cabinet white this weekend.

matt-talley_corner-builtin_11-2016-4 matt-talley_corner-builtin_11-2016-1 matt-talley_corner-builtin_11-2016-2 matt-talley_corner-builtin_11-2016-3 matt-talley_-notebook_11-2016-1


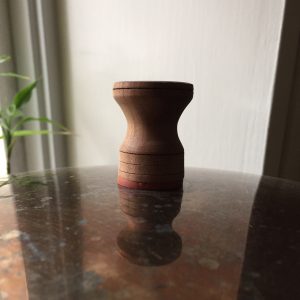
While I was at it, I punched out a rubber washer for a pot lid knob.  I made the knob a couple years ago out of some scrap cherry firewood after the original plastic one broke.  The original washer had corroded, so I made a new one and installed it.

matt-talley_new-washer-for-pan-lid

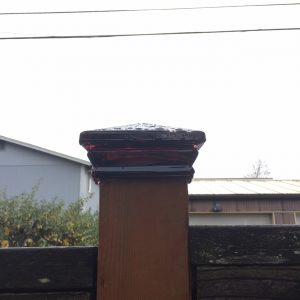
I also took a couple minutes to mount the red glass post topper on the back fence.  It was ordered (along with a spare) months ago and have meant to put it on every weekend since.  There is always an excuse for why I didn’t, so I marched right out first thing Saturday with a tube of clear silicone and finally just got it done.  It is the little victories that keep me going.
matt-talley_glass-post-top_11-16


Jeep Trailer

I have been posting a LOT about our remodel and garage build in the last couple of months, so I thought I would mix it up and post something not remodel related – mostly not related…

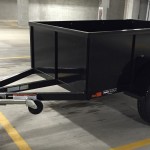
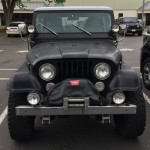
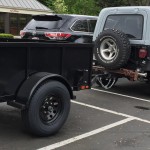
Simple and unassailable fact:  A grown man needs access to a truck or a trailer.  Since our move back to Seattle from France, I haven’t really had either and have been visiting U-haul for my hauling/dumping/moving/logistic needs, but that is getting both tedious and expensive.  I finally bit the bullet and had a trailer made to match my CJ7 Jeep.  I had it built because there wasn’t one available retail that matched what all I wanted to do with it – remodel work, hauling heavy loads of dirt and lawn debris, moving, climbing base camp set up, camping, SCA events, hauling firewood, etc.  I also wanted a shorter and narrower trailer than the standard 5X8 utility trailer that you can find at the roadside truck and trailer dealers.  I wanted it to both look good with the Jeep and I plan on hauling it places that a bigger trailer would be a hindrance so I took the opportunity to have a little customization done to get exactly what I want.

The specs for the new trailer are as follows:

  1. 4X6 tube steel frame with extended tongue
  2. Wheel base to match the Jeep’s so that it will track in the same ruts off-road
  3. 6 lug 225 wheels with grease zerts right on the hub
  4. Steel load-bearing fenders
  5. More ground clearance than the Jeep for dodging stumps and rocks on trails
  6. Long lasting LED brake and running lights
  7. Spare tire mount
  8. Treated wood bed with 6 D-Ring tie downs
  9. 3500lb rated axle, so I can load this thing up with dirt or concrete
  10. Black hardened acrylic paint to match the Jeep
  11. Swing rear gate that is also removable
  12. Welded lip for ramp mounts
  13. Swinging front wheel jack
  14. High replaceable wood sides to match the lines on the jeep.
  15. I will be adding:
    1. Uni-strut interior rails on the sides and bed.
    2. A triangular tongue tool/storage box.
    3. Three Jerry can holders for gas and water on the outside.
    4. One propane bottle holder for the grill/heater when camping
    5. Load-bearing torsion box cover
    6. Removable rack for carrying sheet goods and lumber

I used it the first day I owned it to haul some granite and paint for the bathroom and it will be full of doors and windows on Friday.

Matt Talley_1986_CJ7_Jeep_2 Matt Talley_1986_CJ7_Jeep_1 Matt Talley_1986_CJ7_Jeep_7 Matt Talley_1986_CJ7_Jeep_5 Matt Talley_1986_CJ7_Jeep_3