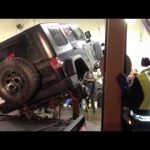
I got the Jeep back from paint months ago and it has been sitting on the lift in the garage – letting the paint cure as we have had work done at the house (Attic and Basement). I am not 100% happy with the paint, but that is another video. I have been collecting small cardboard boxes full of goodies since last October for the after-paint re-fit. That installation process has begun with the mounting of lights, fender flares, a new bumper, etc… I am giddy with anticipation to get it out in the Seattle summer sun.
Tag: CJ-7
The Jeep Rebuild After Paint
As you know, I got the Jeep back from paint about a month ago and it has been sitting on the lift in the garage – letting the paint cure. I am not 100% happy with the paint… It took 4 tries for them to get the hood and fenders right and there are little spots and dings on the tailgate. There is also some mess just above the nerf bars and a run on the rear fender that makes me twitch, but they will be covered by some trim and the fender flairs, so… I included the Jeep’s homecoming in a video here, but skip to 5:09 as I spent way too much time blabbing about other non-Jeep related crap in the 1st part of the Video.
Anyway, I have been collecting small cardboard boxes full of goodies since last October for the after-paint re-fit. That installation process begins this coming weekend. I am giddy with anticipation.
The part additions and changes from Morris, Amazon, ARB, and Northridge4X4 include:
Duel Battery tray
Halogen headlight Lamp Conversion Kit (wanted LEDs, but don’t want to pay $600+ for headlight!!)
Black Rugged Ridge Fender Flare Kit
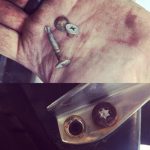
Stainless Fender Flair Hardware
Front Side Amber Marker Lights
New Wiper Blades
New thick rubber floor mats
BestTop Bikini Top (uses existing soft top channel) for the 2 months of sun in Seattle this summer
Rugged Ridge LED Tail Lights
Front Parking Lamp/Lens
Black Factor 55 FlatLink Winch Cable Shackle
Burnt Orange Jeep Fender Decals
New Frame to Cowl Weather Seal
Black Powder Coated Stainless Steel Side Mirrors
New Winch Cover
Warn Winch bumper with D-Rings
Black Vinyl Spare Tire Cover
New Aviation-Style Light Switches for front spots and reverse lights
Stainless Steel License Plate Holder (I had it powder coated black)
Second set of D-rings (Powder Coated Burnt Orange to match Jeep Logo)
Hi-Lift Jack Rebuild Kit (sandblasting and repainting origional)
Bronze Door Hinge Bushings (sourced at McMaster-Carr)
Warrior Pipe ½ doors (because I can)
ARB Recovery Tools Bag to organize my off-road gear
ARB Compact Onboard Air Compressor (Got a SMOKING Deal at the ARB booth at a recent Jeep Swap Meet!!)
Getting new bar covers made as well
Film Friday – Jeep Paint Prep
…And so begins my plan for interweb domination… This is the 1st in a series of videos detailing my Jeep re-painting project. I am doing the prep work and getting ready for my 1986 CJ-7 to go into the shop for a little cosmetic make-over. It was painted black at the factory in Toledo, has been black ever since, and will stay black until they make something darker. I also give a little bit of an update to what I have been up to of late, some projects that are in the works, and a quick pan view of part of a dirty, disorganized, and cluttered shop.
Car Lift and Jeep CJ-7 Saga/Search/Information
Before putting 4000 pounds of 31 year old Toledo steel above my head for the first time I really needed the correct locations for a 2-post-lift pad placement points on a CJ-7. I like who I am and I have some plans for the next 30 years or so and really didn’t not want to be that guy who squashed himself in his own garage. It happens.
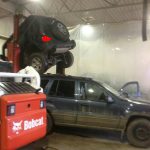
I have seen two jeeps on their sides at dealerships after falling off lifts, countless other lift fails, and have seen CJs put up in the air at least four different ways. I have had a couple of cars in the air since building the garage, referencing their owner manuals for lift placement, but not the Jeep yet. Again, I didn’t want to be the guy that drops his 4X4 pride off the lift in his own garage. I started doing a little research and asking questions.
After a fairly fruitless internet Search, I called the company that built my lift (it is a Rotary Revolution RPT10) and they referred me to The American Lift Institute (ALI) manual that came with the lift. The 2016 version of the manual only goes back to 1991 for most vehicles and when I called them, there was no answer that they could give me. They referred me to “a local Jeep dealer.”
I dropped in the one nearest the house and there was not an “old-guy consensus” on how to life a CJ: on the frame behind the shackle mounts, on the shackles, on the spring plates, on the axles, etc… My Chilton and Hayes manuals have nothing and I am still trying to source a good 1986 Service Manual (can’t find anything in the downloaded ’82) and would love an original Owners manual. I went by a 4X4 shop a bit ago and the tech there said “lift it on the shackles…” and posed it as sort of a question. I walked away swiftly.
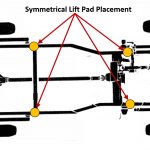
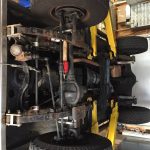
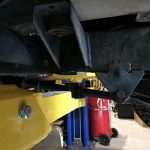
So, relying on Cunningham’s Law, I asked the internet via the JeepForum if anyone had some documentation on where to apply the lift arms/pads on a CJ-7 frame and where the balance point/center of gravity of the vehicle was to put in-line with the lift posts? I got some helpful suggestions and a couple answers that were on the edge of trolling, but the general consensus from CJ owners and mechanics on the forum was to follow the guidelines for the 1991 Jeep Wrangler and their frames, suspension, and balance points are very similar: The lift pads are placed under the frame (centered on the pads), directly adjacent to spring hangers/shackles. Sounded reasonable and plausible, so I decided to go with that. The balance point/CoG is between my dash and the bottom of the steering wheel and that point goes on center between the two posts of my symmetrical lift.
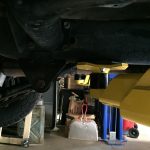
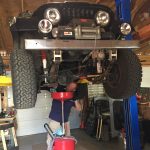
I went ahead a couple weekends ago and decided to put it up and do a little general maintenance. After everything checked out – raising the Jeep 6″ off the ground and giving it a serious shake on all 4 corners, raising it up and down a few times, I spent 30 minute for full oil and filter change. I lubed all the zert points on the drive-line and chassis while I was there. No squashing or falling Jeeps. 🙂
