I have mentioned that when planning our move to Toulouse, I realized that I would have to leave my big electrical shop machines in Seattle. It hurt a little as I have become dependent on a table saw and compound miter saw for even the simplest tasks. I am looking forward to spending some quality time with my hand tools, but I have to have a lathe to complete 75% of the projects that I tackle. There is no way in Blue Blazes that I am was going to build a pole lathe or a foot-powered flywheel lathe – there I draw the line. I needed a fairly large machine to turn the posts, trenchers, stools, bowls, table legs, spindles, scoops, etc… that are on my “to-do in France” list.
Machine tools in France are CRAZY expensive. Look at the US price, change the Dollar sign to a Euro sign and add 30% to the final price. I looked at a large Jet lathe and it cost more than my first truck. Even the small midi version was the equivalent of $600. I just can’t spent that kind of cash on something that doesn’t either feed me or take me to work. After some research, I found a bare bones, no accessories, Chinese made model that some of the local turners were buying for their second or third lathe. It was 1/3 the cost of a well appointed model with the same bed length and power. Sold. I brought all my chucks and jigs and accessories with me, so I thought “Perfect!”
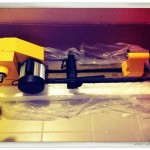
There wasn’t one available in a 400 mile radius, so I had to order it at the home center in the next village over. 11 days later it showed up and I brought my new 400 pound beauty queen home in a Suzuki swift. I am sure the douche-bag that stood 10′ from me watched as I man-handled it into the rear hatch of my tiny car using old tires and 2X4s has already posted the video.
Now, it was advertised at “Ready to turn out of the box!” For that to be true you need the following tools:
- Rubber Mallet
- 1/2″ combination wrench
- Set of standard Allen wrenches
- Flat-head screwdriver
- #2 Phillips screwdriver
- 3/8″ drive ratchet
- 1/2 socket
- Long socket extension: >6″
- Standard Tap and Die set
- A large vocabulary of cuss words
- Drill
- Metal Drill-bit Set
- Large Bastard File
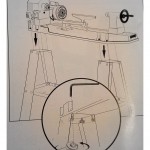
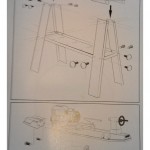
You will also need the following additional parts as the bolts and washers provided were likely scooped from a bin without counting and dropped in a bag. There are only two small pages of instructions and they do not list all the parts, the number of each that will be required, or the order in which they are installed. Take examples of the bits and pieces provided and get duplicates in the same size:
- Washers
- lock-washers
- pan head bolts
- Machine bolts
You will also need:
- four 8′ long 2X4s
- Wood Glue
- Sandpaper
- Pan-head wood screws or deck screws
- 4 sacks of concrete
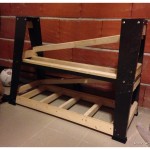
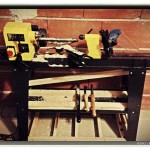
I found out about the hardware issue right away and drove back to the home center in the next village for spares, but I had all of the other supplies on hand – I did not pack light for our move here 🙂 The base was my first obstacle. It was flimsy sheet metal and some of the holes were out of alignment. I drilled and fitted, whacked with a mallet and said lots of dirty words, before I finally got the lathe on. A quick tug showed that the base needed some serious beefing up. If I put an unbalanced piece in it, it would shake apart. I ended up building a crossed braced wooden skeleton for the whole thing – my Jr. High Wood Shop teacher would beam with pride. The reinforcing process took me 4 hours that first night, but that was mostly because I don’t have a miter box saw and was making compound angle cuts with a sliding-T bevel and a Japanese pull saw. I ended up having to chase the threads in the cast iron lathe bed and on the head stock (really) with a couple of different taps and used Loctite on all the bolts.
All the handles and knobs had to be put on and tested and the tail stock and head stock had to be adjusted, tweaked, and tweaked a little more to get them in alignment. The cast iron tool rest was really rough, so I used a file here and there on it and sanded the tool bearing surface and finger groove with progressively finer sandpaper, from 80 to 400 grit. This all took another 3 hours the next night.
After all was said and done, I clamped up a small hunk of 2X4 that was a cut-off from building the base and with just my skew chisel, turned it down and into a bunch of tiny beads. The lathe turns great and has plenty of power. I couldn’t be happier. I saved 800-1000 Euros in exchange for 7-8 hours of me time.