Medieval Benches in Art

As I have mentioned in previous posts, I have been on a 5-board bench kick this year. I have built five so far and two more are in the works. I am also putting together at least three 6-board benches in the next 6-8 months, which share similar design and construction. Both items are classified as “Furniture of Necessity” or “Early Rustic” if you go shopping for one or the other. The patterns for them are roughly the same now are they were 2000 years ago and they lend themselves to hand-tool only construction.

I am not a Luddite that eschews a table saw, not in the least. I just don’t have one in France and am not buying one (If someone dropped off a new 10” cabinet saw and a compound sliding miter saw at my door, I guarantee that I could shoe-horn them nicely into the GROP). It has taken me almost 10 months to decide that I need a plug-in circle saw, but only to speed up the breakdown of thick planks and beams – I will be shopping at a pawnshop in the city though. I am just not spending the money to set up a new cabinet shop when we are leaving in a couple of years. Tools here are CRAZY expensive and most of the stuff available to non-professionals is crap. A Ridged-type contractors saw (bottom rung of what I consider acceptable for cabinet work) here with a real fence and a solid top will set you back the equivalent of $1100.00. Same saw at any Home Depot in the USA is about $500.00. A 7.25” Makita circle saw is the equivalent of $230.00 and an 18vt Ryobi drill with two batteries? $195.00!

Anyway, back to benches and chests… While in Paris last month we visited a plethora of museums and I kept finding little nuggets in the paintings, tapestries, and stained glass: top edge profiles, proportions, leg cutouts, etc… I am going to incorporate a couple of the details into my planed remaining work this year and next – just because I can. Below are a few of those details. They were for sure more to see, but not all museums allow pictures in their halls.

IMG_2729

stools from Book of hours 2

stools from Book of hours 1

IMG_2823

IMG_2825

IMG_2789

IMG_2791

IMG_2736

IMG_2742

IMG_2752

a couple of saw benches for the shop

I needed a couple of saw benches for my GROP, so I put a together two of different designs. They are both simple, plain and sturdy – no nails or screws, just glue, dado joints, and oak dowels. One is an old V-notch pattern that I have seen 1000 times and the other is combination bench/tool tote of my own design. I made the tote handle of the second one from a baseball bat that was cracked. I turned down the ends on the lathe to make 1-1/2″ round tenons and captured the tenons with wedges and 2 dowels – placed at 6:00 and 12:00 as keys. This permanently locks the bat and will keep it from twisting loose. the Louisville brand is facing up when carried – It adds a little flair to something that would normally be utilitarian and is big enough to carry everything I need to do a household fix/honey-do.

Grop Bench 2014 (1)

Grop Bench 2014 (2)

A Bench Building Machine

In addition to the 5-board bench by our front door, I have built a large bench for our dining table and one for our entry-way with shoe storage, per my sweet wife’s request. I have a couple of saw benches for the GROP and 2 narrow ones for my office all cut out as well, but not put together. These benches are traditionally “furniture of necessity” and not meant to be fine furnishings, but I think that there is still beauty in their simplicity and usefulness (useful and helpful are the highest Talley-family compliments). Additionally, they are simple, cheap to build, and lend themselves to hand-tool only construction. Not a single screw or nail is used: I used through-tenons, oak wedges, and dowels. With almost instant tangible results, the whole process in building these is therapeutic. When and if I have a super-crappy day at my J-O-B, I can go into the Garage/Shop/GROP after dinner and make some wood shavings and improve the bejesus out of my mood. Cheaper than counseling and less bloody than a rampage 🙂

7/3/14 Update:

So… The bench built for the dining table had ends that extended a little too far from the legs. It made the bench tippy if someone either sat on just the end or got up with someone also sitting on the other end. There were a couple of incidents where a butt almost hit the ground. I removed 7″ from either side and changed the stretcher detail a bit as the plain 45 degree cut didn’t really match the curl detail on the feet.

IMG_1906

IMG_1908

A Fine French Work Bench

My GROP (garage and shop combo) in Seattle was too small for a proper joiner’s bench. I made due with a slim, high, wall-mounted work counter, a bolted on machinist-vise, Quick Clamps, and the top of my table saw. It worked – mostly – but was a pain in the ass a good bit of the time: I never once planed a board on a stable, solid surface. My GROP here in France is roughly the same size as the one in Seattle, but is absent the huge cast iron machines and saws. I have some room to move and finally have the space for a big, heavy, proper work bench. This shit is about to get real…

As I live in France, I am building a 2m long, 85cm wide split top Roubo-style bohemyth, that will have a 12cm, 4-part slab top (6.5′ X 33.46″ X 4.72″) and it will be 36″ high as that is MY optimal bench height. Wooden leg vise, dog holes, a cast iron tail vise – all the bells and whistles! I am planning for it to take a mule to move this thing as I will do some serious planing on this baby. It is an amalgamation of benches by M. Roubo, Roy Underhill, Chris Schwartz, and Bill Schenher. I am calling it the “Cornebarrieu Bench” after the small village in southern France where we live, where the lumber has been sourced, and where the bench will be made and first used.

I picked up some of the lumber at a yard near the house (still need the top – thinking of Beech!), strapped it to the top of my tiny car and carried it home, giggling manically. The wood is now in the GROP drying out a little and waiting for me to attack the timber and fashion it into one fine, sweet hunk of usefulness. It makes my black heart more than a little happy to think about the look on movers’ faces when they see this thing when they come to pack us out for our eventual move back to Seattle. Mwahahaha…

Bench for the front entry – Project #4 in France

We are a “no shoes in the house” family. It is dry and dusty where we live in the summer and the trails near by that I run and that Stamps-With-Foot and Brodie walk on are shared with horses. We don’t want to track dirt and poo into the house. There is a great spot right by the front door to take your shoes off, but no place to sit down to do it. I decided a rustic little 5-board bench was in order. I spent five hours from the initial sketch design to putting on the final coat of polyurethane over a week’s time. No nails or screws were used, just through-mortises, wedges and dowels. We now have a small piece of furniture outside the front door that is functional and matches the house and the style of our other furniture – you never know it might someday find its way inside.

Tools I brought with me from the old country…

When planning our move to Toulouse, I came to the realization that I would not be able to take my entire shop with me. I didn’t relish the idea of replacing all my power tools and saws with 220vt/60Hz versions, only to have to sell them in a couple of years when we move back to Seattle. I decided that I would bring mostly my hand tools and and spend some quality time working small projects, cutting dovetails, tuning my planes, etc… There were three 24″X24″ boxes and one wooden chest full of edge moulding planes, Stanley Bench Planes, 4 rolls of chisels, mallets, Japanese saws, hand drills, dovetail tools, axes, draw knives, my half set (#2 – #18 even) of 1850ish Gleave hollows and rounds, squares, jigs, rasps, and assorted joinery paraphernalia.

My plan is to use the time here to do the detail work that I am usually in too much of a rush to even contemplate: carved scroll-work, mortised frames, insets, layered stain finishes, edging with the moulding planes, some light carving, maybe even cutting a few linen-fold panels. I have done a couple of little things already, but my first big task is to build a HEAVY work bench so that I will have a proper work space: I am going with a split top Neo-Roubo without a leg vise. I will be installing a cast iron Front Vise and a Screw Vise on the tail of the bench instead. No cabinets underneath so that I can store a shooting board and a Moxon vise. It WILL BE coming home to Seattle with us.

In the interest of full disclosure: I am not a neo-Luddite – I did buy an orbital sander right after we got here and I shipped my Ryobi 18vt tool set (circle saw, 2 drills, reciprocating saw, flashlight, & jig saw). The same sets are sold here and I got a 220vt charger that works with my existing batteries and picked up a couple of fresh new lithium-ion batteries in the process. Aside from the battery tools, I ordered a large wood lathe so that I can make furniture legs, tool handles, bowls, jar lids, platters, etc. I brought all my lathe chisels and chucks with me and I got a model that uses a DC motor that I can change over to one that runs on US current when we move back. It is much larger than my lathe in Seattle and will be a valuable addition to the shop there when we return.

Roller Derby, St. Paddy, Dresser Building and an Anniversary Weekend

This weekend was busy with friends, a dinner out, St. Paddy’s Day activities, an outing to the Roller Derby (?!), and the 9th anniversary of the day that my sweet wife and I met was on Sunday. Even with all that, we still got bunches done around the house: Our under-bed dresser finished, bathroom table drawer installed (a little work on that left), wine crate storage boxes made, basement lighting installed, and the basement work bench is moving along.

The drawers for the under-bed dresser and the one for the bathroom all came from a wooden donor-dresser that my father-in-law drug home from a garage sale last summer. He paid $4 for it and it was in pretty bad shape, but it was solid wood and had potential. It was mistakenly left in the weather (plastic cover leaked) for a month before I salvaged the drawers, cut out off the top and used the sides for kitchen cabinet door panels. I re-squared the drawers, added dividers in the fall, and over the Christmas break sealed the insides (The Ruminator helped). After lots of filling and sanding and more sanding, I stained the fronts to match our bedroom furniture, then built ¾” plywood beams to hang the drawers from bed frame and used some scrap oak flooring as drawer guides/runners. The final product really looks good and is super functional. While some husbands bug their wives by filling the house with brought-home junk – I give my wife more and more and more storage and organization space.

On Sunday, I put the final coat of finish on the basement workbench top, let it dry, and then installed the three runs of aluminum t-track. Stamps-With-Foot bucked up and helped me wrestle its 200 pound beech and maple mass onto the steel base. I secured it with screws and covered the top with carpet squares while I finish the upper shelf/cabinet. I installed a outlet power strip under the main body of the topper and removed the old drawer dividers. I will soon add a plywood back with a mirror, a light under, a dedicated air supply line, install the desk drawers under the bench and mount 4 reclaimed letterpress drawers directly under the top as well. Happy with the progress so far.

A giant sealed dome over our place would solve most of this….

There are some days where I want to just drop everything I am holding, turn off the lights, lock the door, and go on an extended vacation involving a sugar-sand beach and copious amounts of fruit laden alcohol.  This Saturday was one of those days.

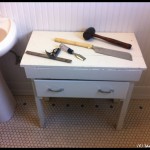
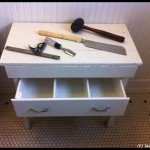
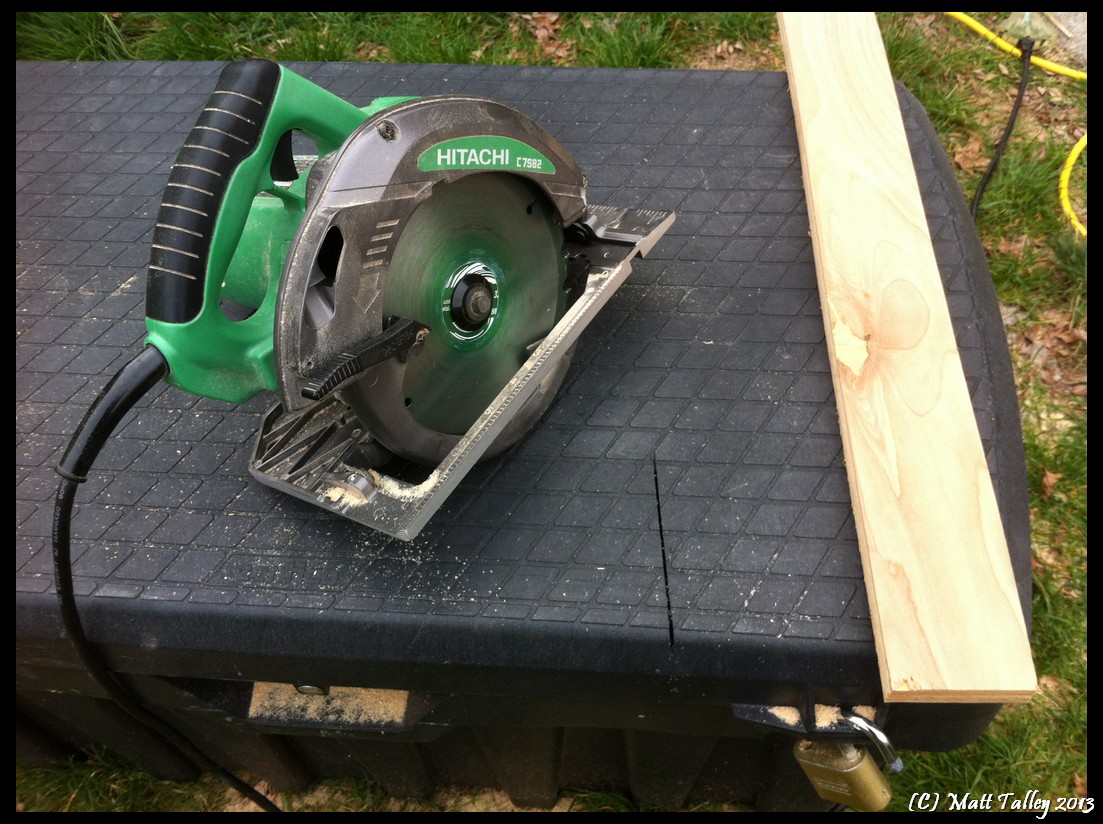
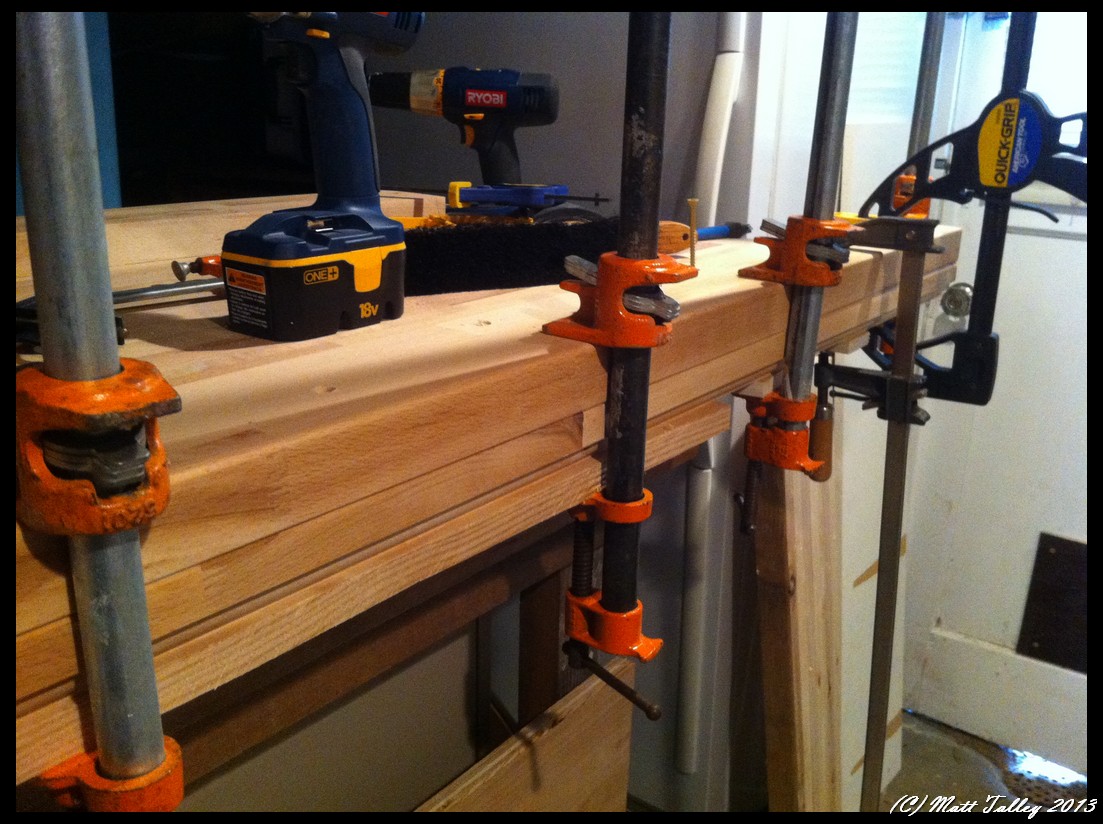
I decided to work on the kitchen cabinet doors, cut some plywood sheets down, and tackle a bench top while the sun was shining.  I opened the shop, brought out a plastic truck-bed toolbox to cut on (my 4 sawhorses are currently being used elsewhere), pulled 3 full-sized sheets of ¾” and ½” plywood out of the lumber rack and drug it all out into the backyard.  After marking the first sheet, adjusting my saw blade depth, lining up my rip fence, and checking for clearance – I started my first cut and immediately ripped a 6” long kerf-cut into the top of the tool box that the sheet was sitting on.  Dammit! I cut the rest of the plywood up without incident, but grumbled thinking about the mistake (I will fill and patch it with molten P-Tex plastic at some later point).  After stacking all the assorted pieces of ply back into my cluttered shop, I man-handled the 170+ pound beech and maple in-work bench top from the basement and placed it on the now-damaged toolbox – trying very hard not to either herniate a disk in my bask or tear what is left of my shoulder.

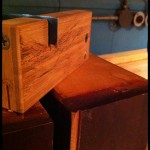
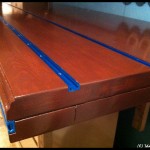
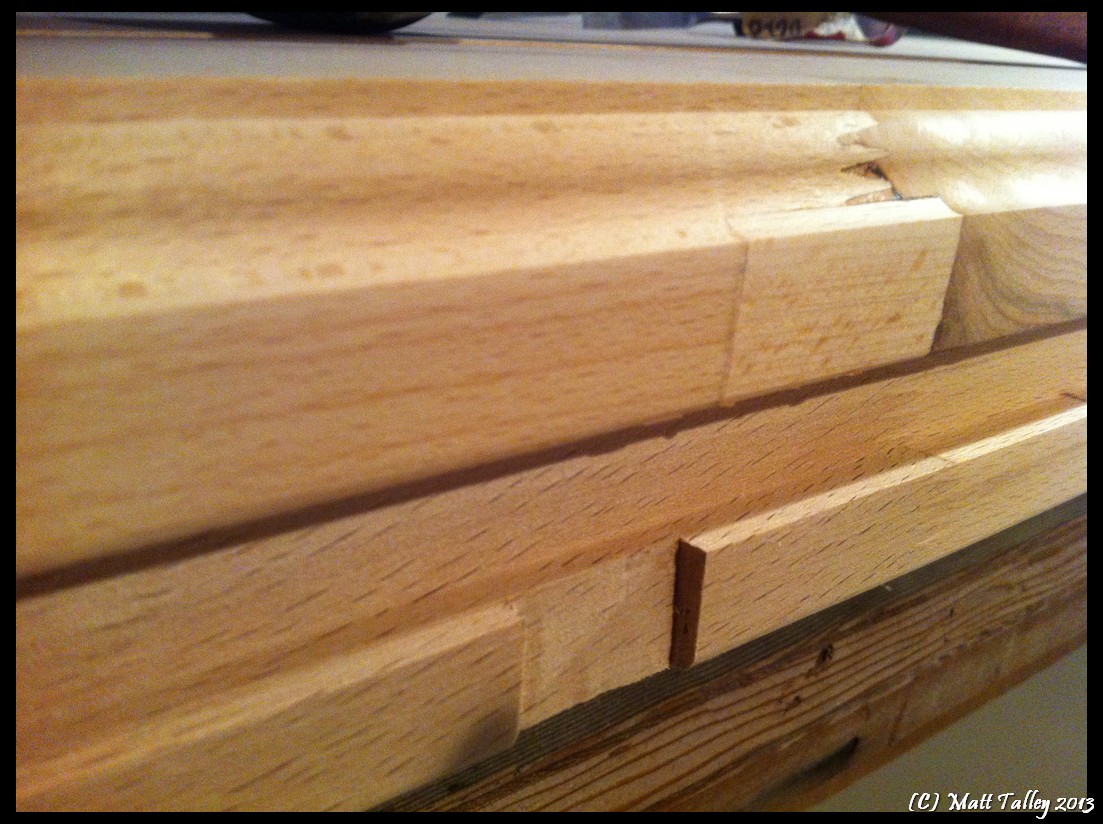
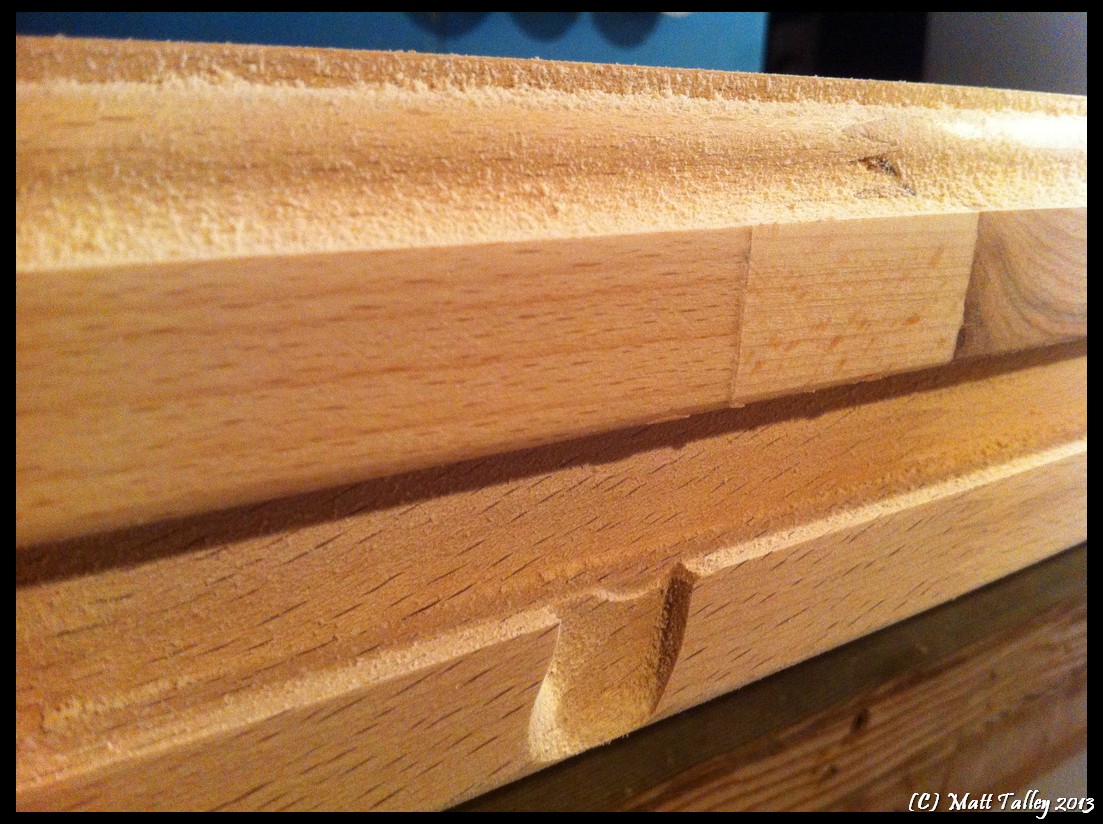
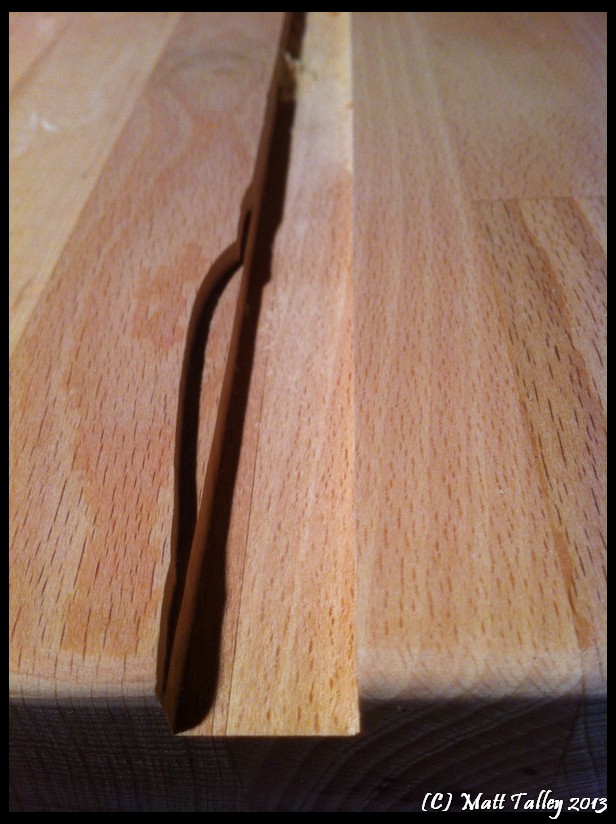
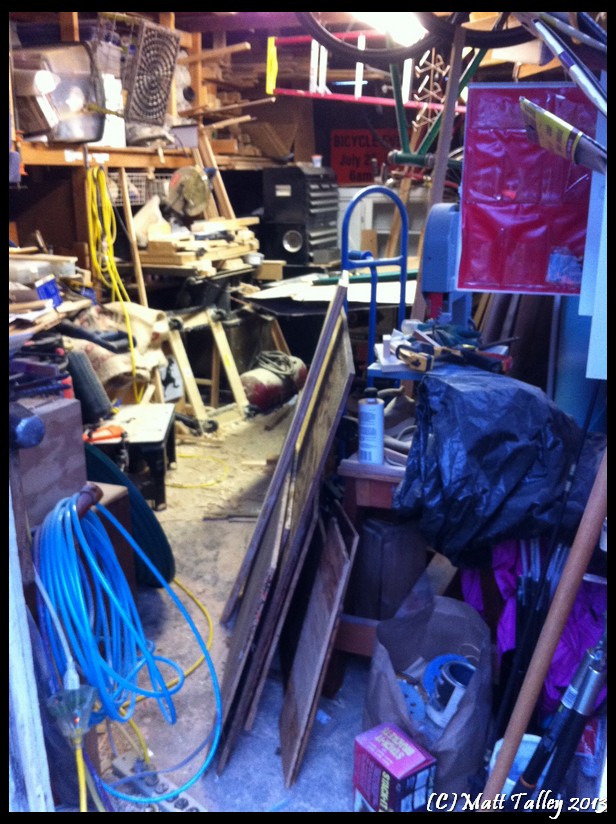
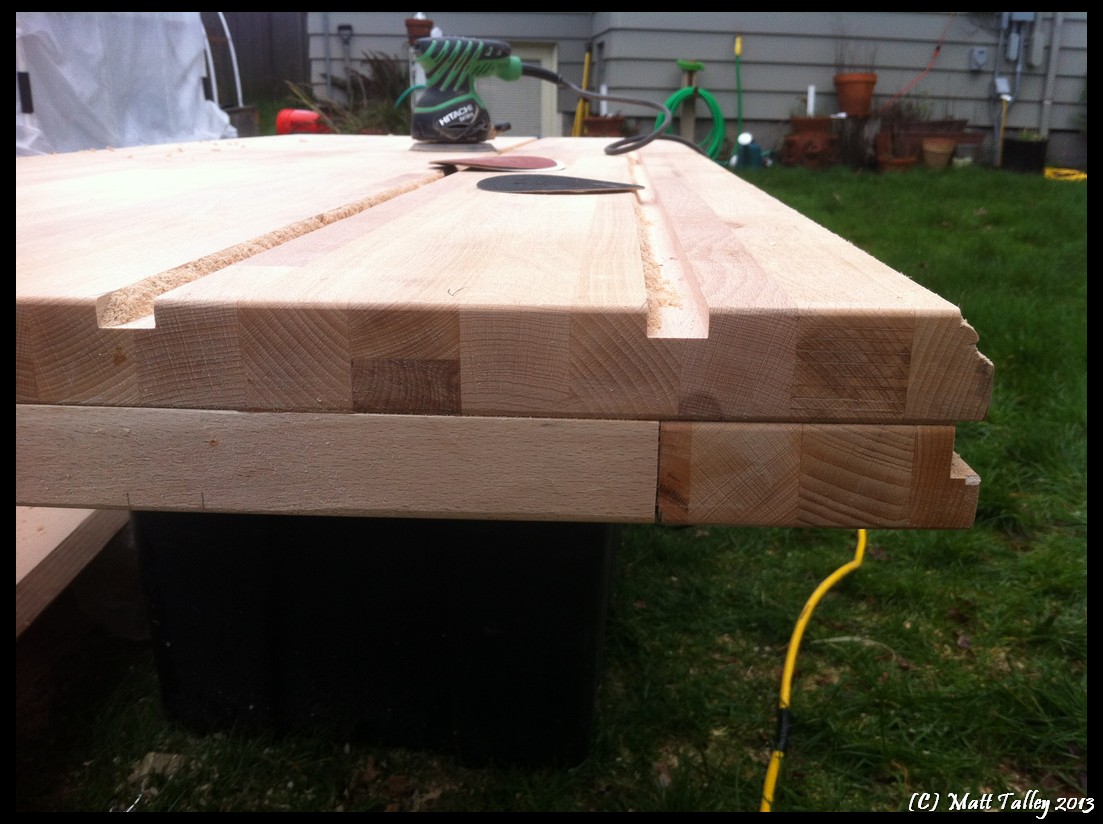
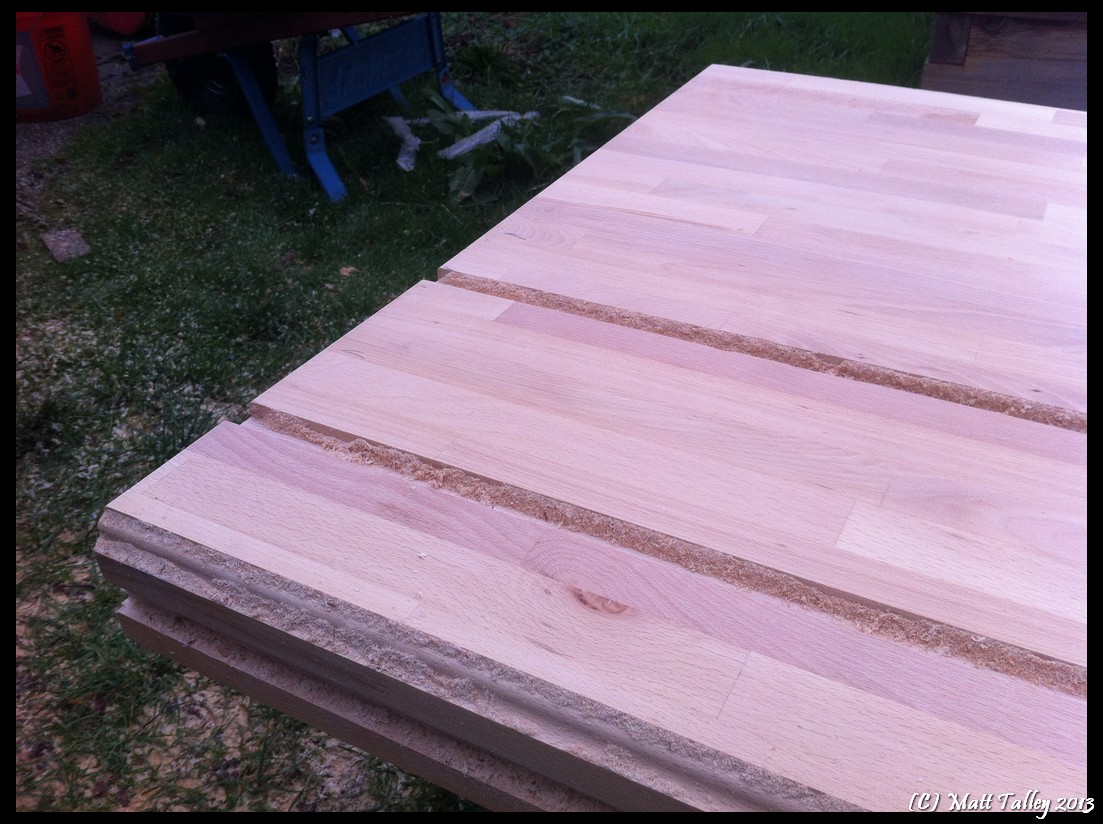
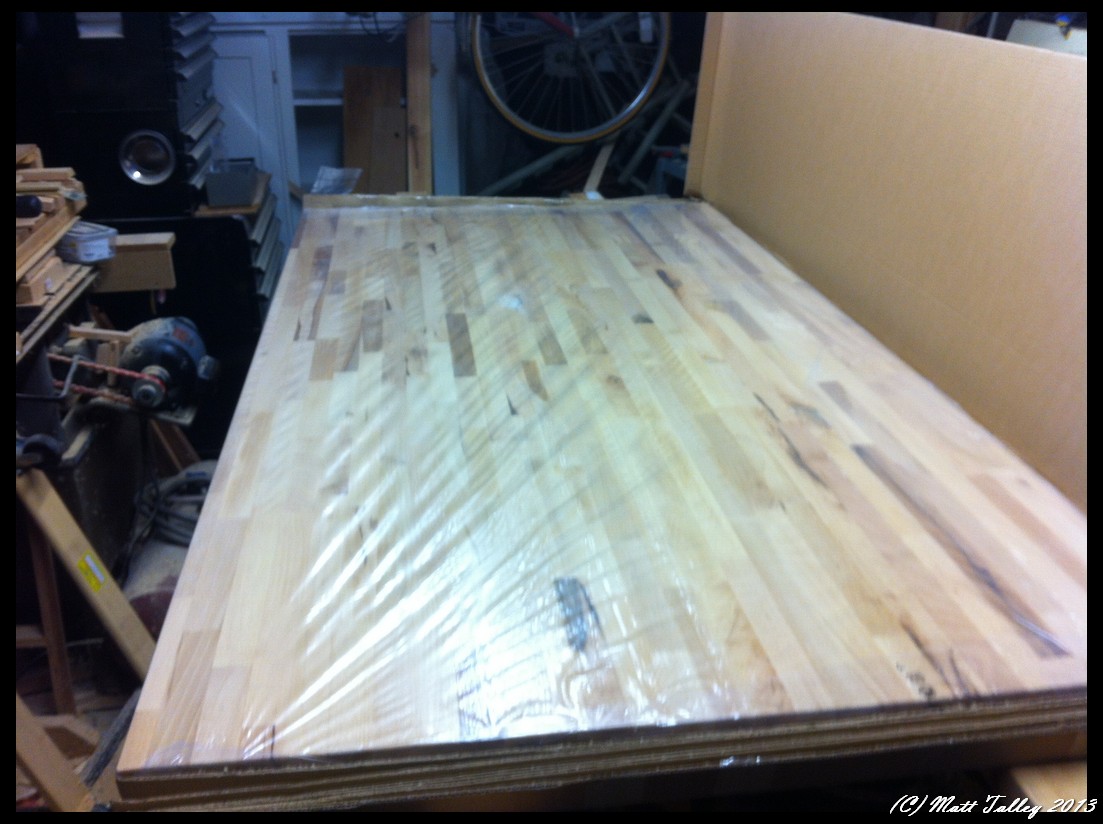
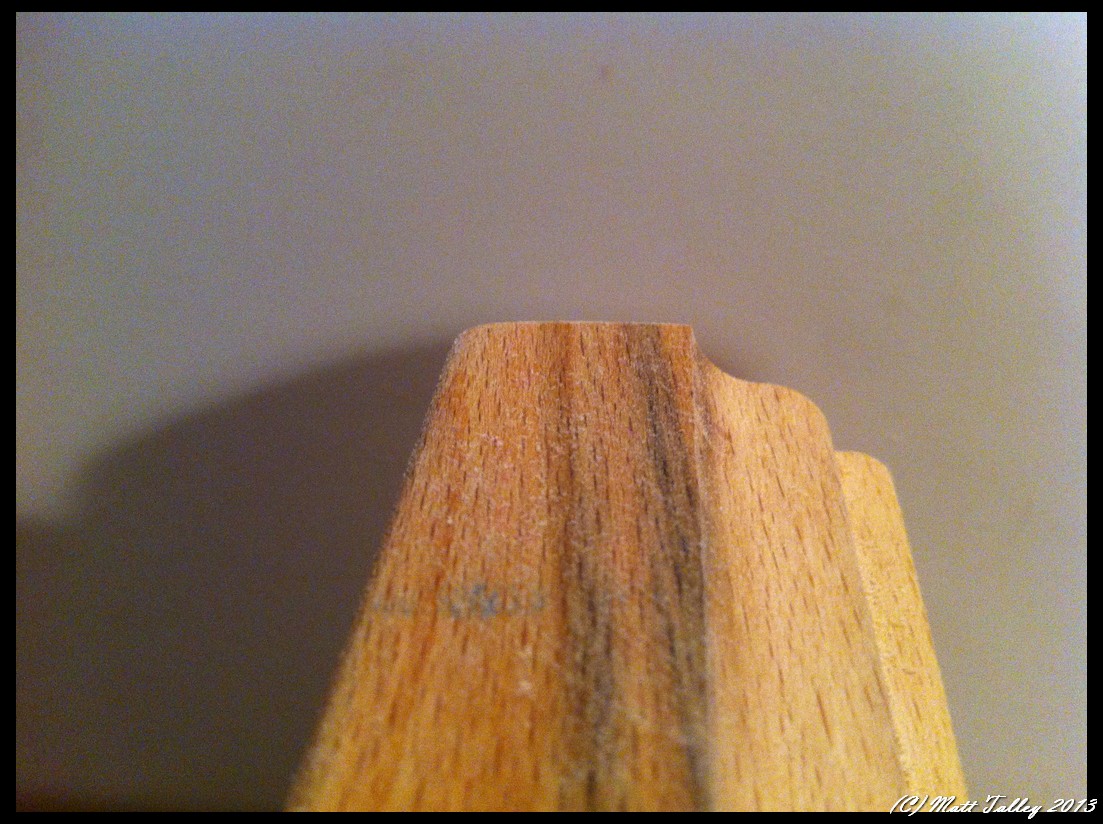
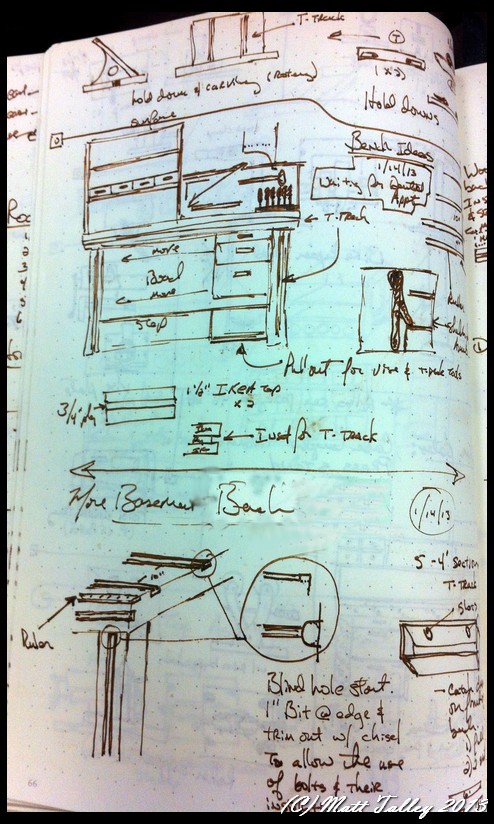
My Shop/Garage is pilled deep and high with lumber, hardware, undone winter projects, wood shavings, tools, sawdust,  flotsam & jetsam, etc….  I spent an hour trying to set up my router and in all the clutter and mess I couldn’t find a ¼” collet for one router and the other does not have an integrated fence, so using my big monkey brain, I improvised a fence.  All I really wanted to do with the top was to route channels for t-track and thoroughly sand it down before taking the beast back into the bowels of the basement to apply stain and a tung oil finish.  All was going as planned and my first cut was perfect.  The second cut went just the same, but at the very end of the third cut my improvised fence failed and the router wobbled – gouging the top that I had spent a month building.  Jesus H. Christ I was pissed! – Mostly at myself, but there was some vitriol left over for the machine in my hands.  I said dirty, hateful, vile things while resetting the fence and making an adjusted cut.  I moved on to make my last cut in the very front lip of the bench and while the fence held, I stood up mid-way through the pass and the router wobbled, making the bit chew into a section of wood where I did not want it to go.  I gritted through the rest of the pass and finished the cut, but the second I was clear of the wood, I wanted to throw the still running router on the ground and beat the electric life out of it with the pruning shears that were leaning against the garage wall.  I had to walk away, hand over my mouth, and just breathed deeply with my back to the offending router, my own incompetence, and the damage they had both wrought.  My moment of reflection was short lived because just as I turned, I felt the first drop of rain fall from what was minutes ago a blue sky that had ominously darkened while I was focused on my router-rage (I swear it happened just like that – strait out of a hip urban dramedy…).  SHIT!!  I ran for something to cover the bench top.  The only thing I could find was a pink tent fly and a sheet of cardboard.  I covered everything and retreated into the shop, right eye twitching with disbelief/confusion/anger.  I spent the next hour drinking coffee laced with sawdust and moving piles of crap around in my shop.

When my sweet wife got home she MAY have found me in the shop muttering to myself, pacing, covered in saw dust, contemplating the logistics of building a giant sealed dome over our entire lot.  She talked me off the ledge, helped me put the top back into the basement, patted me a little, told me I was pretty and smart and a good boy, put me in some fresh, sawdust free clothes, and took me out to see a movie.

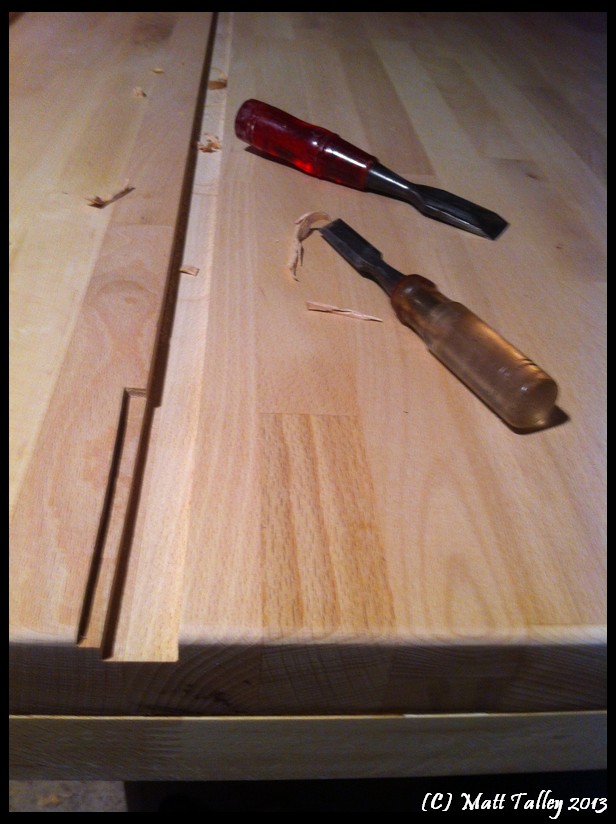
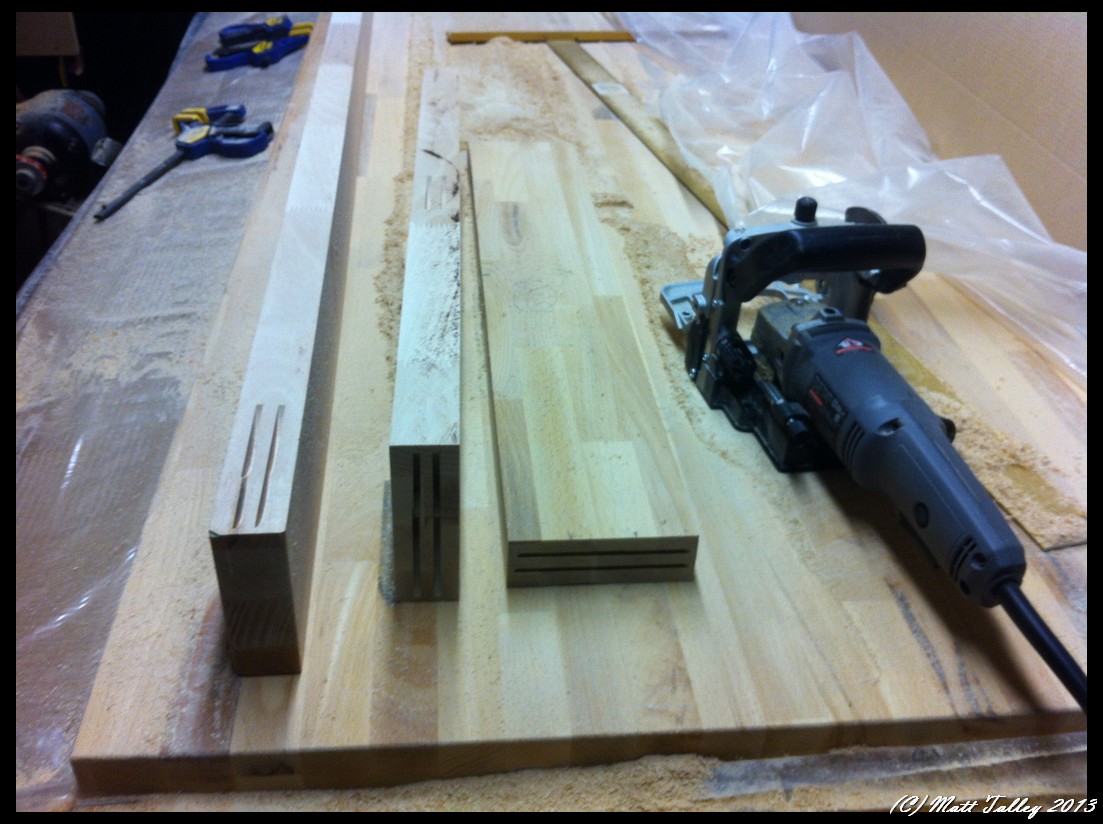
I got up the next morning and after a yummy breakfast of flaky croissants, bacon, eggs and two cups of coffee, I went downstairs and chiseled out the offending screw-ups, then cut and glued maple patches in.   After calming down some and after a good night’s sleep, I felt better about the whole thing, but me and that router are still not on speaking terms.

Basement Bench and Winter Workshop

I have found that my workshop productivity goes way down in the winter/the six months of Seattle rainy season.  My garage shop is small and quickly fills with material, lumber, tools, and projects.  To add to the handicap of the small size, the lack of heat means that I can’t do any finish-work because of wood humidity, shrinkage/swell, and moisture.  I have made do in the unfinished side of our basement for the past three winters, but I am done my wife is done with the mess and clutter and my bitching about an inadequate work area when the weather turns crappy.  I need a little bit of dedicated space that I can work on the small stuff year round that doesn’t require power tools and a little bit of assembly/finish  space where I can glue and clamp some projects up, a solder station, a spot to reload ammo, work on my bikes, and  a clean/dry/warm space to apply stain or a hand-laid finish coat.  Add to this my current want of a small metal lathe and mill and I will have the makings of a nice little hobby shop from which to launch my plans for world domination …er, I mean a spot where I can make small parts, solder, or tinker.

Anyway, instead of buying a crazy expensive cabinet bench or making do with a thin metal and partial board Home Depot bench, I have decided to build the sturdiest all-around hobby bench that I can with the funds and material I have available (~$130.00), add some really nice features (aluminum t-track, lots of drawers, removable vises, power, lights, etc…) and make it into a finished piece of furniture that I will be proud to sit at and show off to friends for the next 30+ years.  To start the process off, I found a cheap older thick steel framed 6′ workbench at Second Use that I felt would make a bombproof, rock solid base.  I sourced a used IKEA cutting-board counter top that I cut down to the appropriate size and then used the trimmed pieces to add thickness and rigidity (I am still going to add some angle iron).  I thought about and sketched 3-9 different ways to add some shelving and some organization to the top and was still tossing around options in my head when a realized that an old buffet that my mom had just might work.  I took some measurements and looked into reinforcing here and there and realized that not only would it work, but that its style would set the tone and color for the entire bench build.

I decided that the drawers to be added under the bench top needed to be narrow and at least partially match the newly planned top section, so I looked for an older desk or vanity that I could cut apart.  I struck out at Goodwill, the Salvation Army, and Craig’s List, but Second Use came through again and hooked me up with exactly what I needed at a decently fair price, well decent after I haggled a bit…

The current state of the build is that the bench top is 2/3 done, the desk is cut apart, the steel legs are up and in place and I am 1/4 of the way done with reinforcing the buffet/top shelving unit.  I will update the build as it is completed and share some more pictures.