The
Kiwi Coil
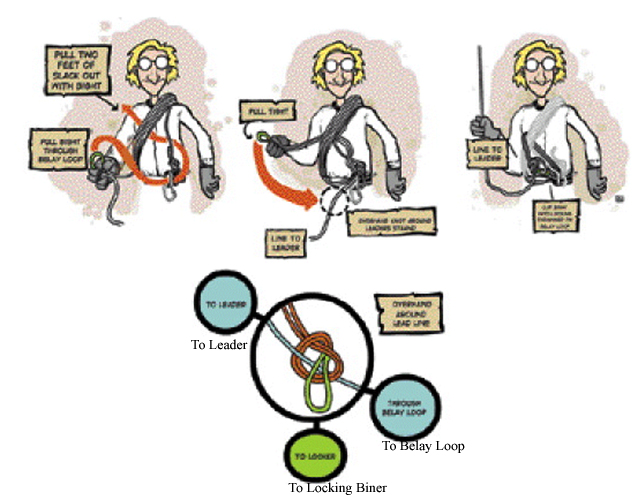
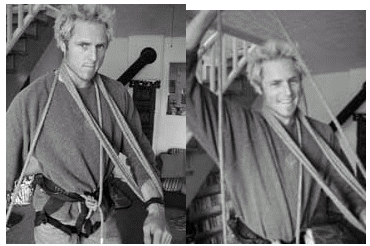
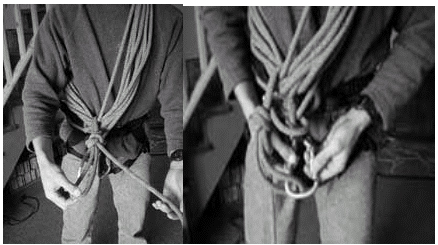
Start by tying into the end of the rope just as you normally would for climbing. Then, start coiling the rope over your neck and around your hand (palm facing down) as in the photos.

The
Kiwi Coil |
| The
first time that I saw this was on the side of Pingora in the Cirque of the
Towers. There was a guide hauling a client up our route that was using this
method. The guide was a prick and really freaked me out at one point, but
his rope work and climbing ability was top-notch. A year or so later the
system was illustrated in Climbing Magazine (see below, sorry about the
scan quality) and I found another site that illustrated it a little better.
Enjoy. |
 |
| The
"Kiwi Coil" is commonly used for glacier travel and any other
time that the entire length of the rope is not in use while you are traveling
together. Follow the photos and instructions that follow. Start by tying into the end of the rope just as you normally would for climbing. Then, start coiling the rope over your neck and around your hand (palm facing down) as in the photos. |
 |
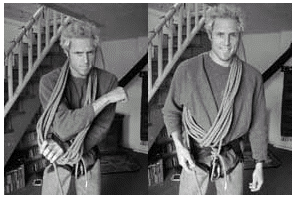
| Continue coliing up the rope until you have taken in the desired amount. Then, take the coils over the shoulder opposite the hand you were just coiling around. The free end of the rope should be coming down from behind that shoulder. Take this into that hand. |
 |
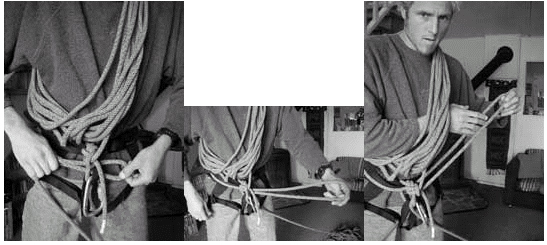
| Now begins the tie off. Make a bight in the free end and pass it through your belay loop. Pull it through with your other hand. Pull out about 18" to 24". I like to call this tie off the "Napoleon" because you now reach through the coils at your chest (like Napoleon does with his hand in his jacket) and grab the bight with this hand. |
 |
| Now, draw the bight back through the chest coils to the other side. Then, take the bight and wrap it under the rope leading to your partner. Continue wrapping it around this strand and then make an over hand knot with the bight upon itself. |
 |
| It is important that the knot is finished with the end leading away from you. Finally, clip this end of the bight back into a locking karabiner on your harness. |
 |
| Make sure that everything is tight and you are ready to go! |