Candle Box build

As part of my on-going campaign furniture project I decided that I needed a small box to hold beeswax candles and a few candle stick holders. I contemplated spending way too many hours crafting a small box with dovetails or finger joints, but good sense and my travel schedule won out and I happened on a wooden 2-bottle wine presentation box at Goodwill while I was there perusing for candle holders and baseball bats (for my lathe). I found four nice small Indian-made brass holders that fit in half the box with just the right amount of patina and beausage. I glued in a plywood separator in the middle of the box and cut down a piece of 1/4″ plywood scrap to cradle the holders. I glued that into one of the halves. A coat of red mahogany stain was rubbed on the outside and the box was finished off with two coats of polyurethane. An appropriately dinged-up brass handle was a sourced for $0.50 at a local reclaimed hardware shop and the box is now ready for a safari, Glamping, or romantic dinners in the back yard, etc..

Campaign Furniture Love and Build

I am a sucker for campaign furniture – the real stuff not the 1970’s MDF, lime green crap with cheapo plated straps and corners applied. Nope, I am talking about furniture that could have been broken down and loaded in a wagon, put on a mule, or strapped to a camel and toted around the world to reside in an officer’s tent in the high mountains of the Hindu Kush, the plains of the Ganges, or on the savannas of the Rift Valley. There is a single modern volume – now out of print – that I have checked out of the local library (through inter-library loan) 4 times and have scanned it in it’s entirety. I also have a 19th century catalog that is printed on pulp paper and completely falling apart that I peruse a good bit. I have even planned a couple of days off while traveling around seeing particular pieces and collections: there is a small shop in the Charleston, SC antique district that I spent hours in and while in London last year I found a shop that I wanted to move into. To tempt me even more, I have read rumors that Chris Schwartz, author of The Anarchist’s Tool Chest, is working on a new book and I am vibrating with anticipation.

There is a bit of both romance and leisurely comfort when one spends time afield surrounded by real furniture. I have a couple of original pieces, but they were dear enough that they cannot leave the house and won’t be spending any time glamping with us in the summer or in a high-country elk camp. Instead, I have been working on some modern versions that can be thrown in the back of a truck, hauled at high speed down goat trails, and opened up like Optimus Prime to reveal stout, useful, pleasing furniture. I have a source for solid wood shipping crates of different sizes that I have cut, stained, altered, and added to for this purpose. The limiting factor in all of this, is that every single piece has to break down, or fold up so that everything together fits in the bed of a small truck: 4’X6′

Right now, I have the cast iron cookware box, a candle box, 2 small tables, and a field desk done. I am 90% done with the wet bar (you NEED booze while glamping…) and an oil lamp/lantern box. The camp kitchen is in work, but will not be near complete or usable by the time we move. I have also designed a linen trunk, small chest of drawers, and a full-sized bed, but these haven’t even been started. The Campaign Furniture build is an on-going task and I hope to finish it all while we are in France. We are actually contemplating using it to furnish our guest room there.

The Ruminator’s Summer Visit – 2013

My son will turn 13 this winter – I feel so old. He came out to Seattle this summer for a visit and I was able to take the whole time off from work due to our pending move and the prep involved. We had the best time together and I can only hope and pray that as he ascends/descends into adolescence that our summers and time together are at least half as good as this summer was.

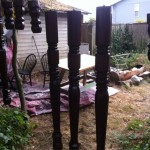
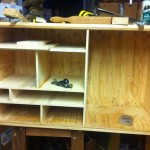
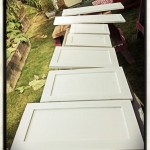
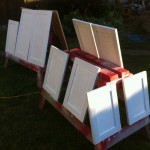
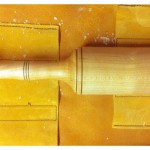
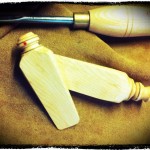
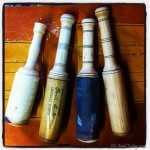
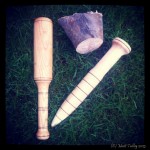
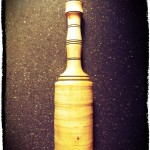
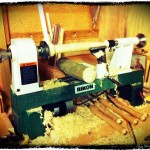
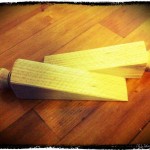
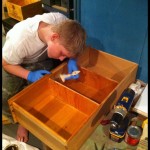
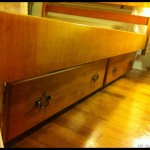
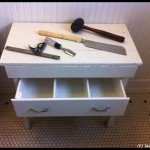
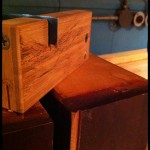
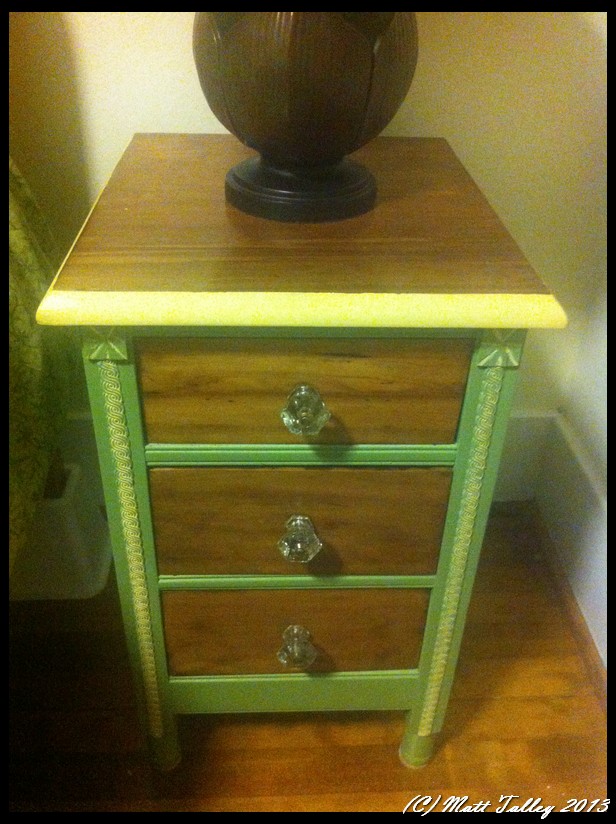
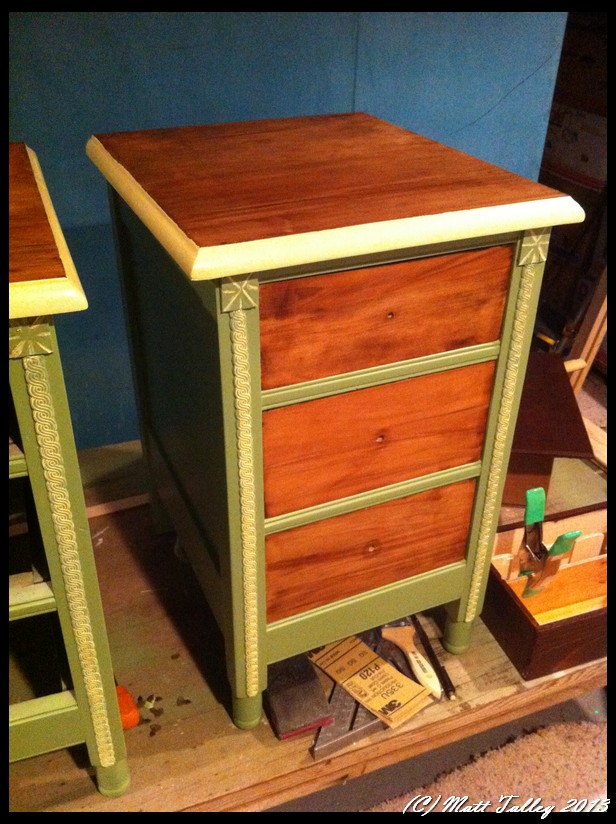
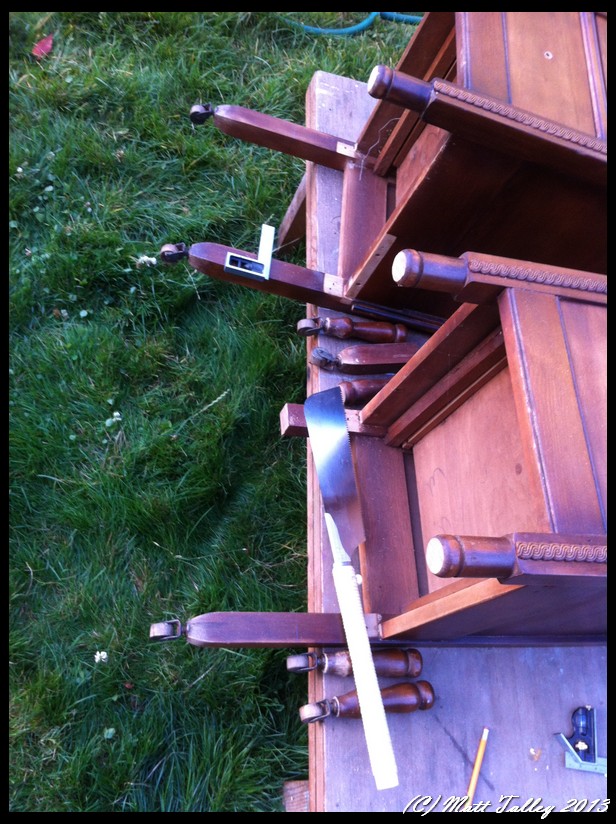
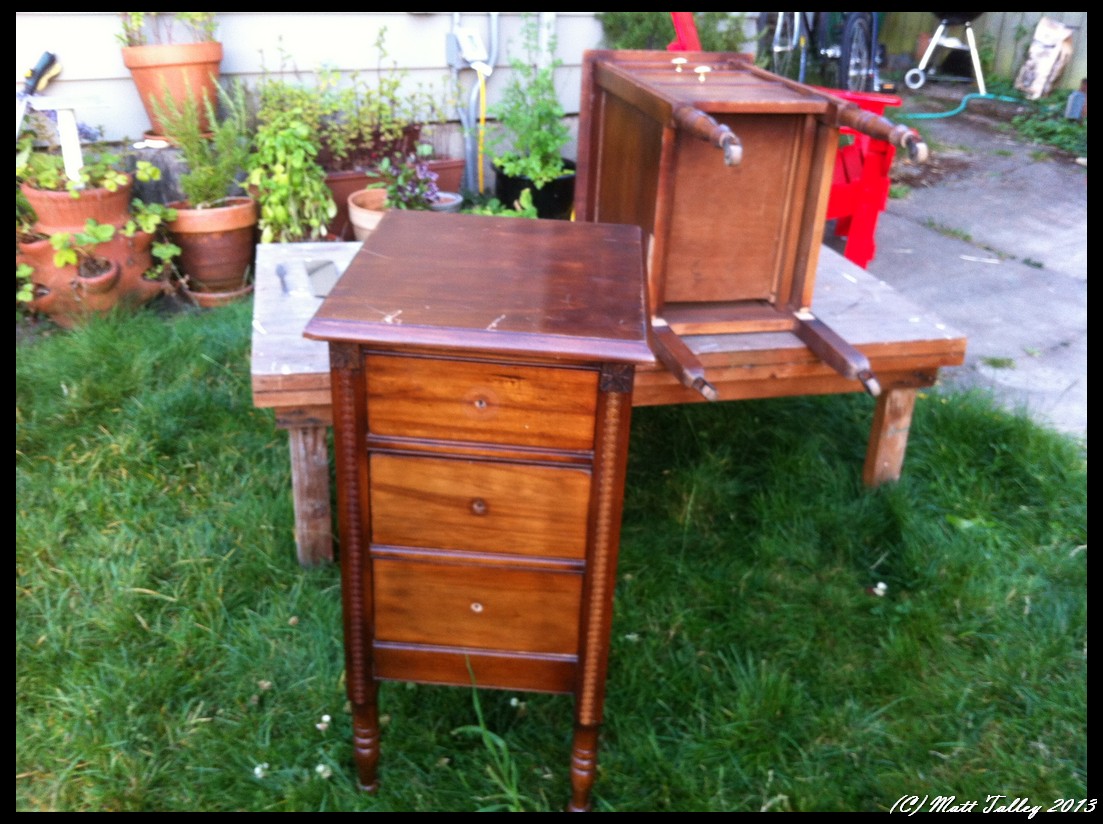
He is at the age where he is starting to take direction well and can stay on-task for a bit, so I put his little butt to work. We had a mountain of stuff to get done before we leave for France and his extra set of hands was incredibly helpful. We shopped for steel fence and stair rail, installed a speak-easy in the front door, cut and primed two stair rails, I taught him how to used an HVLP spray-gun to paint furniture, we stained table legs, used the router, he learned the first steps in using a wood lathe (he helped make his own carving mallet and made his mother a honey dipper turned from European beech), and he helped me measure, mark and chisel hinge pockets in the kitchen cabinet doors. My toe-headed son helped dig the two 18″ holes for the front entry stair rail, dug a hole up front, outside the fence, and helped replant a root-bound rosemary there. Since he was in mole-mode, we went into the back yard and he helped dig the hole for a new receptacle and motion light power pole near the back fence. We then squared and leveled the pole, braced it, ran conduit for the wire, and mixed & poured concrete. It was a long day and he was a tired little puppy after the digging and concrete work. I guarantee that he slept like a rock that night – I did.

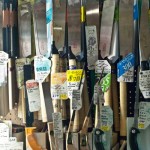
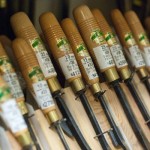
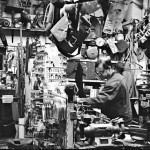
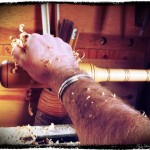
The Ruminator also learned about how to properly use hand planes this summer – he loved them. Left to his own devises, he would sit in the shop for hours banging away on scrap with the chisels and making piles and piles of long, curly, paper thin wood shavings. He was channeling Roy Underhill and I was so proud!

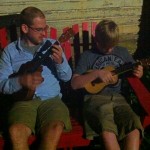
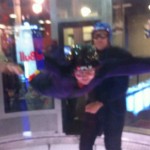
It wasn’t all work though – I am not a slave-driver. There were bike rides, visits to the park and the beach, movies at the theatre and on the iPad, Austin Powers and South-park voice impressions (much to Stamps-With-Foot’s dismay), ukulele playing around the fire pit, and he is probably the first kid in his hometown to have ever been indoor skydiving.

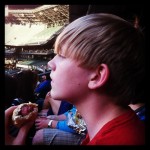
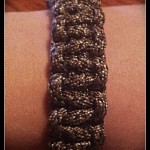
Knotted “survival bracelets” are popular right now and the one we tied up last year is now too small or was unraveled and used on some woodland adventure, I’m sure. We stopped at Home Depot on the way home from some outing and he picked out the paracord color and stainless steel shackle. We sat in the back yard with Stamps-With-Foot, chatting with a family friend while I tied a new bracelet. It fit perfectly and he beamed with gratitude. This was the summer that the Ruminator went to his very first Major League Baseball game – Mariners vs. The Red Socks – and had the whole hot dog/roasted peanut experience. We had great seats 23rows up on the first base line and the Mariners won. I was so happy to be there with him and it made my heart happy to see his face shine when a bat made contact and sent a ball into the outfield.

Probably the highlight of his trip though (for him) was when we went to the Washington Gathering of the Clans and he got a sword. A shiny steel Viking sword. Thinking back to when I was 12, I would have given up anatomy for a sword! I would have slaughtered vegetation, hacked fruit and veggies gruesomely, sheared branches, cut myself at least twice, tried to wear it to school, and gotten into some semi-serious trouble of some sort before my blade would have been taken away and put in that unknown place in my parent’s house from which there was no return – propped up next to my first pellet gun, beside that awesome surgical tubing slingshot, and near that box full of fire crackers. Anyways, I made him promise, not to do what I would have surely done – we will see how that works out. I bet he spent his first week back twirling the thing around like a mini blond Conan – to the annoyance of his mother.

He has been promised that if he does well in school and minds to a considerable degree, doesn’t act up in class, and helps around the house, he will get to fly to France for the summer next year. It is an amazing opportunity and I am looking very forward to showing my son France and Europe! Hiking, cycling, road trips, climbing, food, culture, language, all of it!

Kitchen Cabinet Doors

I am super trying to finish up the kitchen cabinet doors and get them painted and hung. I was putting the last coat of paint on them this weekend and the cat decided to help… I said dirty words – loudly. The cat didn’t care and looked away like I was insane for questioning her right to sit in fresh white paint. Had to let the door dry and sand cat hair off and repaint. I said more dirty words. The cat didn’t care and laid on her side in the grass, I am sure thinking: ‘Ima gonna do it again, jus ’cause. Dirty pink bald monkey…’

Fvcking cat.

I went to Seattle Hand-tool Heaven today.

Somehow, I have lived in Seattle for nearly 5 years and yesterday was my first visit to Hardwick’s Hardware in the U-District (just up the hill from another favorite shop – Recycled Cycles). I made a quick stop looking for a used posthole digger while my son and puppy waited out front in the truck. I stumbled into old-school hardware heaven: Narrow rows stacked floor to high ceiling with new and used (in wonderful shape) planes, chisels, axes, drawknives, Knowledgeable – not too crusty – staff, and tools the one Yelp reviewer has said are “mighty enough to build Viking warships with…”

I may be in love… I lingered for as long as possible (10 minutes) and while I left without a posthole digger, a Stanley Sweet Heart #45 plow plane jumped out of its locked case and came home with me. I will be returning when I have a little cash and a couple of hours to peruse alone and without my sweet wife there to narrow her eyes and tell me “no” when I lust after the broad axe or fondle a fish-tail gouge.

The place has been in business since 1932 and proof that there is room left in the world of Home Depots and Lowes for the neighborhood hardware store where Norman Rockwell would feel at home. Hardwick’s is a bit of a drive for me, but it is officially my new go to stop for hand tools and hardware.

Hammer in my hand…

This is a plane hammer that I made from brass bar stock and a game-day bat from my youth. The hammer head was made on an old-school machinist lathe and I used a rasp and Japanese pullsaw to form the handle. A light tap is all it takes.


New Bench Chisels

The bottom chisel (originally my grandfather’s) is the only one I have left from my shop getting burgled/cleaned out over a year ago. I have saved my pennies and dimes for a while and two days ago I bought a set of Stanley Sweet Hearts. I mortised the hinges into the kitchen cabinet doors I am building for my wife. Having quality tools makes me happy.

20130717-135338.jpg

Building Custom Cabinet Doors

1. Buy dimensional 3/4″ poplar boards.
2. Plane to uniform thickness.
3. Rip 2″ and 3″ strips on the table saw.
4. Two dado cuts on table saw for 1/4″X 3/8″ panel groove.
5. Run each section on router because table saw is a POS and there is depth variation in all the grooves…
6. Threaten table saw with large iron maul – mean it.
7. Grumble a little.
8. Cut door stiles (sides) to length – Measure opening for stiles, subtract 4″ for stile width and add 3/4″ for double 3/8″ panel slot.
9. Write all measurements down on a non-descript sheet of paper.
10. Put measurements somewhere safe.
11. Take a 2 week to 4 month break because life gets busy.
12. Lose paper with measurements.
13. Tear house and shop apart looking.
14. Give up and re-measure.
15. Cut rails.
16. Lay all parts out and label, check sizing, trim two pieces, and pray a little.
17. Set up horizontal drill press to drill for dowel joints.
18. Screw up at least 4 initial holes.
19. Hit head in shop at least 3 times.
20. Build sweet dowel trimming jig for table saw – let head swell a little.
21. Cut 3/8″ off each dowel (8 per door).
22. Drill 16 holes per door.
23. Sand the cut-off end of dowel.
24. Dry fit first door.
25. Success!
26. Get out every bar clamp, hand clamp, and Quick-clamp that you own and set up clamping station.
27. Find original measurements for doors in the “safe place.”
28. Say dirty words very loudly. Repeat.
29. Add glue to dowels and joints and assemble door.
30. Apply judicious blows from wooden mallet to seat parts.
31. Get glue on hands and in hair.
32. Clamp up.
33. Wipe extra glue on door off with wet rag.
34. Repeat last 6 steps 8 more times.
35. Scrape clue, plane joints, and sand doors with 3 different paper grits.
36. Check and adjust door fit to openings and prime after more planning.
37. Re-prime and paint with two coats of white cabinet paint.
38. Mark, mortise, and install hinges on door.
39. Install red glass pulls.
40. Mark and mortise hinge/door onto cabinet.
41. Check fit and adjust 2 to 9 times.
42. Repeat steps 28 thru 41 eight more times
43. Drink three beers and swear to never build your own kitchen cabinets from scratch ever again!

Hanging out in our ‘hood this weekend

We had a quiet West Seattle weekend: Friends over on Friday and we all drank no small amount of great Italian wine and ate the last of our French Comte cheese. I worked around the house and in the shop (me and the lathe are friends) Saturday morning while Stamps-With-Foot nursed a touch of a hangover and snuggled with the Brodie – He didn’t complain. Sunday was lazy with Brunch at Meander’s in White Center (Go For the Chicken and Waffles!) and afternoon coffee at C&P. After coffee and reading, there was a trip to Trader Joe’s, home for left-overs, some quality hottub time, and then we finished the evening with glasses of port, sitting in front of a fire.

Cutting trees down and making stuff

Shortly after we moved into La Maison du Talley, we cut 21 trees out of the backyard. There was only one serious tree – a 40′ cedar – and the rest were smaller Bay Laurels and Vine Maples that were blocking any possibility of sunlight reaching the ground. I kept some of the larger, straighter sections of the small trees and put them in the loft of the garage to dry and season, hoping that I would eventually make stuff out of them. That was three and a half years ago and while spring cleaning in the garage/shop this weekend I decided to take a little break and mess stuff up again 🙂 I pulled a couple of sections down and cut them to manageable size with the chop saw. I knew exactly what to do with pieces.

We have a neighbor who is crazy helpful and has a passion for dahlias. He grows and shares them with the whole street and has helped Stamps-With-Foot litter the edges of the yard and flower beds with them. She loaned him the bulb planter early this spring and he loved it. He had somehow gone through life as a gardener and just never tried one. I decided to make him his own with graduated depth gauge marks and a matching mallet to drive it into the odd patch of hard ground. The planter is made from a section of the vine maple and the mallet is turned from a hickory Little League baseball bat that I bought for $2.00 at Goodwill. The maple was super-dense and I counted 21 very tight growth rings on it. It grew in the shade under larger trees for all that time and that made it an especially hard and nice piece of wood to turn with sharp chisels – the wood shavings and tailings came off in long, thin, lace-like strips. An absolute pleasure to work with.

Since I was making sawdust already, I decided to keep going: The wife and I are planning to make some/most of our Christmas gifts this year. I have already started and added a few mallets for the woodworkers in my life (I am not spoiling the surprise – none of them read this blog…). I also turned a garden mallet for Stamp-With-Foot from a section of Laurel tree (her name-sake). I added the burned striped bands at her request after she saw her’s beside the others and got mallet-envy.

Just before my wife stomped out to the shop and MADE me come in for the night, I took a hunk of red oak that I have had for 10+ years and turned a couple of fancy door-stops. Since we live in a house built in 1928, the doors have a mind of their own and a well placed wedge keeps a person from walking into the edge of a door in the middle of the night. I will add some tung oil and a few coats of satin poly this week to finish them up.

Roller Derby, St. Paddy, Dresser Building and an Anniversary Weekend

This weekend was busy with friends, a dinner out, St. Paddy’s Day activities, an outing to the Roller Derby (?!), and the 9th anniversary of the day that my sweet wife and I met was on Sunday. Even with all that, we still got bunches done around the house: Our under-bed dresser finished, bathroom table drawer installed (a little work on that left), wine crate storage boxes made, basement lighting installed, and the basement work bench is moving along.

The drawers for the under-bed dresser and the one for the bathroom all came from a wooden donor-dresser that my father-in-law drug home from a garage sale last summer. He paid $4 for it and it was in pretty bad shape, but it was solid wood and had potential. It was mistakenly left in the weather (plastic cover leaked) for a month before I salvaged the drawers, cut out off the top and used the sides for kitchen cabinet door panels. I re-squared the drawers, added dividers in the fall, and over the Christmas break sealed the insides (The Ruminator helped). After lots of filling and sanding and more sanding, I stained the fronts to match our bedroom furniture, then built ¾” plywood beams to hang the drawers from bed frame and used some scrap oak flooring as drawer guides/runners. The final product really looks good and is super functional. While some husbands bug their wives by filling the house with brought-home junk – I give my wife more and more and more storage and organization space.

On Sunday, I put the final coat of finish on the basement workbench top, let it dry, and then installed the three runs of aluminum t-track. Stamps-With-Foot bucked up and helped me wrestle its 200 pound beech and maple mass onto the steel base. I secured it with screws and covered the top with carpet squares while I finish the upper shelf/cabinet. I installed a outlet power strip under the main body of the topper and removed the old drawer dividers. I will soon add a plywood back with a mirror, a light under, a dedicated air supply line, install the desk drawers under the bench and mount 4 reclaimed letterpress drawers directly under the top as well. Happy with the progress so far.

Cast Iron Camping Cookware Box

In my on-going project to build the finest glamping/campaign furniture kit in the Pacific Northwest, I have added a custom box for holding all of our cast iron and campfire cooking gear.  It all started out with a wooden box I picked up at a garage sale that was full of a cast iron camp set that had been used once.  We have added a square fry pan, pot lifters, trivets, stand-off, roasting sticks, a grill, bacon press, a 12″ lid, and corn-shaped bread pan.  I had thought about including all of it in my camp kitchen, but it would have made the unit so heavy that I would have needed a winch to get it off and on to my truck bed.

The box that it came with was just a roughly tacked together crate, but it had potential.  I spent a couple of hours adding trim, remaking the lid, adding reinforcement, and painting it a deep red.  To Finish it off I added brass pipe handles and brass closures.  It is still not light, but one person can carry and move it.  The “new” box holds all the aforementioned gear, looks snazzy, and doubles as a seat for around the campfire.

Basement Bench and Winter Workshop

I have found that my workshop productivity goes way down in the winter/the six months of Seattle rainy season.  My garage shop is small and quickly fills with material, lumber, tools, and projects.  To add to the handicap of the small size, the lack of heat means that I can’t do any finish-work because of wood humidity, shrinkage/swell, and moisture.  I have made do in the unfinished side of our basement for the past three winters, but I am done my wife is done with the mess and clutter and my bitching about an inadequate work area when the weather turns crappy.  I need a little bit of dedicated space that I can work on the small stuff year round that doesn’t require power tools and a little bit of assembly/finish  space where I can glue and clamp some projects up, a solder station, a spot to reload ammo, work on my bikes, and  a clean/dry/warm space to apply stain or a hand-laid finish coat.  Add to this my current want of a small metal lathe and mill and I will have the makings of a nice little hobby shop from which to launch my plans for world domination …er, I mean a spot where I can make small parts, solder, or tinker.

Anyway, instead of buying a crazy expensive cabinet bench or making do with a thin metal and partial board Home Depot bench, I have decided to build the sturdiest all-around hobby bench that I can with the funds and material I have available (~$130.00), add some really nice features (aluminum t-track, lots of drawers, removable vises, power, lights, etc…) and make it into a finished piece of furniture that I will be proud to sit at and show off to friends for the next 30+ years.  To start the process off, I found a cheap older thick steel framed 6′ workbench at Second Use that I felt would make a bombproof, rock solid base.  I sourced a used IKEA cutting-board counter top that I cut down to the appropriate size and then used the trimmed pieces to add thickness and rigidity (I am still going to add some angle iron).  I thought about and sketched 3-9 different ways to add some shelving and some organization to the top and was still tossing around options in my head when a realized that an old buffet that my mom had just might work.  I took some measurements and looked into reinforcing here and there and realized that not only would it work, but that its style would set the tone and color for the entire bench build.

I decided that the drawers to be added under the bench top needed to be narrow and at least partially match the newly planned top section, so I looked for an older desk or vanity that I could cut apart.  I struck out at Goodwill, the Salvation Army, and Craig’s List, but Second Use came through again and hooked me up with exactly what I needed at a decently fair price, well decent after I haggled a bit…

The current state of the build is that the bench top is 2/3 done, the desk is cut apart, the steel legs are up and in place and I am 1/4 of the way done with reinforcing the buffet/top shelving unit.  I will update the build as it is completed and share some more pictures.

The Never Ending Hutch

Right after we bought our place, I saw an add on Craig’s List for a huge hutch.  It piqued my interest and I went by to take a look at it.  A builder had pulled it out of a church school in Queen Anne, but it had been in the rectory library before that.  It was in really bad shape: paint splattered here and there, broken and missing trim, missing glass, dents, dings, scratches, etc…  Even with all that, I saw potential.  After some surprise haggling, I loaded it on my truck and brought it home.  This was right after I had shoulder surgery for the fourth time, so I would not be man-handling two 8 foot by 4 foot sections of furniture…  I picked up some laborers in the Home Depot parking lot by the house and had them load it into my basement where it sat taking up space for three months before I felt strong enough to tackle the job.  Below is the truncated build process in 67 easy steps:
  1. Looked at hutch for too long and decided to get it done.
  2. Started with bottom section – doors removed.
  3. Stripped off all old paint and varnish from outside with “environmentally friendly” orange stripper.
  4. Scraped and scraped stripper off.
  5. Cussed “environmentally friendly.”
  6. Put more stripper on.
  7. Scrubbed off again.
  8. Wife helped for 40 minutes, hated it and didn’t touch either section again.
  9. Shoved a 1″ splinter under one of my fingernails.
  10. Said the “F” word 5+ times, bled on base & floor and thought about cutting it all up for firewood.
  11. Washed whole thing with paint thinner to stop the stripper residue from working any more.
  12. Let dry and sanded whole case with 120 grit.
  13. Sanded with 220 grit.
  14. Sanded again with 220 grit.
  15. Stained with a crazy pricey, but color-matched mahogany tinted oil-based stain.
  16. Used wife’s special dish gloves.
  17. The old, old fir had issue with the stain and was a little splotchy in some really key spots.
  18. Was grumpy for two days.
  19. Second coat of stain used to blend some areas.
  20. Put on first coat of wipe-on poly acrylic semi-gloss finish.
  21. Wife found stain covered dish gloves and I got in trouble.
  22. Went to store and bought wife new gloves.
  23. 24 hours later, scuffed finish with white 3M pad and applied finish coat 7 more times.
  24. Spent HOURS on the final coat.
  25. Repeated all above steps with the four raised panel doors.
  26. Installed 100+ year old glass pull-knobs on doors.
  27. Whole process took two months.
  28. Moved base into finished side of basement for use as a media cabinet and LCD TV base.
  29. Went downtown to Chinese-owned granite shop on Seattle’s 1st Ave and haggled over granite for top.
  30. I am a poor negotiator in Chinese.
  31. Left and came back with Mandarin speaking co-worker.
  32. Got GREAT deal on custom top.  1/12th of the price that I was quoted at Home Depot – really!
  33. Built A-frame jig for back of truck to haul granite.
  34. Picked up top and hauled home.
  35. Bribed 4 neighbors to help move it into place.
  36. Neighbors won’t answer my call anymore…
  37. Four months from start to finish.
  38. Two weeks later I started the top section.
  39. Decided to make top section into a living room “built-in.”
  40. Built, painted and installed new 8″ base for the top section in our living room to match existing trim.
  41. Removed the doors, hardware, and hinges.
  42. Repeated steps above with the exception of splinter under nail and use of wife’s gloves: I learned my lesson the first time.
  43. Cut hole in back for outlet already on wall.
  44. Had other, unsuspecting neighbors help me move the top section up.
  45. New neighbors called me names after it was all done.
  46. Hole for outlet 1″ off to the left.
  47. Said hateful words.
  48. Grumpy again.
  49. Calmed down and used Dremel tool and coping saw to remove section from one side and glued it to other side.
  50. Trimmed out outlet hole.
  51. Stained and finished outlet trim.
  52. Had wedding and took 30 day break in the rebuild/refinish process.
  53. Started looking for matching trim and crown molding at reclaimed lumber yards.
  54. No Luck.
  55. Had crown custom milled at high cost by a shop in SODO that had 90 year old machines running on their floor (shop closed about a month after I was there last 🙁
  56. Started the process of refinishing the doors.
  57. Installed crown molding.
  58. Shot nail through molding and into palm on final piece of crown.
  59. Bled on top of hutch – no dirty words.
  60. Installed refinished doors.
  61. Built two interior shelves out of 80 year old fir floor boards.  Stained and finished – look original!
  62. Smacked the back of my head when installing shelves and almost knocked myself out.
  63. Sourced and purchased piece of wavy restoration glass to match original broken pane.
  64. Stained and finished the crown.
  65. Put final coat of trim paint on the new base.
  66. Installed the one missing glass pane.
  67. 5 months after base installed the top is done and looks like it has been in our place since 1928.
Never again.

Wooden Nightstand Build

My sweet sweet wife has issues with the color green – most shades. While living in Hamburg, we had a tiny bedroom that Stamps-With-Foot wanted to paint “sage green.” She bought the paint at Max Barr (a Teutonic version of Home Depot) brought it home and painted a little swatch on the wall. It was kinda dark, so she painted the whole wall. Still kinda dark. She then painted the whole room. I came home and my bedroom was Olive Drab, Army Green… It took me two coats of primer and three coats of paint to banish the darkness.

Flash forward a few years to Seattle. We have replaced all of our MDF particle board IKEA crap furniture with real wood pieces with the exception of our night stands. I hate them. Hate. I traded my mother a couple bookshelves for a former dressing table/vanity that was deeply scratched in places and had a couple of drawers that wouldn’t budge. It was in two pieces already and I shortened the legs, stripped off some of the old finish and prepped them for paint. Stamps-With-Foot wanted the pieces to match our 1930’s bedroom set, which has a sage green accent color. The plan is to have the bodies painted green, use a soft sunflower yellow for the accent and to completely strip the top and drawer fronts and coat them with a polyurethane so that the natural color and grain would pop. I had primed them, sanded, primed again, and grabbed some color swathes for her to choose from. She chose a fine green and I had it custom mixed at my local Benjamin Moore store (friends don’t let friends buy paint at Home Depot). I had two smooth coats sprayed on before my sweet wife decided they were the wrong color green. I tried in vain to talk her out of making me swap the color. I tried really hard – I even mentioned the Hamburg incident. No dice, the color WOULD be changed.

I showed up at the paint store with a picture frame for them to color-match, ignored their snickers, bought all new paint, went home, sanded, and resprayed both pieces with two coats of the “new” green. I painted the accent color and rubbed the color into the cracks before washing it off the high spots. The tops were polyurathaned, drawers were fixed, dividers installed, fronts refinished, 100+ year old glass knobs bought/installed, and then I carried them up to our Master Suite and my sweet bride gushed over them. Her delight made my heart happy.

In my heart of hearts I know she is still second guessing the 2nd color choice, but I have sworn to myself that if she changes her mind again she will be banned from deciding house/furniture/accent colors for the term of one year and that I will turn the basement into a mountain chalet-themed man cave- which might happen anyway, I am just really looking for an excuse to belay my guilt.

Weekend Update – 1/7/13

My son was here for a week+ for the holidays and we did cool stuff as he is the Igor to my Dr. Frankinstein. He left on Friday morning and to keep myself occupied so I wouldn’t mope around all weekend thinking about how much I missed him, I busied myself with a few on-going projects:

Underbed dresser – 95% done
Letterpress drawers made into occasional tables – 50%
The never ending kitchen remodel – 85%
Sofa table rebuild – 20%
Bathroom drawer for wife – 50%
Candle box – 100%
Glass cabinet handle installation – 45%
Hall mirror – 22%
Helping a friend move – 50%
Etc…

While fitting the final pieces of the under bed dresser (built from an 1980s $4.00 garage sale upright five drawer) for our room and I transposed  two numbers and cut something a touch too long. Grumble… Grumble…  I went out to the shop, measured for screw clearance and put it on the table saw to rip down just a touch. I missed one screw, but my $56 carbide tipped cabinet blade didn’t. Sparks and bits of carbide flew. I said dirty words and came into the house to drown my sorrows in a Mexican coke, Jack with honey and an old Clint Eastwood western while propped up in bed with my grumpy face on.

Kitchen Cabinet Build and Remodel

When looking at the house that we now live in the one room that had us on the fence was the kitchen.  it had original cabinets, but it was dark, dated, there were no outlets, and one wall was just a hodge-podge of appliances.  I have spent the better part of my very limited free time trying to fix those issues.  I have added a dishwasher, a knife rack, lots of paint, cranberry glass handles/pulls, outlets, pullouts, switches, a microwave, under cabinet lighting, build drawer organizers and am in the process of finishing hand made, period and house perfect cabinets for what was the ugly wall.  It has been a very long and laborious process.  I would never be this detailed in a house I was building for someone else – I would lose money.

Below is a gallery of the progress up until this point:

Lawn Furniture done!

As I mentioned in a previous post, there had been parts for Adirondack lawn chairs all over the house and shop for 9+ months waiting on me to gather the will to glue them up and drive some weatherproof screws home.  The Ruminator and I put together when he was here this summer – he supervised while waxing poetic about dressing up like a viking – and I spent a combined 12 hours priming and painting them candy apple red.

Since I don’t want to repaint them every spring I used an oil-based exterior paint.   Holy crap, it was hard to find!   It seems that everyone has switched to latex based paint for homeowner use (ease of use, easy cleanup, better for the environment, etc…) and I had to resort to having gloss deck and concrete paint custom mixed.  It went on like glass though and should be impervious to our rainy long winter weather for three or four years.  My sweet wife super loves them and could barely wait until they were dry before giving them a proper, reading a book in the sun, test.

Below is a gallery of the whole build process:

Sawdust and paint fumes

It has been roughly eight months since my shop was robbed.  It is just now that I have found the will and desire to start building furniture again.  I have let projects and repairs pile up and let my garage shop digress into a sawdust filled junk-room.  There have been parts for Adirondack lawn chairs in my basement and shop since December.  I finally got around to gluing them up and screwing the pieces together when my son was here this summer.   That little project led me to start cleaning the shop and find all the stuff that has been waiting on me.  I dabbled with a couple of boxes, then started making pieces and organizing tools and supplies to tackle the larger stuff.  Below is a list of current projects that are in work:

  1. Painting the Adirondack chairs
  2. Re-build of my father’s 1971 bookshelves
  3. Kitchen cabinet doors
  4. Misc. Lathe tasks
  5. Kitchen cabinet pullouts
  6. Camp Kitchen box build and paint
  7. Campaign furniture for luxury car camping
  8. Hall mirror
  9. Copy of a 12th Century Abby oak door
  10. Fireplace surround and mantle
  11. New Kitchen cabinet pulls and knobs
  12. Garden tool shed
  13. Christmas gifts
  14. Garden table

The above are started and in-work.  I have plans to also build the below items soon:

  1. Small basement work bench (reloading and winter projects)
  2. Rebuild bookcase in master bedroom
  3. Murphy bed for my home office
  4. Box ceiling for master bedroom
  5. Home office bookshelves
  6. Chicken coop
  7. Ornamental planter box
  8. Cookbook shelf in kitchen
  9. Rebuild my standing desk
  10. Basement stairs rebuild

Ignoring the yard and building stuff

Horror of horrors, I did not touch my yard this weekend. My lush, Ireland-green grass (I am a wee bit narcissistic about my grass) was left to grow and stretch toward the sky in the weekend sunshine. I spent all available daylight hours outside and didn’t even attempt to take the mower out, turn the compost, or battle with my creeping nemesis – the dandelions. Stamps-With-Foot did a little weeding on Saturday, but the bulk of our weekend was committed to getting the kitchen cabinets done enough so that we could do a test fit and install.

Success! My wife was a priming and painting machine: taking care of the microwave cabinet, the lowers, and the drawers. The lower cabinets were positioned into place and their rock-maple tops fitted (waiting on the drawer fronts and pulls to be finished). I cut all the frames for the doors, assembled the fridge cabinet, installed it with my wife holding the thing up in the air (hehehe), tacked together the trash/recycling slider, and cut the shelves for the microwave cabinet. When completely done, our cabinet space will increase by more than a third, will include al the latest and coolest amenities (slides, organizers, spice racks, pullouts, etc…), and the new cabinets completely match the original 1928 built-ins, both in construction and style.

I need to finish the fridge top cabinet, install the drawers, add a corner cookbook shelf, tack up cove-crown around all, and one final coat of paint. SOMEDAY, this will all be finished and we will have the most awesomest kitchen a tiny, period appropriate, craftsman house can have!

I added a pic of Brodie lounging in the sunshine, just because.

Sweet, Sweet Desk Lovin’

This is starting to get out of hand. We have six desks in our home and I need more. It may have now turned from fetish into a sickness. We are using them for all sorts of stuff: a work table, a liquor cabinet, a sewing/project center, paper repository, and for their intended purpose of writing and surfing the interwebs. Whenever I travel I have a wandering eye for bicycles and desk-like furniture – imagine Ron Jeremy leering at the contestants in a beauty pageant and you will have a good idea of what happens to me when I see a brazed bike frame or a Georgian secretary… I have seen a couple of pieces lately that I NEEDED! I needed them WAY down deep inside – like the Pope needs Jesus.

The one and only thing that keeps me from being more of a desk hoarder is my epic lack of proper funding. It makes me sad to leave them in the store all alone, where no one caresses their tops, opens the drawers slowly, tells them that they are pretty, and where they will end up with someone who will not treat them as nice as I would have.

Below is a selection from of desk-p0rn from the Sherlock Holmes Museum, the Charleston Antique district, Harrods in London, Restoration Hardware, misc. furniture shops, and my favorite Seattle antique store.

What I want Thursday – 4/12/12

A list of stuff and things that I want currently – not that I necessarily need, but that i wuold like to have or see done/happen:

1. More time to read, write, build, snuggle, climb, bike, run, laugh…
2. A twin Murphy-bed in my office disguised as a mid-century modern wardrobe so that we have more guest space.
3. For my year-long kitchen project to be finished
4. To remember the password for my old laptop so I can have access to 10+ years of pictures…
5. My very own spending money that I can do with what I wish without submitting to a vote/need analysis
6. To have my FVCKIN’ tools back that some asshat stole…
7. A few new t-shirts for summer and a flat belly to reside under them.
8. For my Mother and Sister to find the perfect place in life
9. For all the dandelions in my yard to cease to exist
10. I would very much like for the really sad, really pregnant girl I say in Seattle yesterday to find someone/something/someplace that makes her warm, happy, and safe.

Aftermath of a robbery

A couple of months ago, we were robbed – my shop was cleaned of tools. It is just now that I have calmed down enough to write about it and not rant and want to get up and throw things/commit serious bodily harm to someone. All of my hand tools, small power tools and a rolling large tool box were taken. It was a huge blow, not just in dollars, but in sentiment as well. There were carving chisels that were my grandfathers, most of my father’s wrenches , 80 year old spoke shaves, saws, a brand new – never used – router, and all my air nailers. Cleaned out.

We were in the UK and Ireland for 9 days and a couple days after we got back, I had a miserable day at my J-O-B and just wanted to work in the garage/shop and make a big pile of plane shavings – stress relief. I walked in the door and there was stuff everywhere (more than usual). Boxes off shelves, lumber moved, clamps scattered… I couldn’t comprehend what I was seeing – did my wife move my stuff… No… Wait… Fvck!! I got crazy mad, then wanted to cry. My stomach tied itself in knots and my heart was sick as I made a mental calculation of what all was in my tool boxes. I called the cops.

Police came, took a report, I called in insurance company, and started looking on Craig’s list and in local pawn shops, while taking slow and painful inventory of what was gone. Not one tool, chisel, saw, router, or wrench ever showed up. To add insult to injury, I know who took it all. We had some contractors do some work at the house around Christmas and one of them was a little sketchy. Not weird junky-itch sketchy, he just looked around at everything in the house and yard with an appraising eye and followed me into the shop to get some supplies I had for him to use and he lingered just a little too long. I didn’t really put it all together until weeks later. I won’t go into details because I cannot “prove” anything and an online accusation could lead to court or this guy showing up at my house again and that would lead a different sort of court case… But I KNOW this guy has my stuff. I know, not a hunch, not a feeling, I know. I called the police to tell them what I had found and I was told that unless he was seen on a public street with one of my tools in his hand, that they could do very little. No warrant to search his vehicle, or house, or shop would be forthcoming… Man, it pisses me off that I paid this guy for slow work that I had to finish AND he took my property – tangible links with my father and Grandfather.

I filed a complaint for the workmanship issues and uncompleted work with the BBB, gave him a craptastic review on Yelp, and let the guy who recommended him know what all exactly happened. Maybe I can save someone else’s stuff. Additionally, I cut the plug off of a power planer months before the break-in because it had an electrical short to the metal housing. I hope that he puts a plug on it and the thing shocks the living shit out of him or that one of the carving chisels slips and relieves him of a reproductive organ in the lower abdominal region…

Spring Cleaning and Garden Prep -2012

The sun is out and it looks like spring has finally come to Seattle. I had a full weekend off and was in the country for a change, so it was time to get busy waking the garden and yard up, prepping for planting, take care of some spring cleaning and enjoy a sunny warm day outside. Below is how this past Sunday went for me:

Up and out of the shower by 10:00am
Wife made yummy breakfast with Trader Joe’s Croissants
Coffee made me human
Put on my overalls
Removed extension cords that powered Christmas lights
Started taking down Christmas lights – 2.5 months late
Realized when on top of ladder that I needed long reach tool I made last year
Spent 30 minutes searching…
Remembered that I turned old tool into something else
Muttered dirty words
Spent 10 minutes making new long reach Christmas light removal tool
While on top of ladder, cleaned gutters – 5th time in 12 months…. Stupid Pine tree
Turned compost
Cleaned and swept shop a little
Took apart one of our winter hot houses.
Planted forgotten bag of tulip/Camila bulbs found in hot house
Shook head and hoped that they will come up
Mulched roses
Feed roses some of the pink Miracle Grow good stuff
Treated roses for Black Spot as preventative measure
Killed some evil dandelions
Laughed manically while committing the deed
Reconnected the garden irrigation system
Wife brought me coffee and a kiss
Mulched the apple and cherry trees
Ran out of mulch
Started to Home Depot and somehow drove past and all the way to Second Use
Found $220+ of oak flooring for $25
Bought oak flooring…
Picked up more mulch at Home Depot and replacement drill for one that was stolen
Unloaded truck
Wife didn’t raise eyebrow at truck full of wood
Got away with unplanned purchase this time…
Trimmed dead shoots from lavender
Mulched around all the lavender
Sweet wife made me lunch
Moved new cabinet from shop into basement
Started to move charcoal grill
Found football sized mass of blue and black mold inside grill
How in the hell does that happen??!?!?!
Gagged more than a little
Muttered more dirty words
Cleaned out mold, scrubbed every surface with bleach solution and wire brush
There were some additional words spoken that start with F
Made HUGE hot fire with oak shop scrap to kill EVERYTHING in grill
Grill now ready for spring
Laid out spot on outside garage wall for new garden tool shed.
Cut stakes for raspberries
Dark outside so went into basement
Sanded kitchen cabinet shelves that are under construction
Put a coat of primer on them
Installed in some drawer slides in what will be new 15″ cabinets beside the stove
Fv#%ing drill battery ran out of juice
My lovely bride made a yummy dinner
Can’t find new charger for new drill
Wrapped last of wife’s birthday gifts
Put finishing coat of clear-coat on Persian table base that I have been redoing
Somehow got finish in my mouth
Spat and tried repeatedly to scrap the turpentine taste off my tongue
Failed
Gave up
Went to bed
Opened book
Not a single word read before I passed completely out.

What I Want Thursday – 3/15/12

Time again to reflect on some crap that I have been obsessing over for the last couple of weeks:

1.  To be in Hawaii on vacation with my wife and OUT of cell phone range
2.  To organize and back up all my computer files and pictures from the mess of harddrives and CDs/DVDs
3.  For my shop to be back up to 100% after the break in
4.  A fantastic sport coat
5.  For it to be sunny and 70 degrees outside my house
6.  A Midi-Lathe to complete some house and garden turning projects
7.  A sliding tool box for my truck
8.  A set of 2010 leather-bound Encyclopedia Britannica
9.  To get a real, hand written, paper letter from my son and daughter
10.  To never  worry about the IRS or April 15th EVER again.
11.  I want to ride my bike like I did when I was 12:  aimlessly and all day!!
12.  More time…

Campaign Furniture

Charleston, SC is one one the places that makes Marta Stewart go all weak in the knees: it is antiques heaven.  I had just finished reading a post on the Lost Art Press Blog about a shop there that deals mainly in campaign furniture (a type of furniture made specifically for travel and/or military campaigning and something that makes  my inner Martha breathe heavy), when I got the serendipitous news that my J-O-B was sending me there for a few days. Well then…  I had one afternoon off and I drug a couple of coworkers to the antiques district downtown and hunted for the shop.  My, my, my….  The proprietor had original pieces from the British Raj that he let me fondle and covet.  I really wanted some personal alone time with a specific teak and wicker lounger.  Me, the chair, some port, candle light, and sweet, sweet love….

I am in the process of building my own campaign-style camp kitchen, chairs, table, and wet bar to take with us on the Lukowski-Gahagan-Talley Glamping trips planed for this spring and summer, where roughing it means the mushrooms are crimini instead of chantarails.   I snagged a few ideas from the shop and some additional research that I am incorporating.  I will post when somewhat complete, but in the meantime, take a look at some of the pictures I snapped and have included below.

MIA – last seen with paint on new pants and sawdust in eye

I realized yesterday that haven’t posted anything for almost a month: no astute observations, not one pointed remark, no weird OCD-driven lists, no pictures of adventures at home and afield…. Nothing. Hmmmm.  I have just been REALLY busy!! It started with painting the living room, the kitched paint was next, we expanded into wiring a hot tub, I decided to finish up a furniture project, the breakfast table “needed” to be cut down, fancied up, and refinished.  I am heavy into finishing my incredibly overbuilt and way too complicated kitchen cabinets, Halloween came, there was Thanksgiving prep, I had to put the garden to sleep for the winter, blow all the water out of the yard irrigation system, clean the gutters (4th time this year – grumble, grumble… hate neighbor’s tree… grumble, grumble…). On top of it all, my J-O-B was INSANE: lots of late nights, weekends, travel, OT, pressure, stress, etc…

There is some proof of all the work that we have been doing – I have semi-updated the pictures on my project page, but remember that most were shot with an iPhone in crap conditions.  None of this pics are going to get me into National Geographic!

It hasn’t been all work though:  I have been able to go to the range with my cuddly .45s and punch holes in some zombies a good bit – fine, fine stress relief.  I mentioned Halloween – Stamps-With-Foot and I outdid ourselves again this year at our local Halloween party. We went as Wednesday and Pugsly Adams – a big hit at the festivities.   I went as a pimp to work – think Will Ferrel in The Other Guys movie: grill, blond ‘fro, leopard coat/fedora, purple faux croc high-heeled side-zippered boots, a pimp cane, crunk cup, loads of bling, coke nails – I had it down. A my fellow engi-nerds let me down though… Not one other costume in my group – not even a funny t-shirt!!  Sales had some good ones this year, HR was all in, the fiber optics group brought game, but Engineering sucked it! How is it all those people with big brains, imagination, and vast amounts of reasoning ability could not come up with something?! There are WOW players, Trekkies, SGA initiates, one D&D uber-geek, and every single one of them (including the female members of our team) have slave-girl Leia dreams…. They let me down, but I soldiered on and even gave a new-hire tour and orientation in my pimp-o-rific attire. I will not forget or forgive their breach of the nerd code! Philistines.

Speaking of my J-O-B, the long hours, travel, all the late meals out, and my general lack of physical motivation has gifted me with 20 extra pounds of fat compared to this time last year.  In essence, it is my own fault – my bikes are all sitting there waiting on me to love them, I have a sweet pair of new running kicks, A gym membership that we pay for every month, and a dusty yoga mat.  I HAVE to dig deep, put away work and get my butt moving or I will be the size of Jabba the Hutt in no time and the Wife is not into Slave Girl Leia…

I think that brings it all up to date for the most part. I will try to be more diligent about keeping up when life starts swirling around me.